What sorts of humor in Korea are acceptable, and which aren't? Join me and my friend Soyeong as we talk about the kinds of humor and jokes that Koreans like making, and what kinds of jokes you shouldn't make as a Korean learner. We'll also share some things you should definitely be careful of when in Korea, such as types of humor to absolutely avoid at all costs.
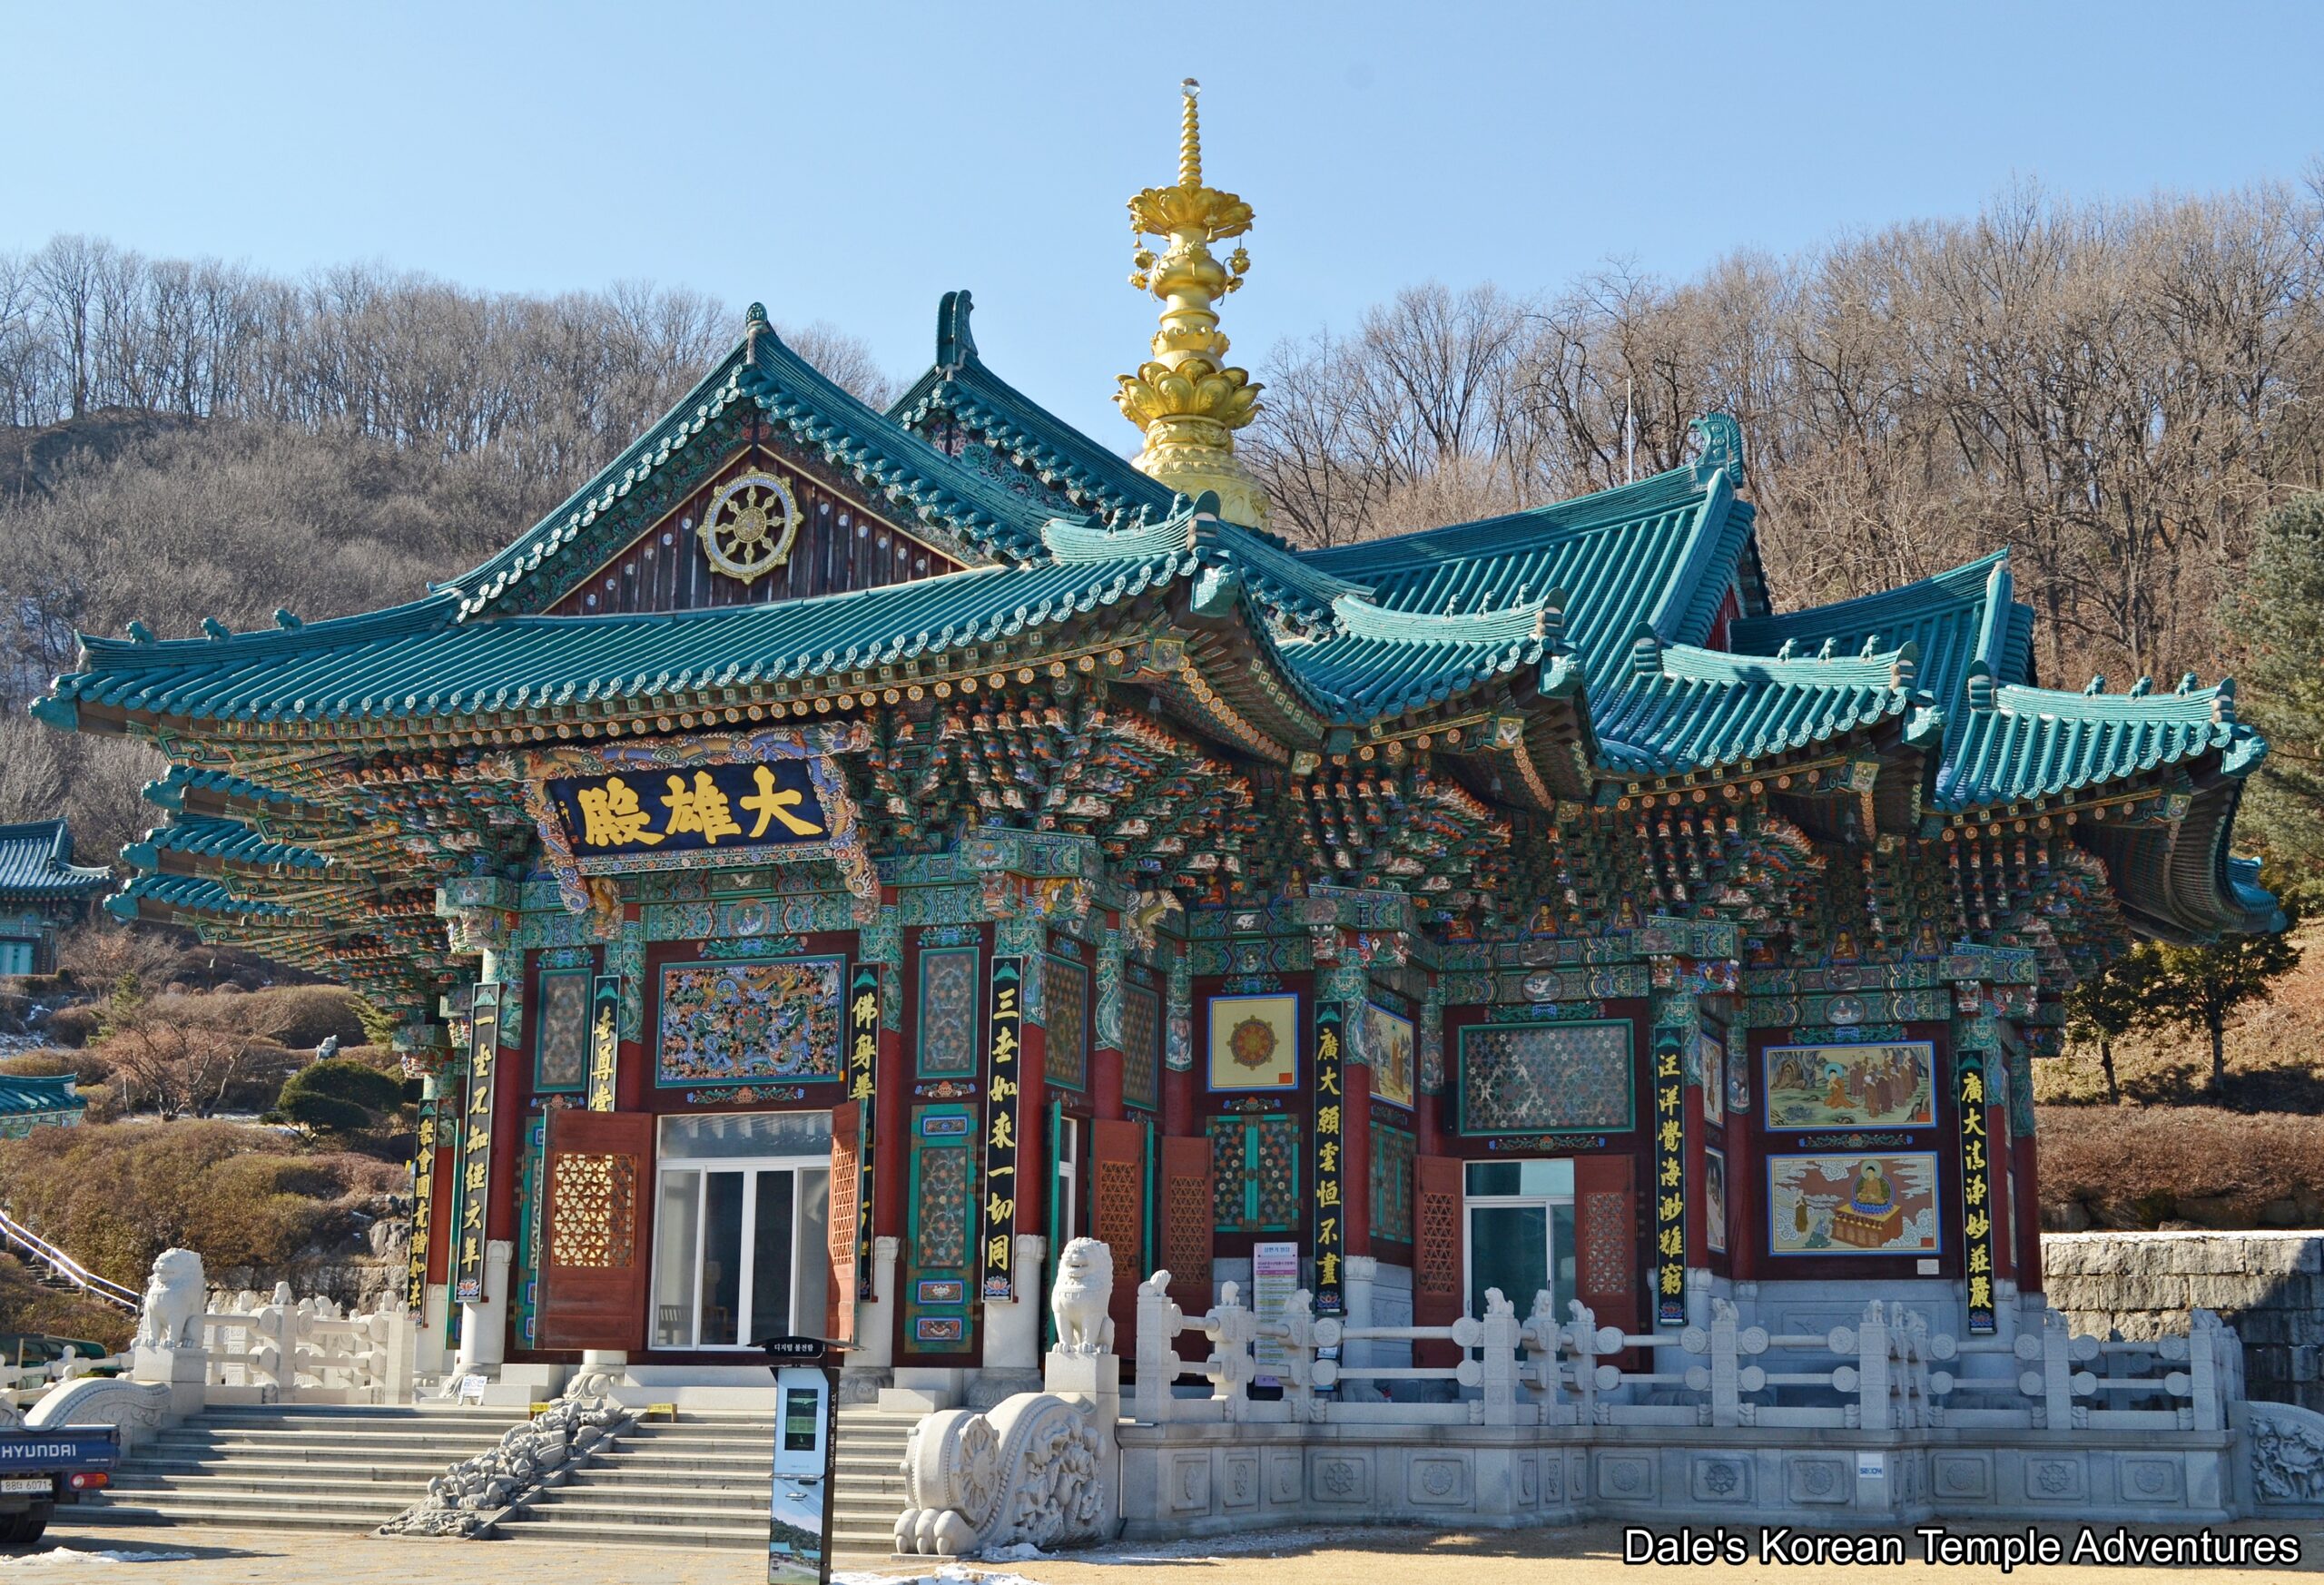
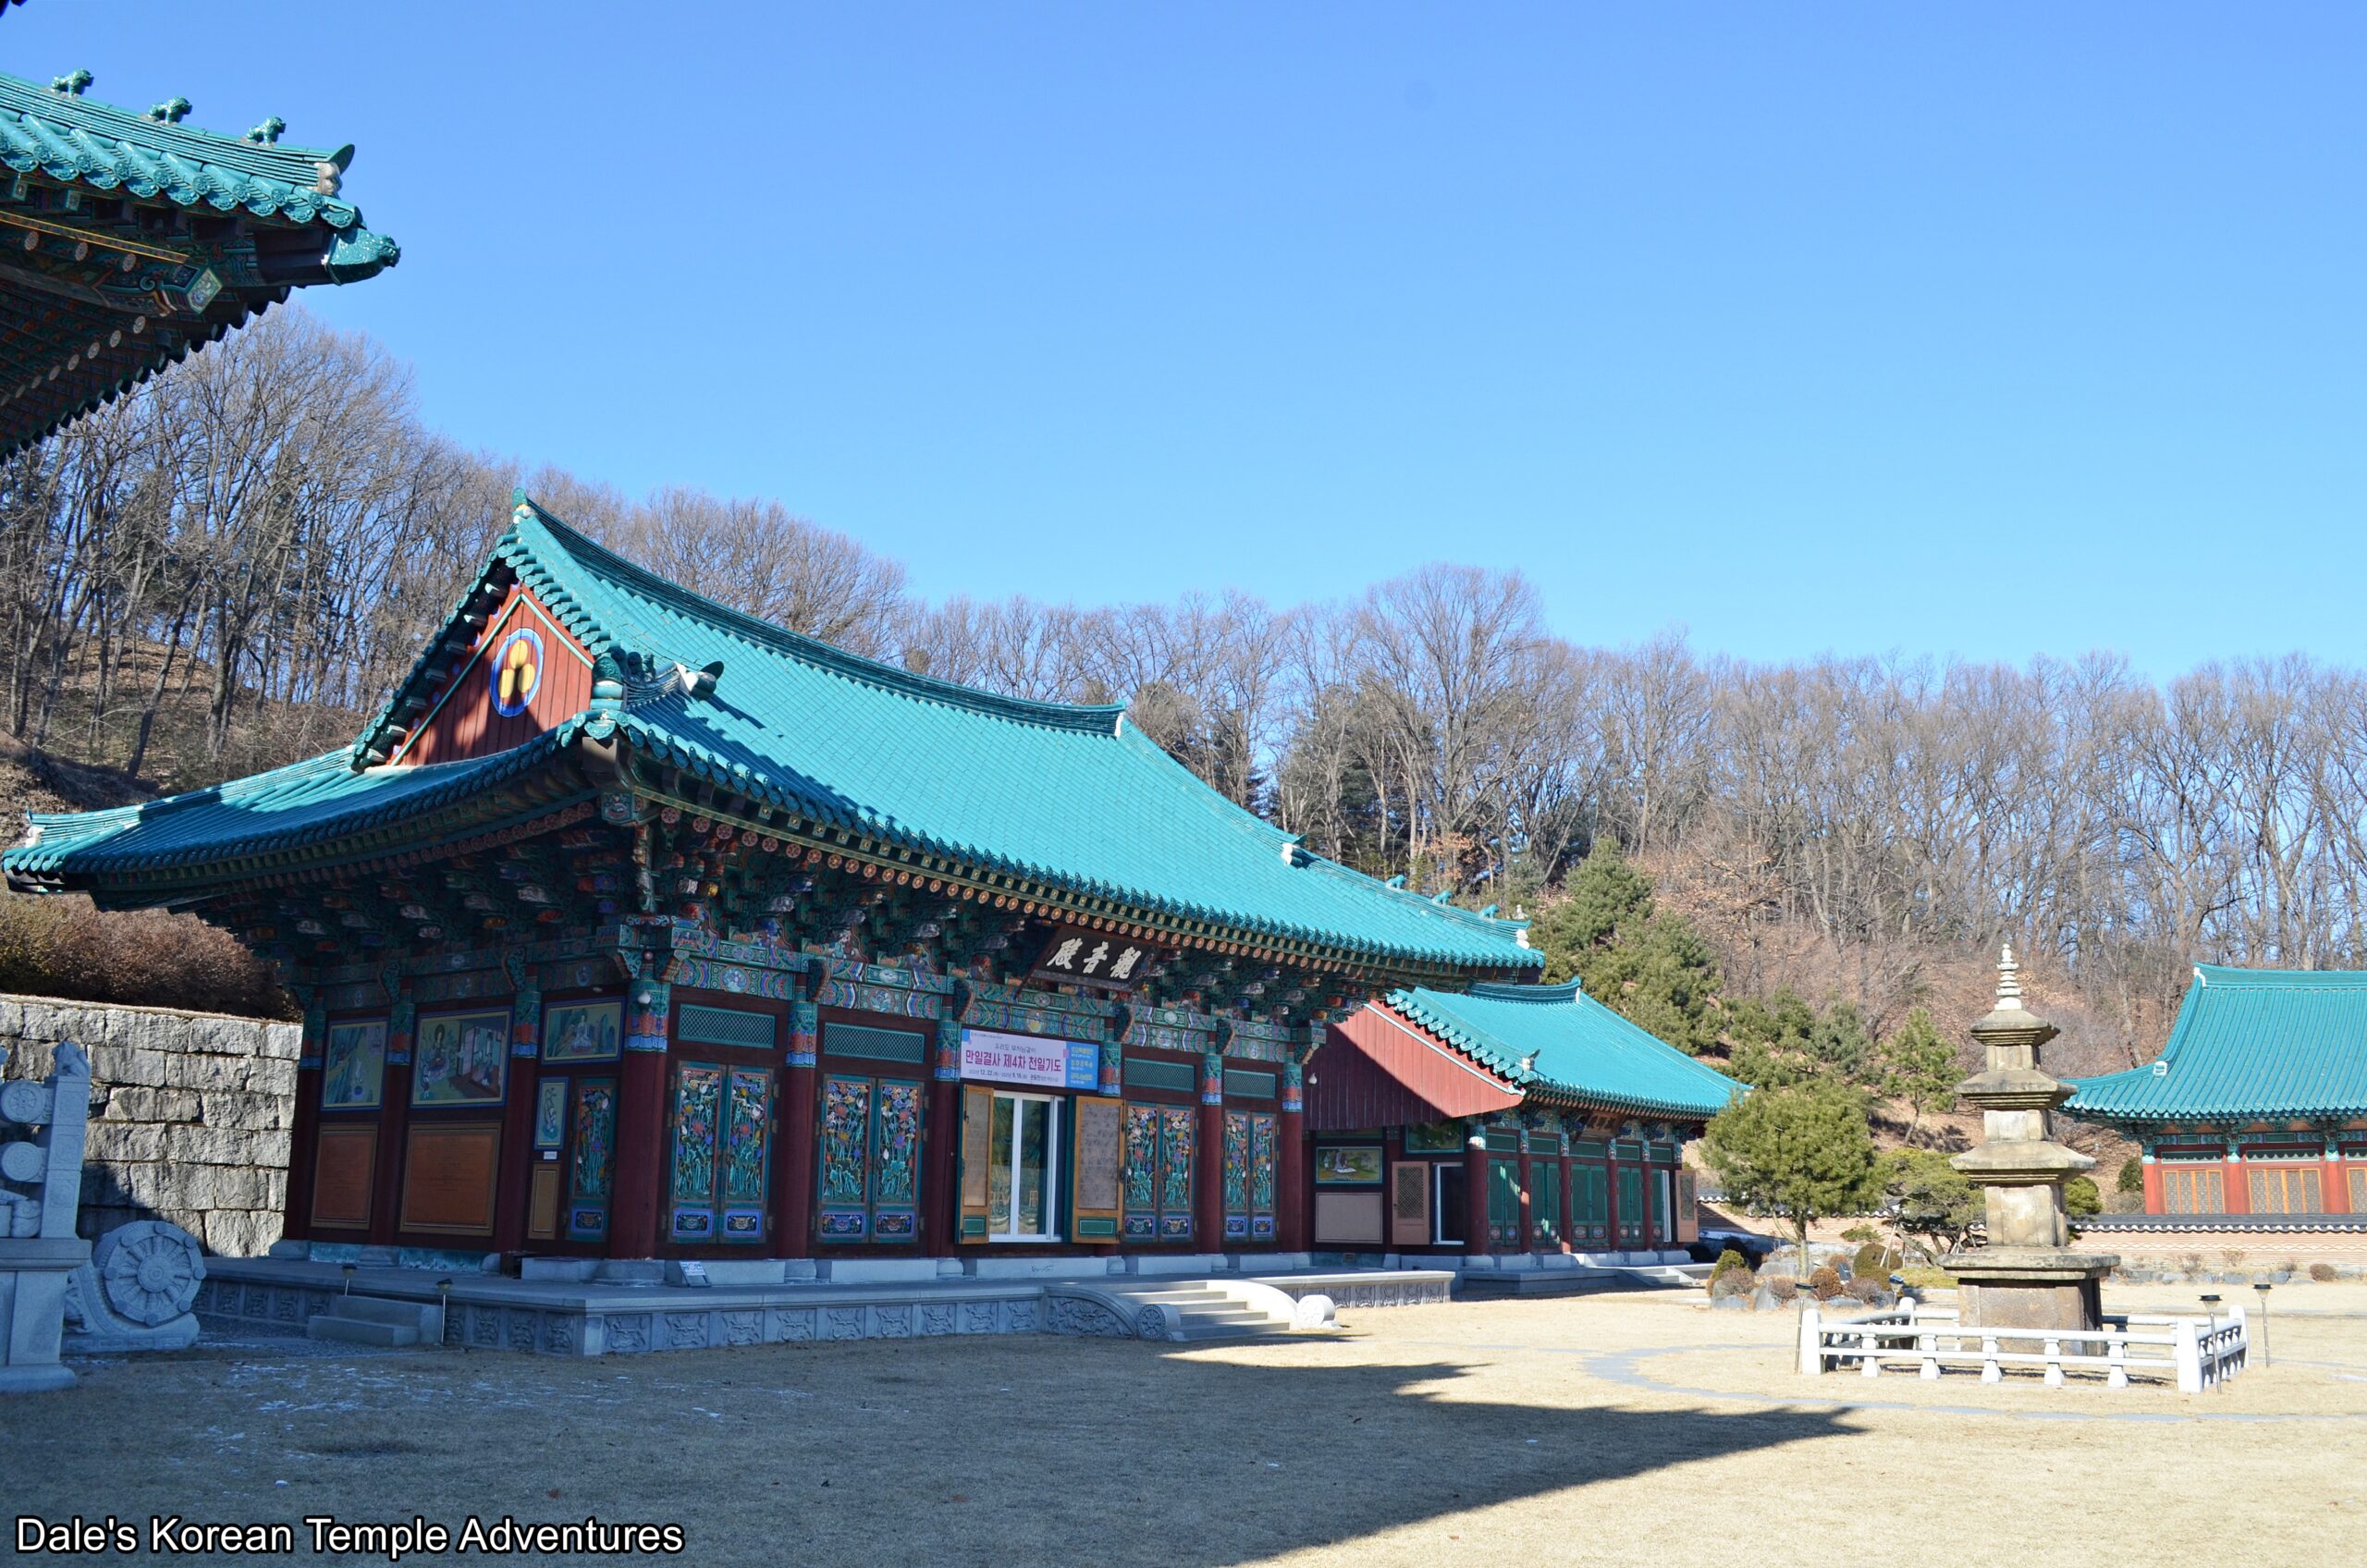
The Daeung-jeon Hall at Beopryunsa Temple in Yongin, Gyeonggi-do.
Temple History
Beopryunsa Temple is located to the east of Mt. Munsusan (403.2 m) in the southeastern part of Yongin, Gyeonggi-do. Beopryunsa Temple, which is also sometimes spelled in English as Beomryunsa Temple, was first conceived of in 1996 when Sangryun dreamed of Gwanseeum-bosal (The Bodhisattva of Compassion). Ten years later, and in 2005, Beopryunsa Temple was first opened. In 2008, Beopryunsa Temple started to conduct the Temple Stay program at its temple. Some 11 years later, this program was selected as the best Temple Stay program in Korea in 2019.
As you first make your way up towards the main temple courtyard, you’ll pass by a rather large Iljumun Gate. Passing by this colourful entry gate, you’ll next come to the expansive temple parking lot. On either side of a long stone set of stairs are two administrative offices at Beopryunsa Temple. It’s only after mounting these stairs that you’ll find the Beomjong-gak Pavilion. Housed inside this large bell pavilion are the four traditional Buddhist percussion instruments including a rather large Dharma Drum, which is known as a “Beopgo” in Korean.
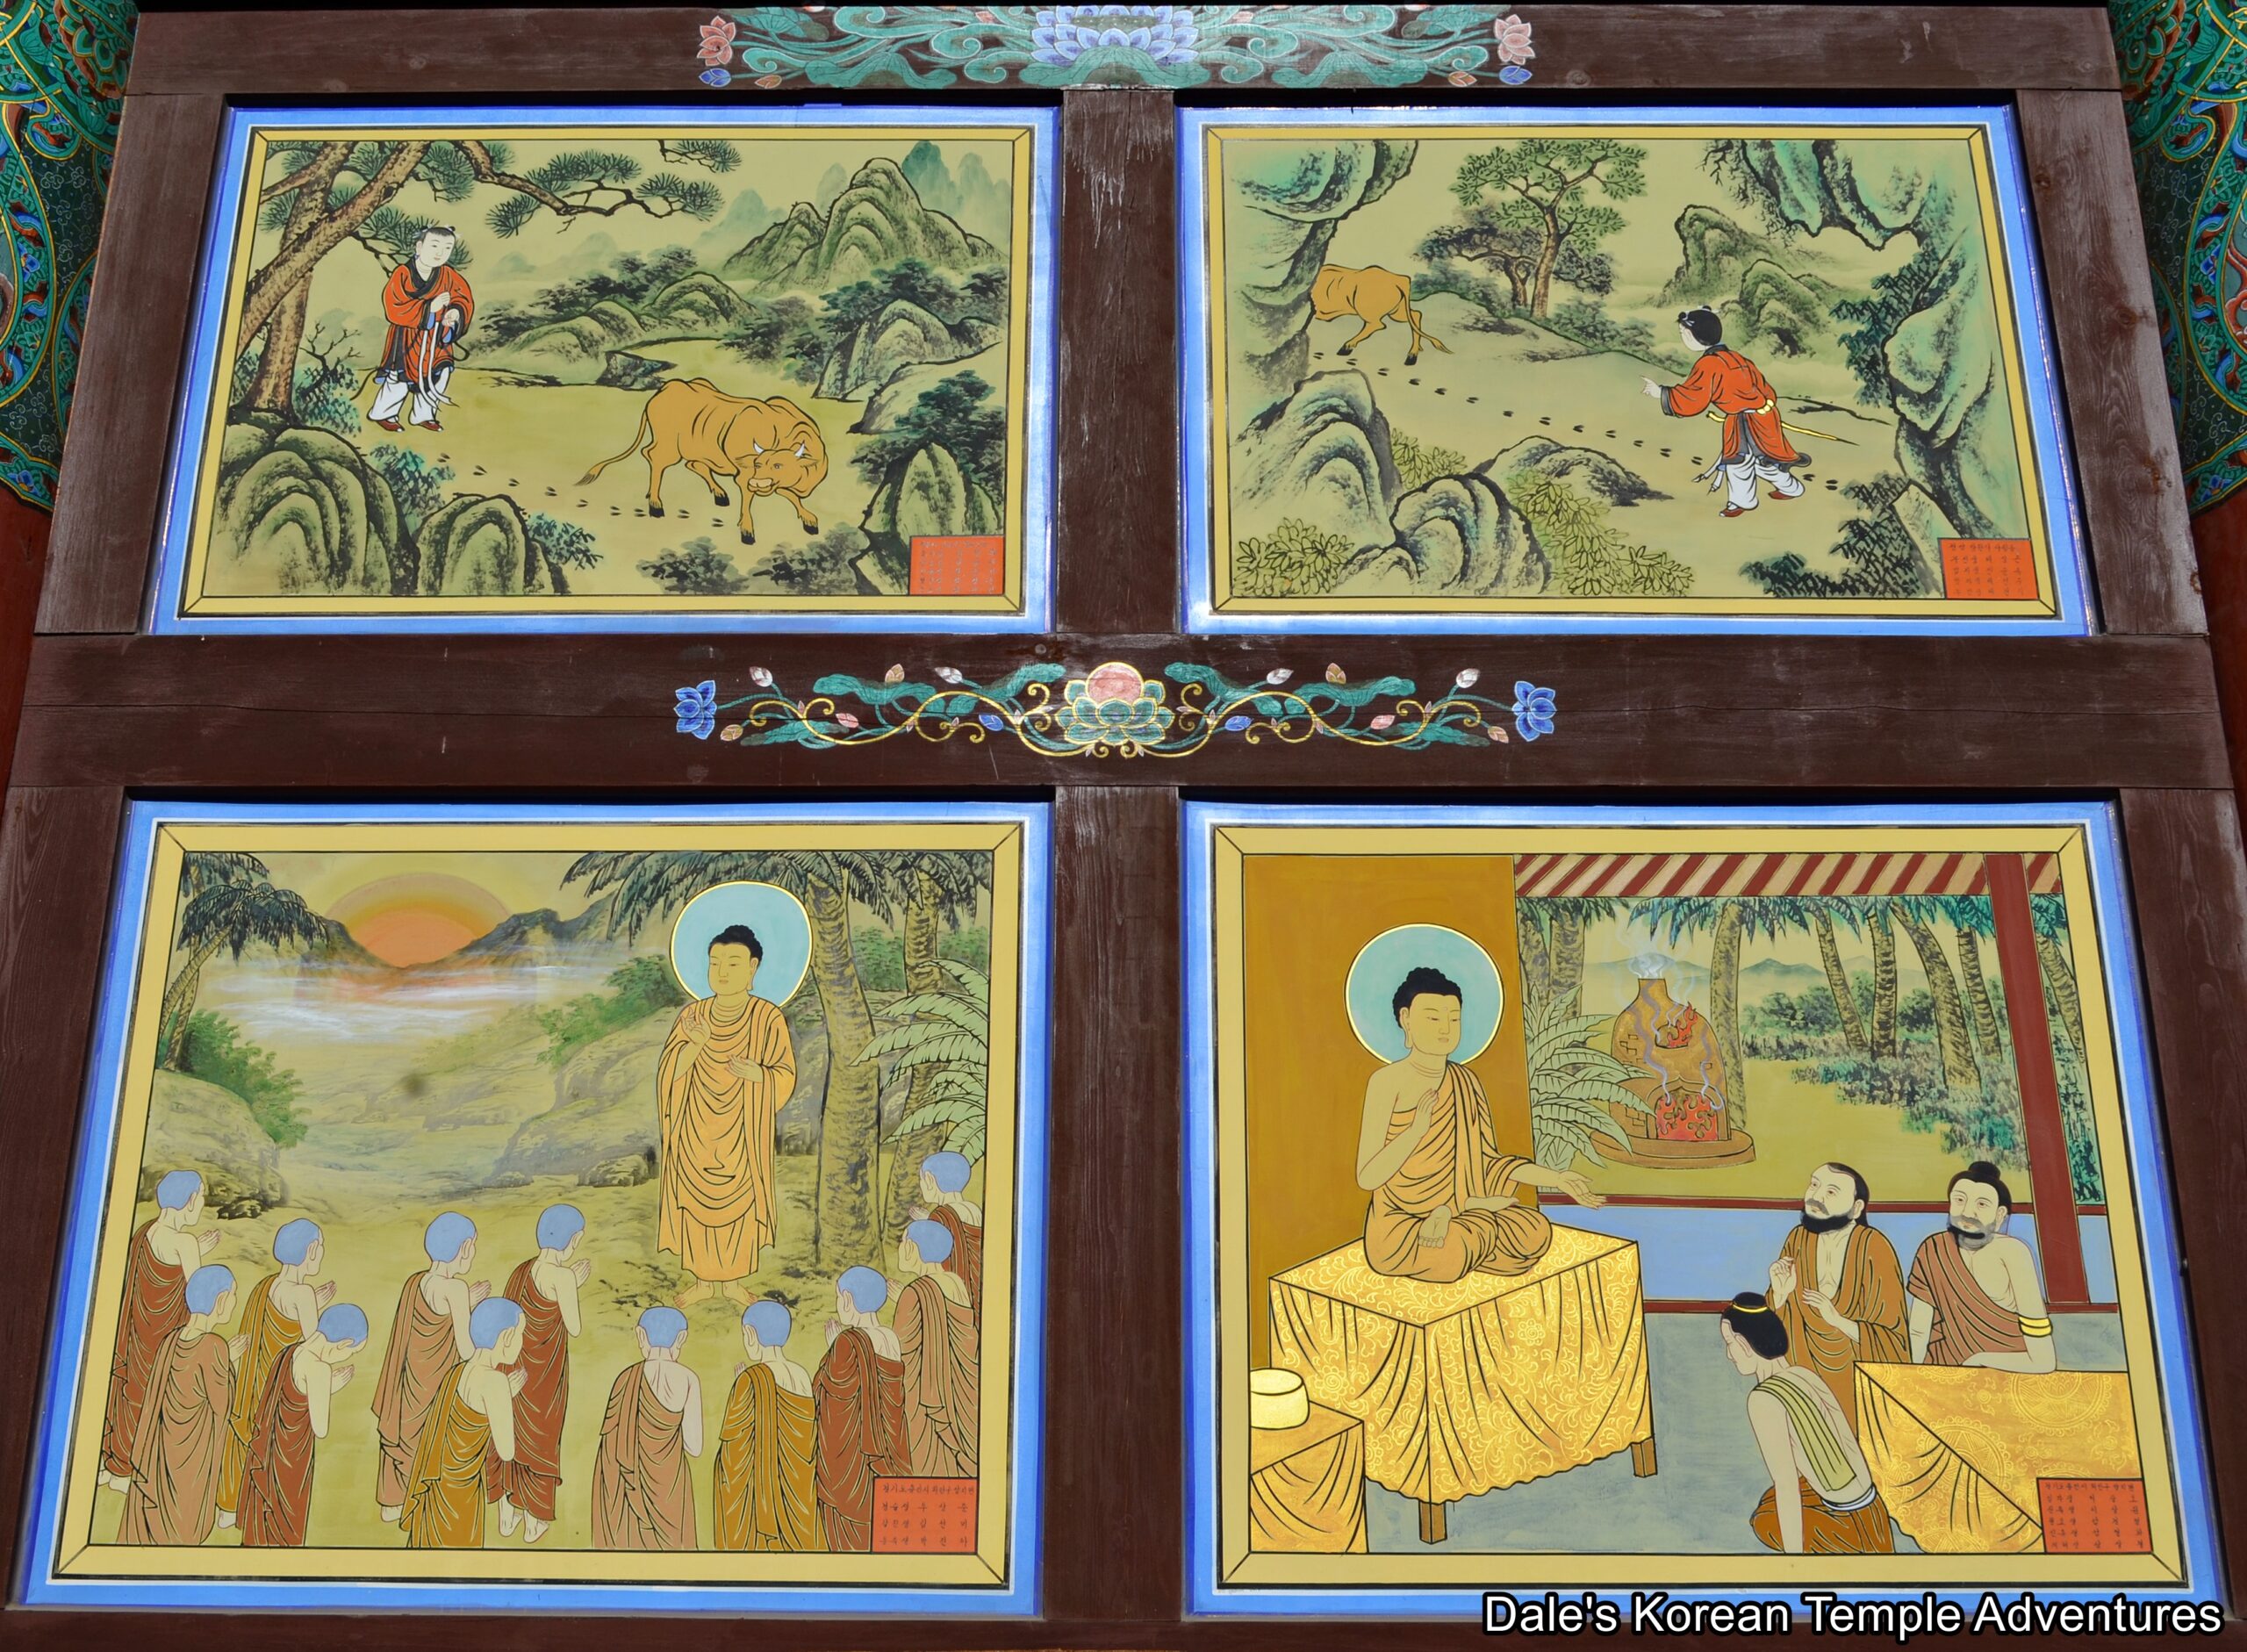
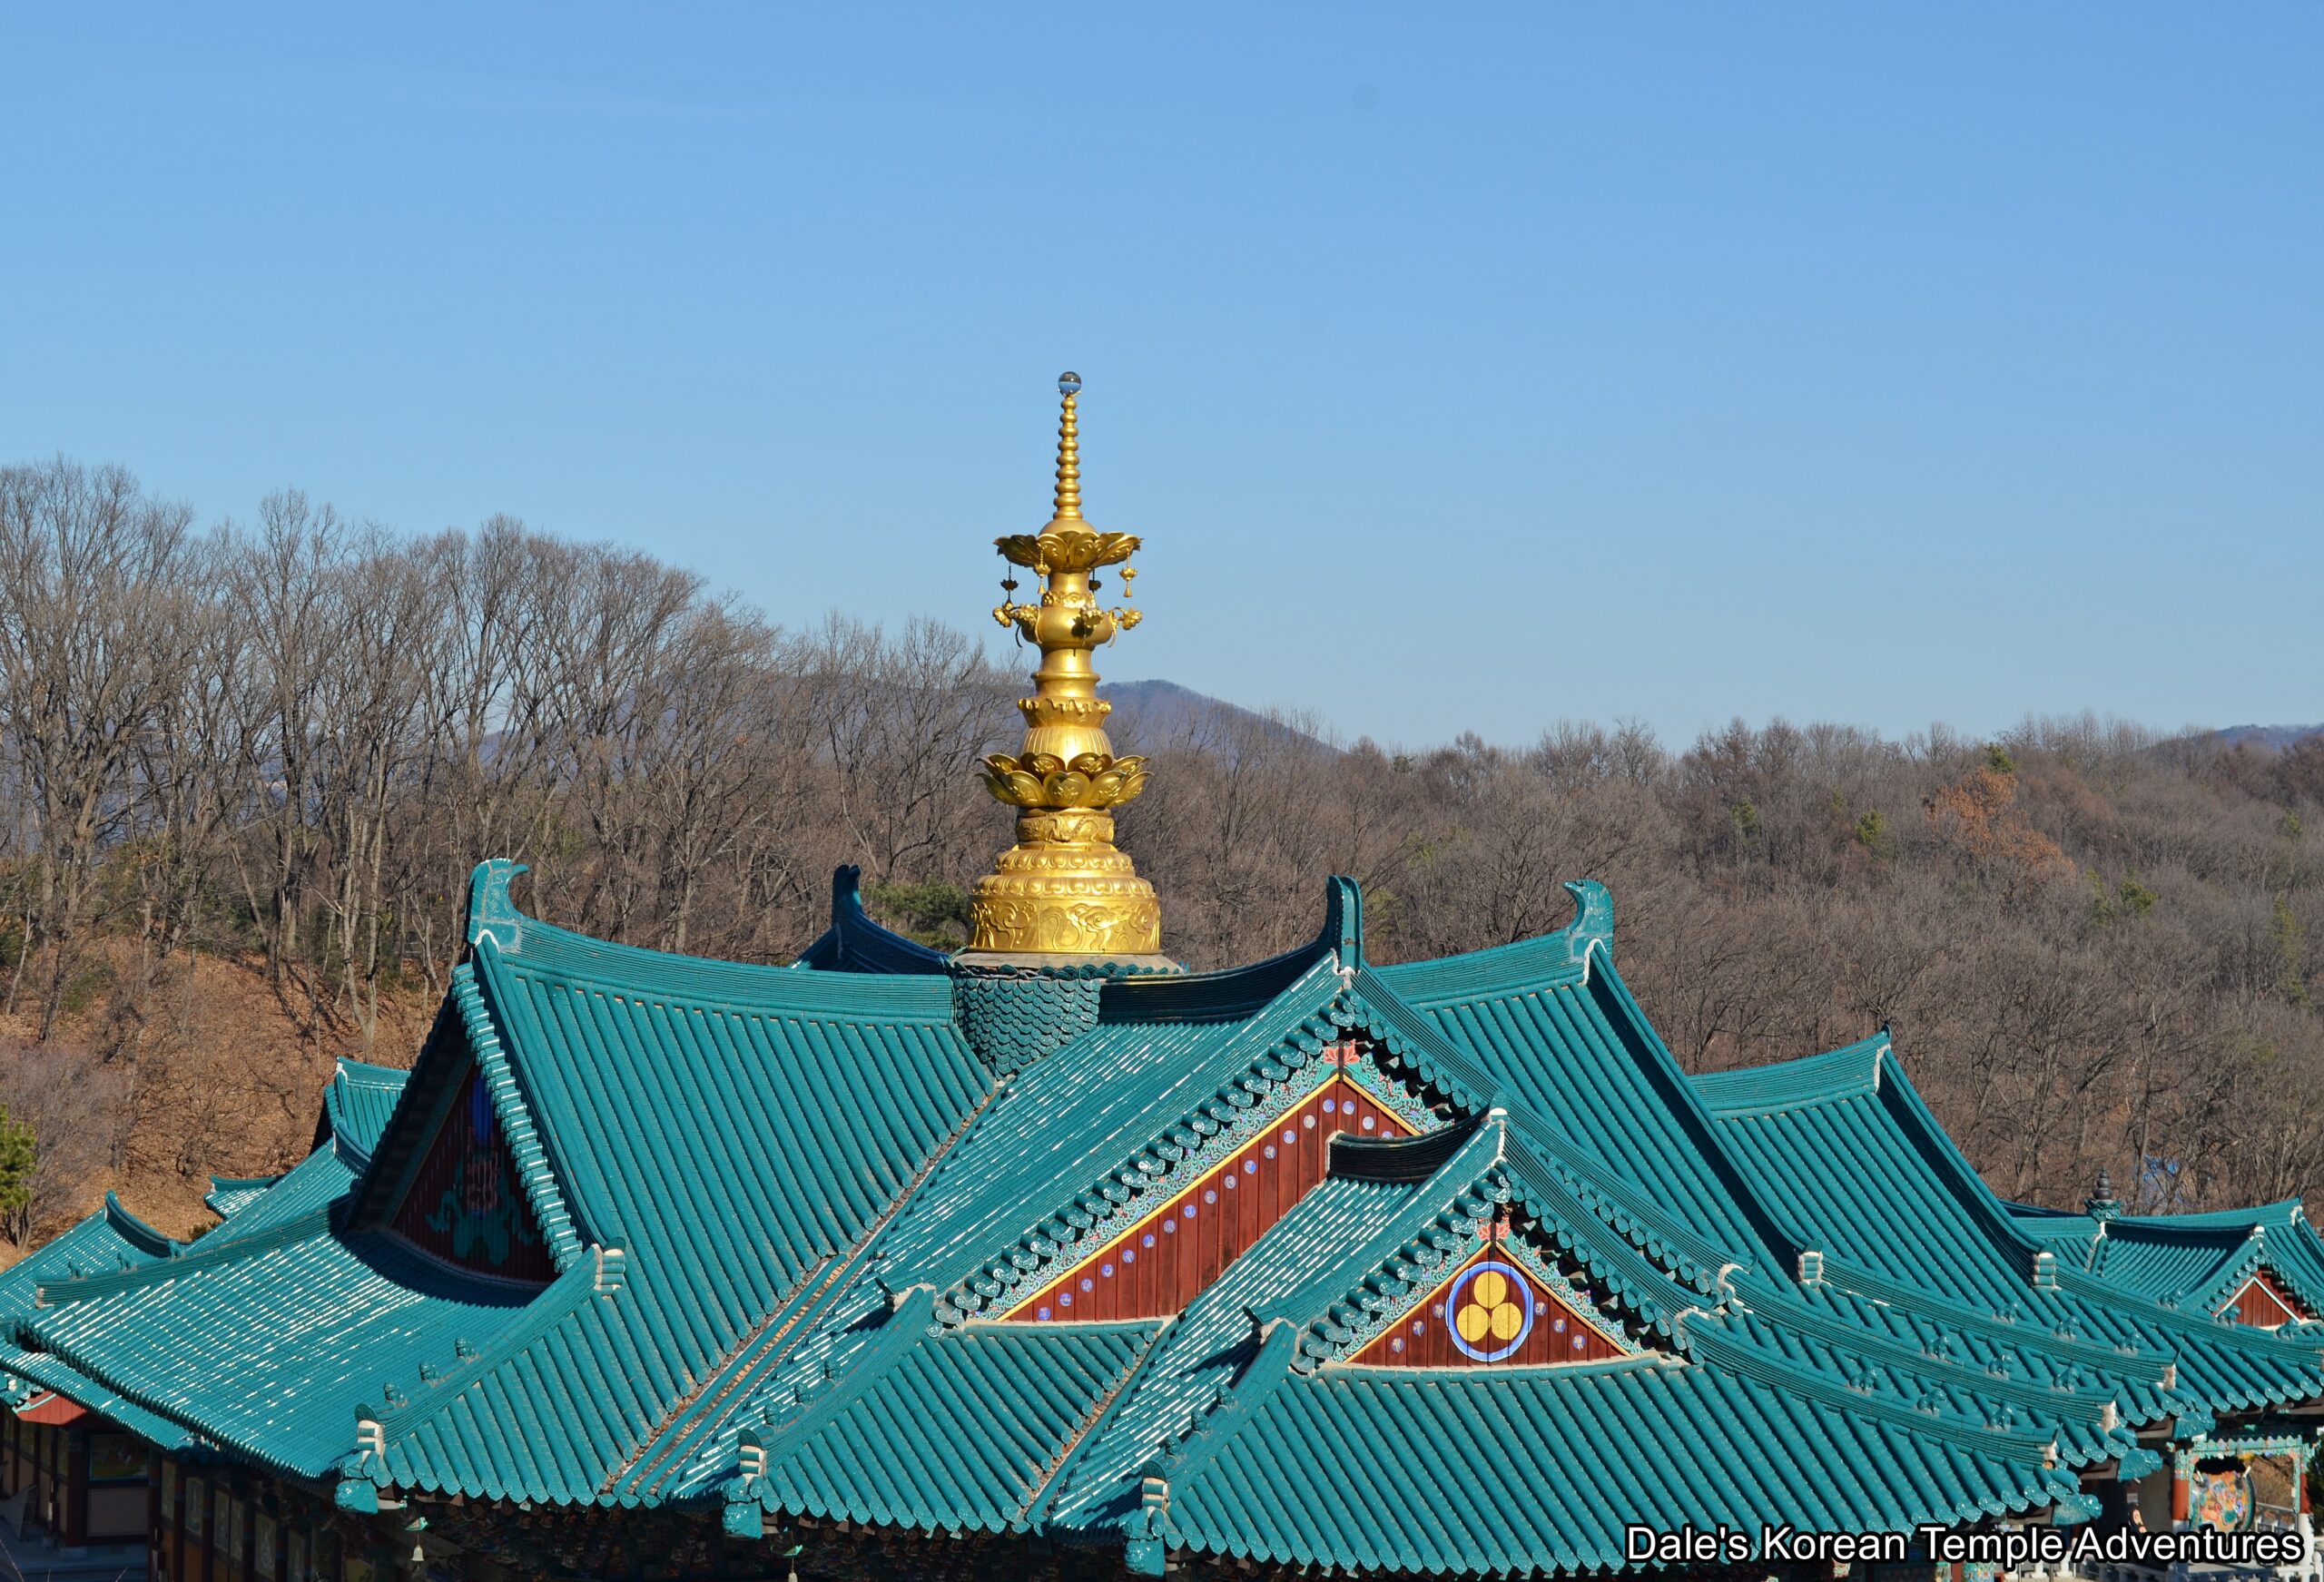
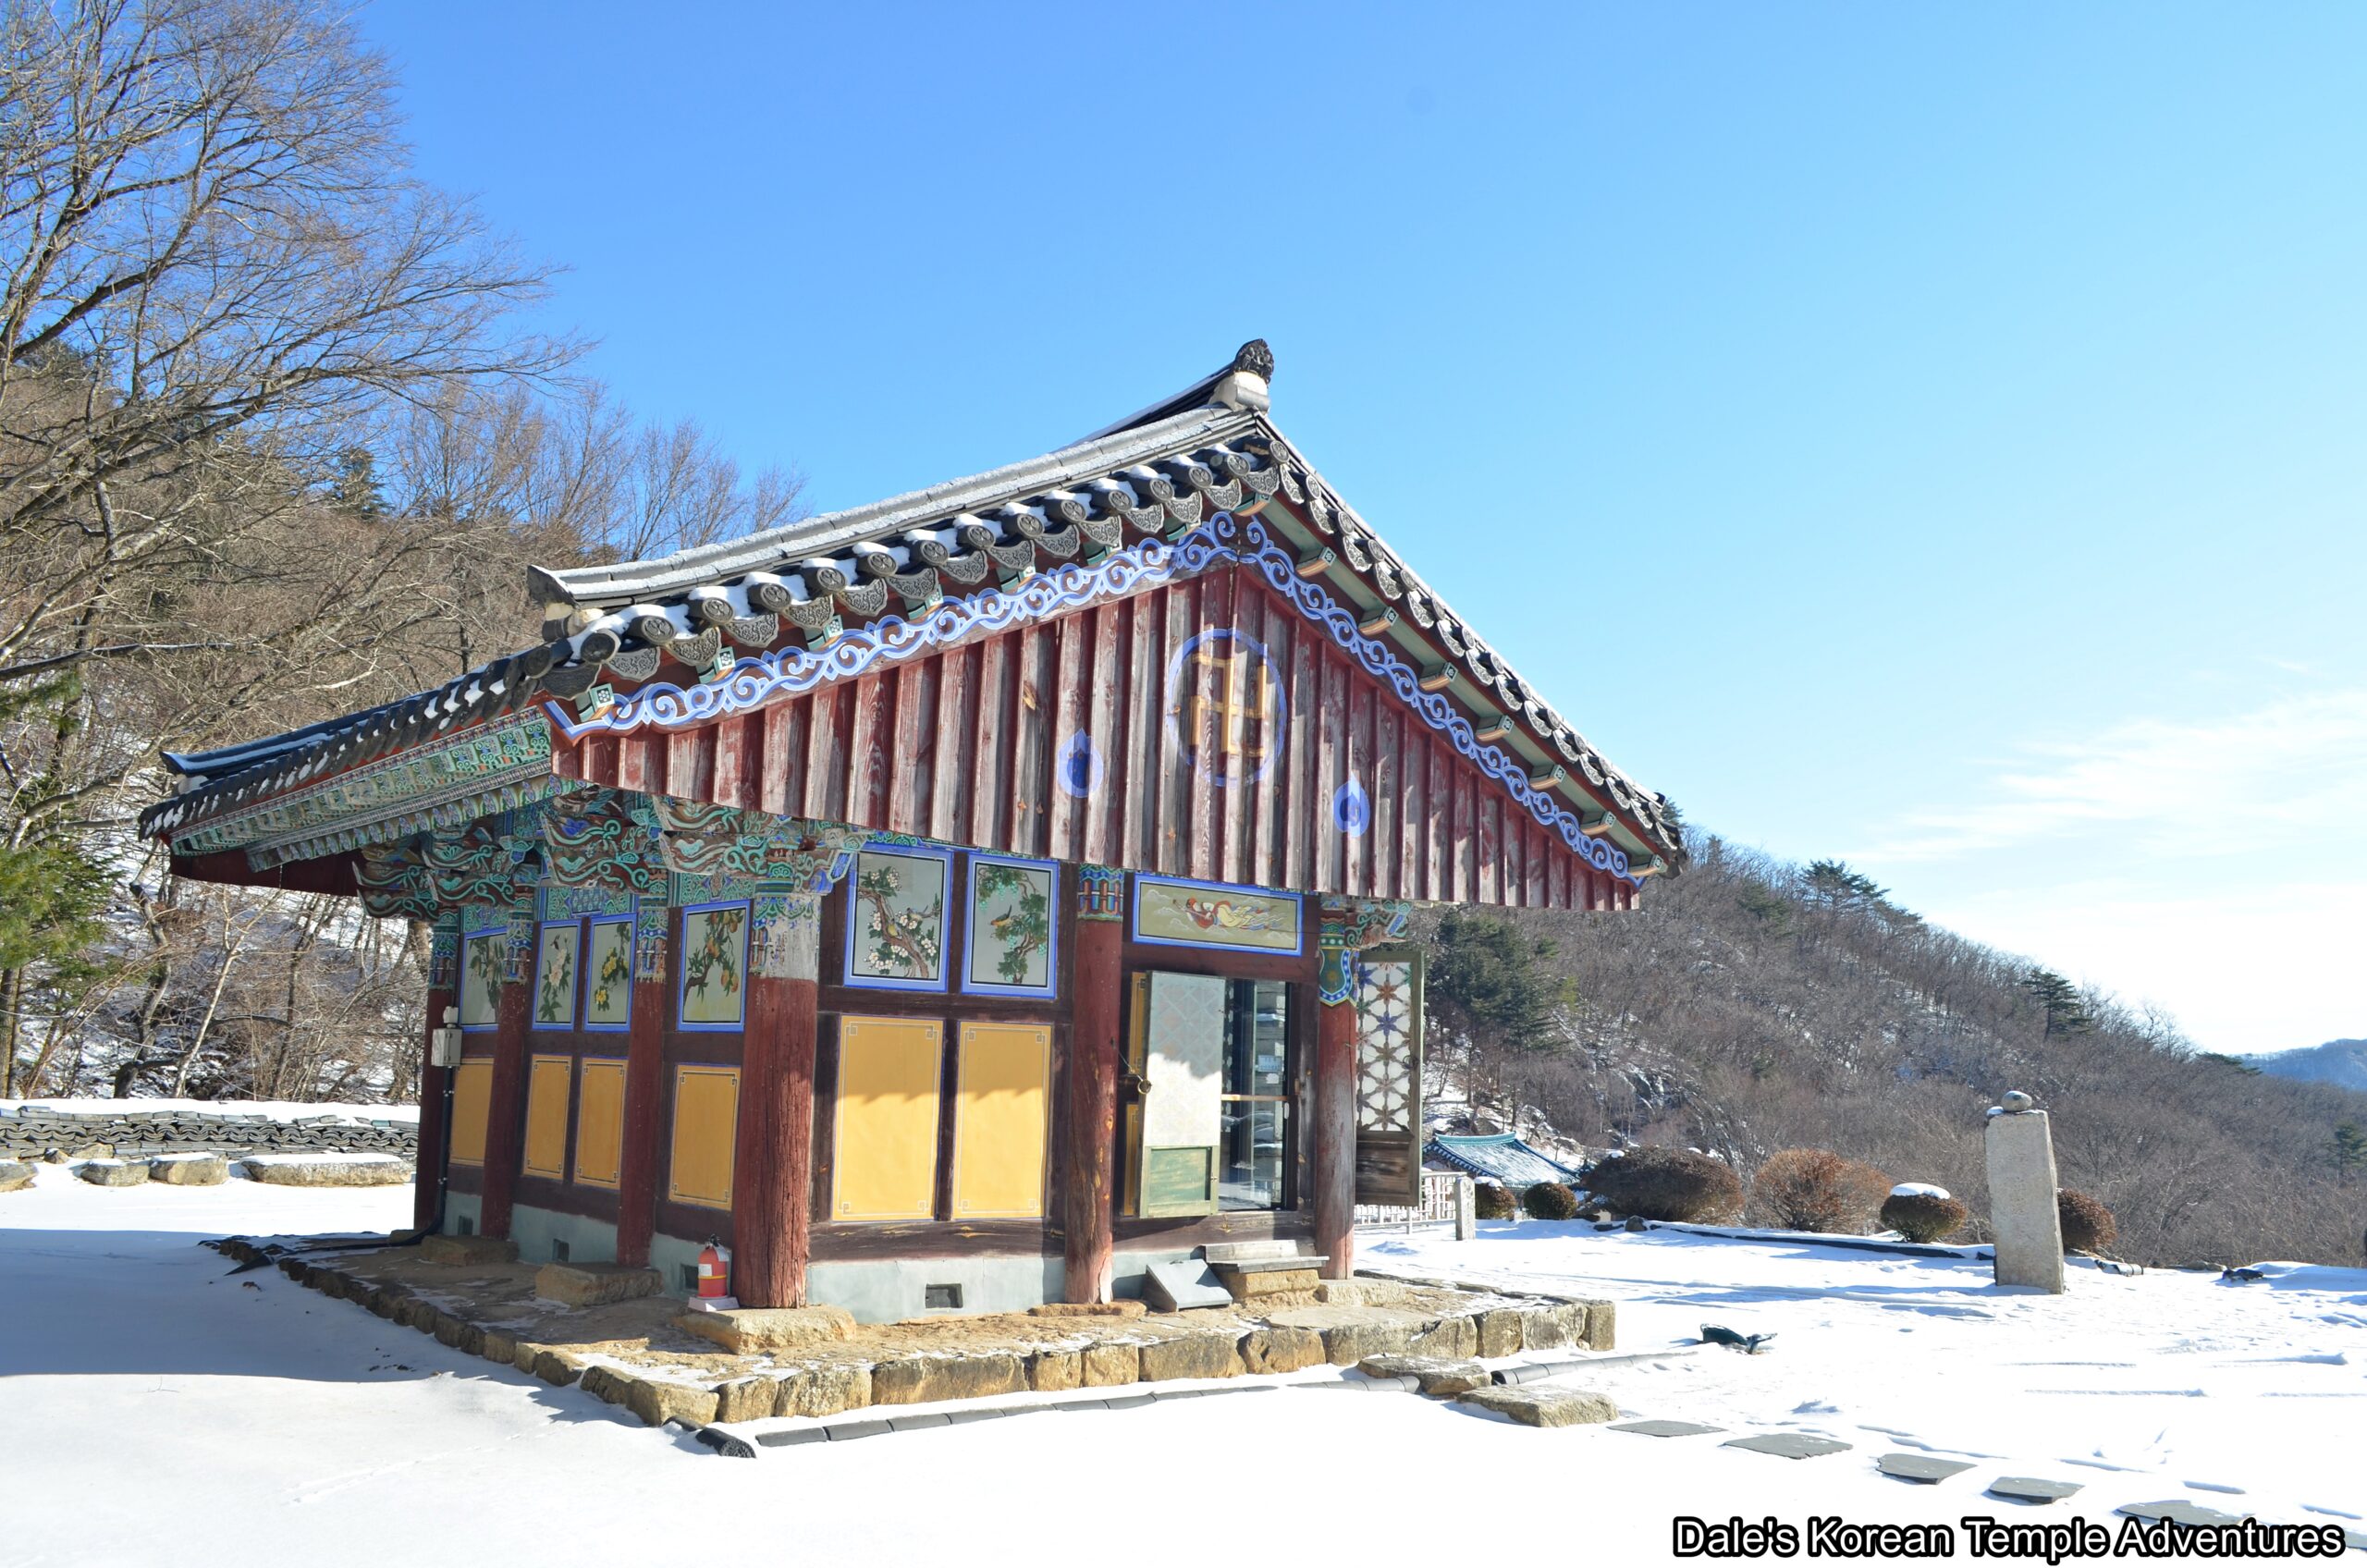
Slightly to the left, your eyes will instantly be drawn to the large Daeung-jeon Hall at Beopryunsa Temple. In total, the main hall is some 430 square metres in size. Additionally, it’s shaped like the Chinese character 亞, which means “ah.” The hall is made from indigenous red pine trees from Mt. Baekdusan. Nearing the Daeung-jeon Hall, and at the foot of the stairs leading up to the main hall, you’ll find a stone relief of a Gwimyeon (Monster Mask) as well as intertwined lotus flowers. Overhead of the main entry to the Daeung-jeon Hall is a masterful wood relief of a yellow and blue dragon. The exterior walls are adorned with an assortment of various murals that include various Buddhas and Bodhisattvas, as well as the Shimu-do (The Ox-Herding Murals). Also adorning the exterior of the main hall are stout dragonheads, bluish-green roof tiles, as well as a large golden finial atop the Daeung-jeon Hall.
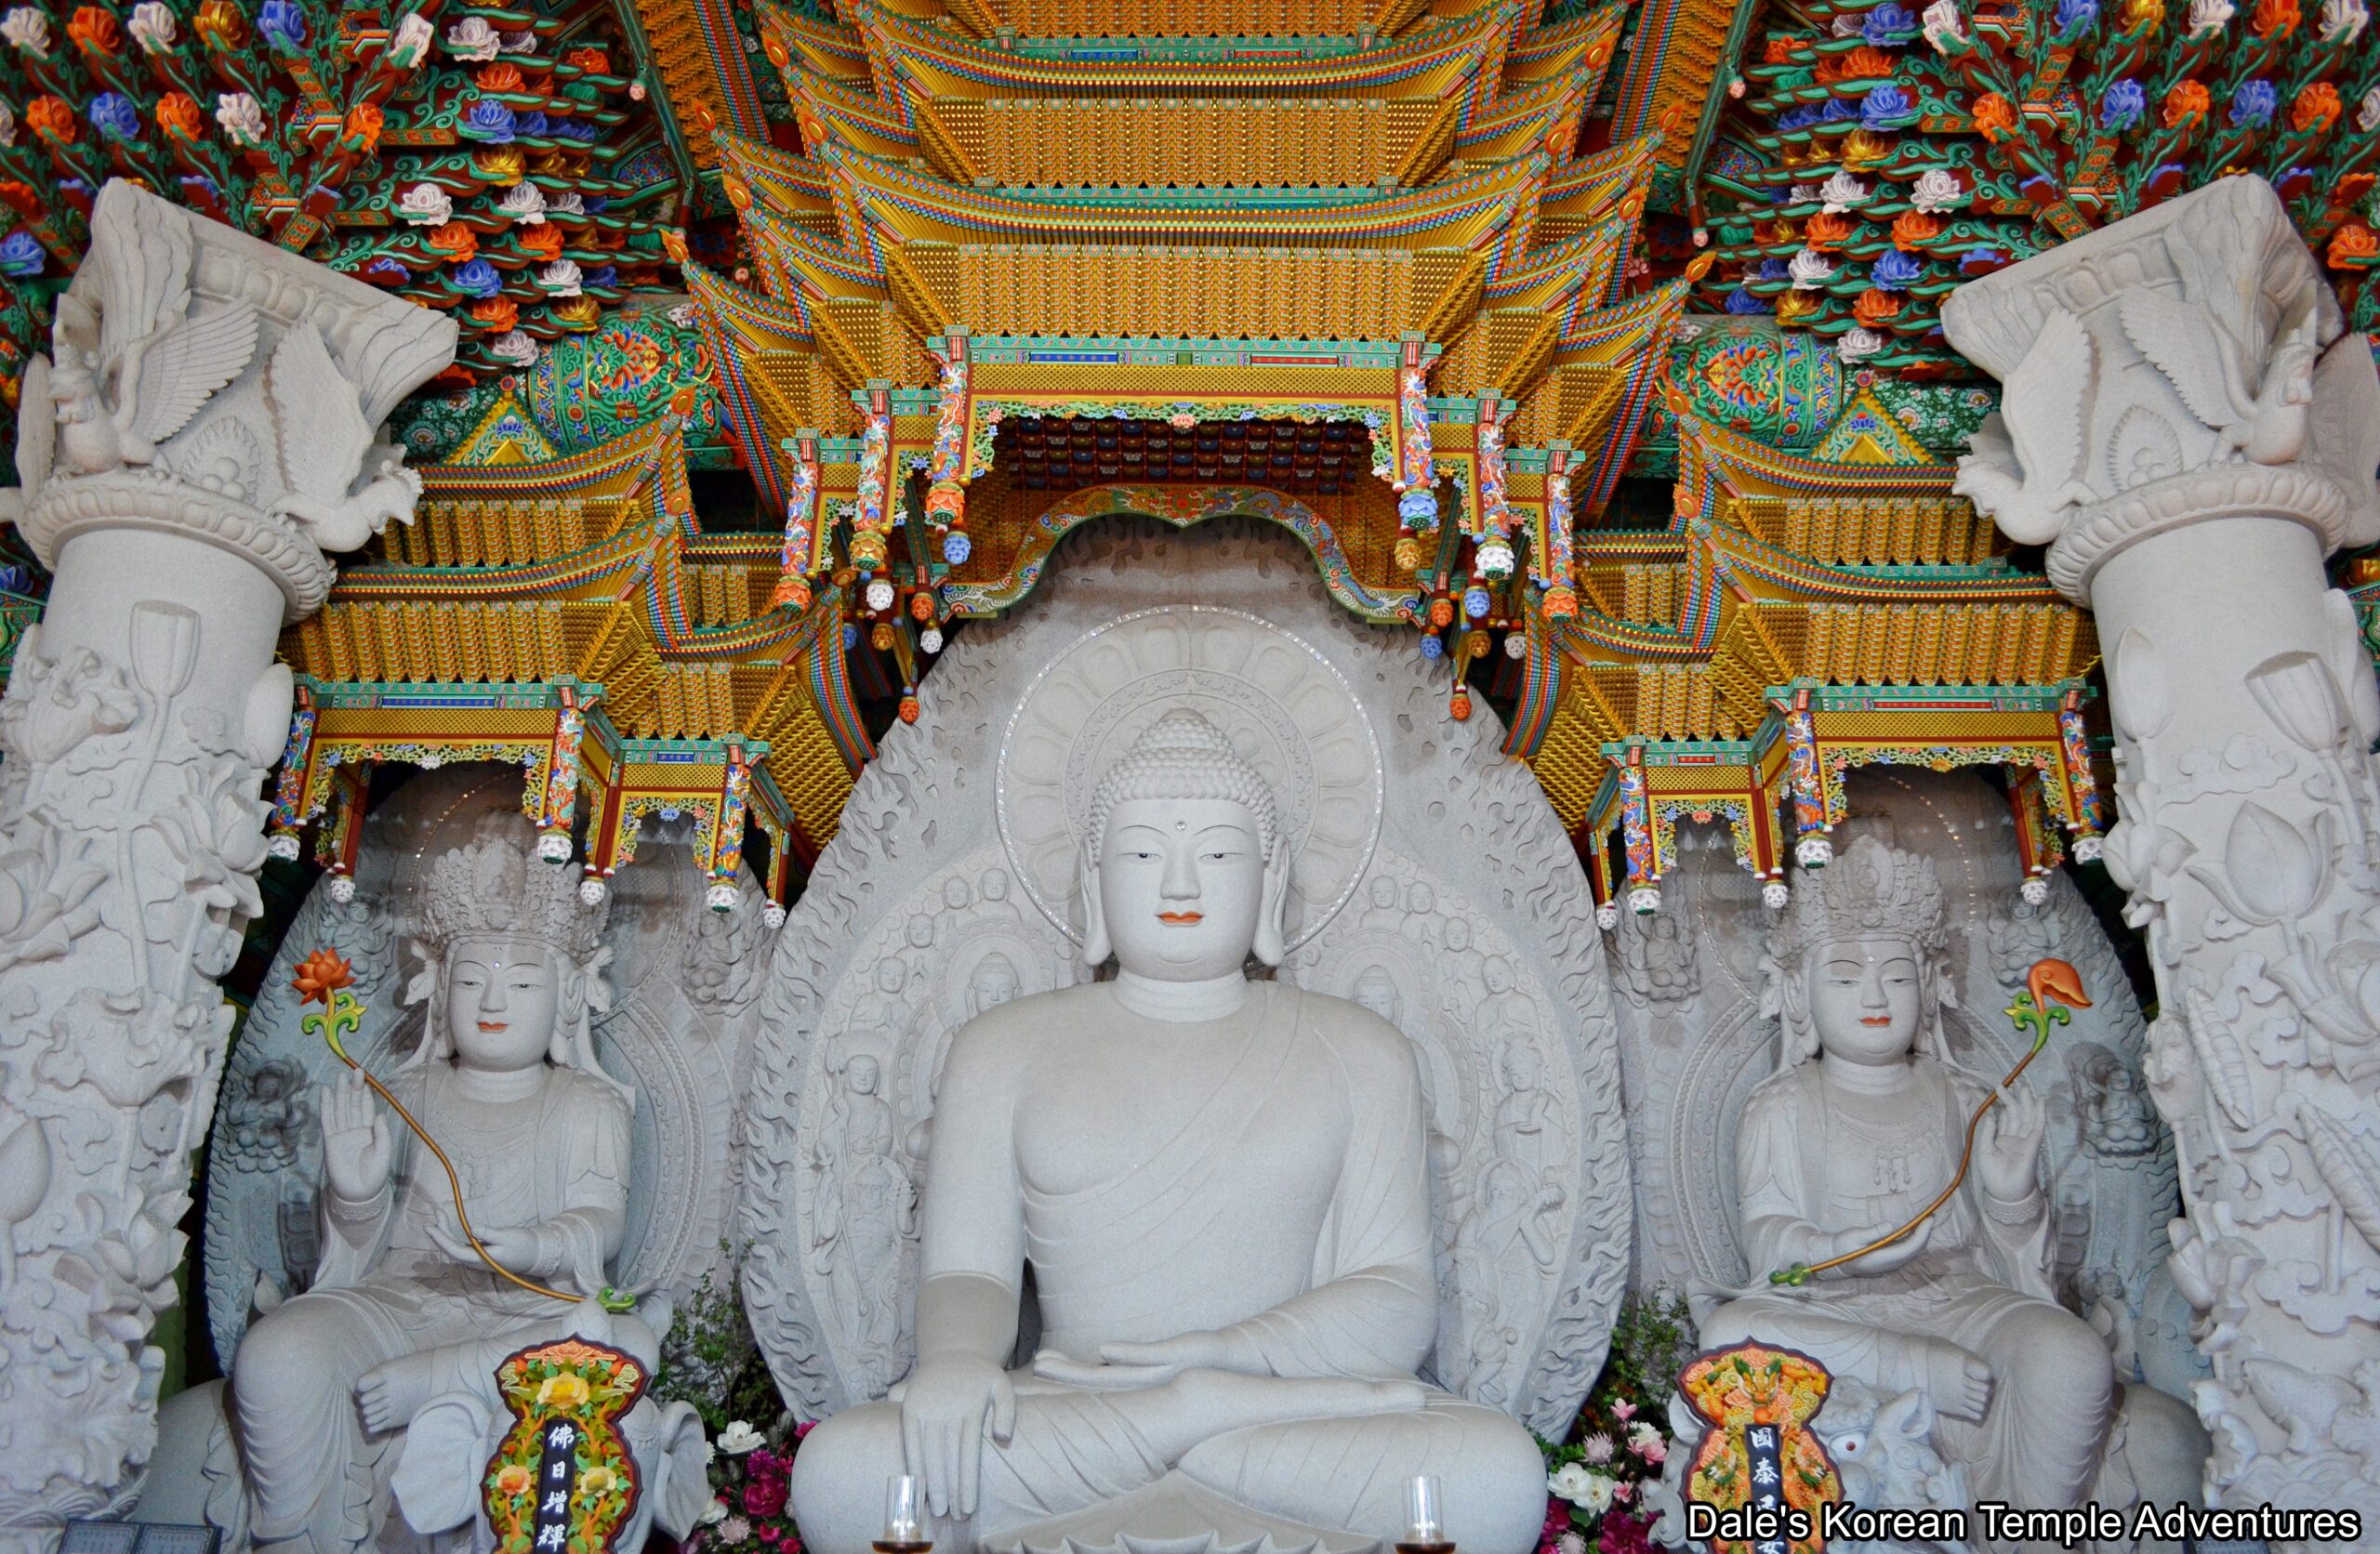
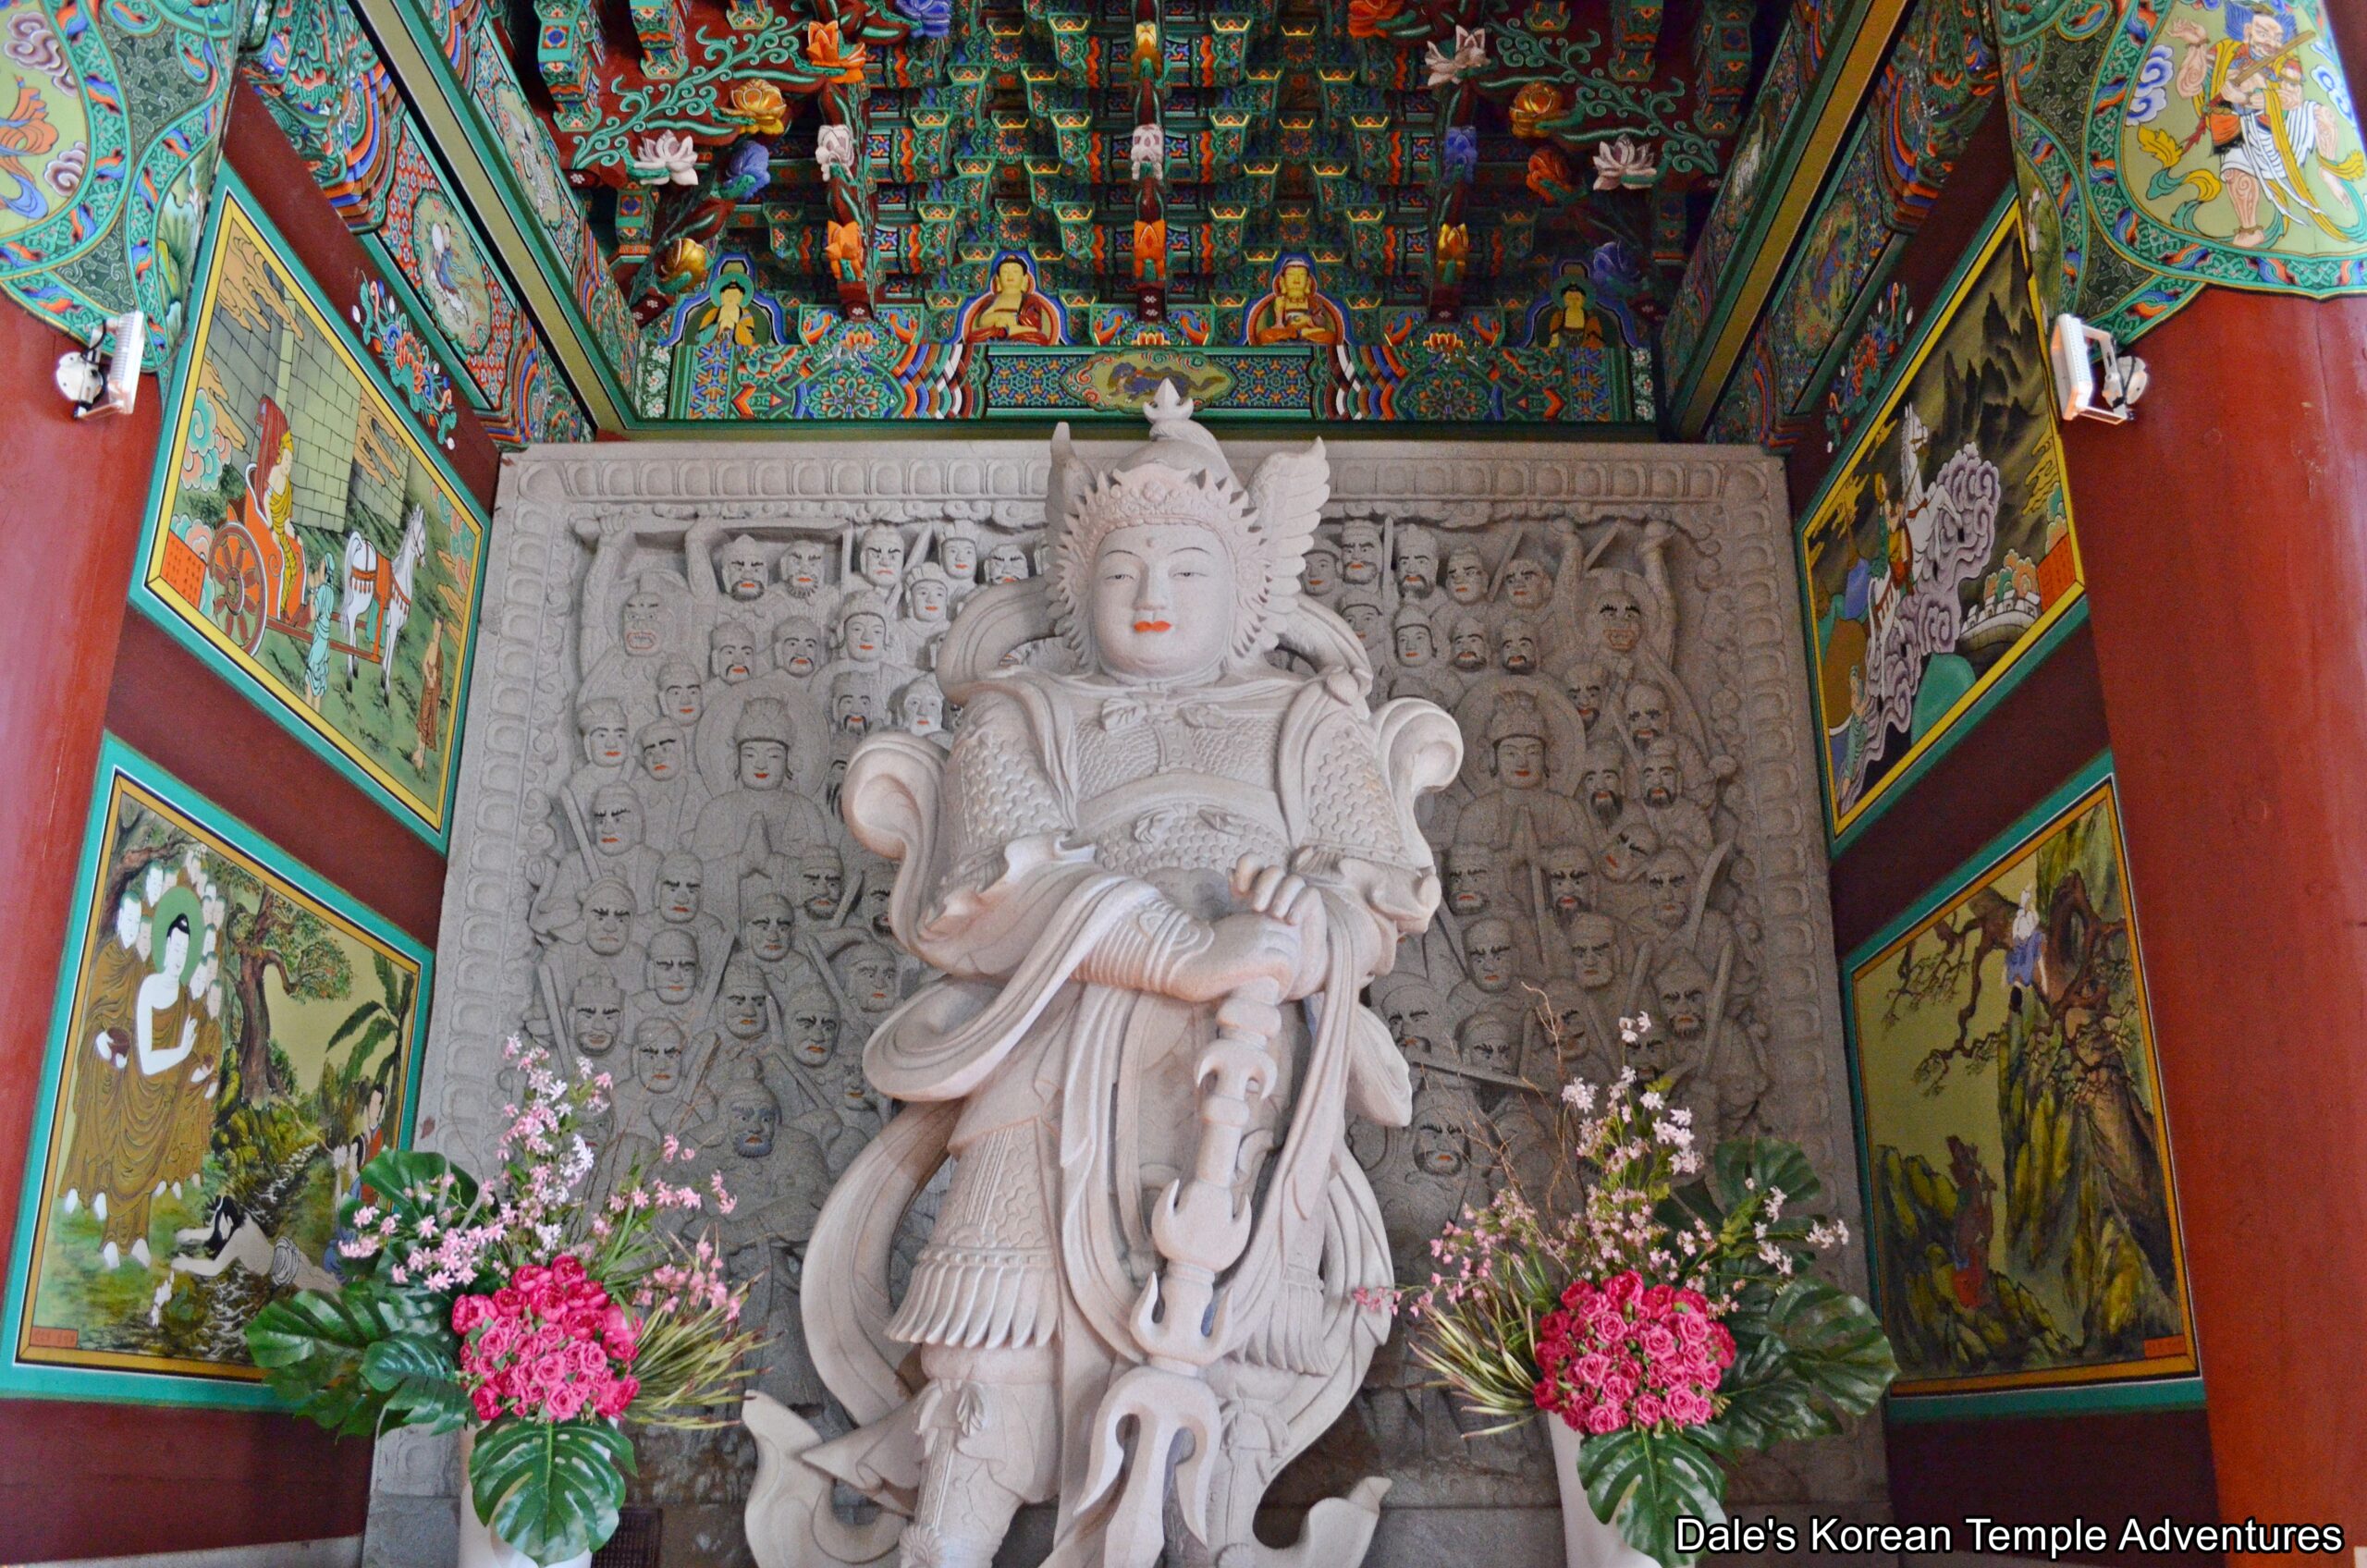
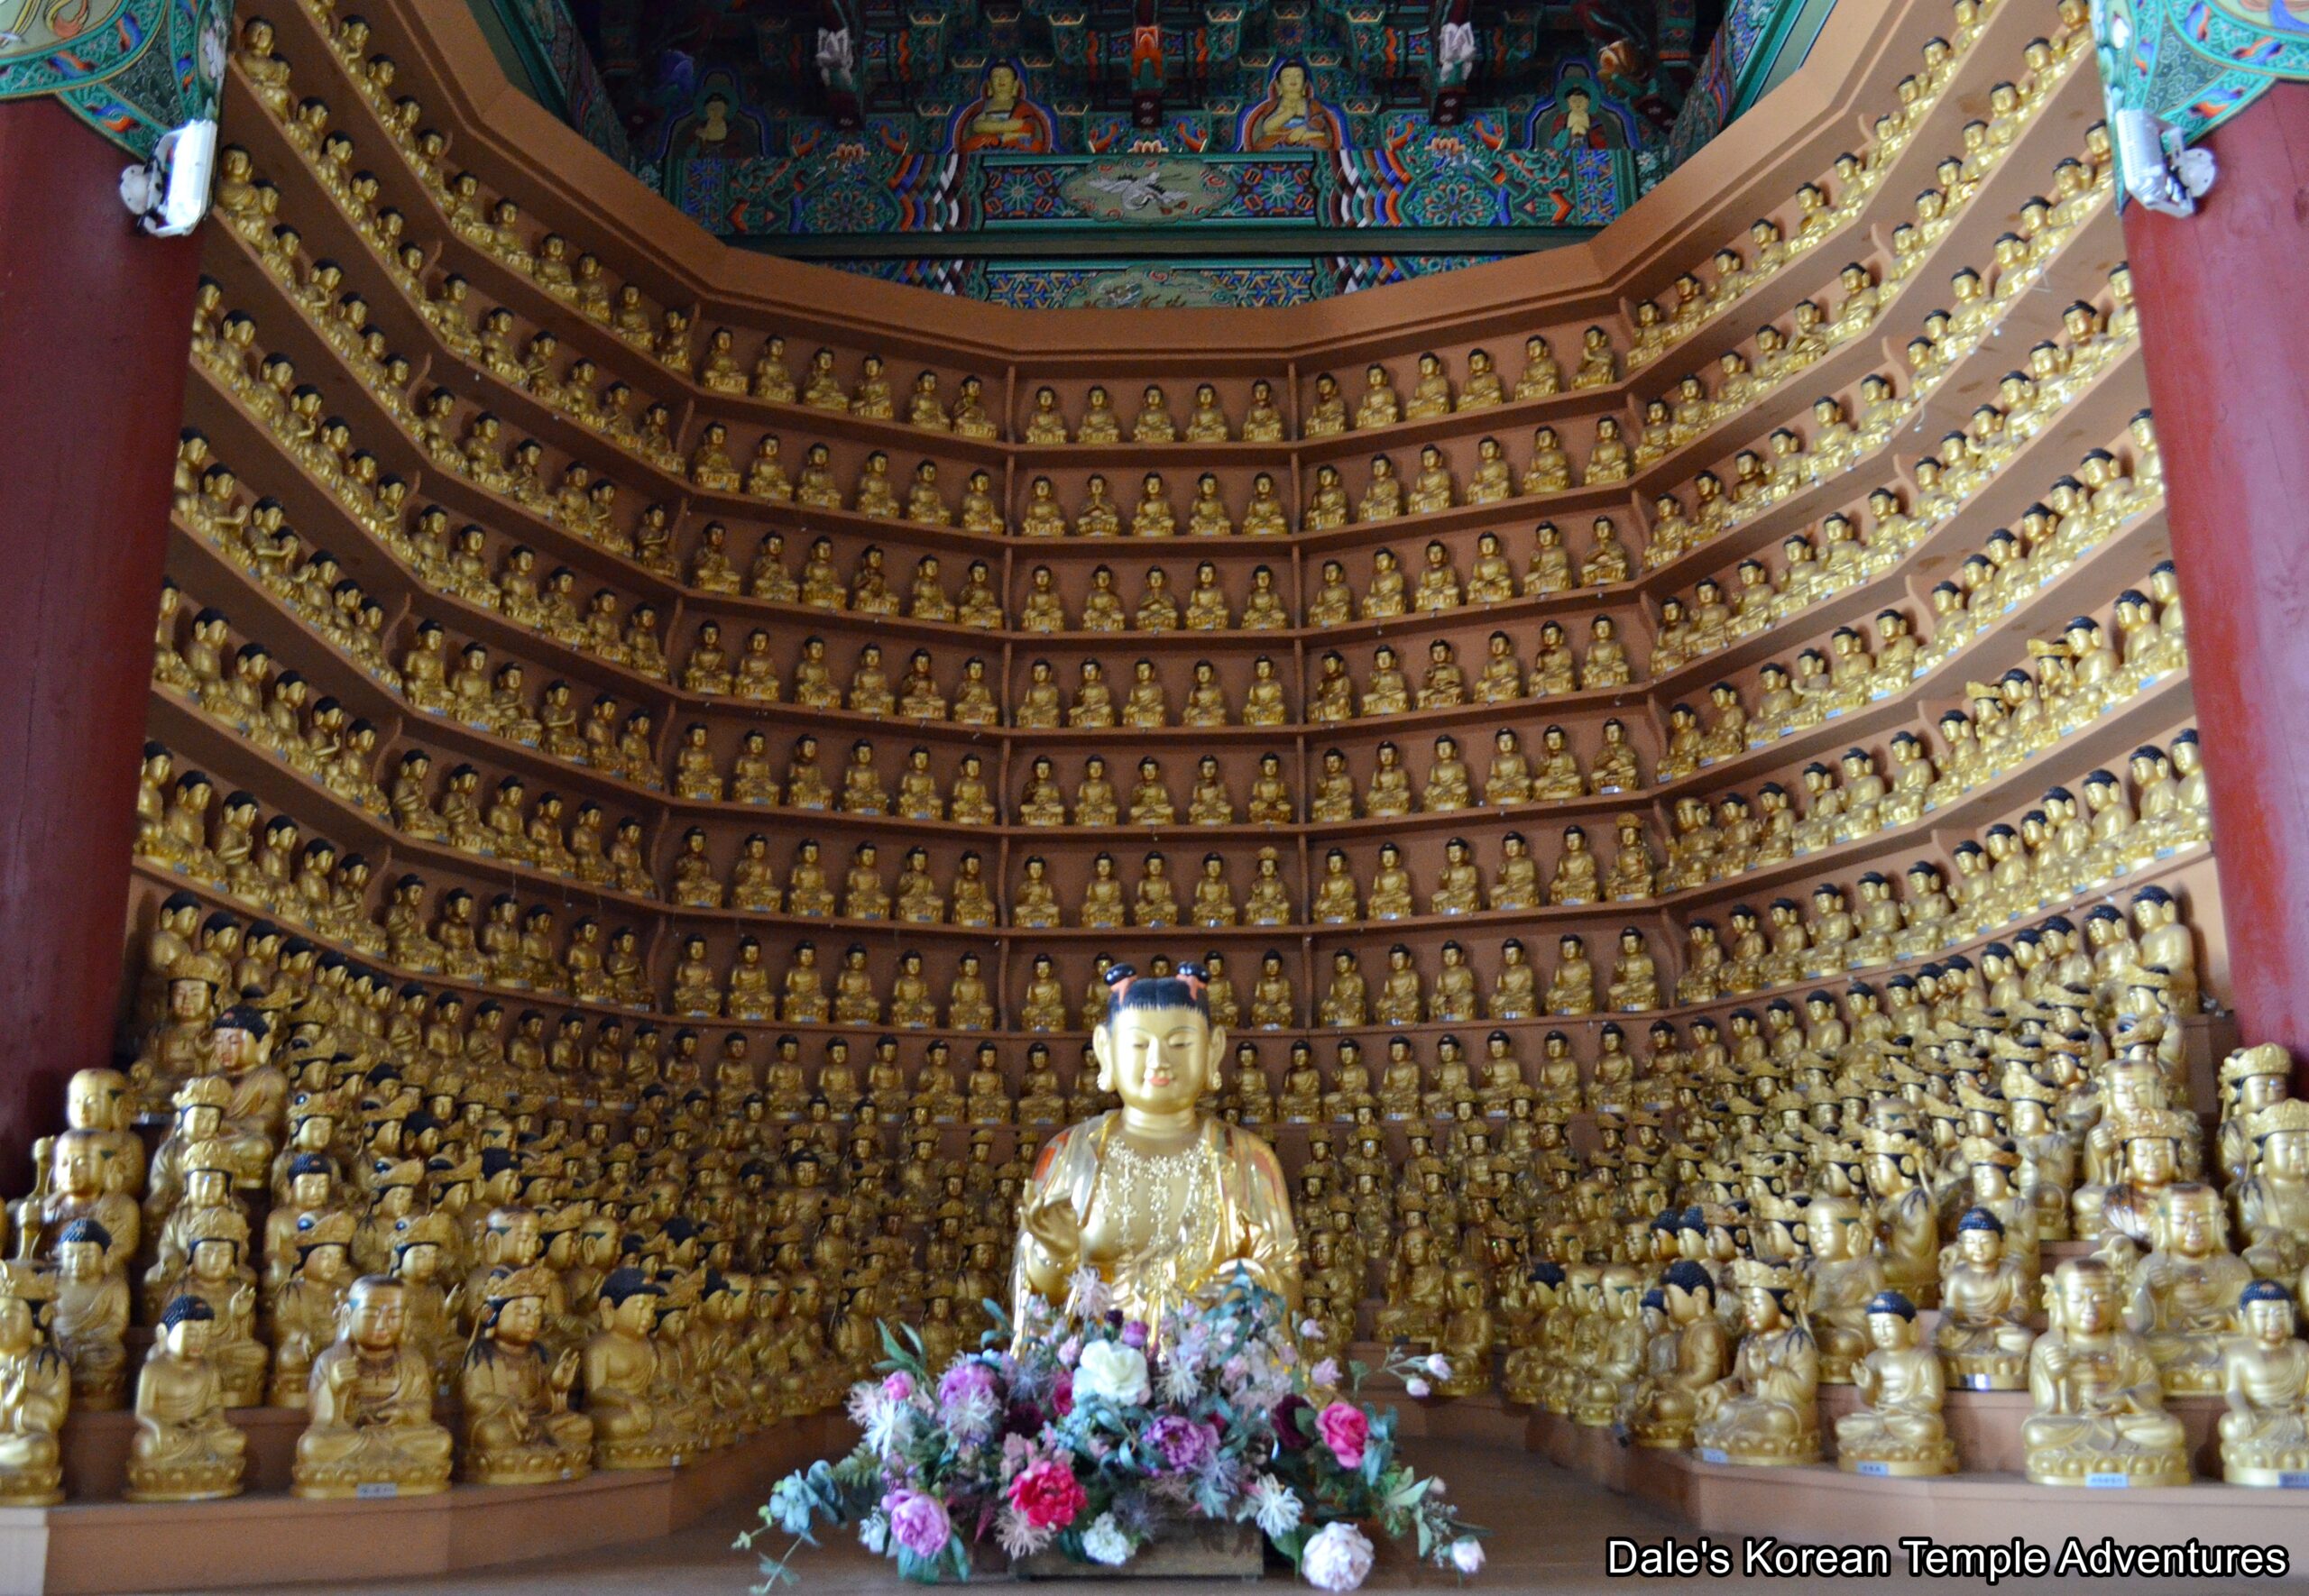
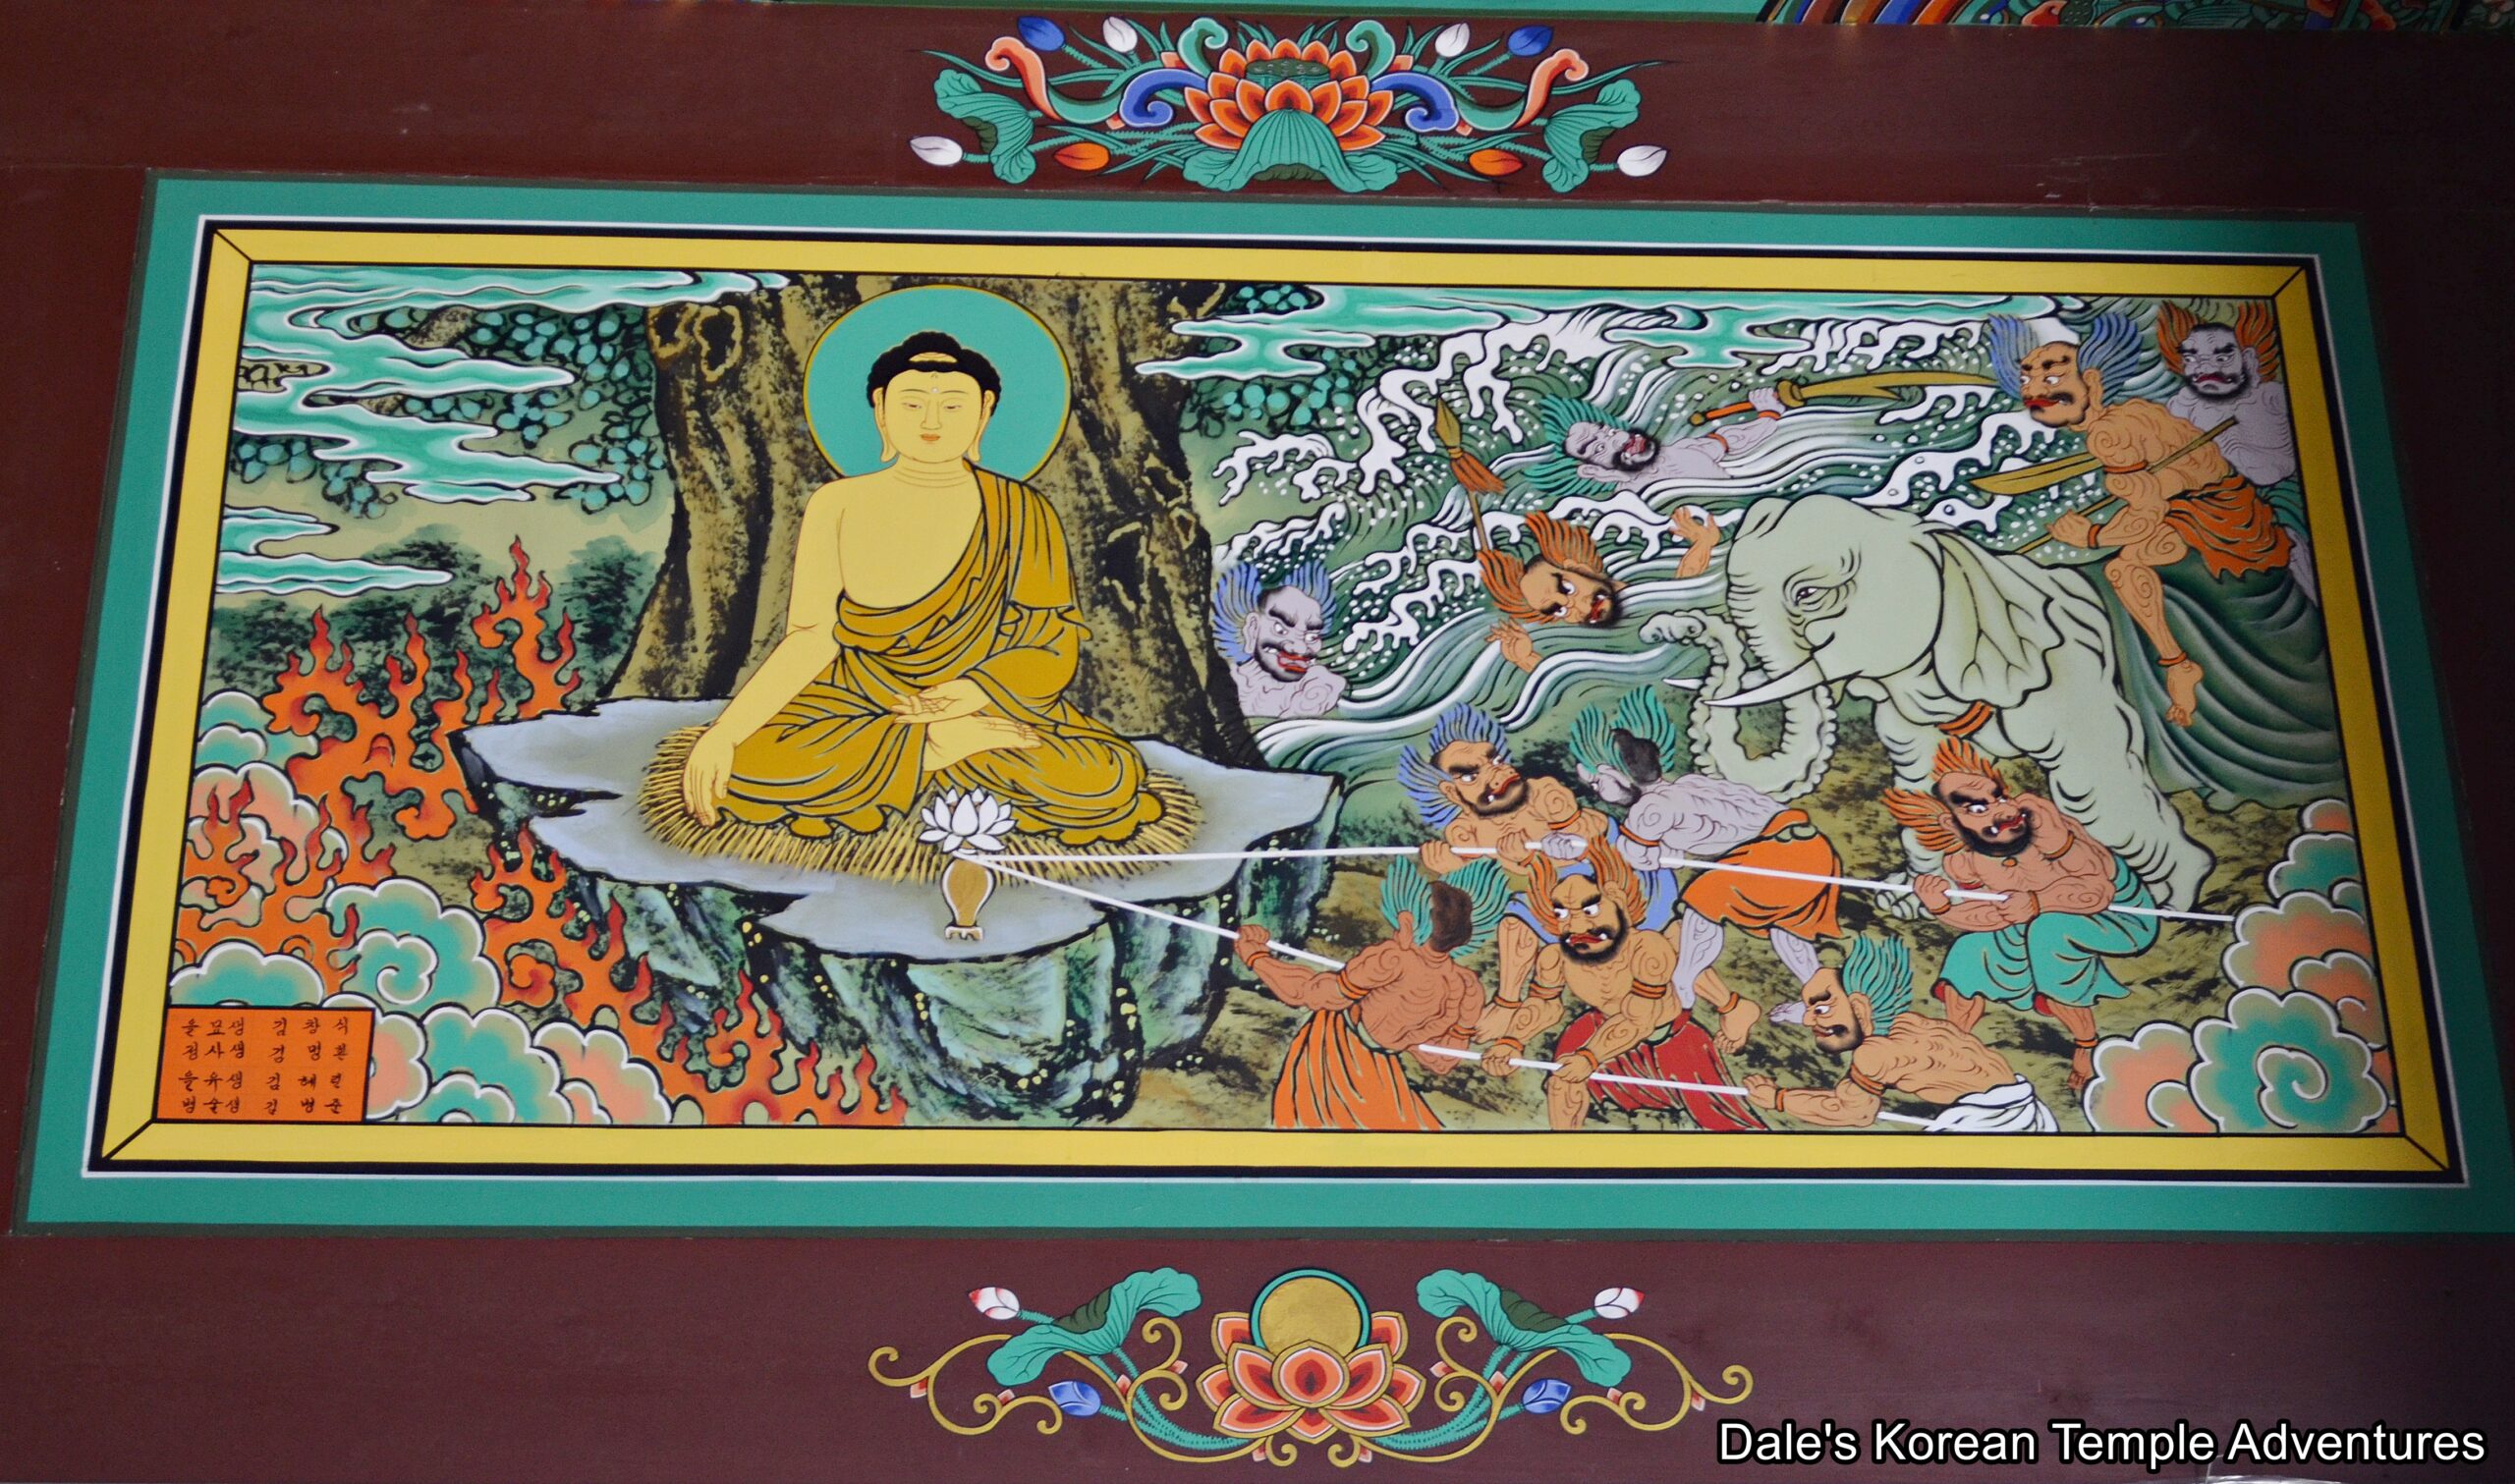
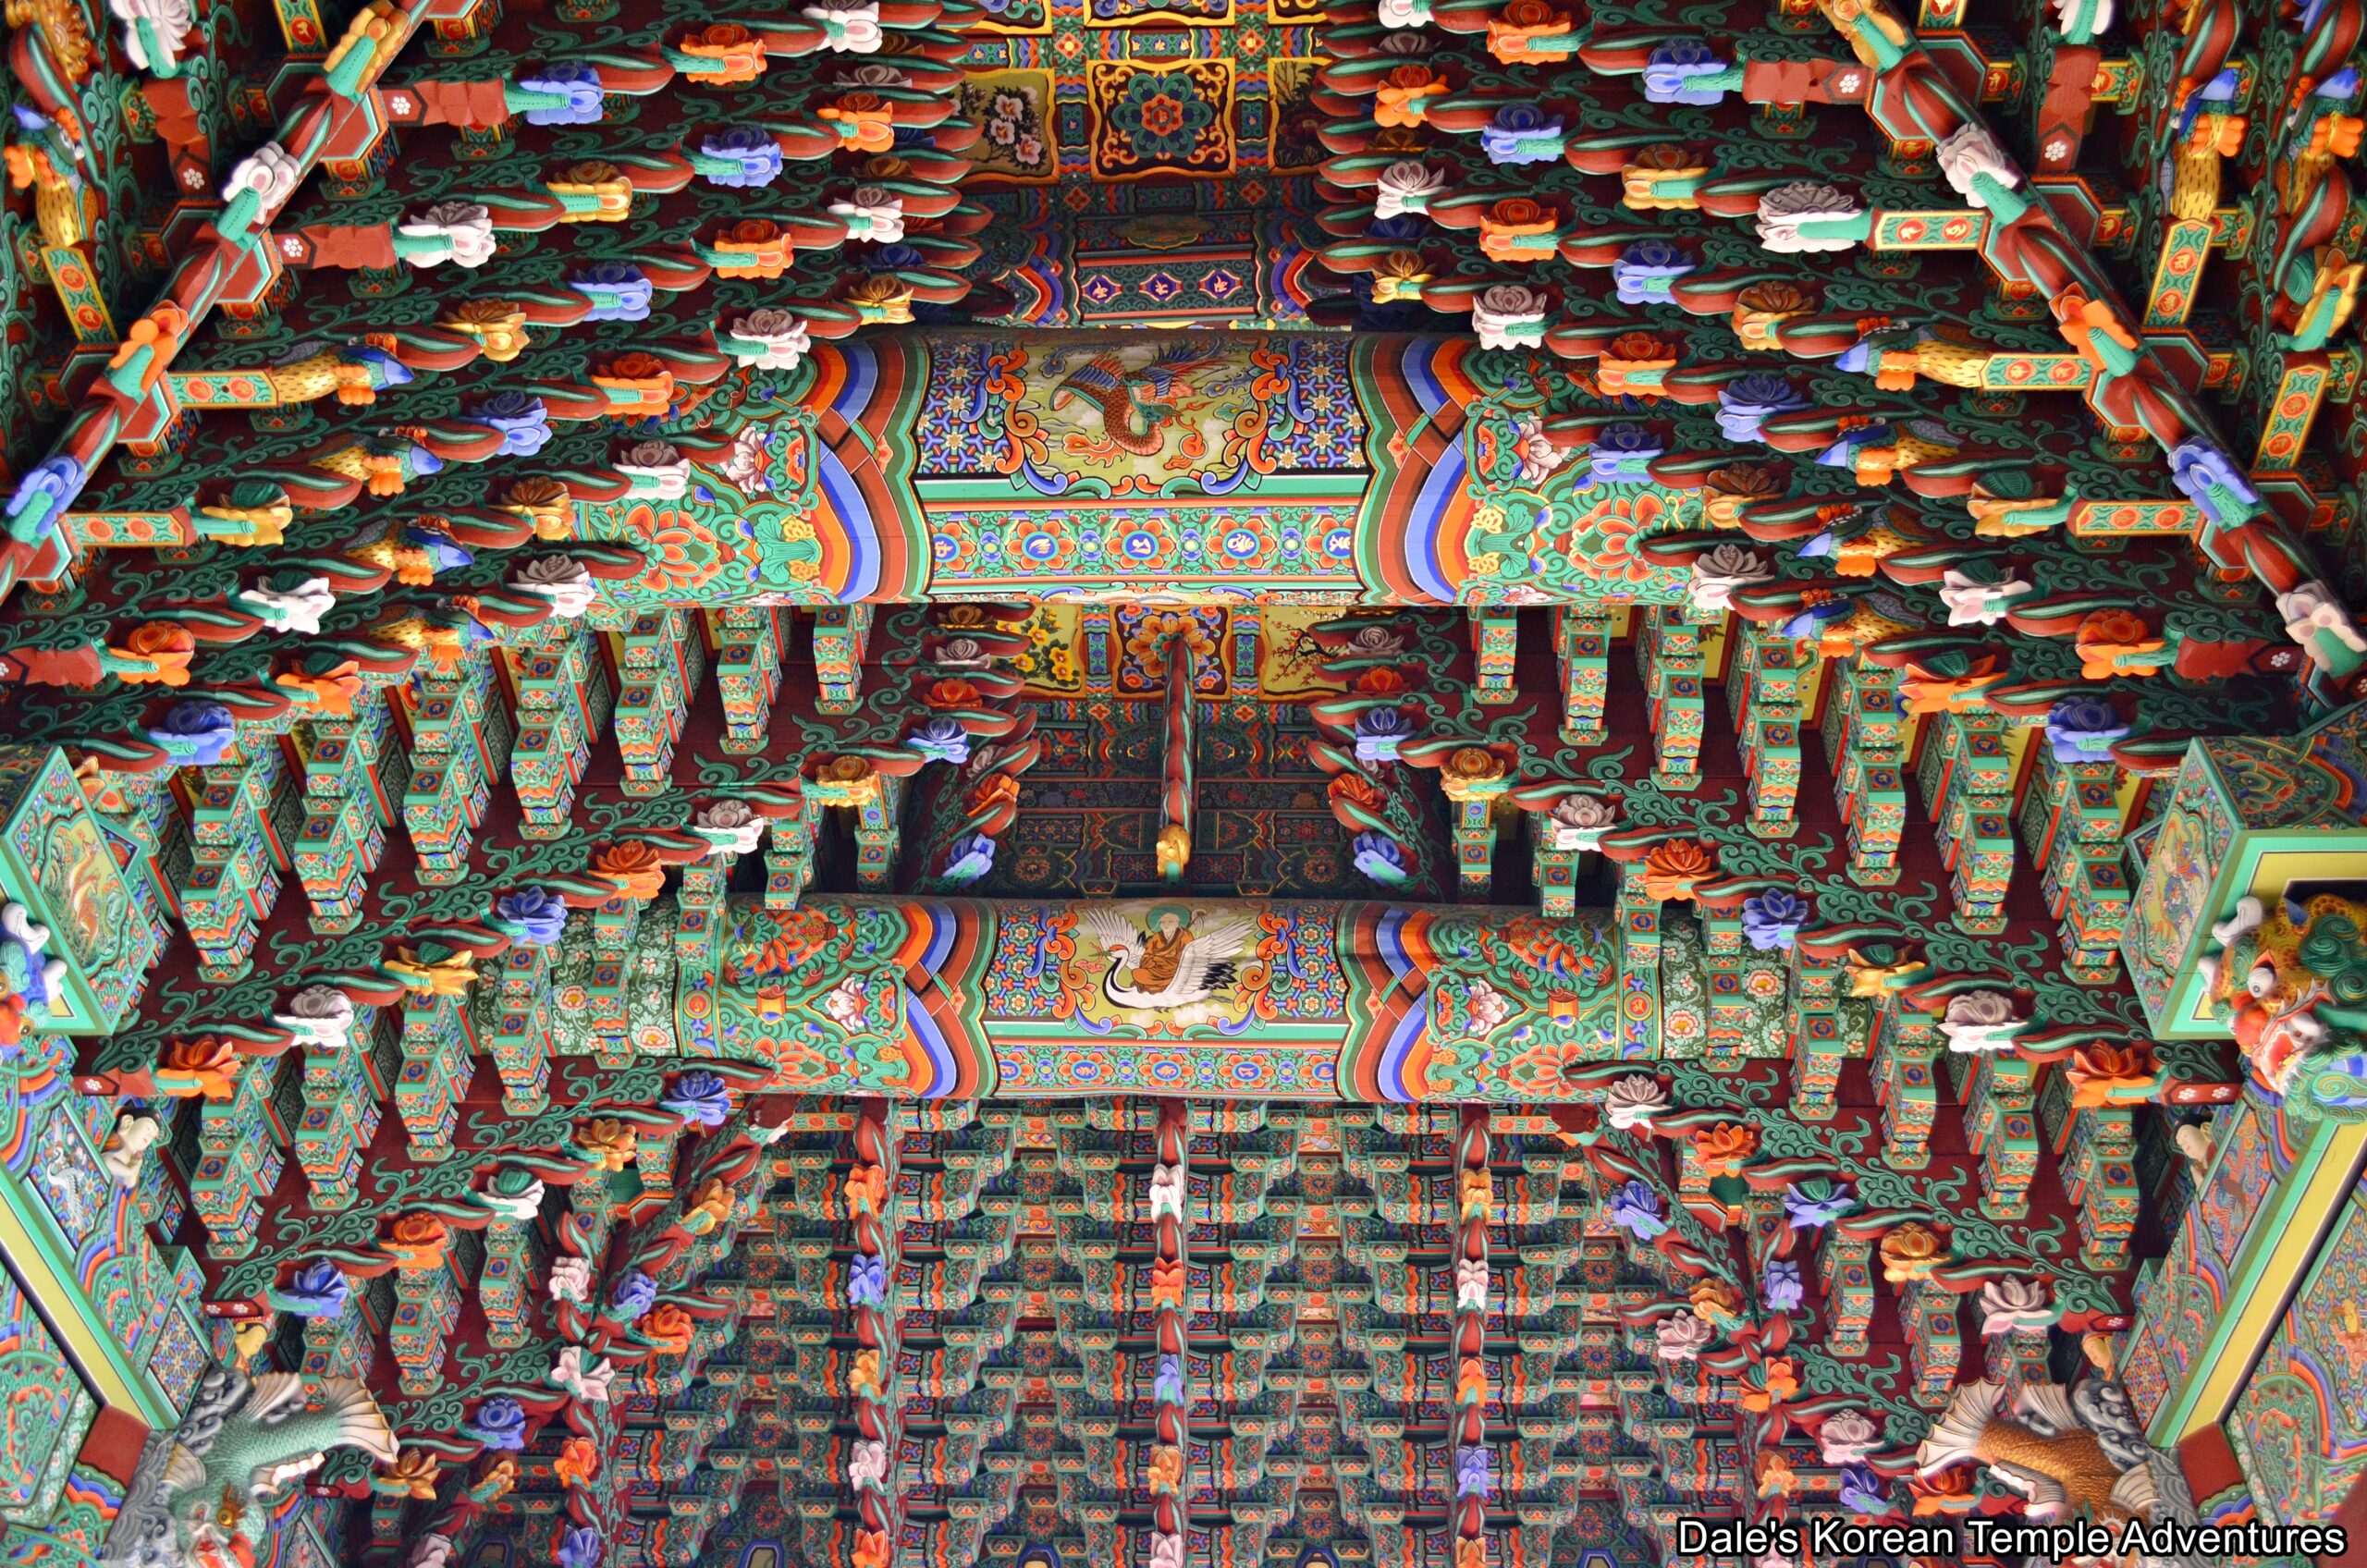
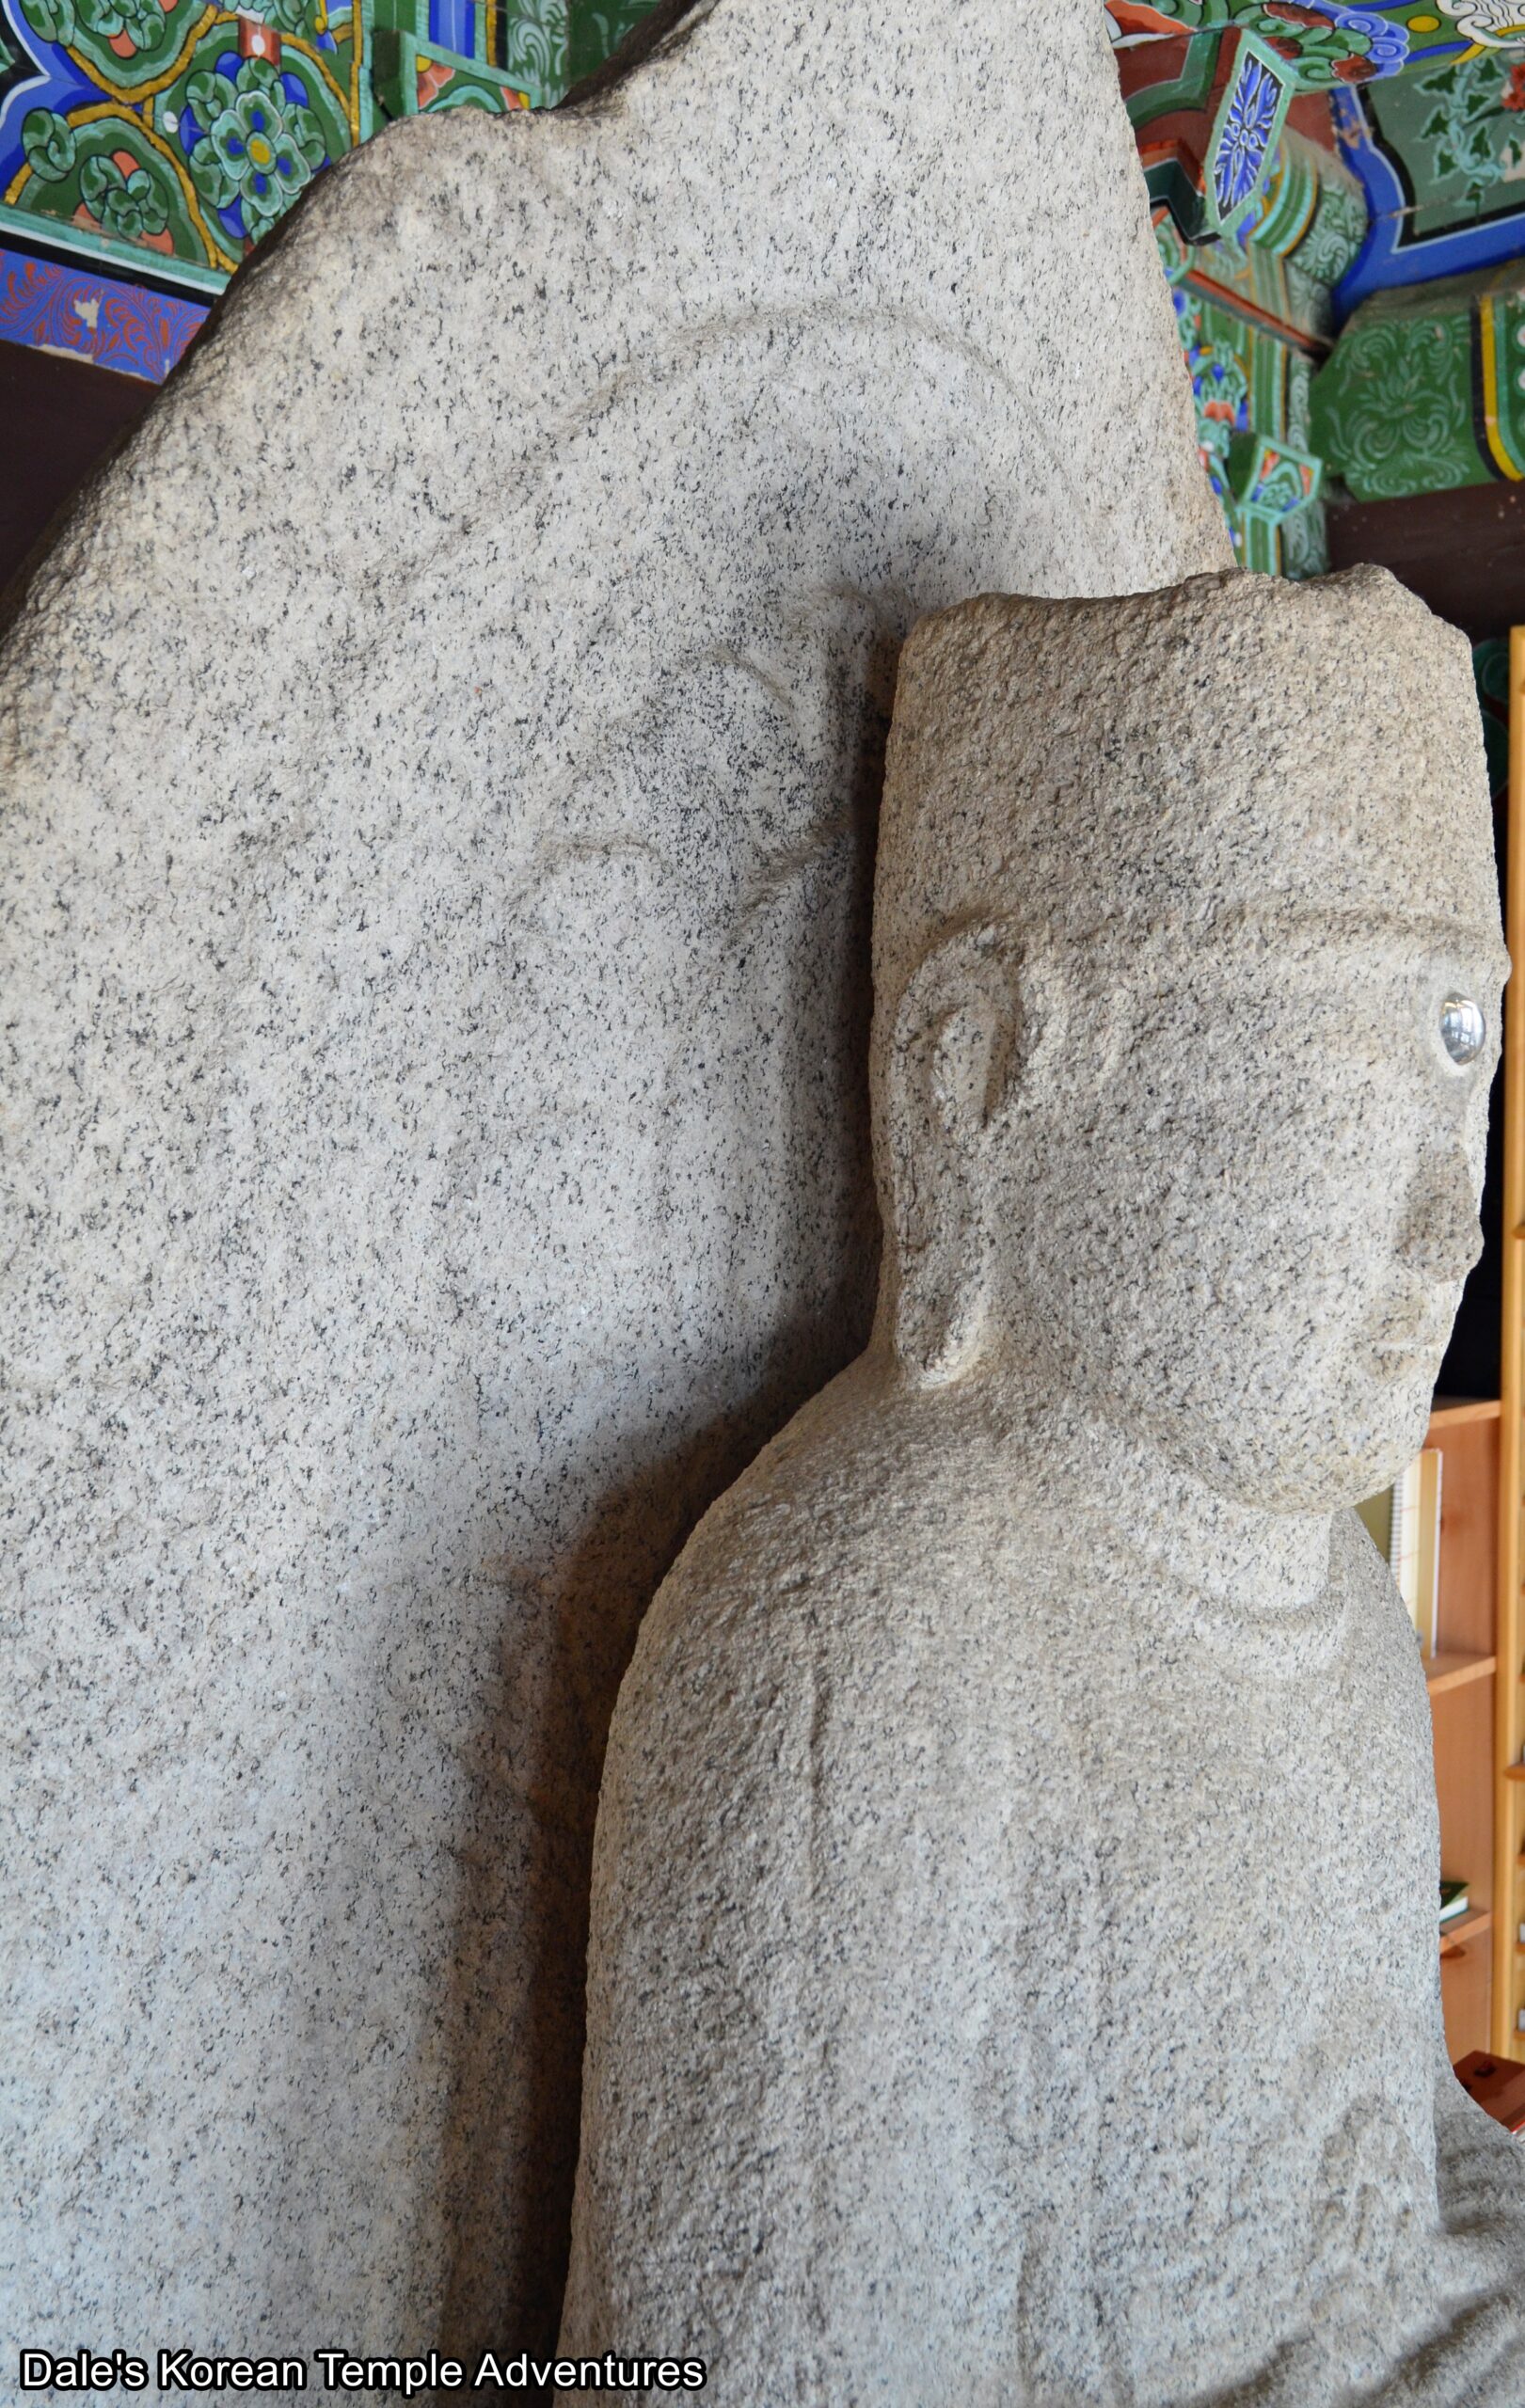
But as beautiful as the exterior is to the Daeung-jeon Hall, the interior is just as beautiful, if not more so. Inside the cavernous interior of the main hall, you’ll find a large stone triad on the main altar. The central image of Seokgamoni-bul (The Historical Buddha) weighs an impressive 53 tons, and it’s also three times bigger than the statue inside the historic Seokguram Grotto in Gyeongju. Joining this central image on either side are stone images of Bohyeon-bosal (The Bodhisattva of Power) and Munsu-bosal (The Bodhisattva of Wisdom). Just as a comparison, the image of Munsu-bosal weighs 33 tons. And bookending the main altar are two large stone pillars. The body of the pillars are adorned in reliefs of lotus flowers, while the top of the pillars are adorned with multiple reliefs of phoenixes. The entire main altar rests beneath a large, golden canopy. To the right of the main altar, you’ll find a standing stone image dedicated to Dongjin-bosal (The Bodhisattva that Protects the Buddha’s Teachings). This statue stands in front of a stone relief of the Shinjung Taenghwa (Guardian Mural). In total, there are 104 guardians in this relief. And to the left of the main altar, you’ll find a child-like image of Munsu-bosal surrounded by various images of Buddhas and Bodhisattvas. If you look up at the ceiling of the structure, you’ll see one of the most intricate and colourful ceilings inside any shrine hall in Korea. Adding to this beauty on the walls are the Palsang-do (The Eight Scenes from the Buddha’s Life).
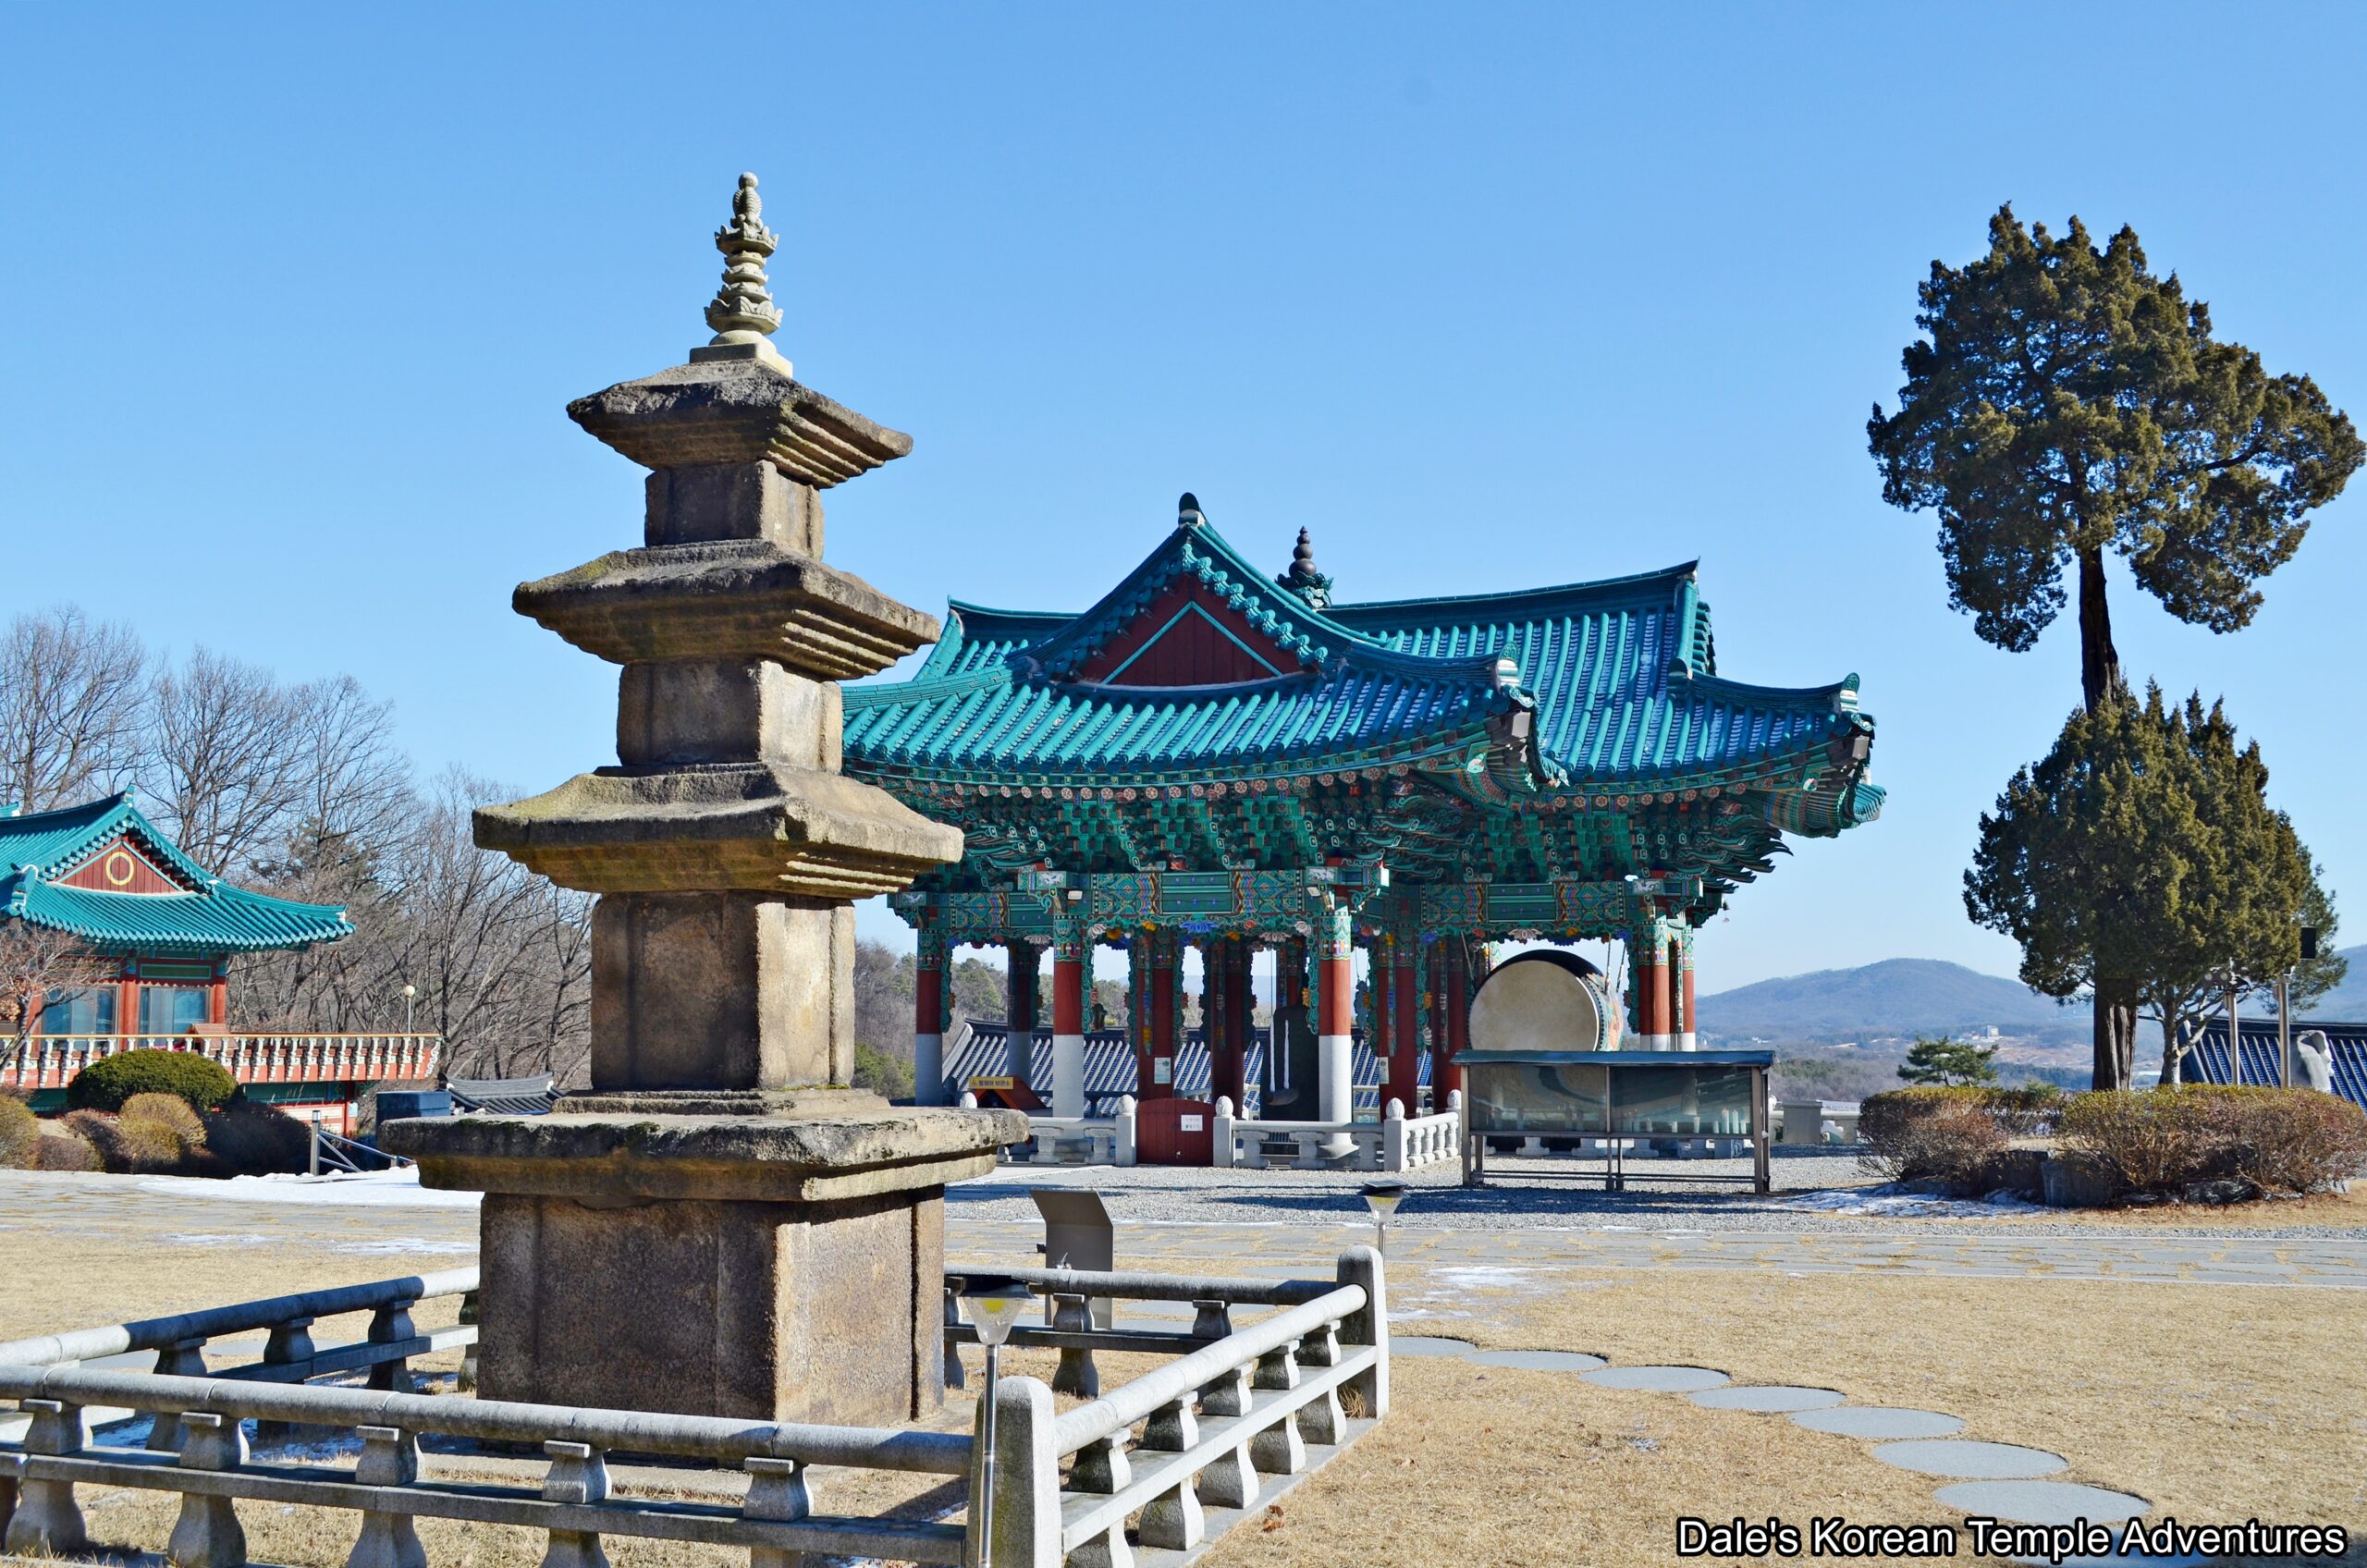
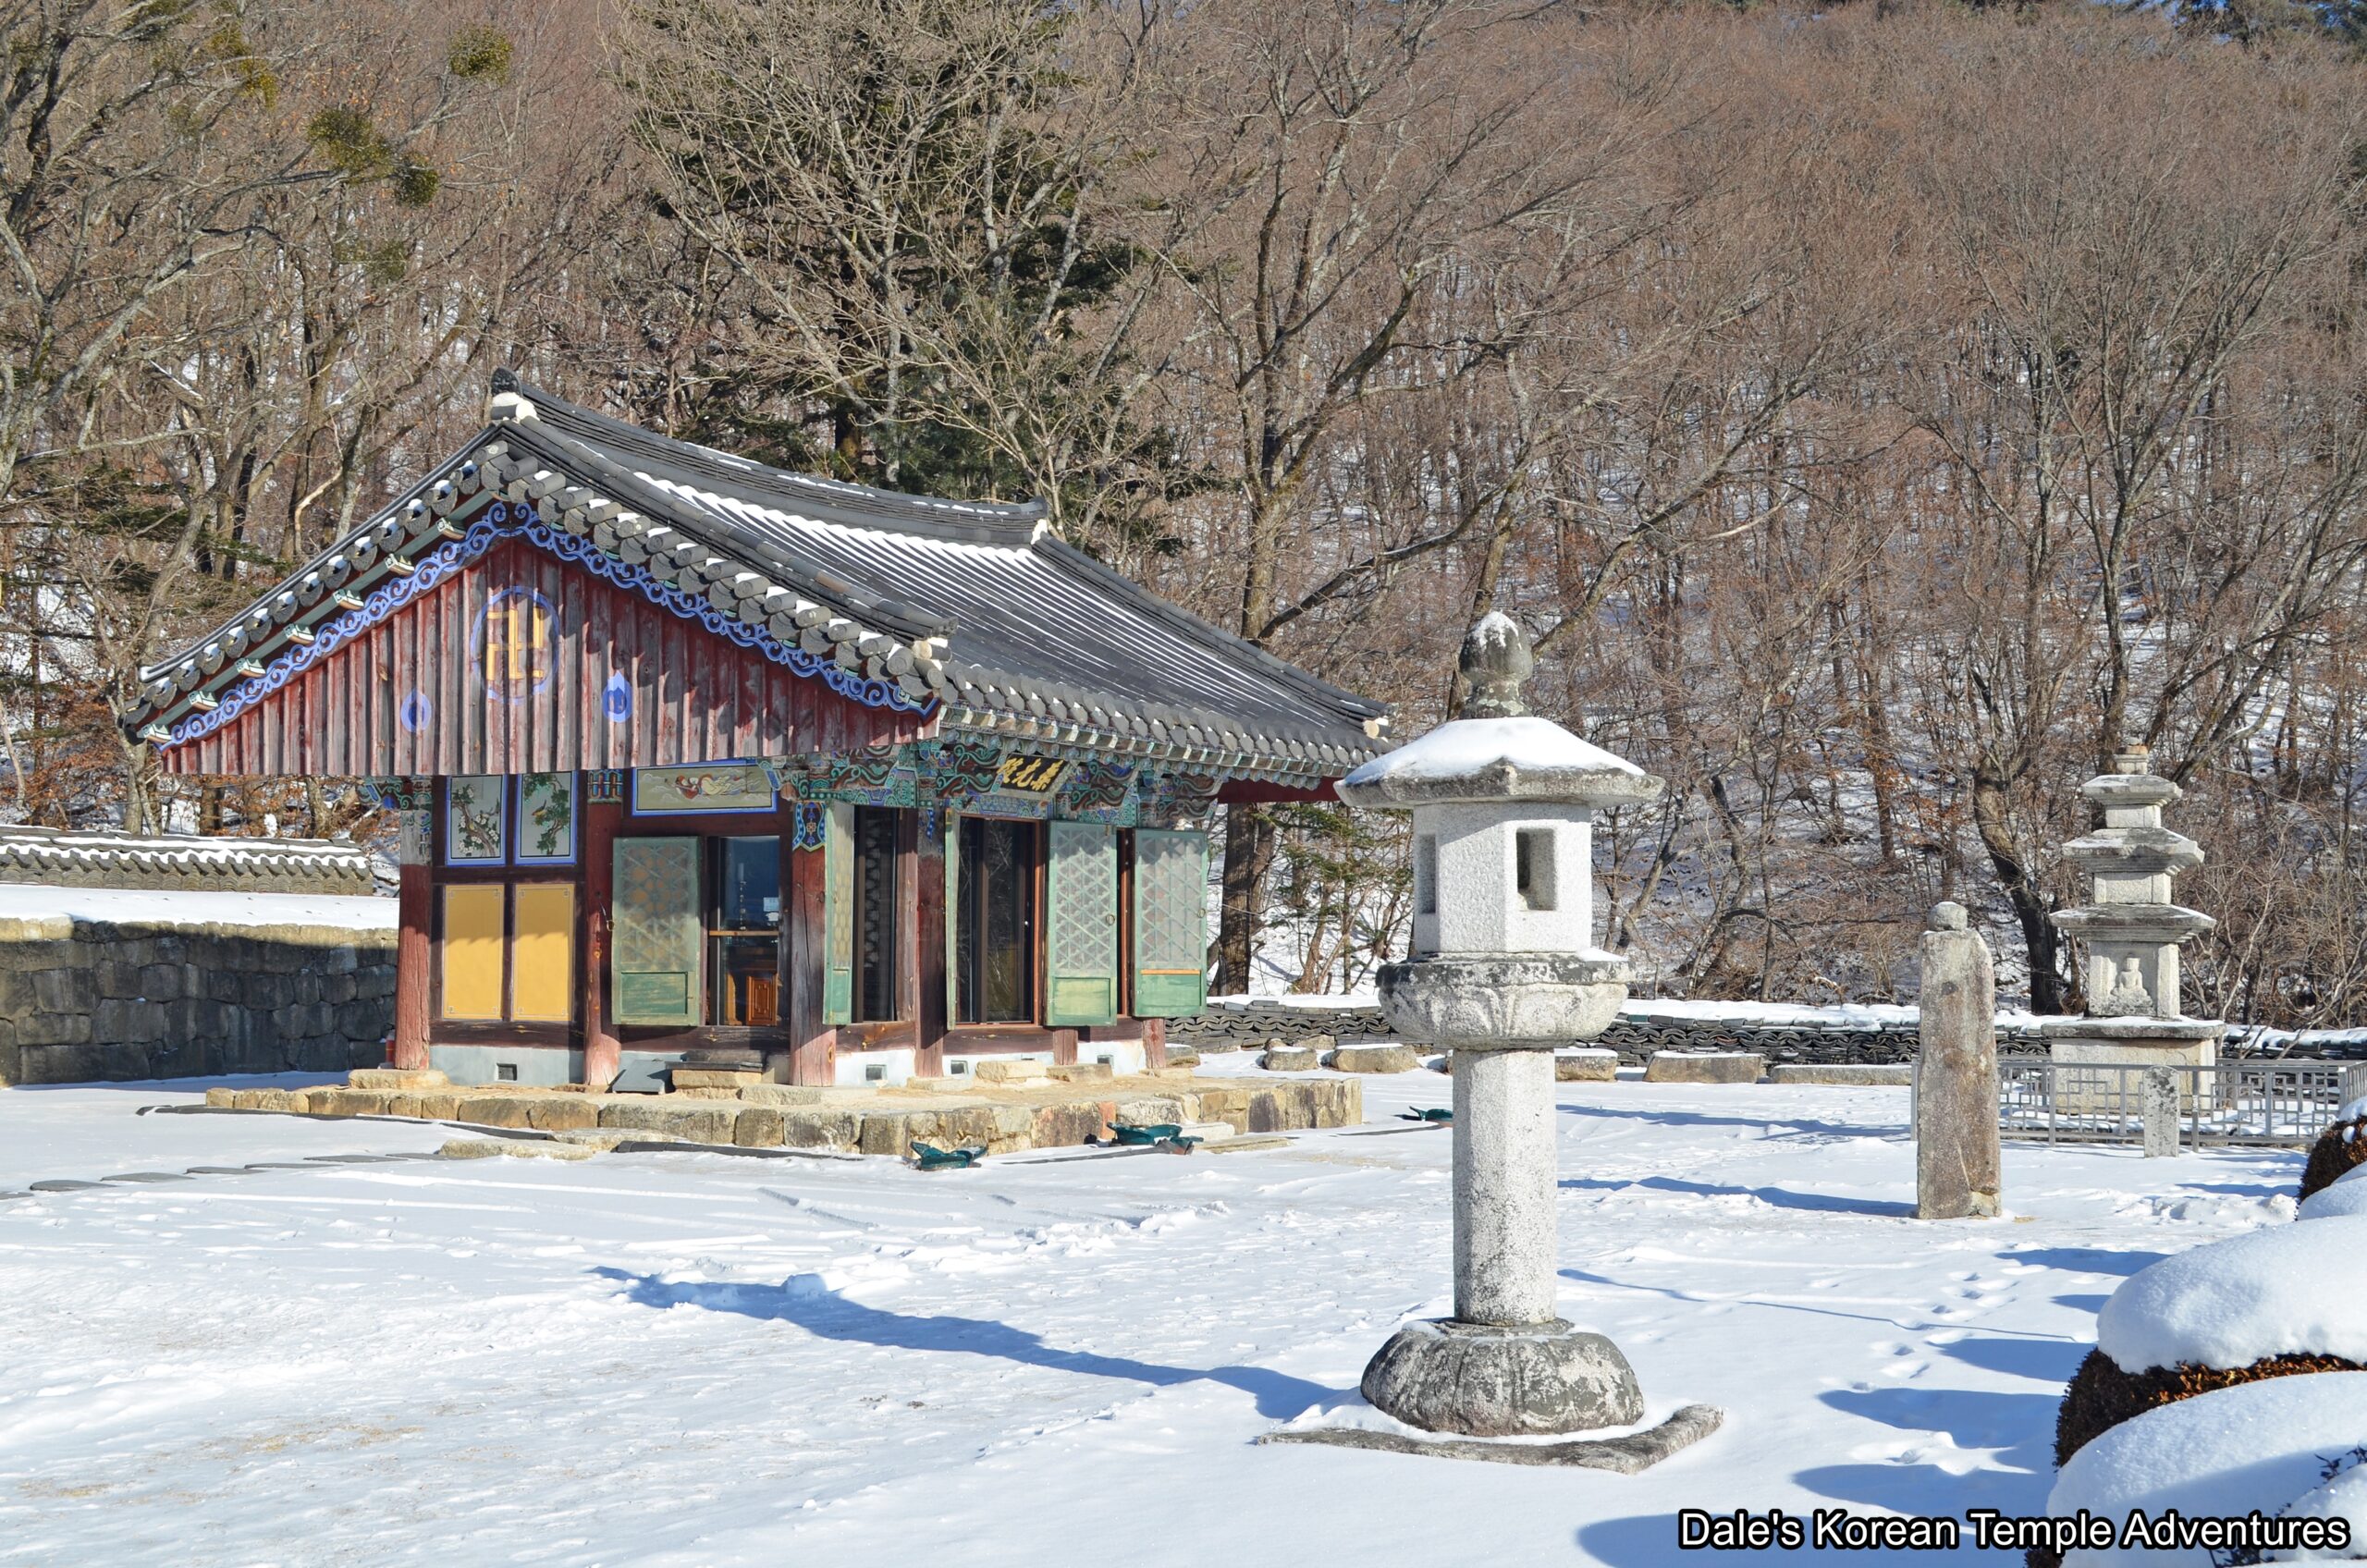
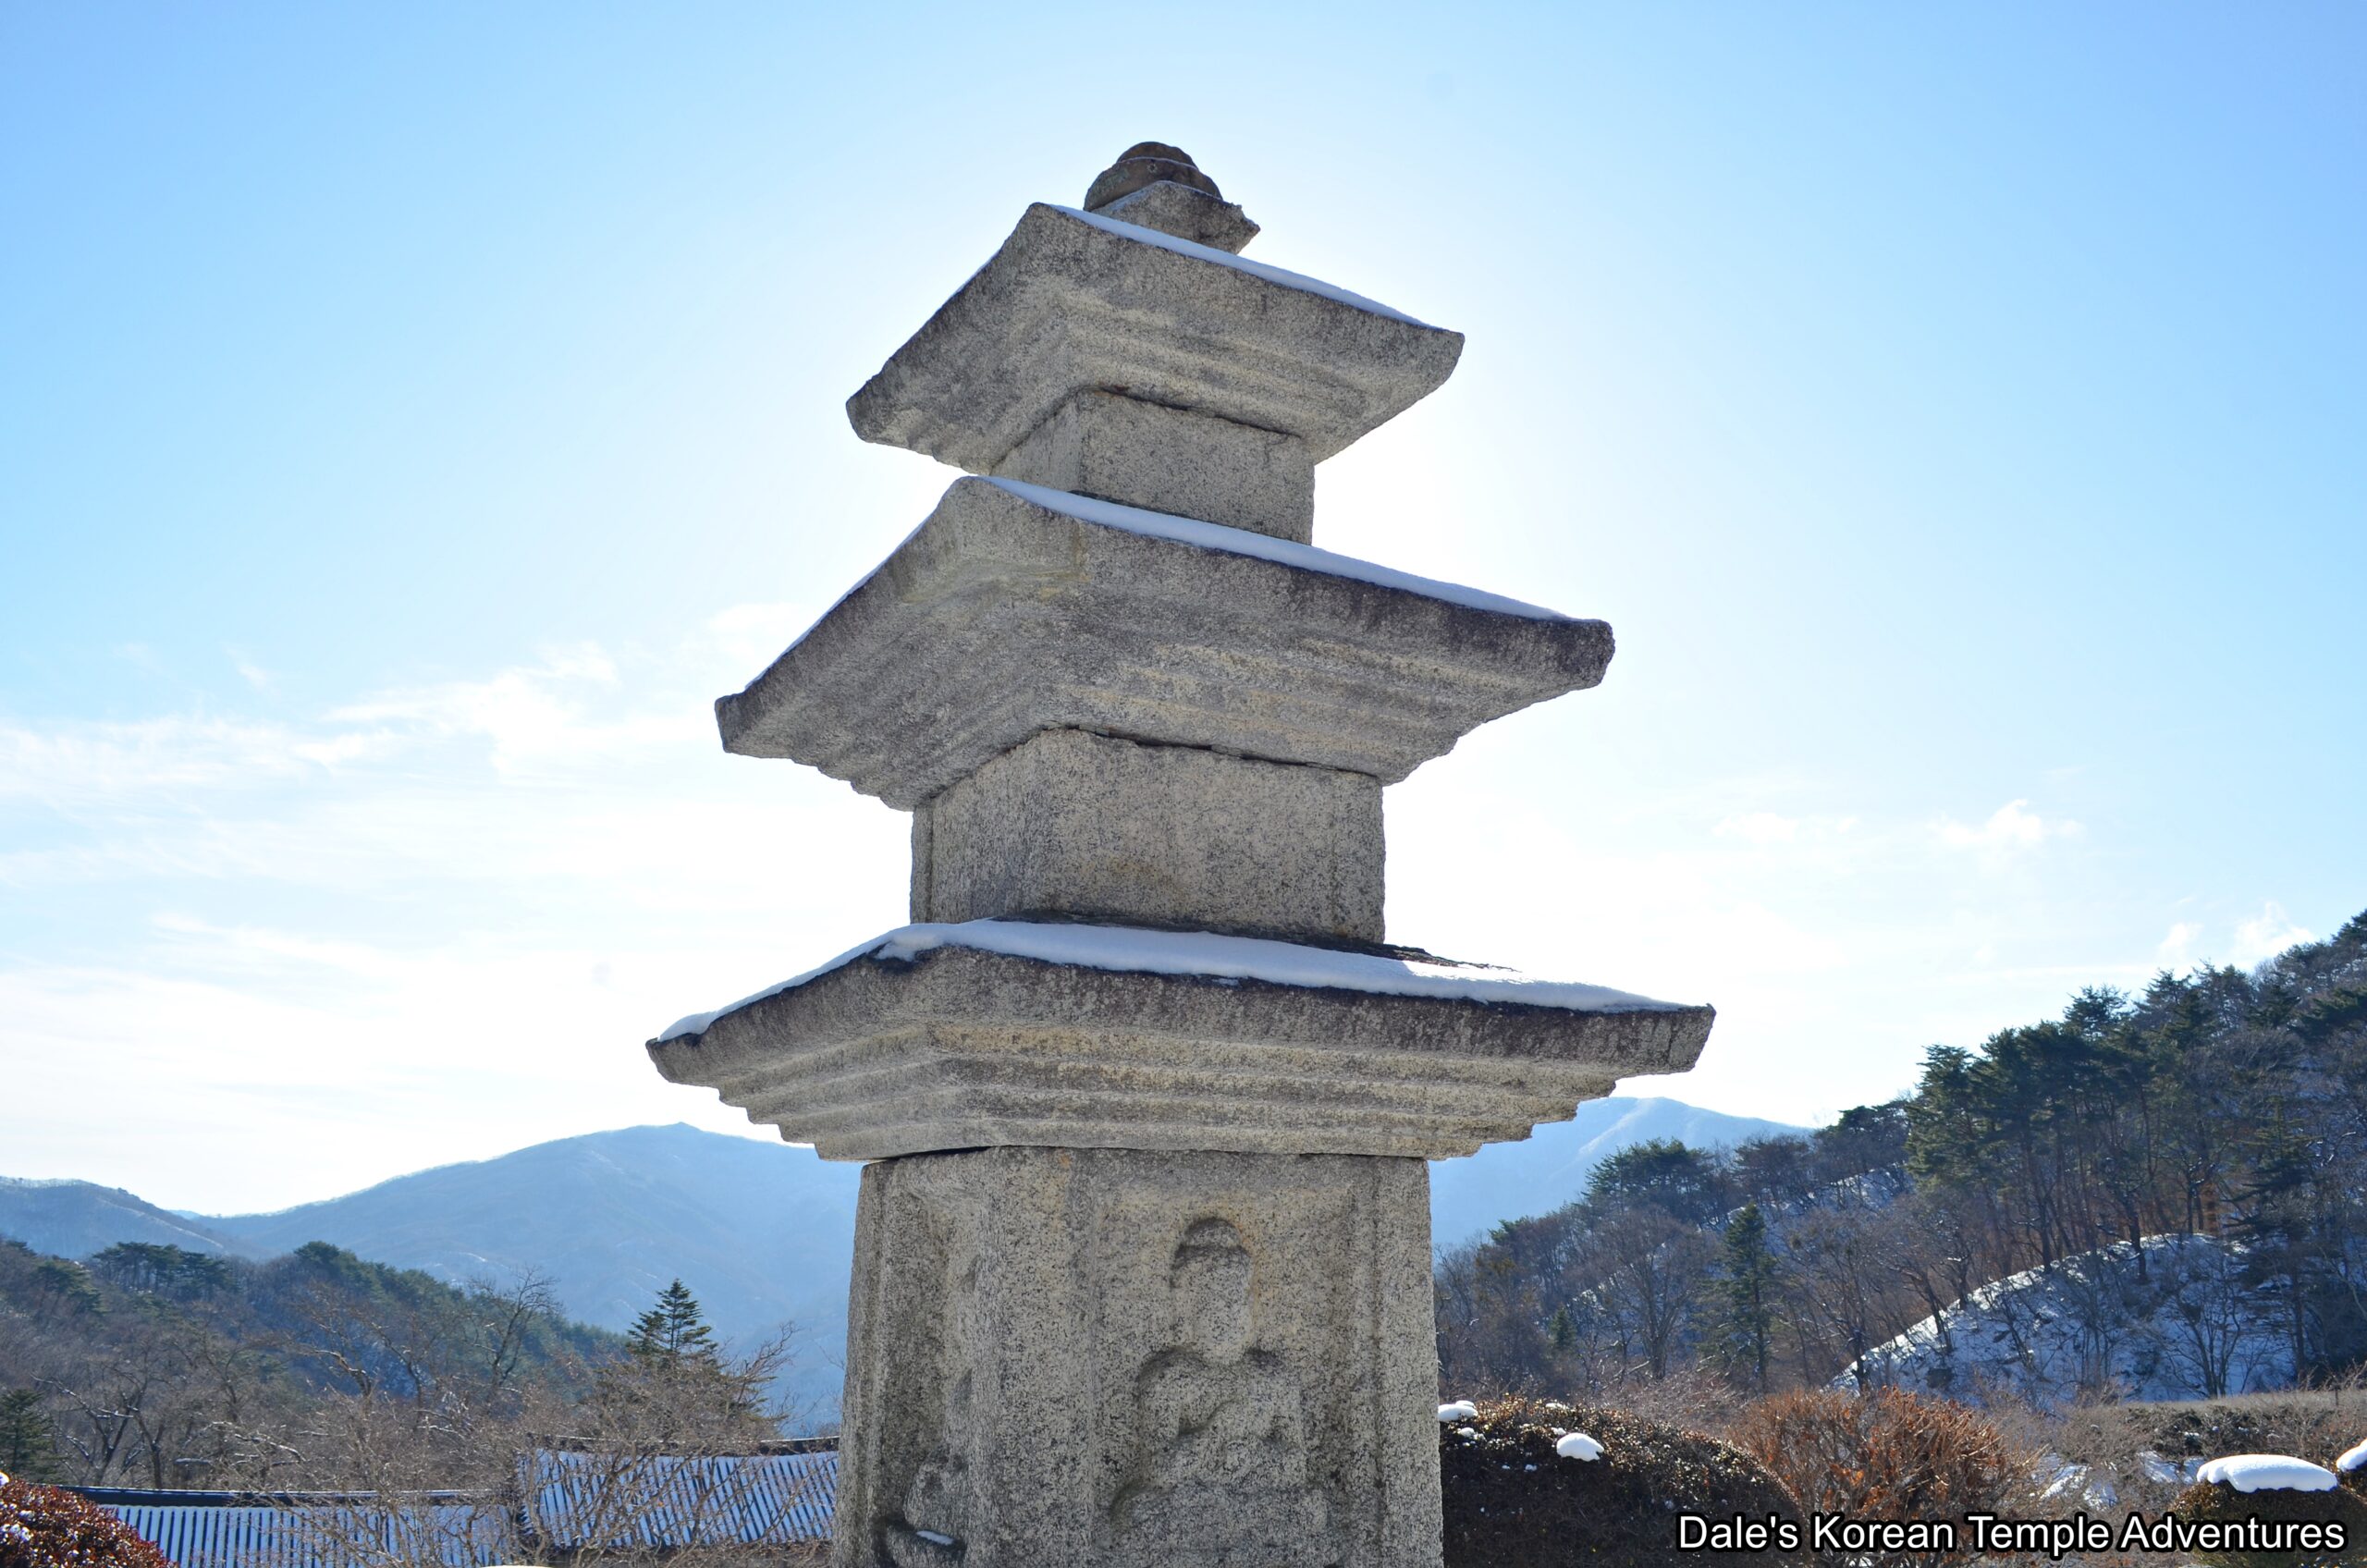
To the right of the Daeung-jeon Hall is the Gwaneum-jeon Hall. And out in front of this shrine hall is the “Three-Story Stone Pagoda of Beopryunsa Temple in Yongin.” This three-story pagoda was first located in Guro-dong, Seoul. It was later moved to its present location. The pagoda is small and has a single-layer base. Each of the three roof stones for the body are quite short and steep for its overall size. Also, a new finial has been attached to the top of the pagoda. Based upon its style, it appears as though this pagoda was first constructed during the Goryeo Dynasty (918-1392).
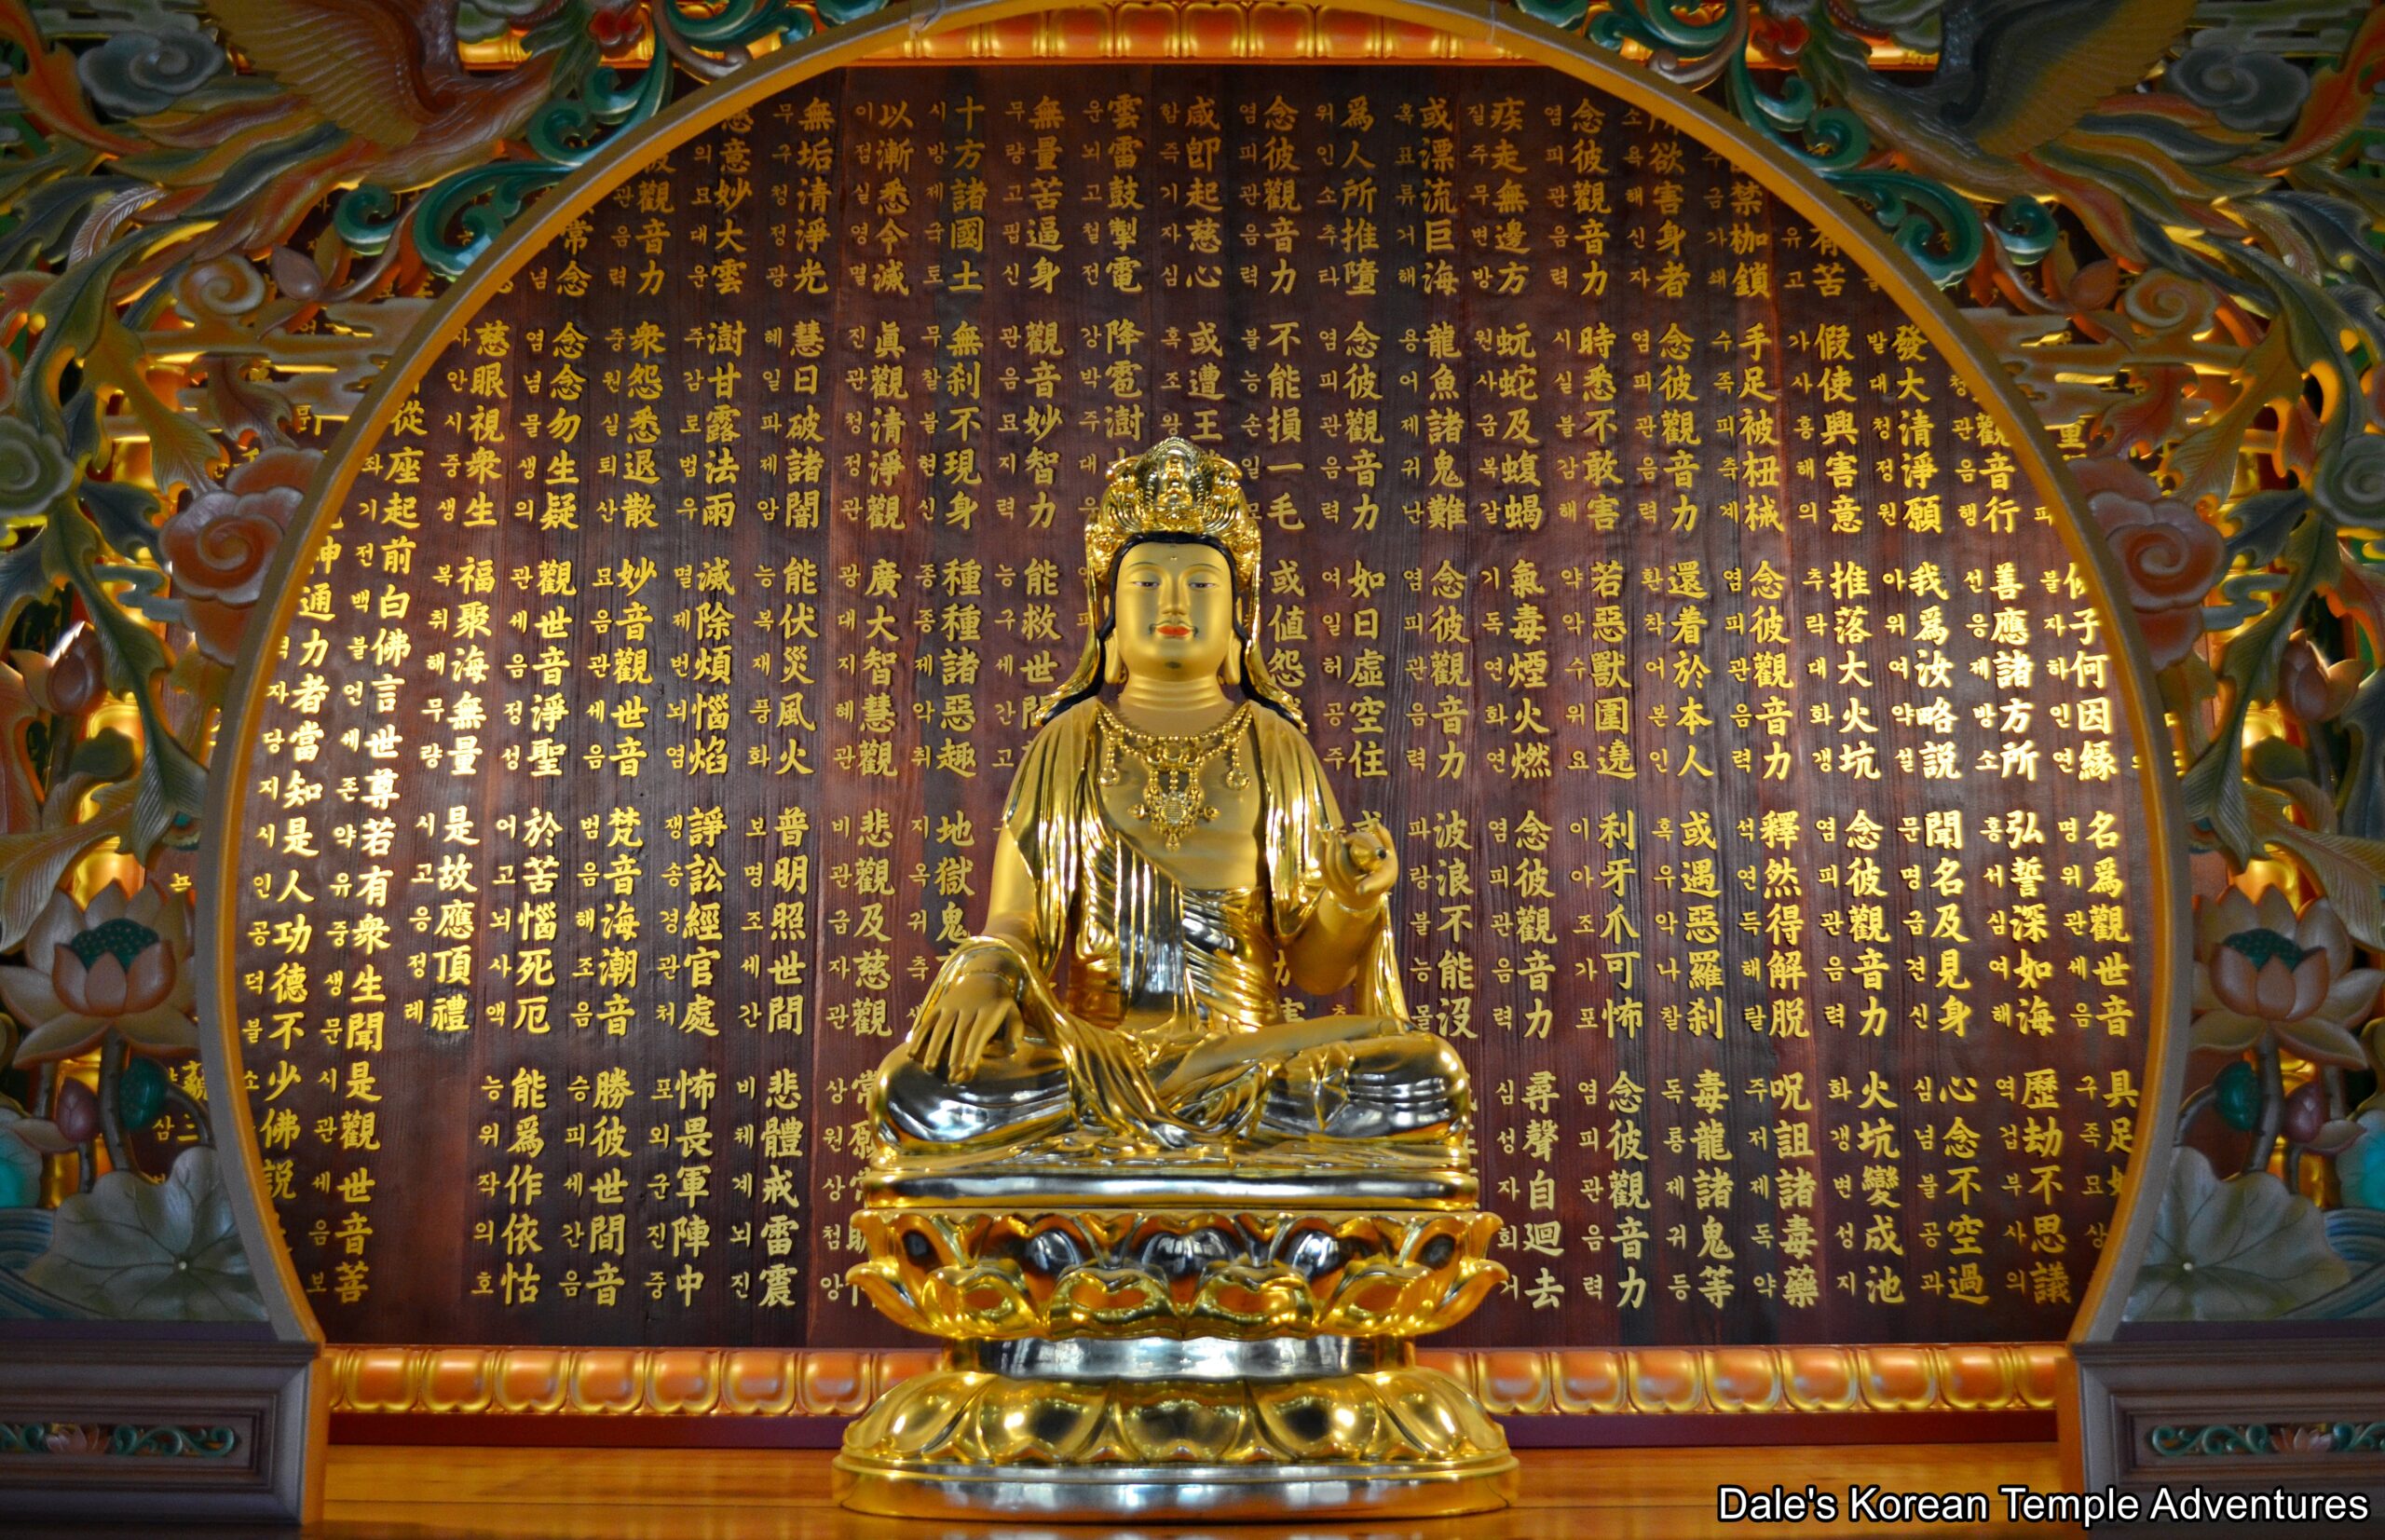
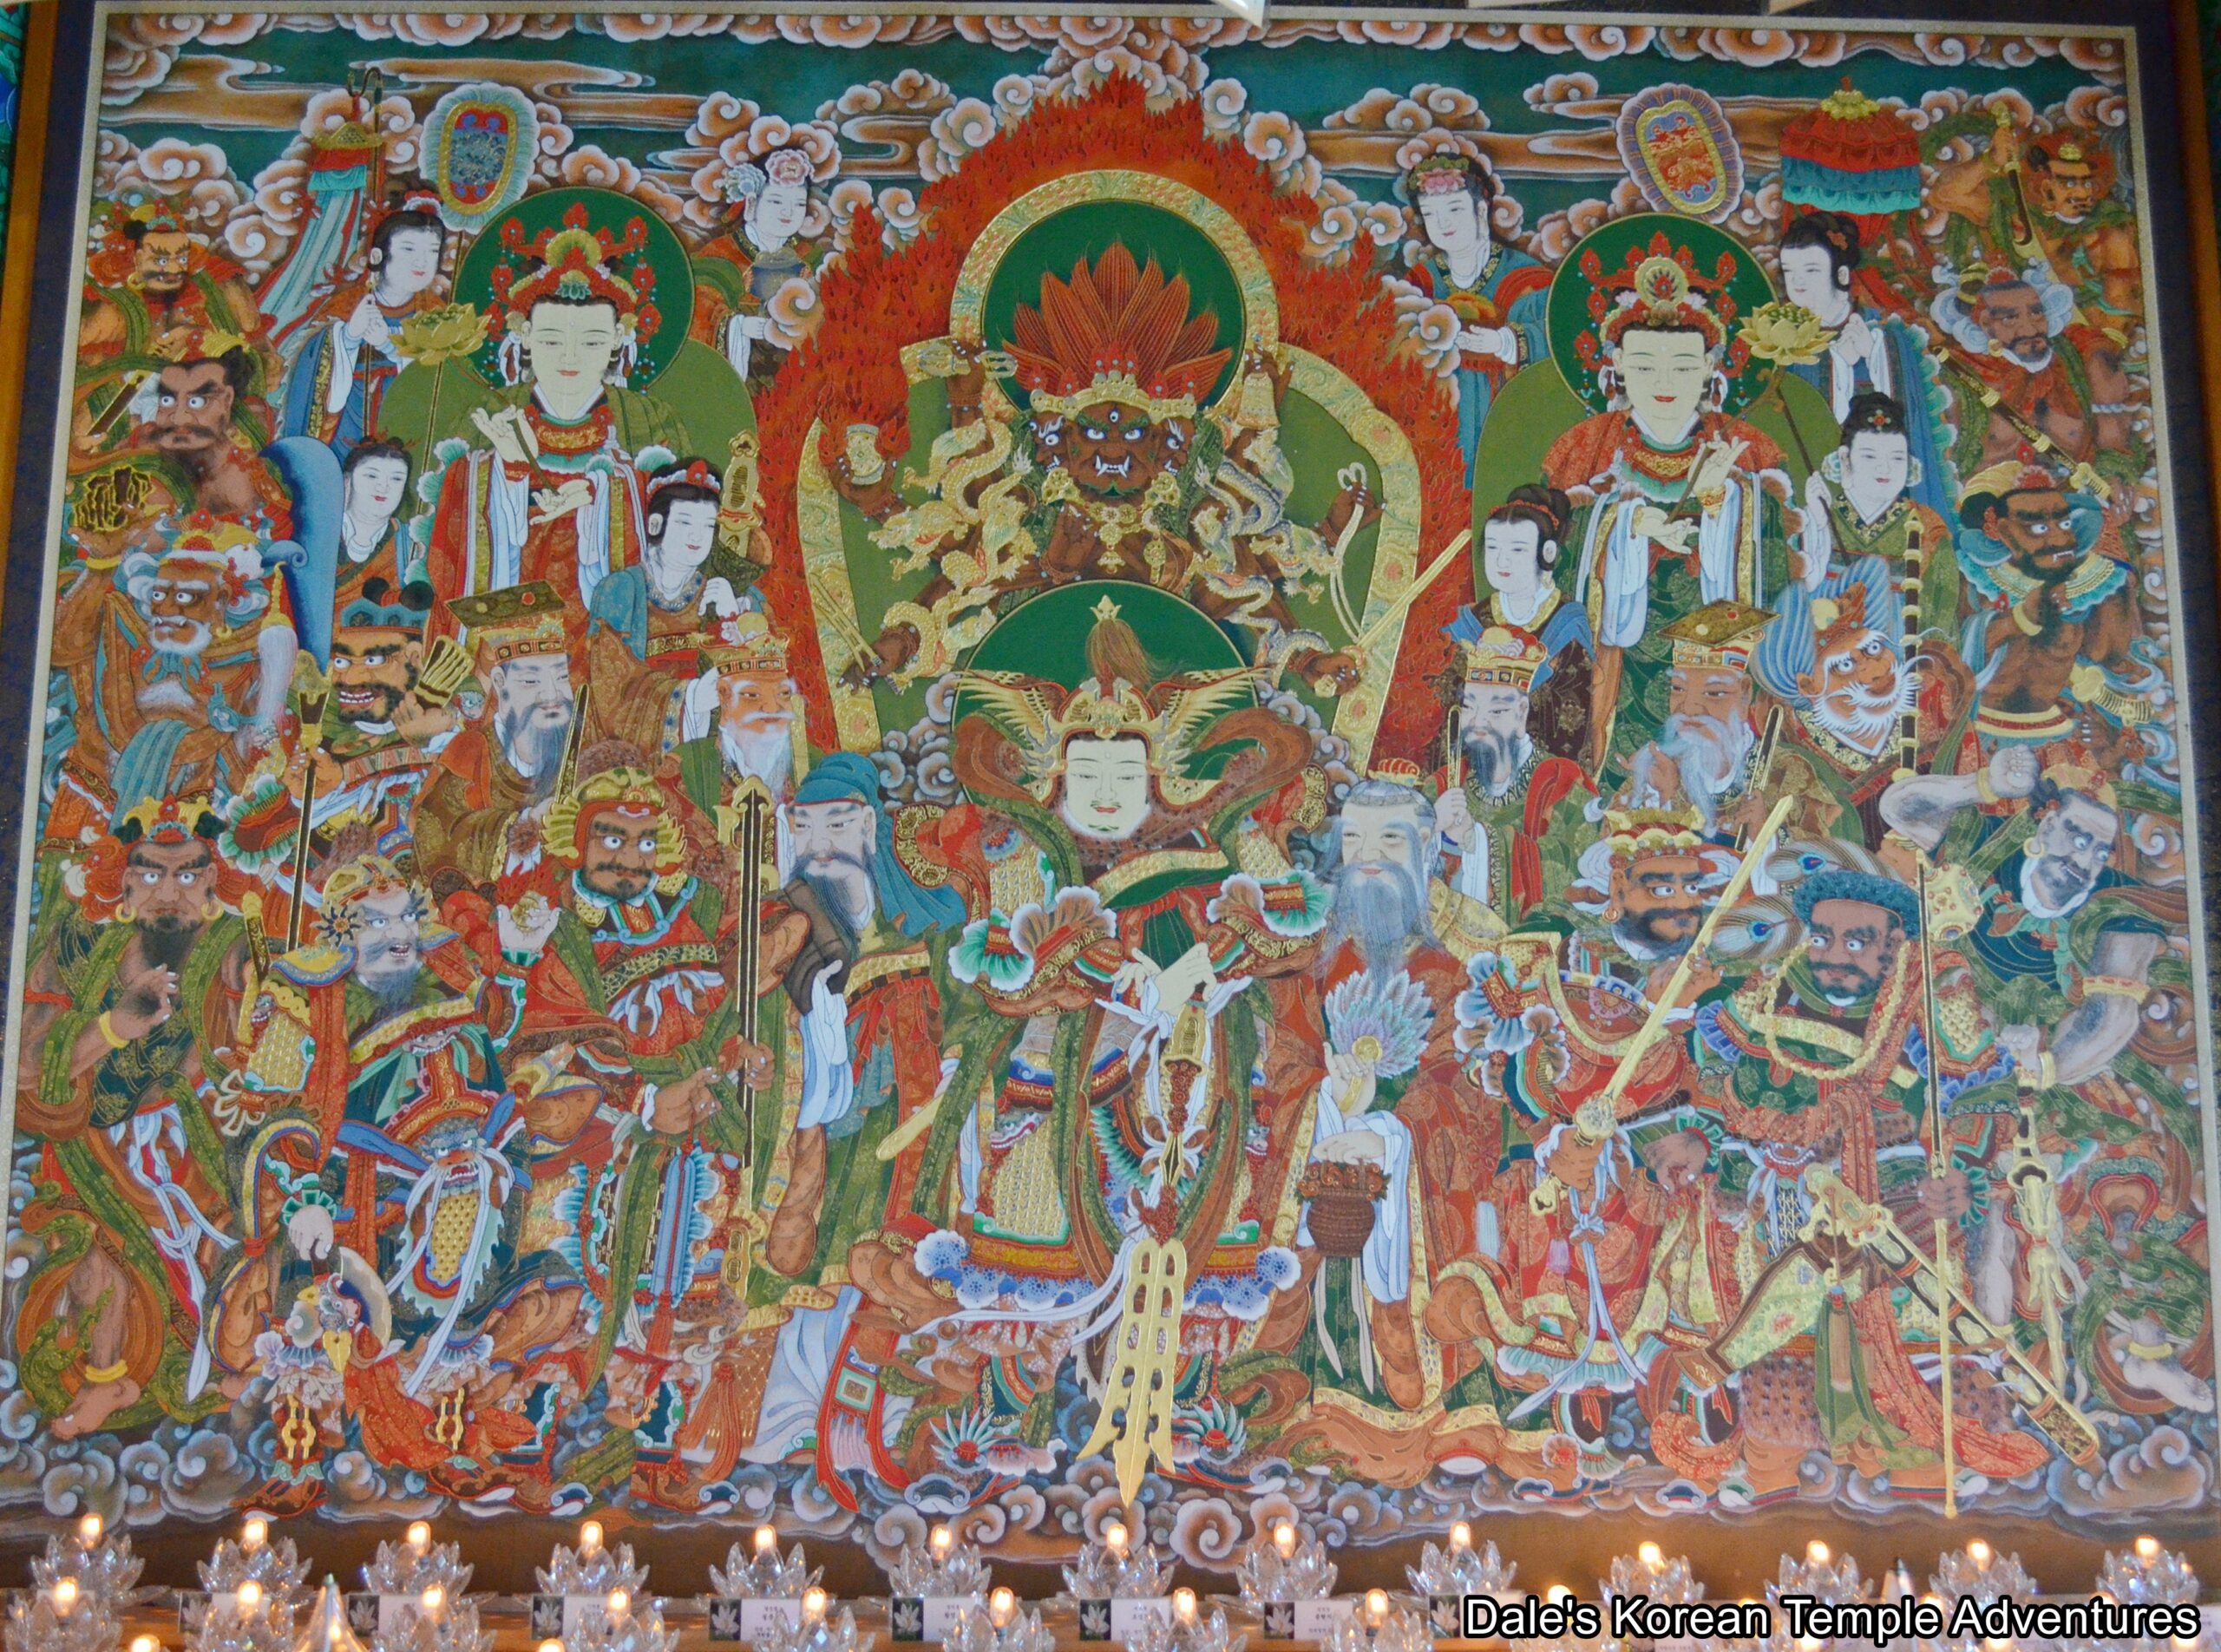
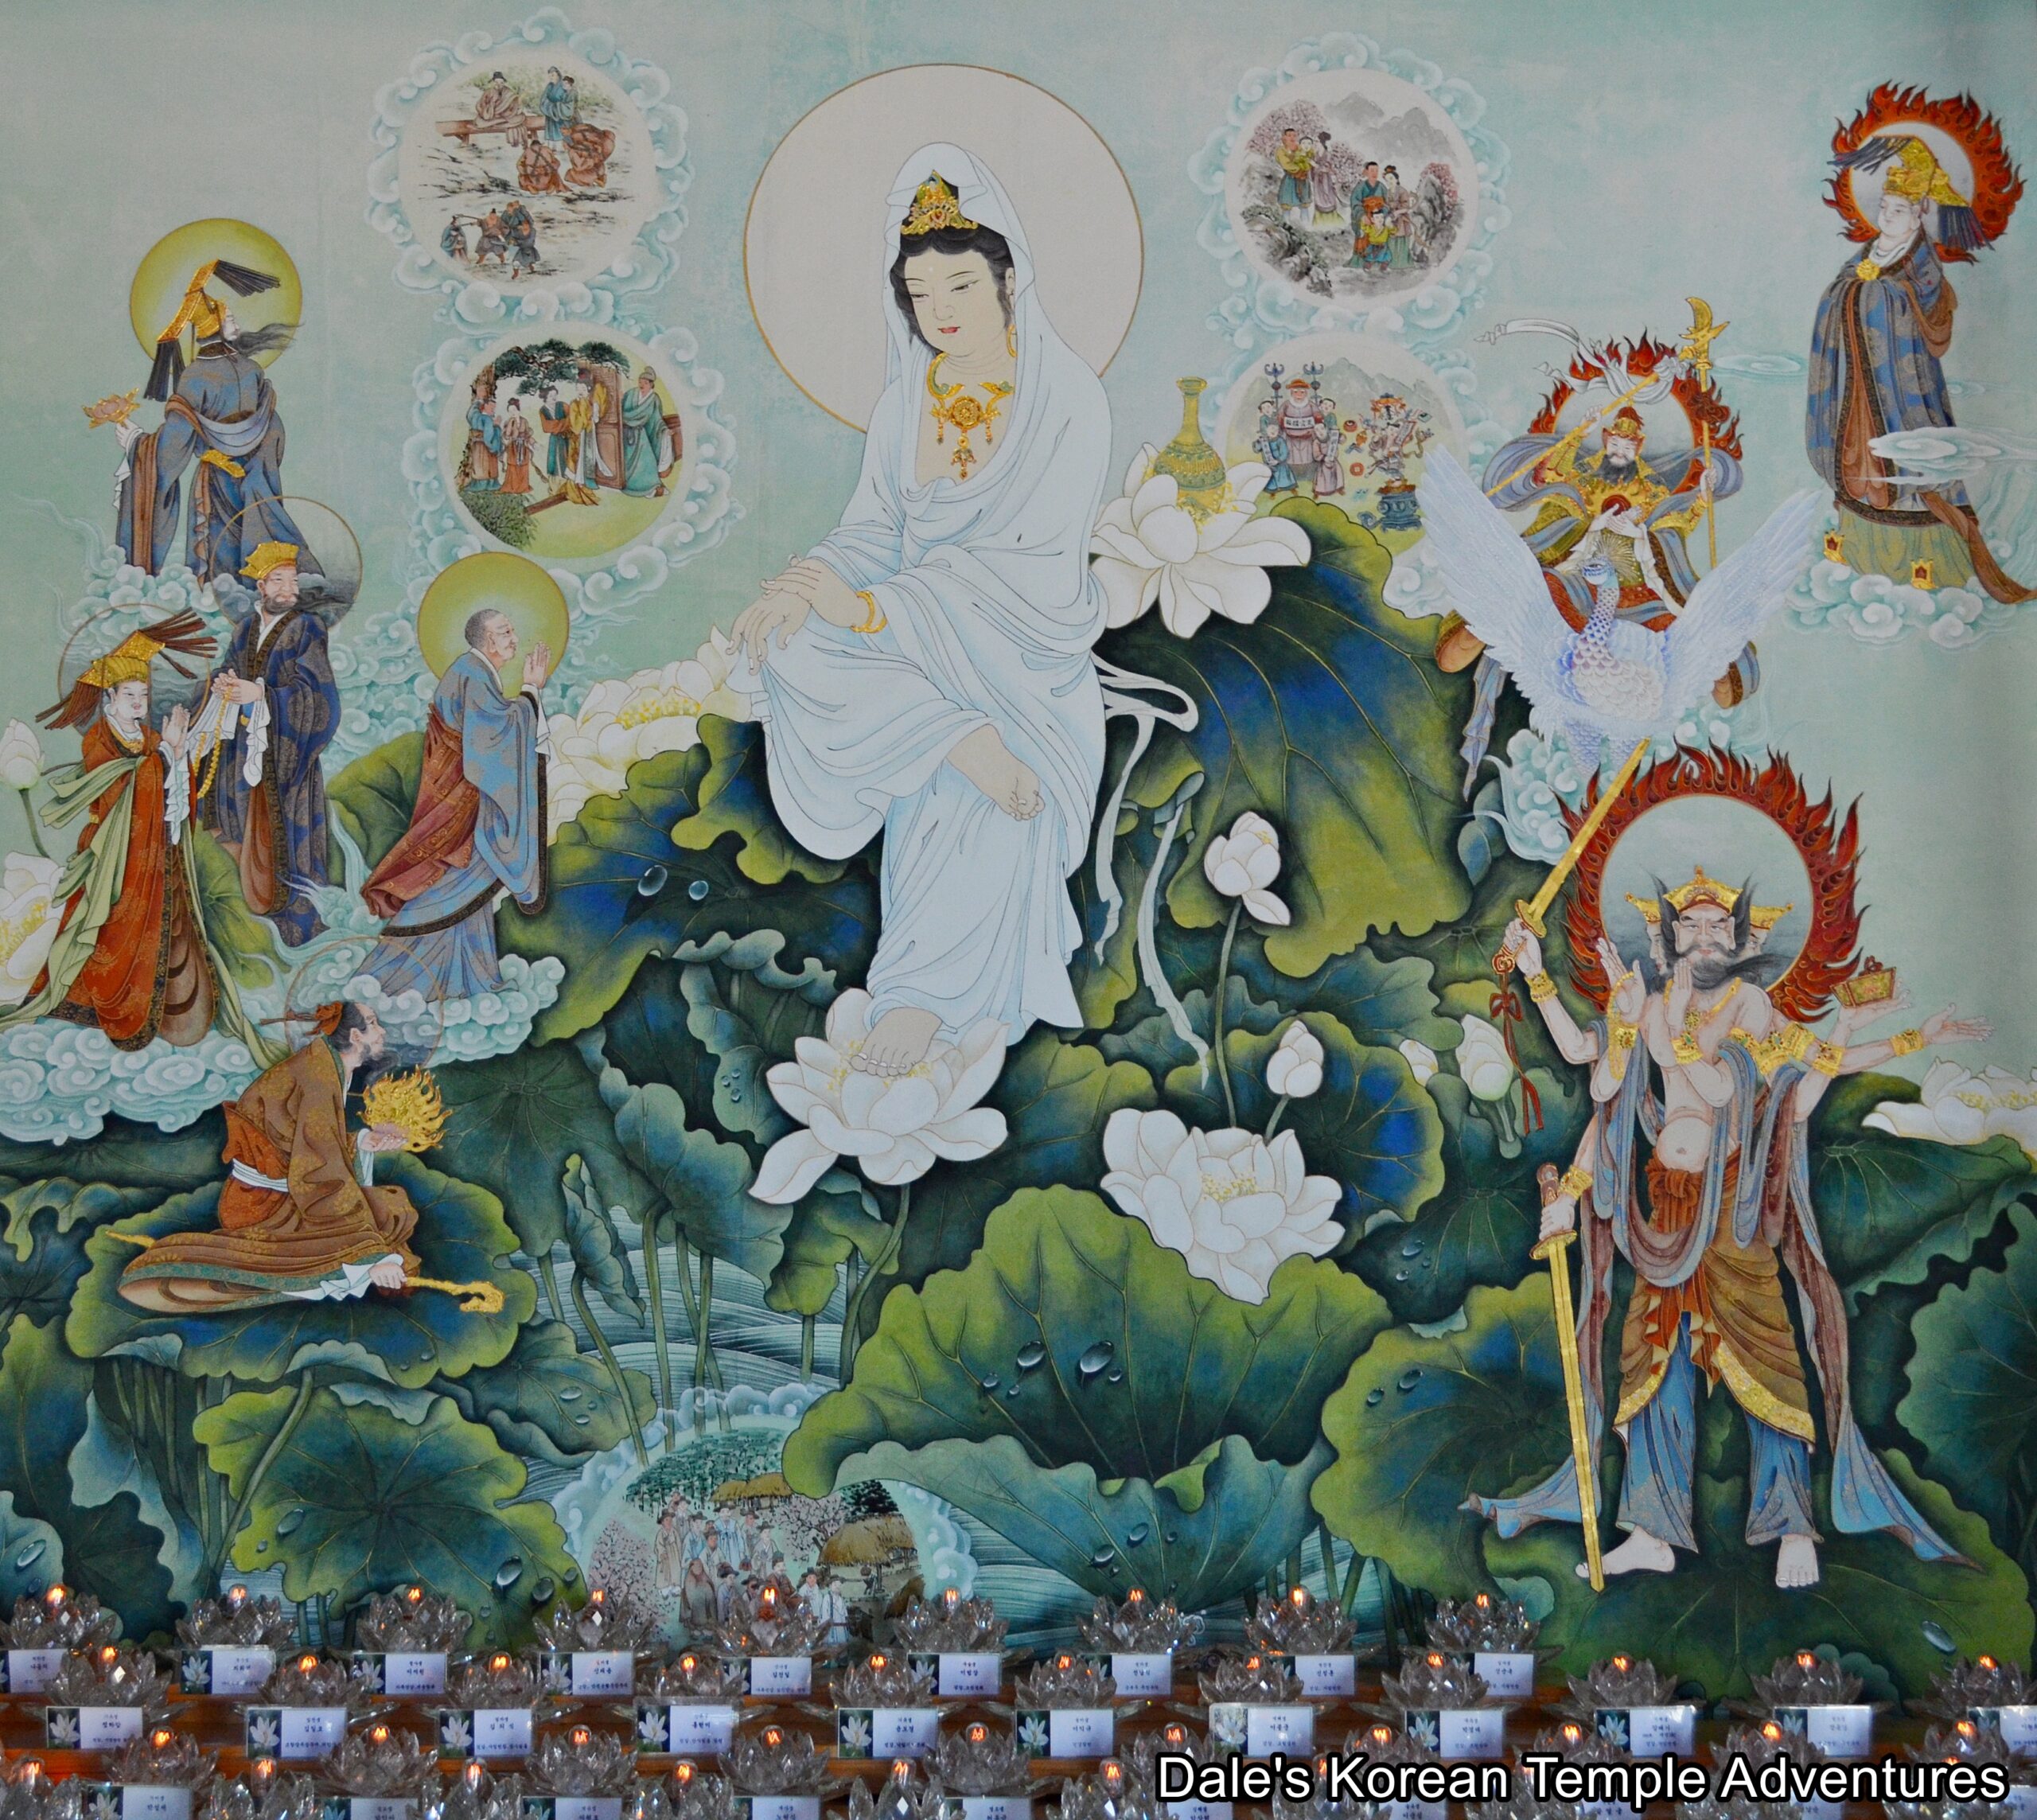
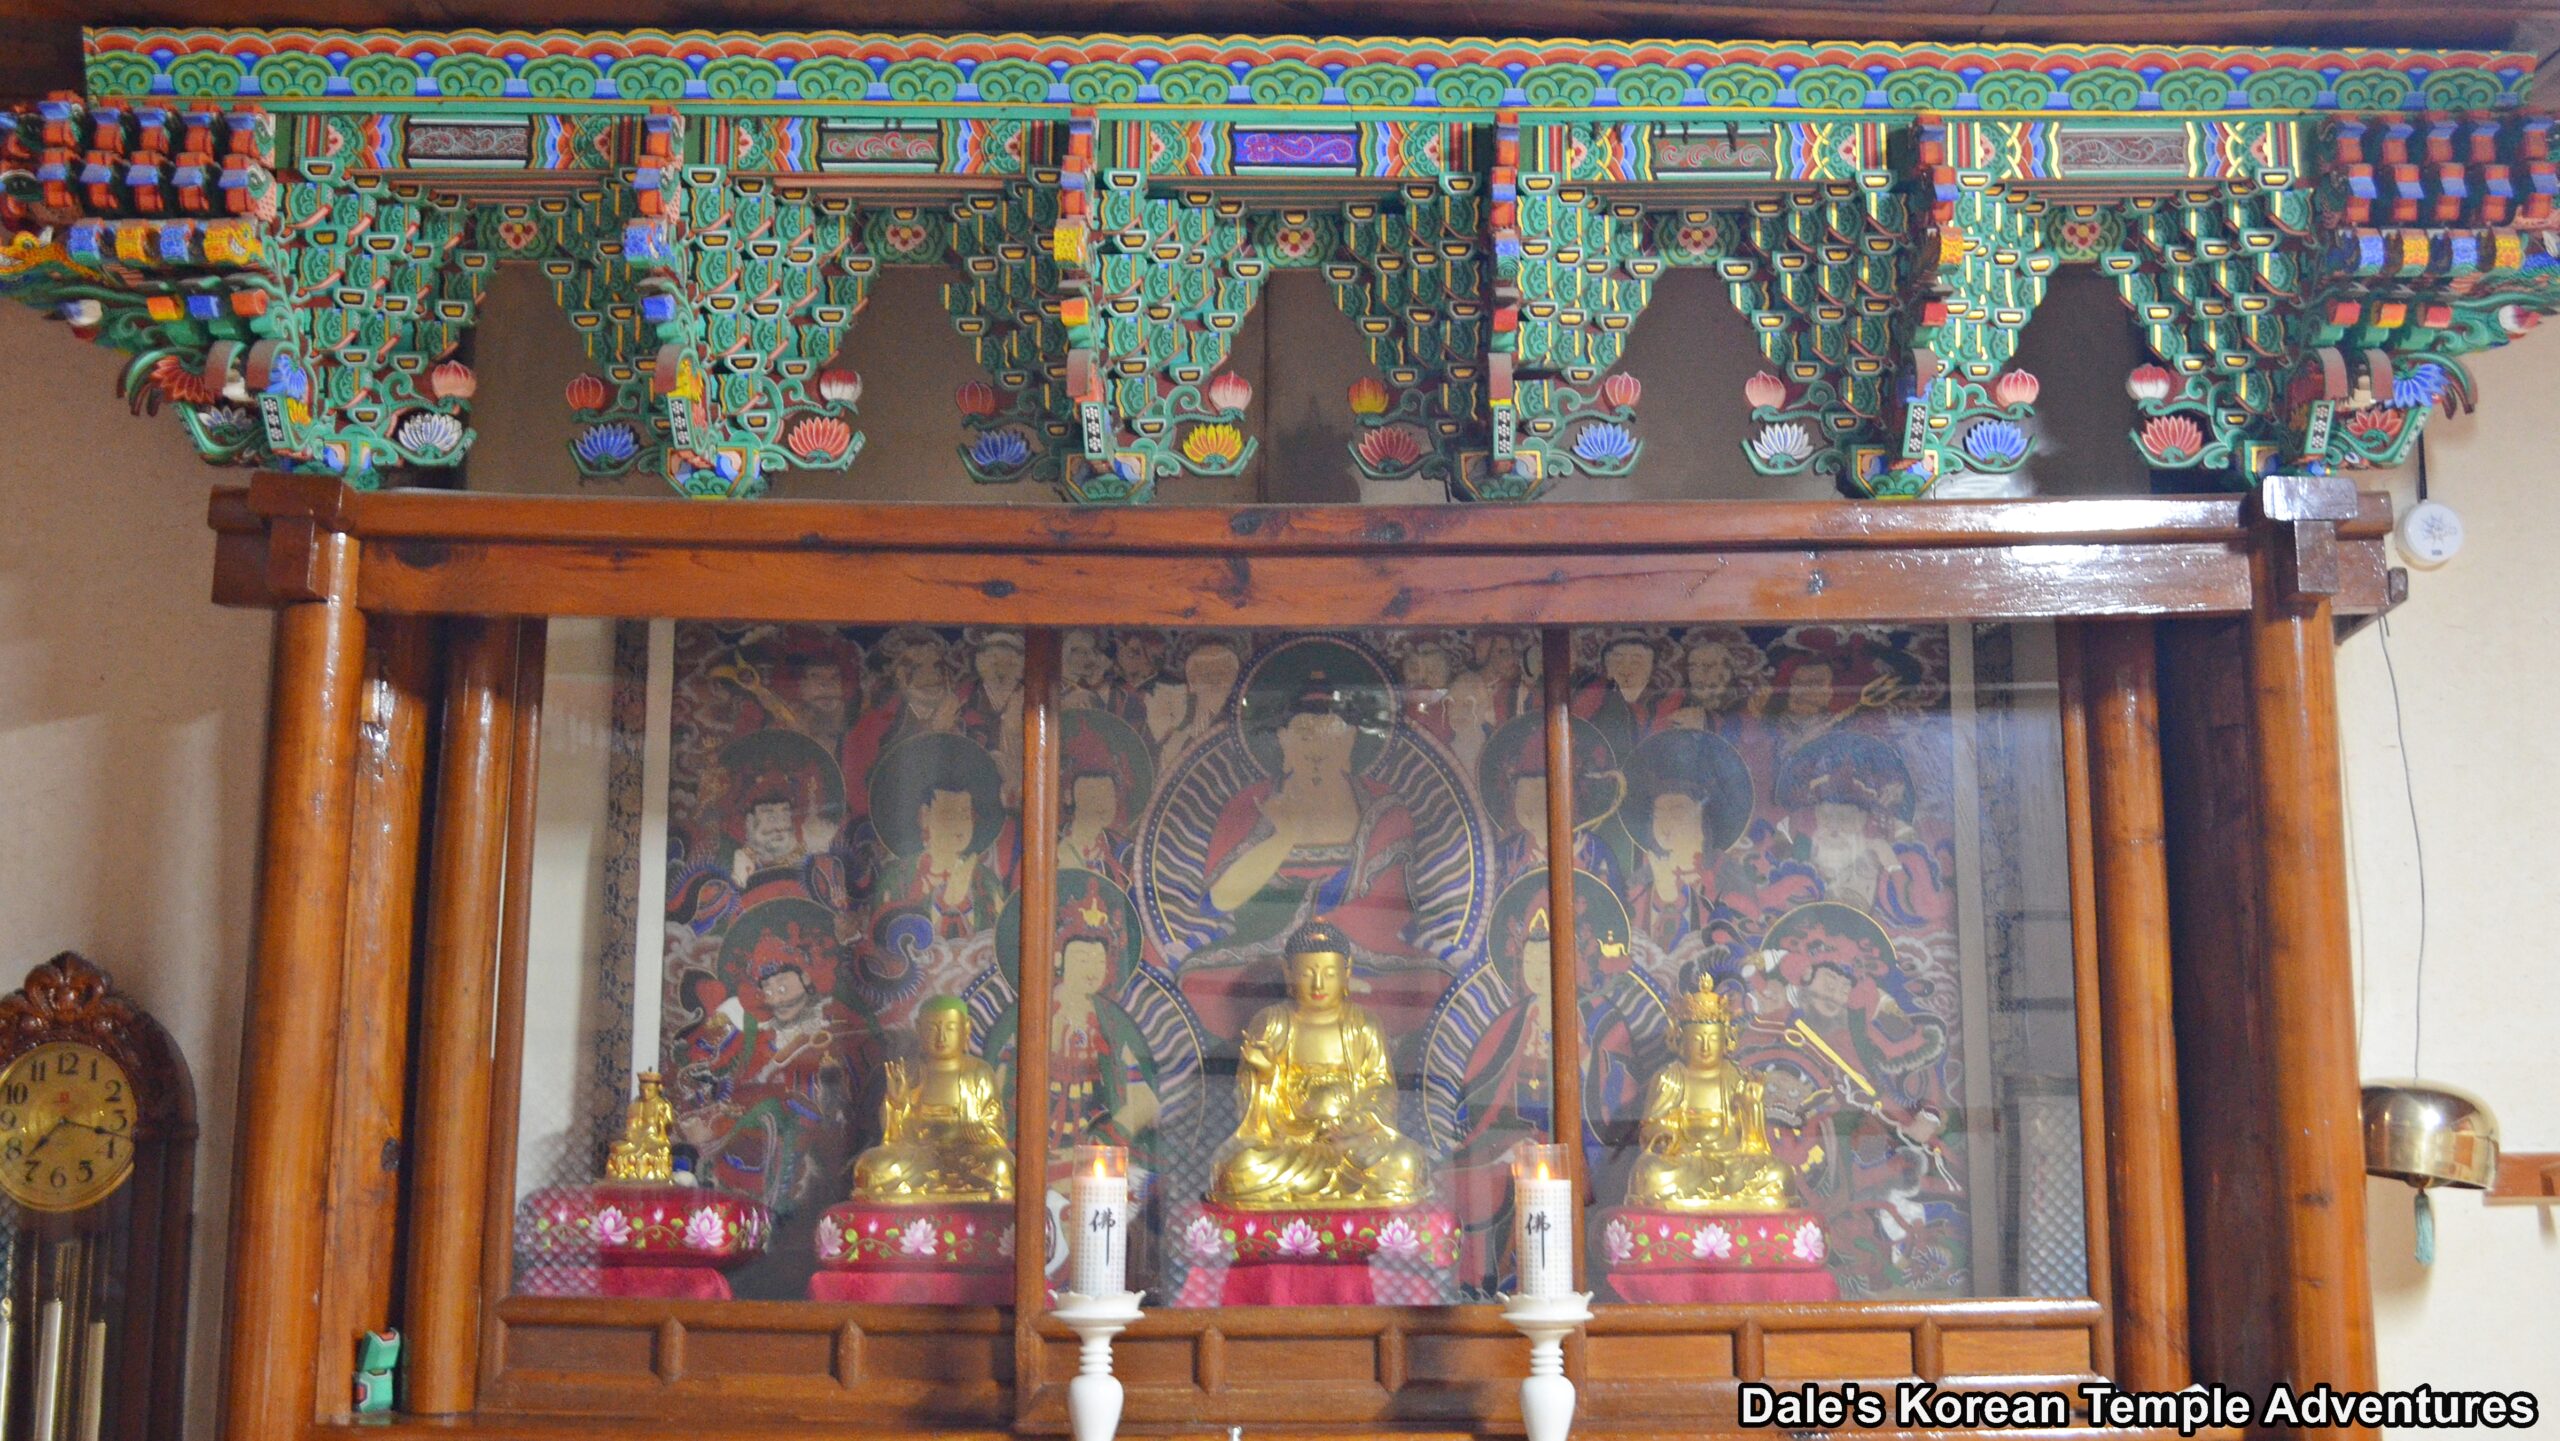
As for the Gwaneum-jeon Hall that stands behind the “Three-Story Stone Pagoda of Beopryunsa Temple in Yongin,” the exterior walls are adorned with various incarnations of Gwanseeum-bosal (The Bodhisattva of Compassion). Stepping inside the Gwaneum-jeon Hall, you’ll find a shrine hall filled with beautiful Buddhist artistry. The main altar is occupied by a solitary image of Gwanseeum-bosal, who is surrounded on all sides by a colourful enclosure and a golden canopy overhead. This statue is backed by golden hanja script of a portion of the Lotus Sutra. And this statue is fronted by wooden panels of lotus flowers and phoenixes. Hanging on the far right wall is a large Shinjung Taenghwa (Guardian Mural). The entire interior of the Gwaneum-jeon Hall is adorned with masterful paintings of the Bodhisattva of Compassion.
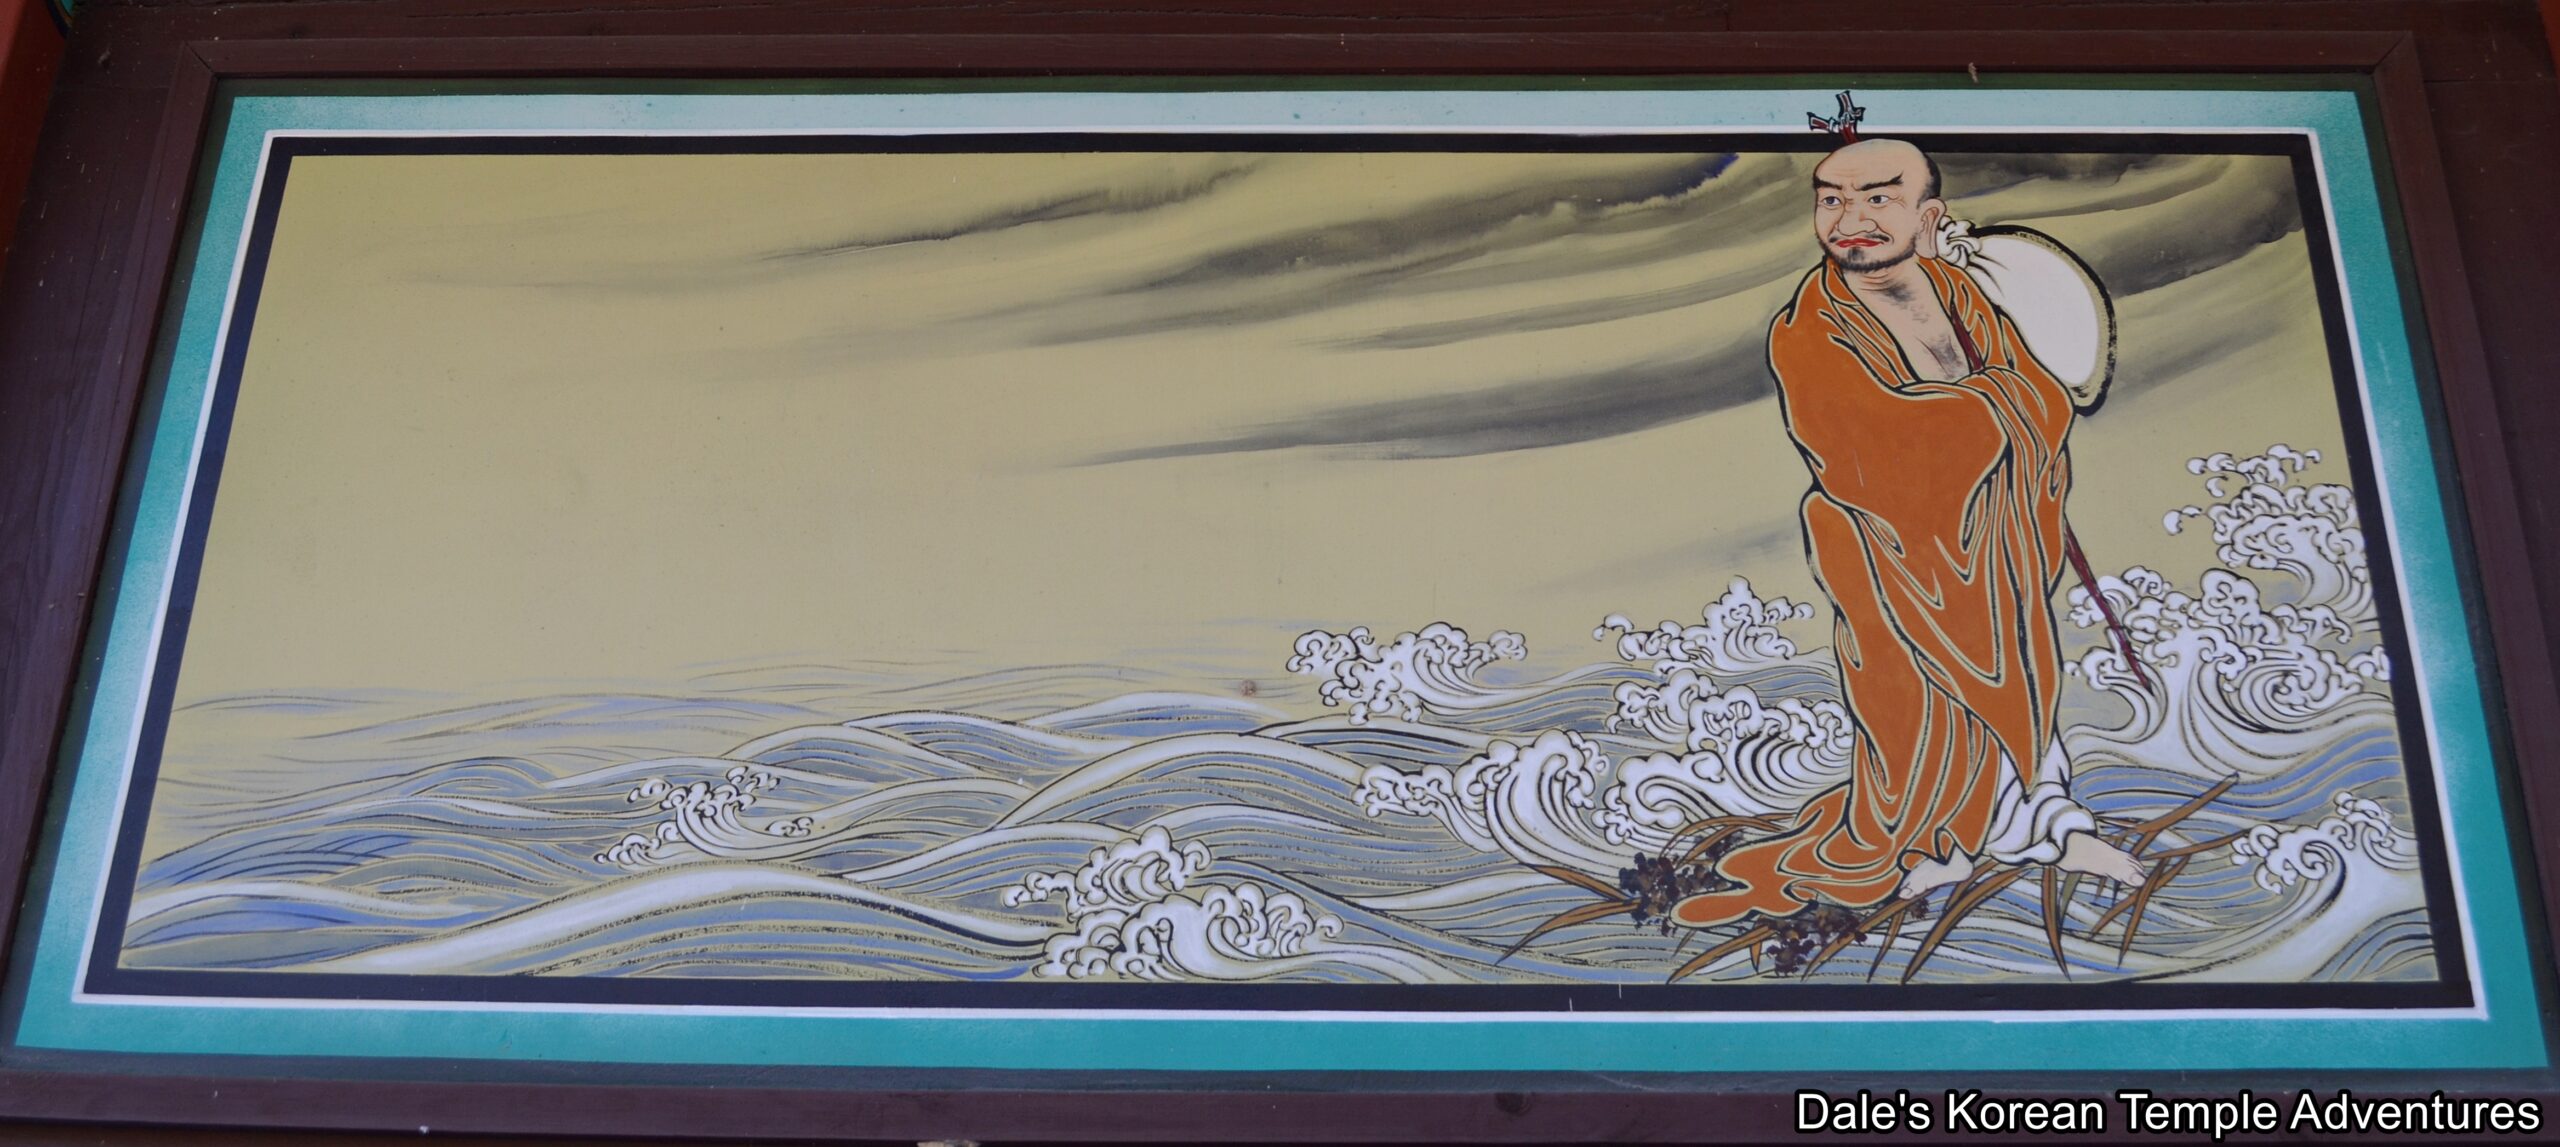
To the right of the Gwaneum-jeon Hall is the Josa-jeon Hall. The exterior walls are filled with paintings dedicated to images of Wonhyo-daesa (617-686 A.D.) and Uisang-daesa (625-702 A.D.), as well as the Bodhidharma. Stepping inside the Josa-jeon Hall, you’ll find two pictures of the temple’s founders on the main altar. And to the right of the Josa-jeon Hall is a large residential area for nuns. To the left of the Daeung-jeon Hall, on the other hand, is the Temple Stay building, as well as a beautiful pavilion that houses a dragon-head water fountain with spring water pouring forth from it. And if you look up at the ceiling of the pavilion, you’ll notice a ceiling filled with beautiful painted images of white cranes.
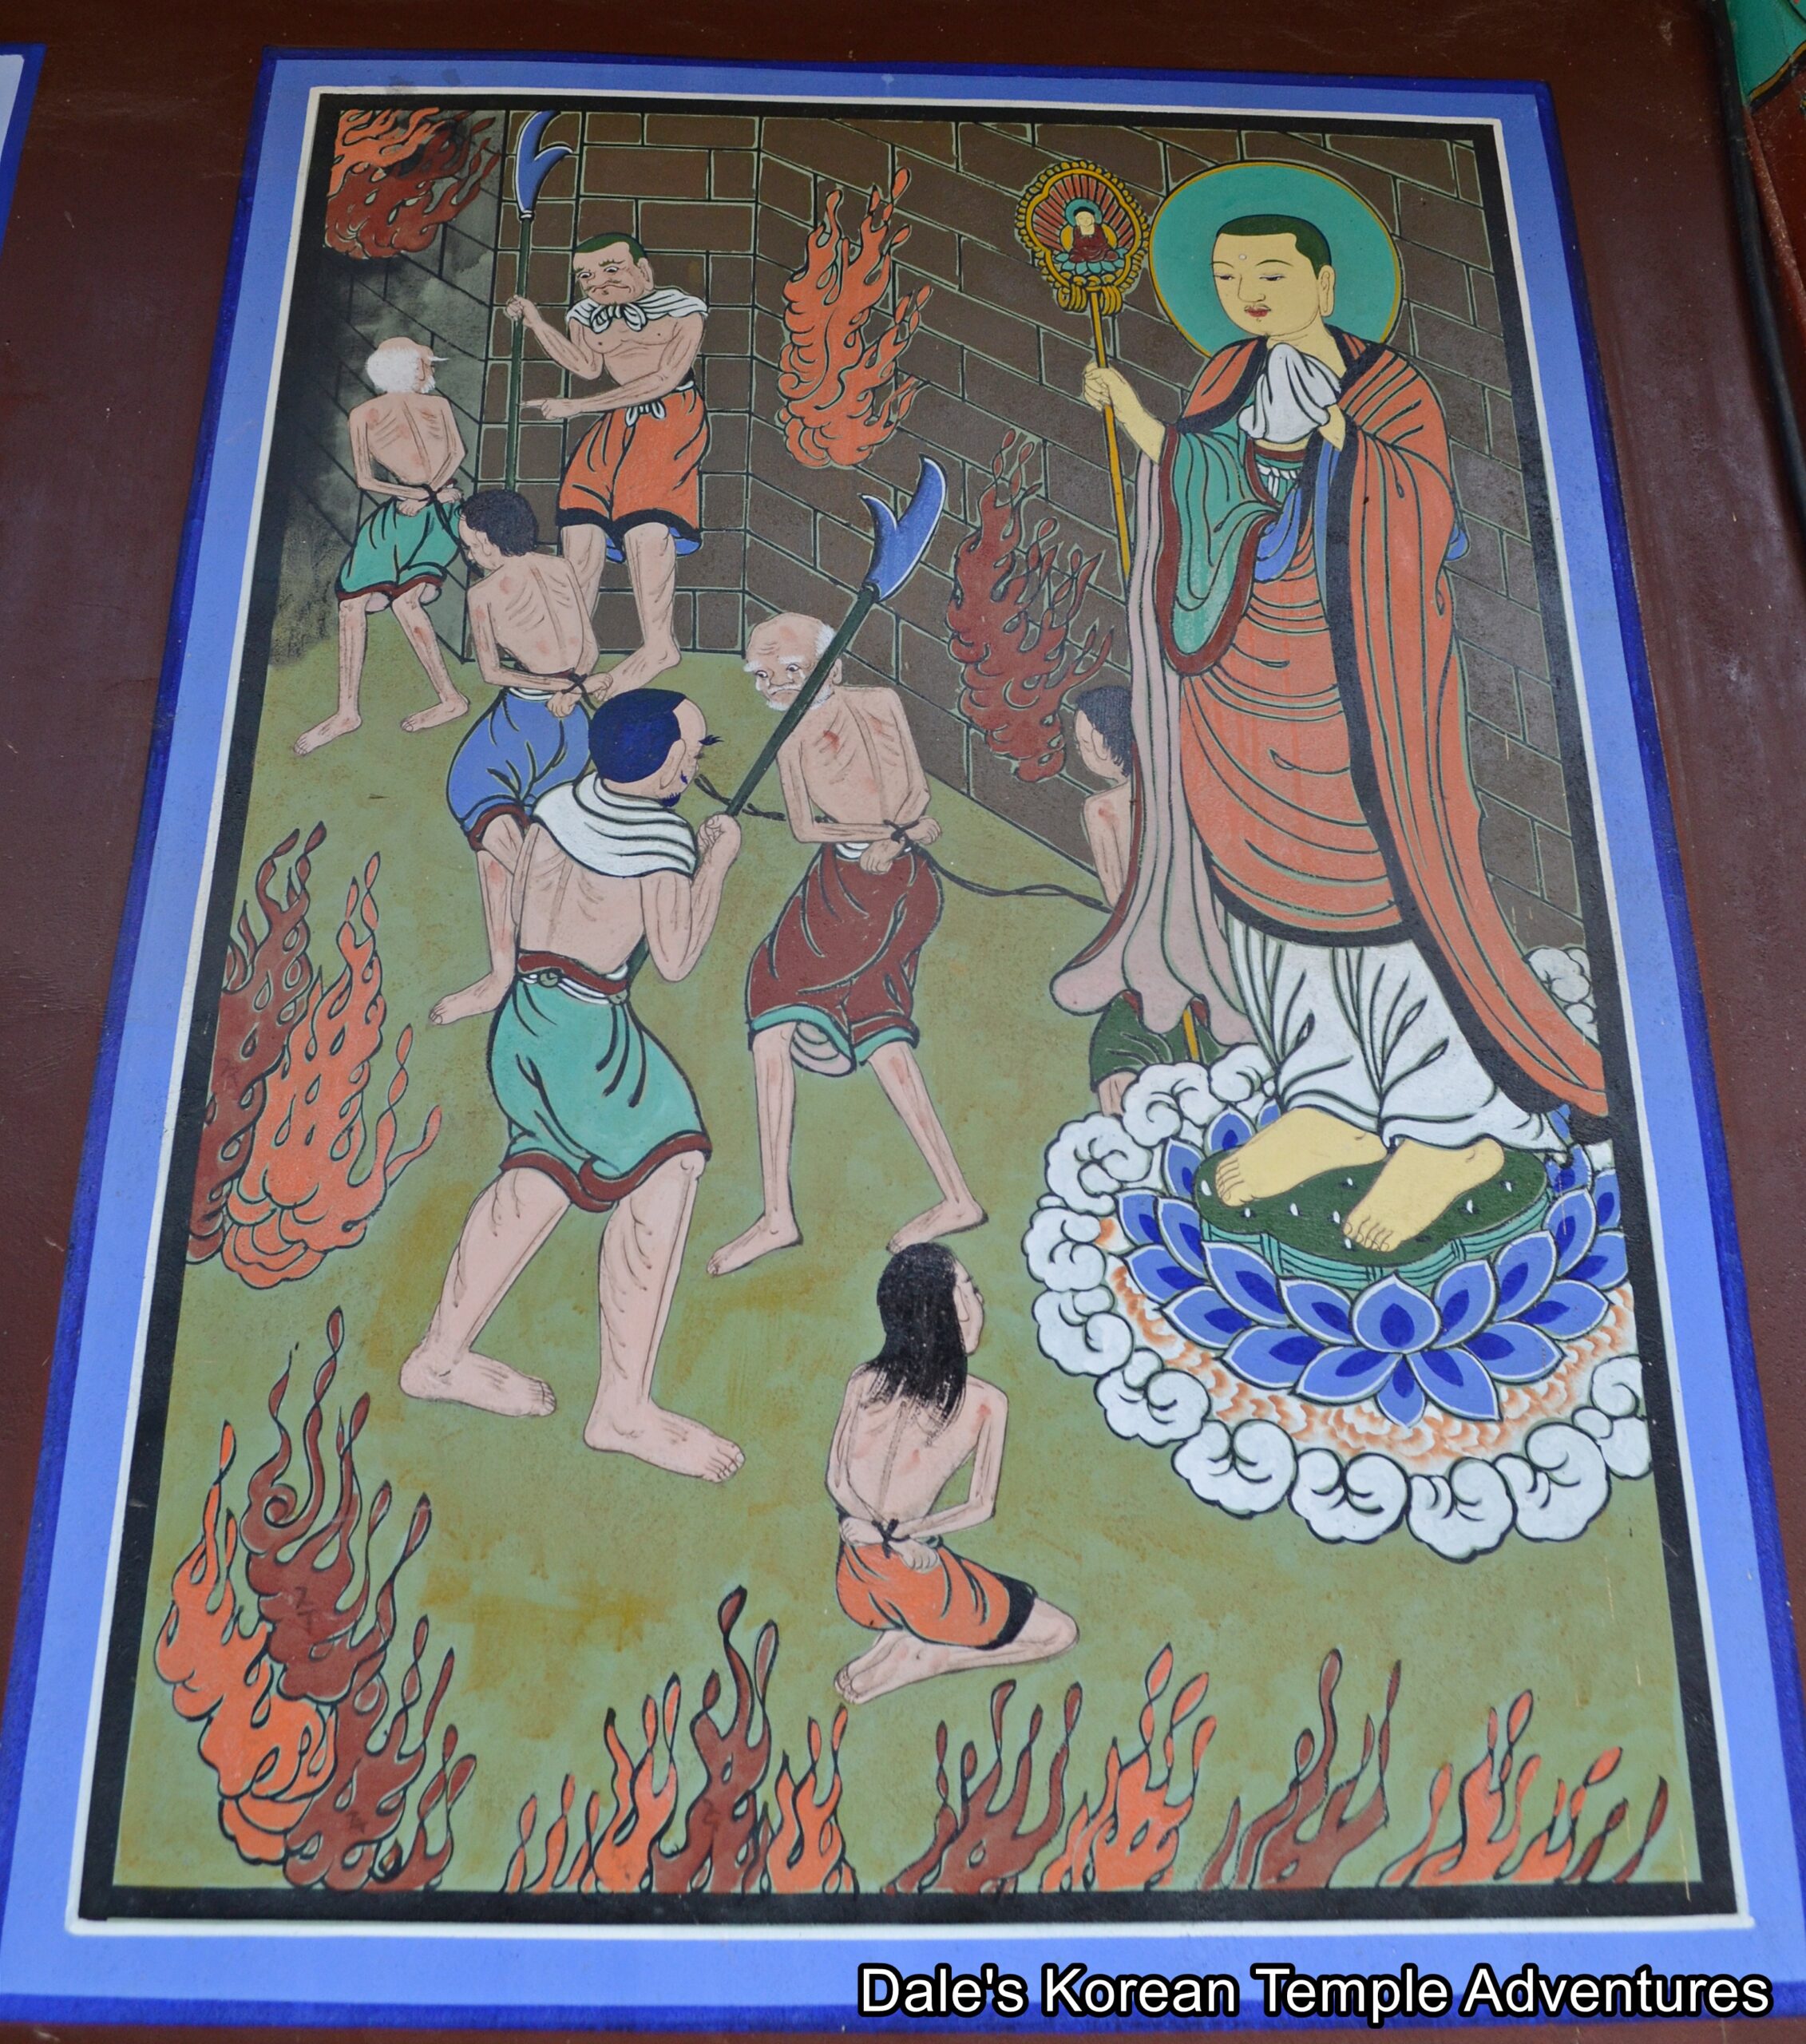
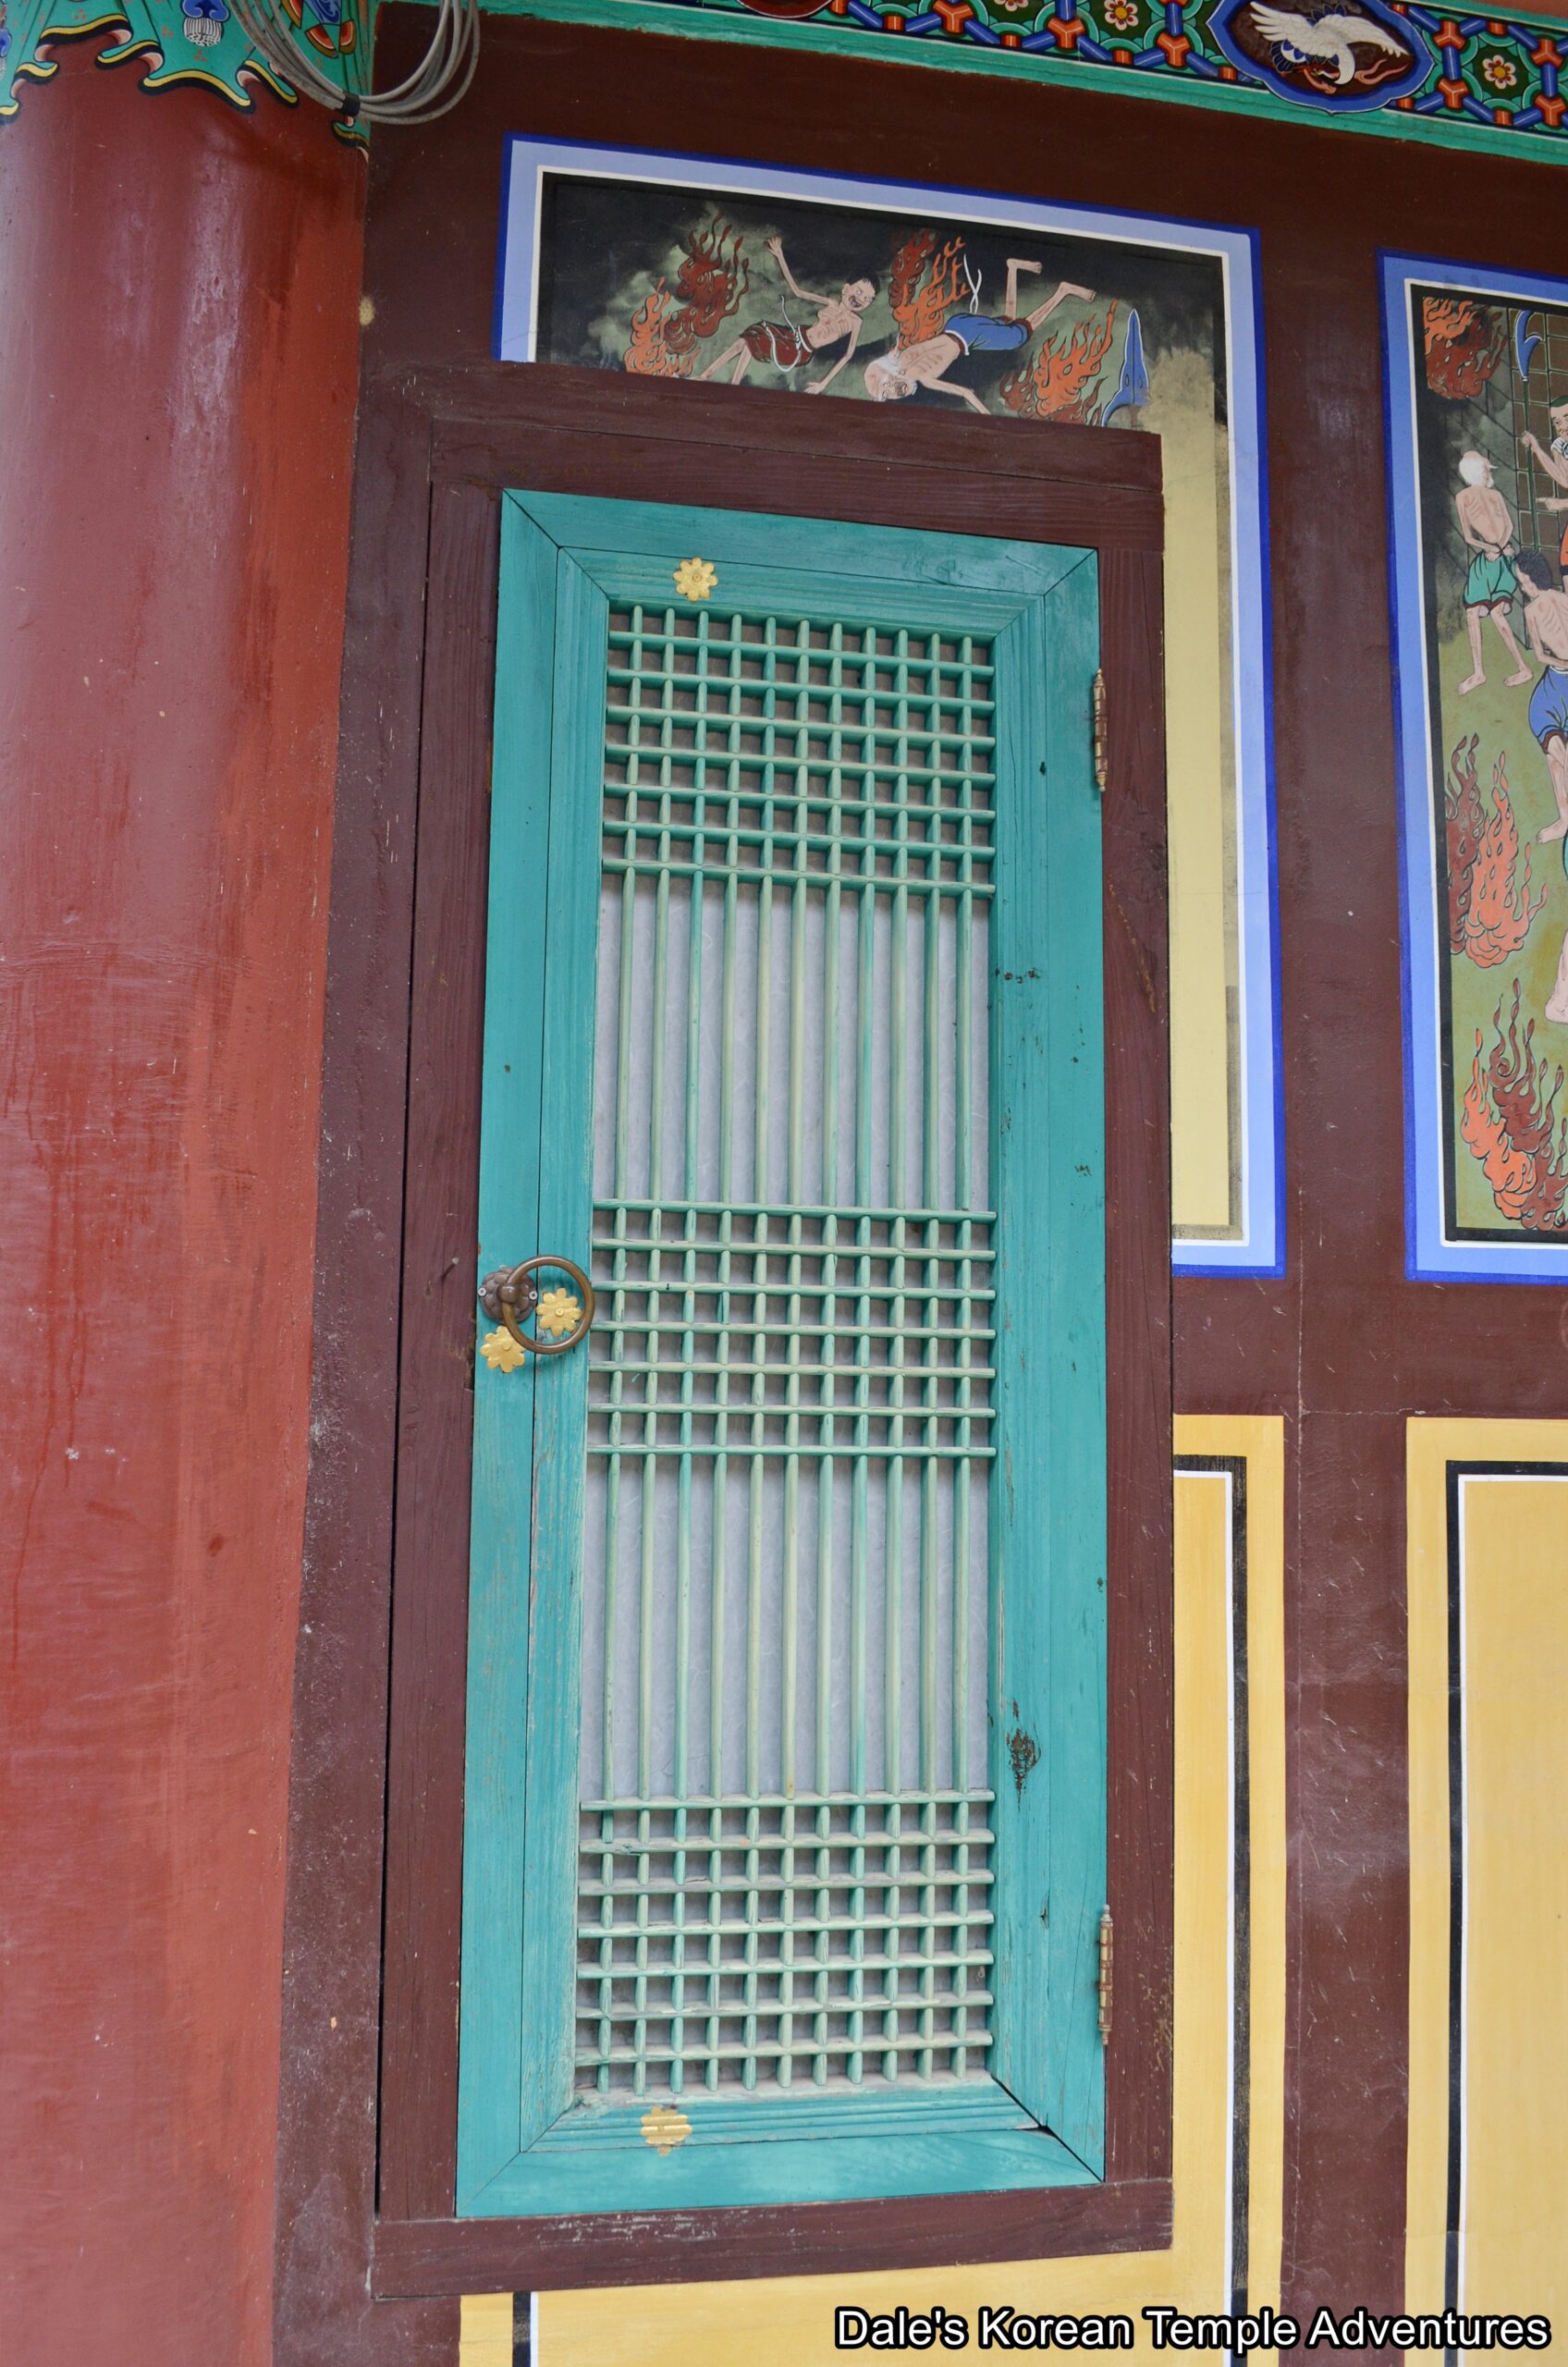
Backing this wooden pavilion is the Geukrakbo-jeon Hall. The exterior walls are filled with images of redemption and Buddhist hell. Stepping inside the Geukrakbo-jeon Hall, you’ll find a main altar occupied by a triad centred by Amita-bul (The Buddha of the Western Paradise). This central image is joined on either side by Jijang-bosal (The Bodhisattva of the Afterlife) and Gwanseeum-bosal. This main altar triad is then joined on both sides by intricate paintings dedicated to the Siwang (The Ten Kings of the Underworld).
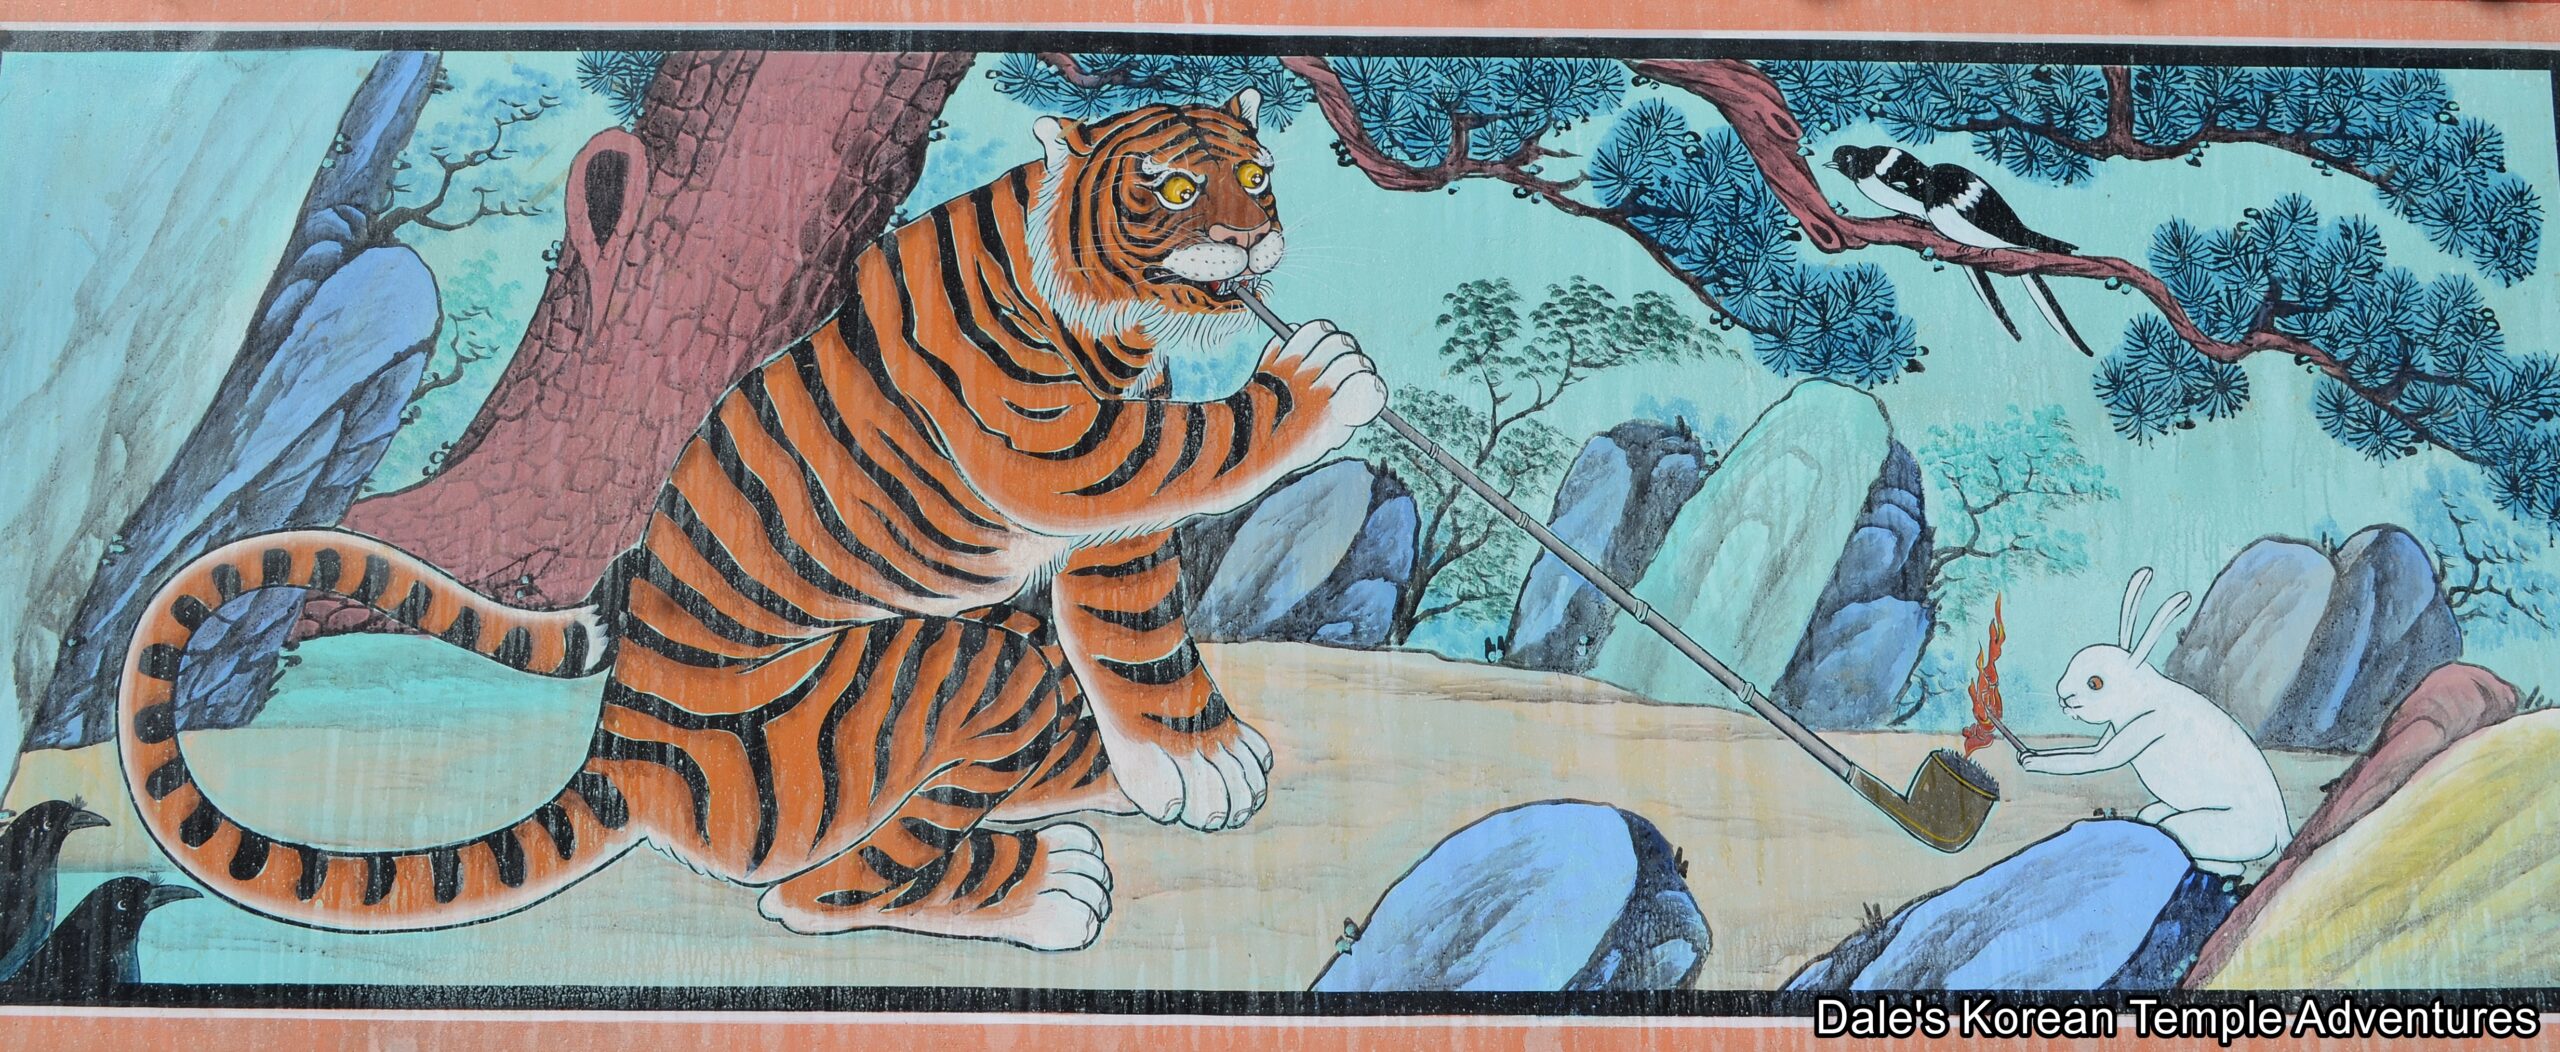
To the rear of the Geukrakbo-jeon Hall, and past a stone statue of Podae-hwasang (The Hempen Bag), you’ll find a trail that leads up to the Samseong-gak Hall. Along the way, you’ll pass by a standing statue of the Bodhidharma. Adorning the exterior of the Samseong-gak Hall are murals dedicated to Dokseong (The Lonely Saint), three paintings dedicated to Chilseong (The Seven Stars), and a minhwa of “Tiger Smoking a Pipe.” Stepping inside the Samseong-gak Hall, you’ll see three colourful, wooden reliefs dedicated to Chilseong, Dokseong, and Sanshin (The Mountain Spirit).
How To Get There
From the Yongin Intercity Bus Terminal, you can take either Bus #10-3 or Bus #10-4 to get to Beopryunsa Temple. The bus ride will last some 24 stops over 25 minutes. You’ll need to get off at the “Wonsam-myeonhaeng-jeongbokji-senteo-hacha – 원삼면행정복지센터 하차.” The bus will drop you off right in front of the temple grounds.
Overall Rating: 8/10
For a modern temple, you really can’t do much better than Beopryunsa Temple. The beauty of the temple starts with the amazing Daeung-jeon Hall, but it certainly doesn’t end there. The exterior walls to this beautiful hall are filled with stunning murals. And as beautiful as the exterior is, the interior is even more beautiful with its massive granite main altar statues, as well as the intricate woodwork up near the ceiling of the structure. In addition to the Daeung-jeon Hall, the interior of the Gwaneum-jeon Hall is one of the most impressive in Korea with its main altar golden hanja script and the masterful murals dedicated to the Bodhisattva of Compassion adorning all of the interior walls. Other things to keep a look out for are the murals adorning the exterior of the Samseong-gak Hall, the Siwang (The Ten Kings of the Underworld) paintings inside the Geukrakbo-jeon Hall, and the “Three-Story Stone Pagoda of Beopryunsa Temple in Yongin.” All make for a beautiful visit to Beopryunsa Temple.
The stunning Daeung-jeon Hall at Beopryunsa Temple.
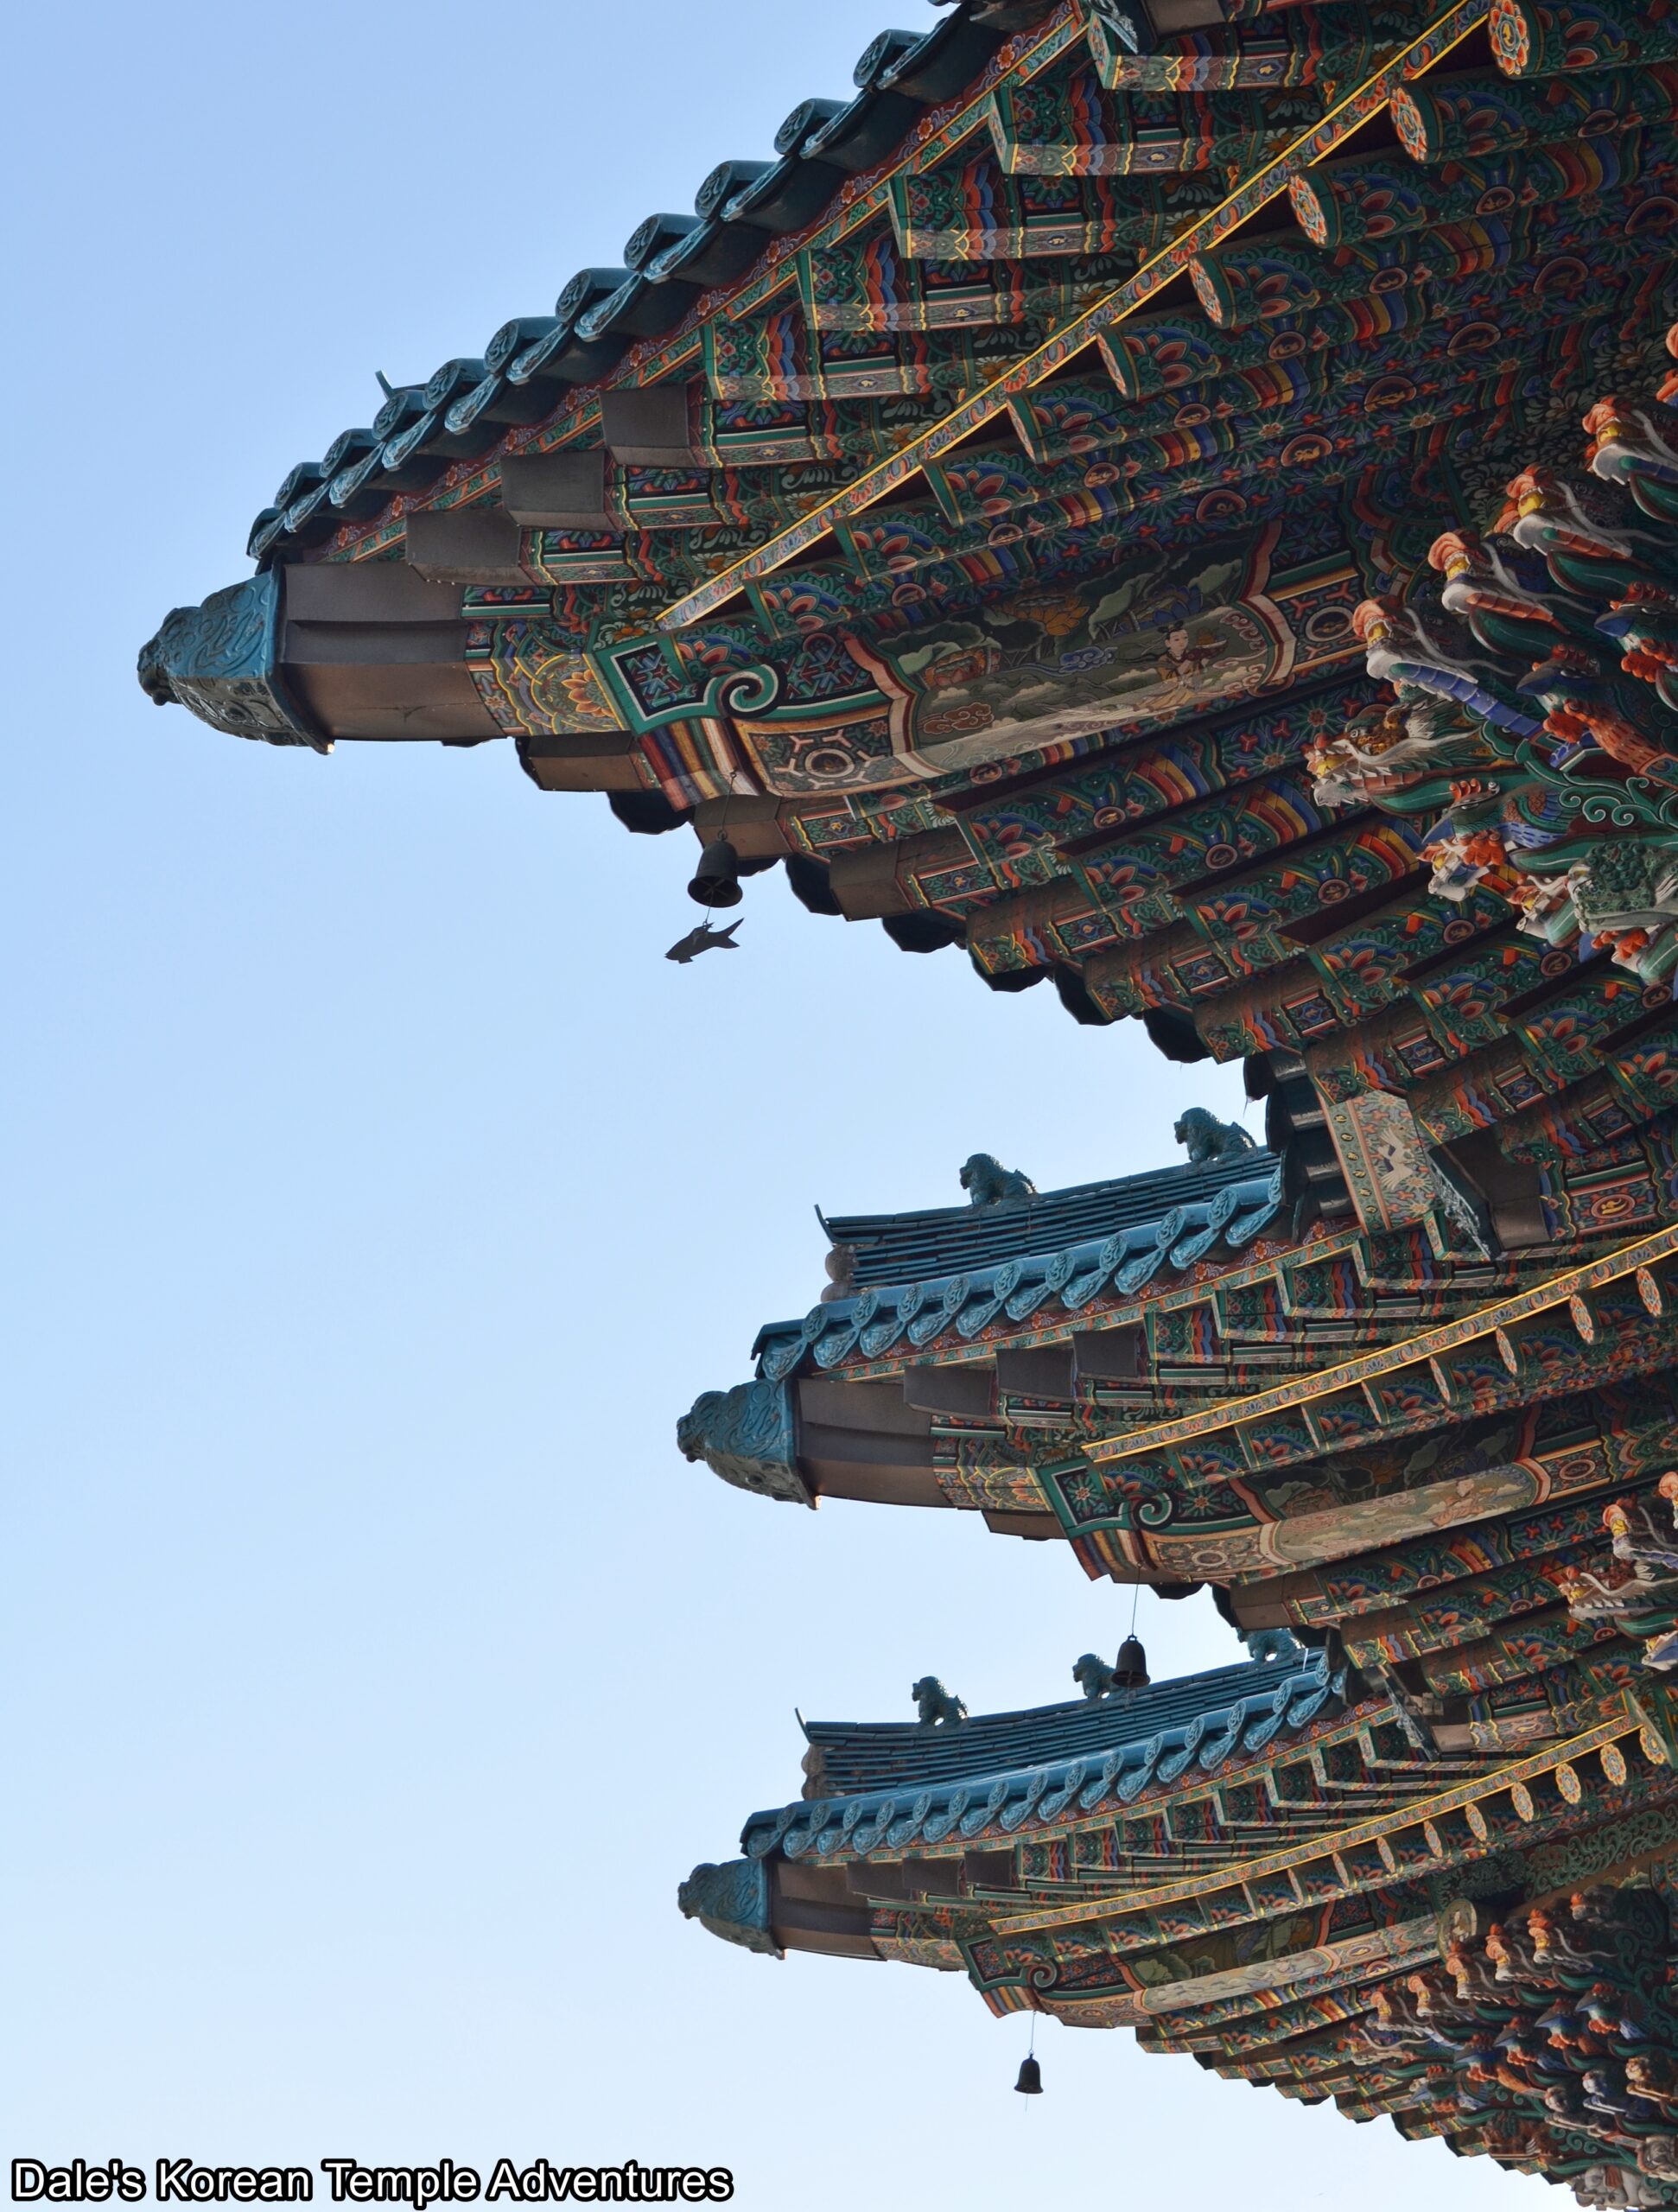
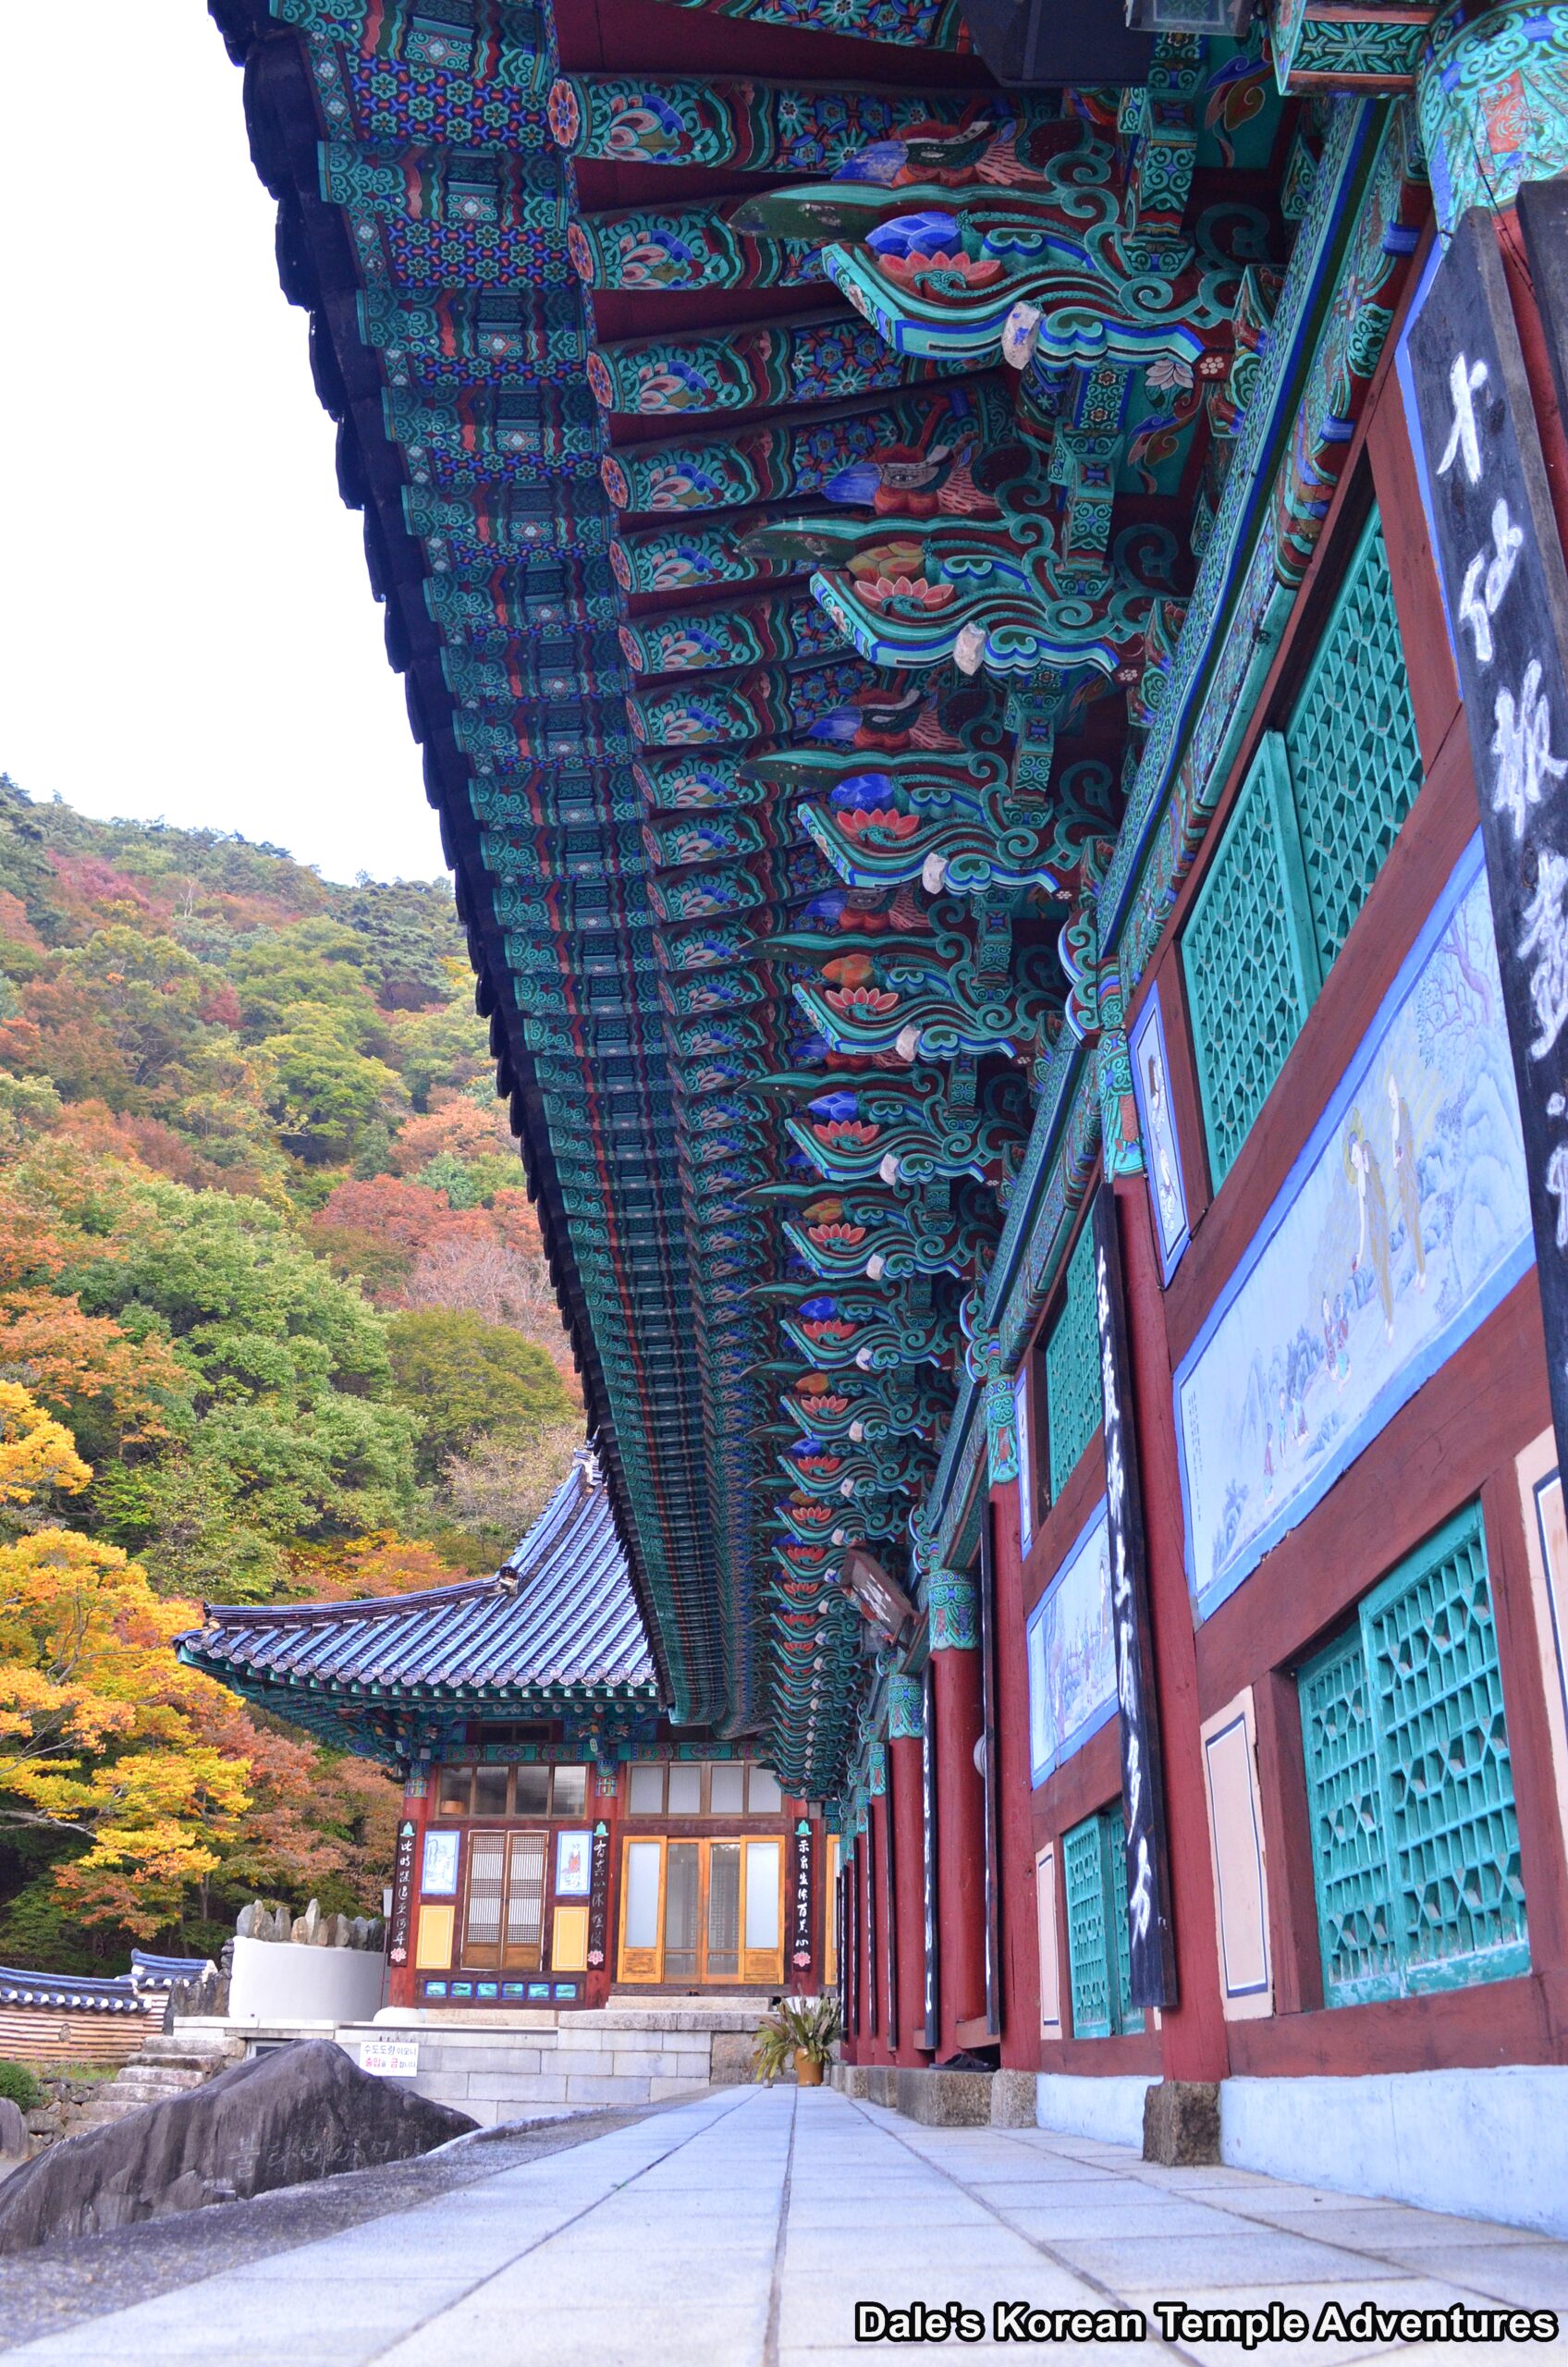
The amazing and intricate angles of the Daeung-jeon Hall.
A panel of four paintings that adorns the exterior of the main hall.
The impressive main altar inside the Daeung-jeon Hall.
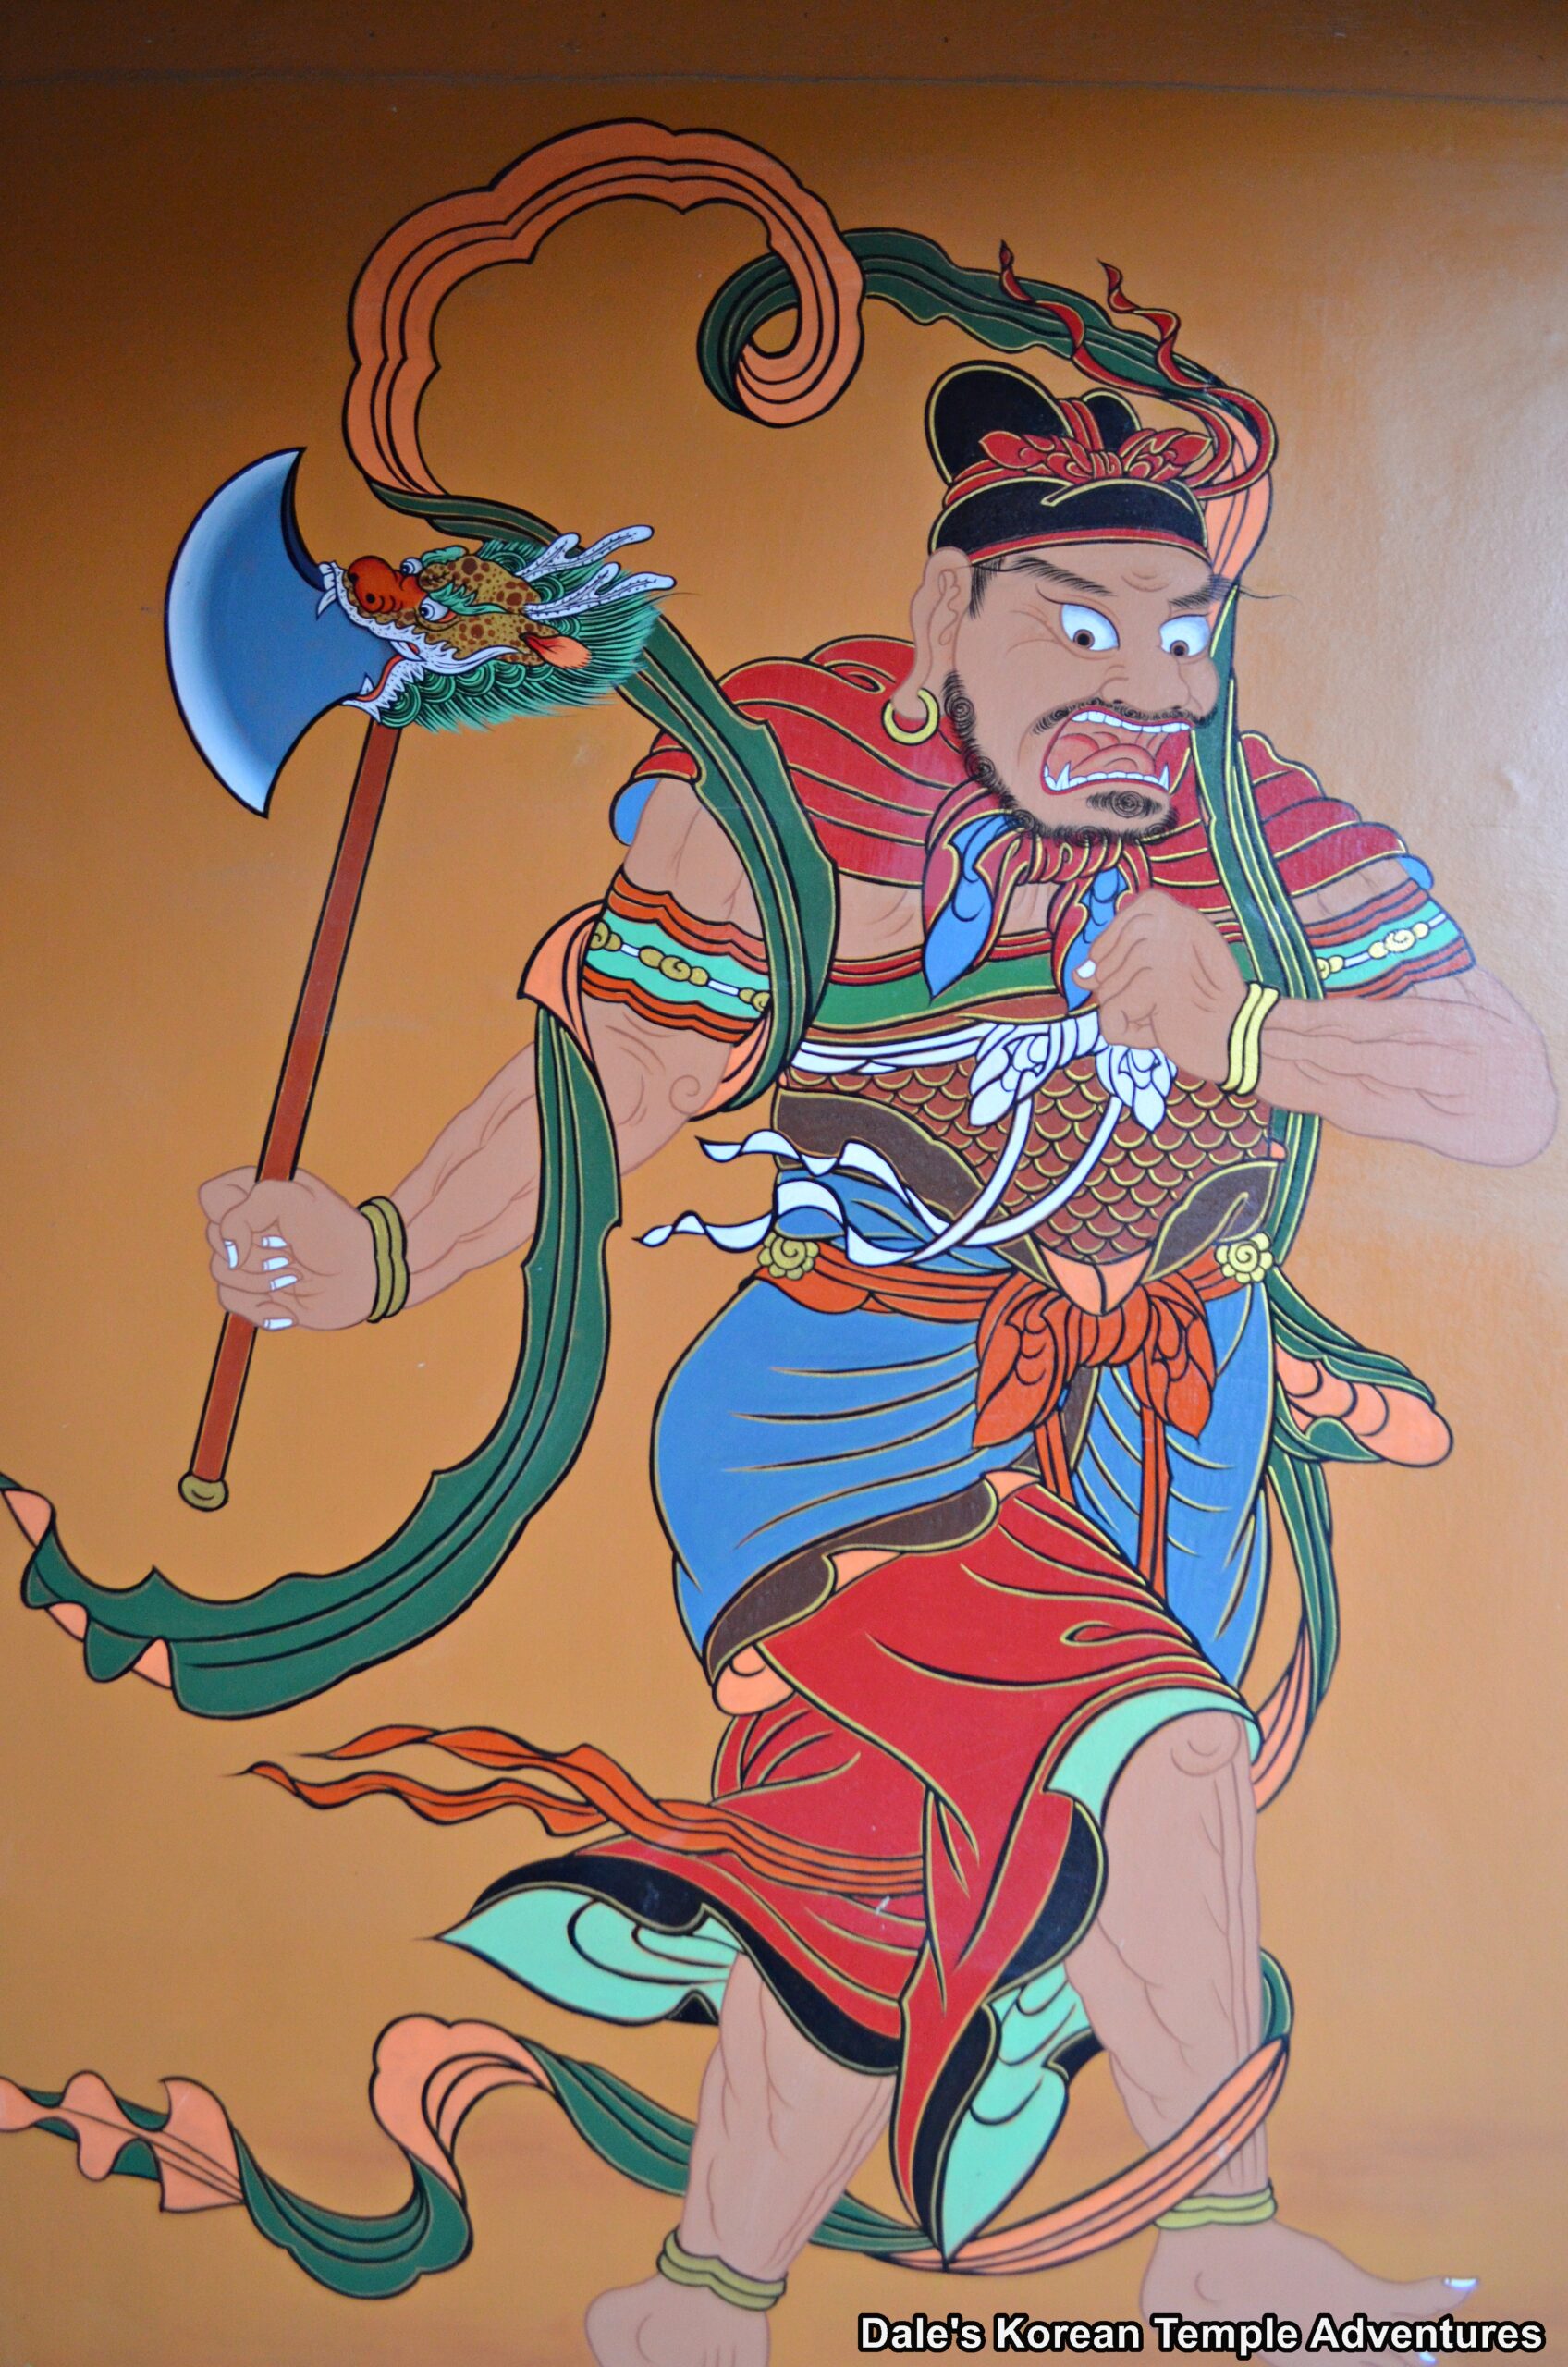
A statue of Dongjin-bosal backed by a stone relief of the Shinjung Taenghwa (Guardian Mural).
The shrine dedicated to Munsu-bosal (The Bodhisattva of Wisdom) inside the Daeung-jeon Hall.
One of the Palsang-do (The Eight Scenes from the Buddha’s Life) that adorns an interior wall of the main hall.
The intricate and colourful ceiling and beams of the Daeung-jeon Hall.
The Gwaneum-jeon Hall (left) and Josa-jeon Hall (right) with the “Three-Story Stone Pagoda of Beopryunsa Temple in Yongin” out in front of the two temple shrine halls.
The main altar of the Gwaneum-jeon Hall.
The Shinjung Taenghwa (Guardian Mural) inside the Gwaneum-jeon Hall.
And one of the masterful paintings dedicated to the Bodhisattva of Compassion inside the Gwaneum-jeon Hall.
A mural dedicated to the Bodhidharma that adorns one of the exterior walls of the Josa-jeon Hall.
The “Three-Story Stone Pagoda of Beopryunsa Temple in Yongin” with the Beomjong-gak Pavilion behind it.
The ceiling of the wooden pavilion that houses the dragon-head spring at the temple.
The stunning roof of the Daeung-jeon Hall.
The “Tiger Smoking a Pipe” that adorns one of the exterior walls of the Samseong-gak Hall.
And the wood relief dedicated to Sanshin (The Mountain Spirit) inside the Samseong-gak Hall.
Gukilam Hermitage on the Haeinsa Temple Grounds in Hapcheon, Gyeongsangnam-do.
Hermitage History
Gukilam Hermitage is one of a dozen hermitages on the Haeinsa Temple grounds in Hapcheon, Gyeongsangnam-do. As a result, Gukilam Hermitage is beautifully situated in Gayasan National Park. It’s unknown as to when Gukilam Hermitage was first founded. It’s also unknown who first founded the hermitage, as well. The name of the temple derives from the monk Byeokam (1575-1660).
Byeokam was born in Boeun, Chungcheongbuk-do. His father died when he was nine years old, and Byeokam became a monk at the age of fourteen under the monk Buhue (1543-1615). When the Imjin War (1592-98) started, Byeokam participated in the war under Buhue. And when the war was over, Byeokam returned home. Later, and at the behest of King Gwanghaegun of Joseon (r. 1608-1623), Byeokam became the abbot of Bongeunsa Temple. In 1624, Byeokam supervised the construction of the Namhansanseong Fortress in 1624. For his service, and the construction of the fortress in three years, Byeokam received the title of Gukil-dosa.
As for Gukilam Hermitage, it was rebuilt by Byeokam in 1637. Later, it would be rebuilt and repaired in 1942 and 1948. Currently, the hermitage is run by nuns.
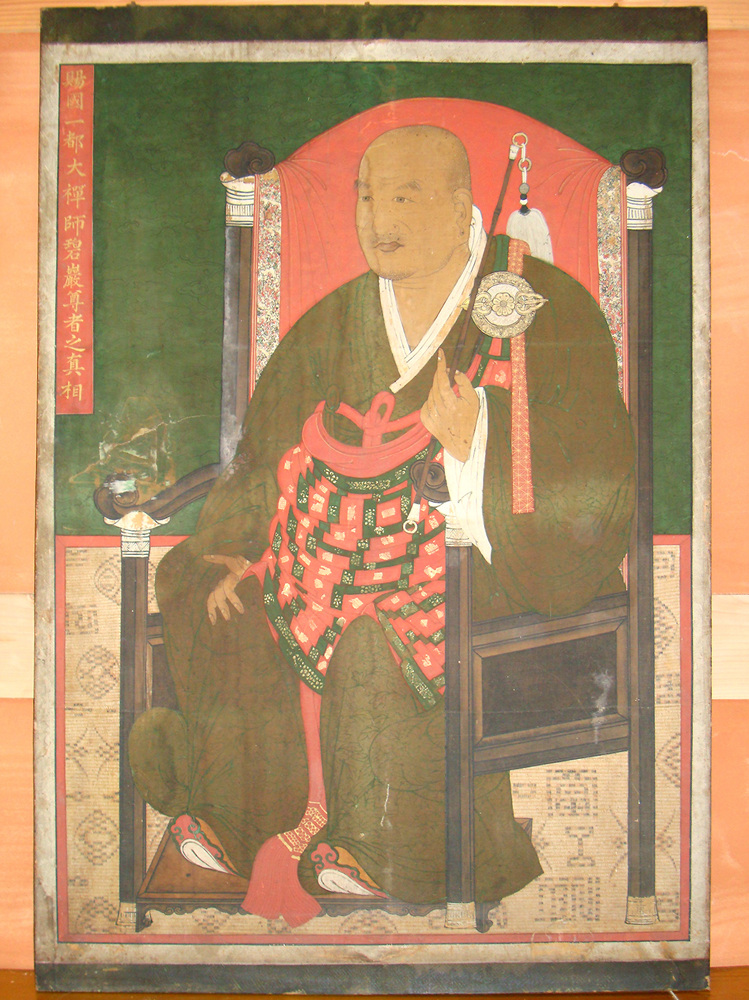
A painting of the monk Byeokam (1575-1660). (Picture courtesy of the CHA).
Hermitage Layout
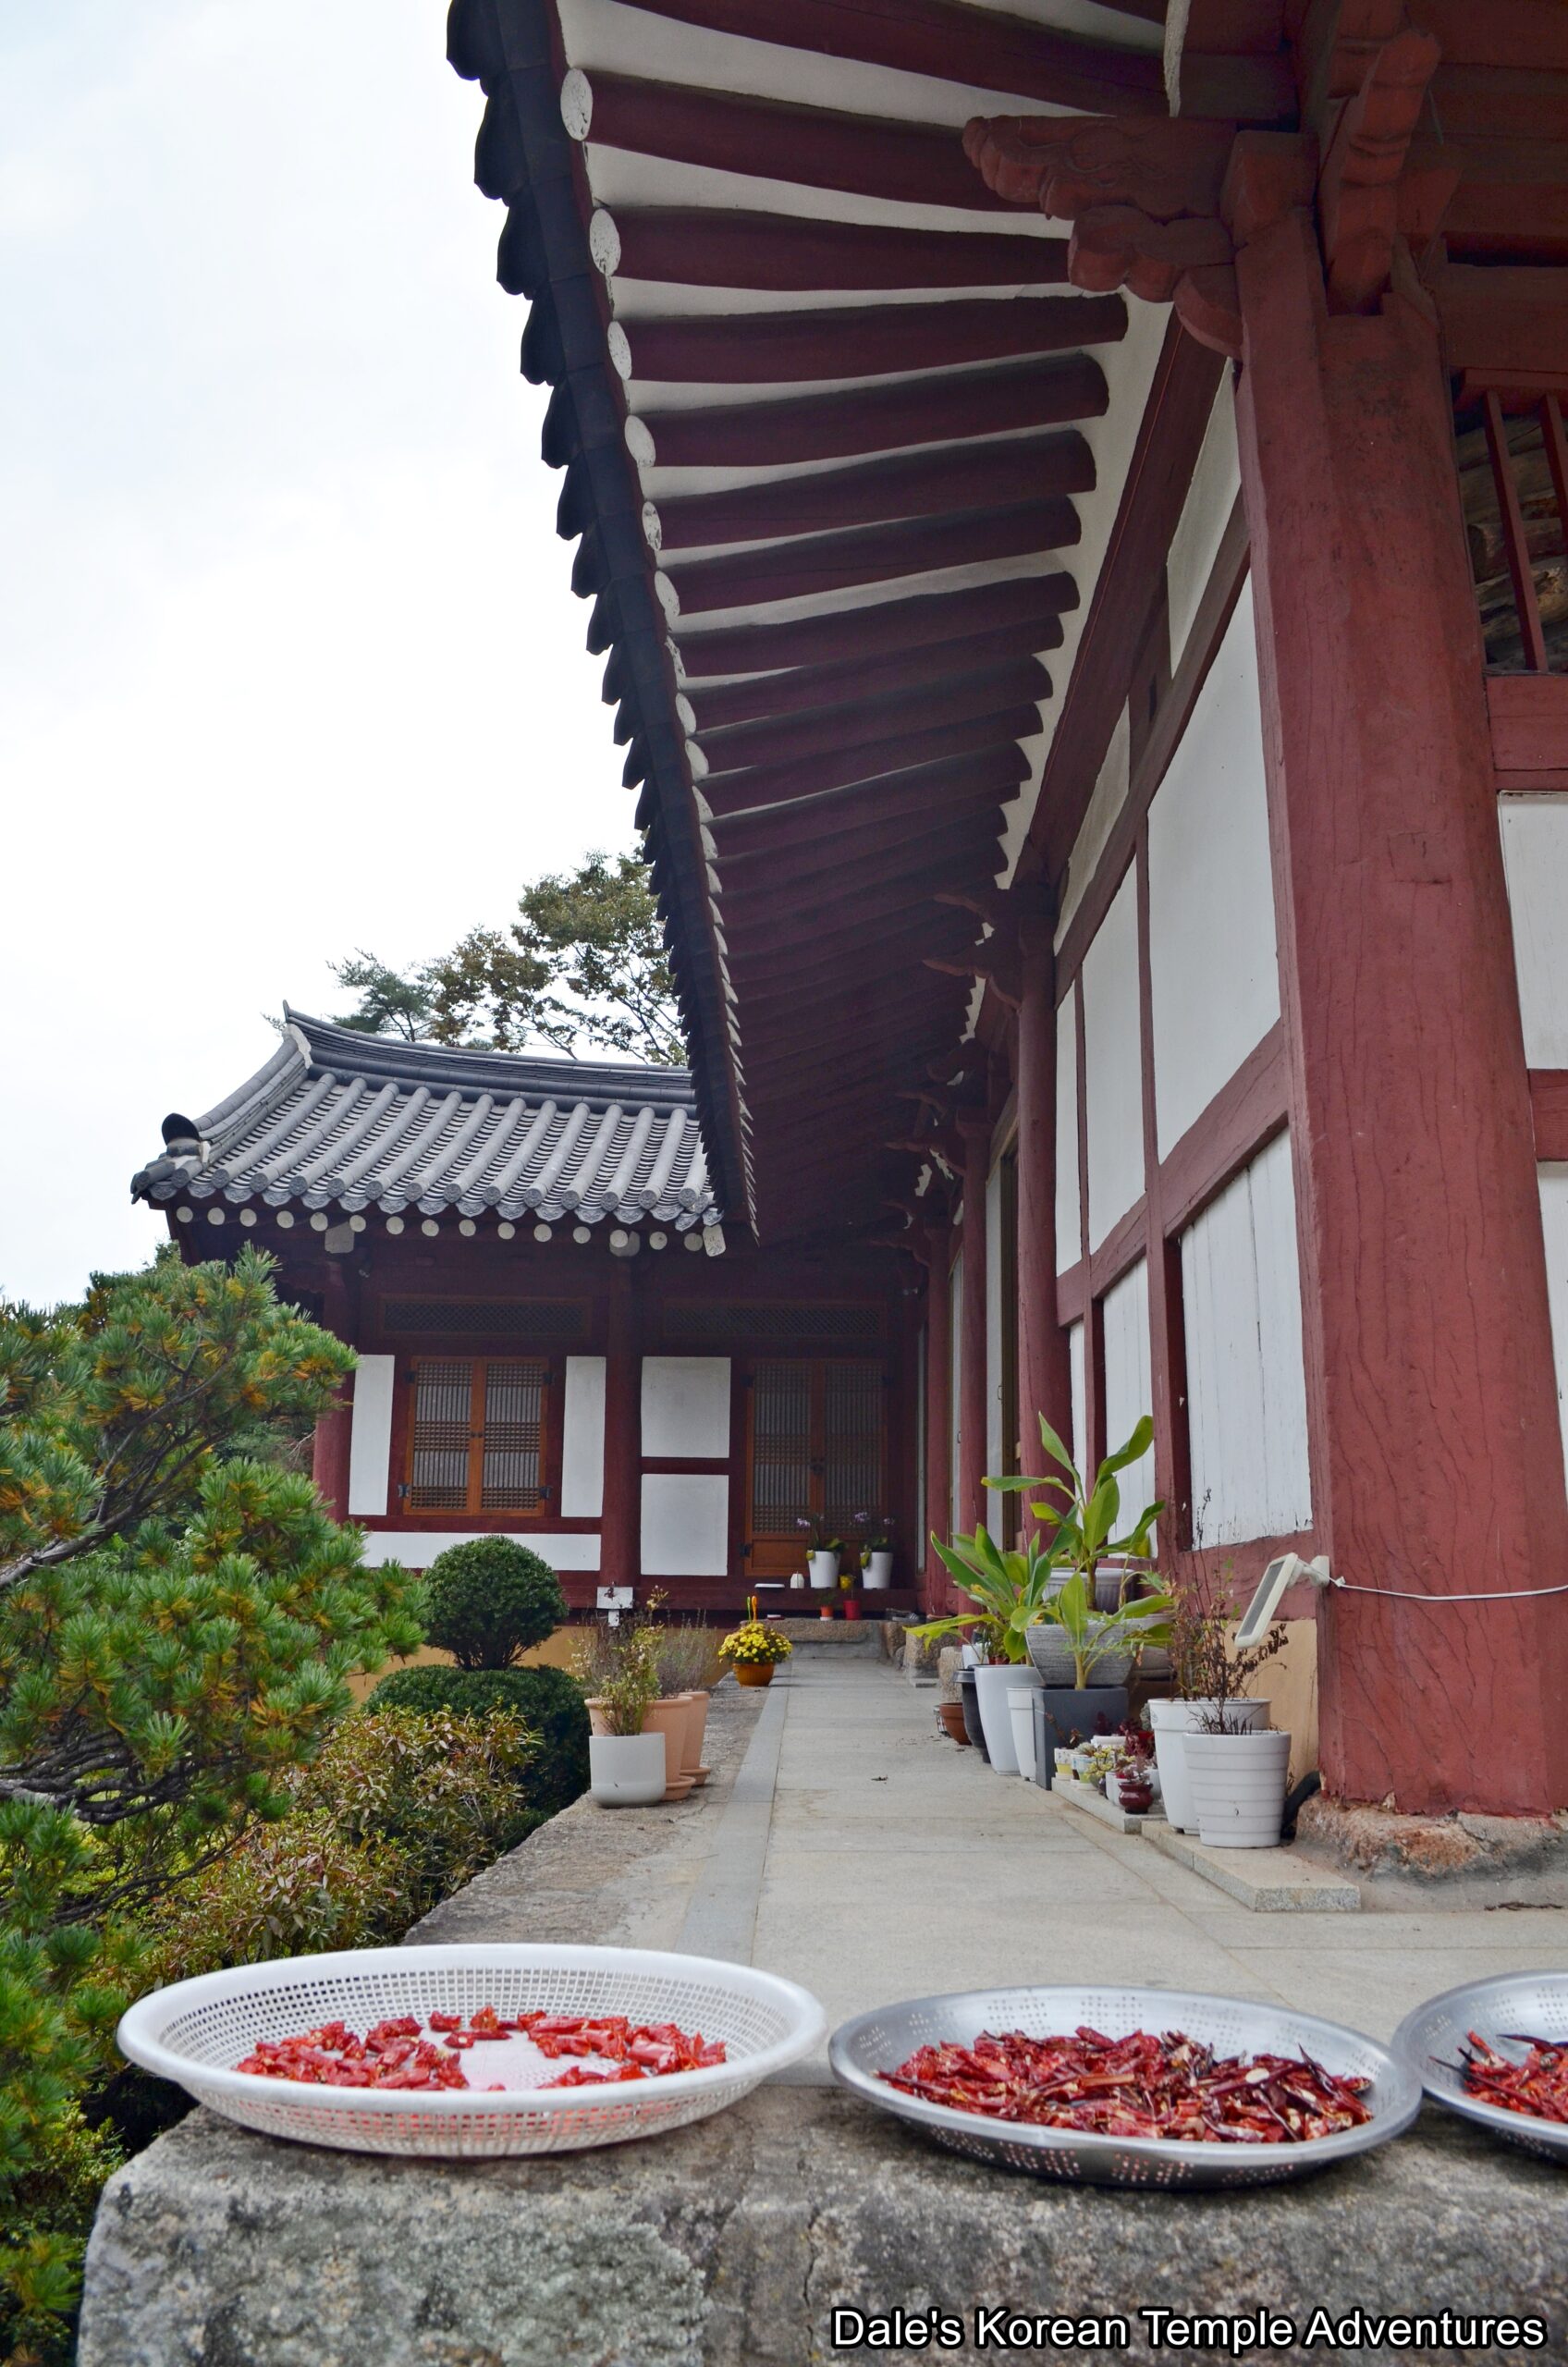
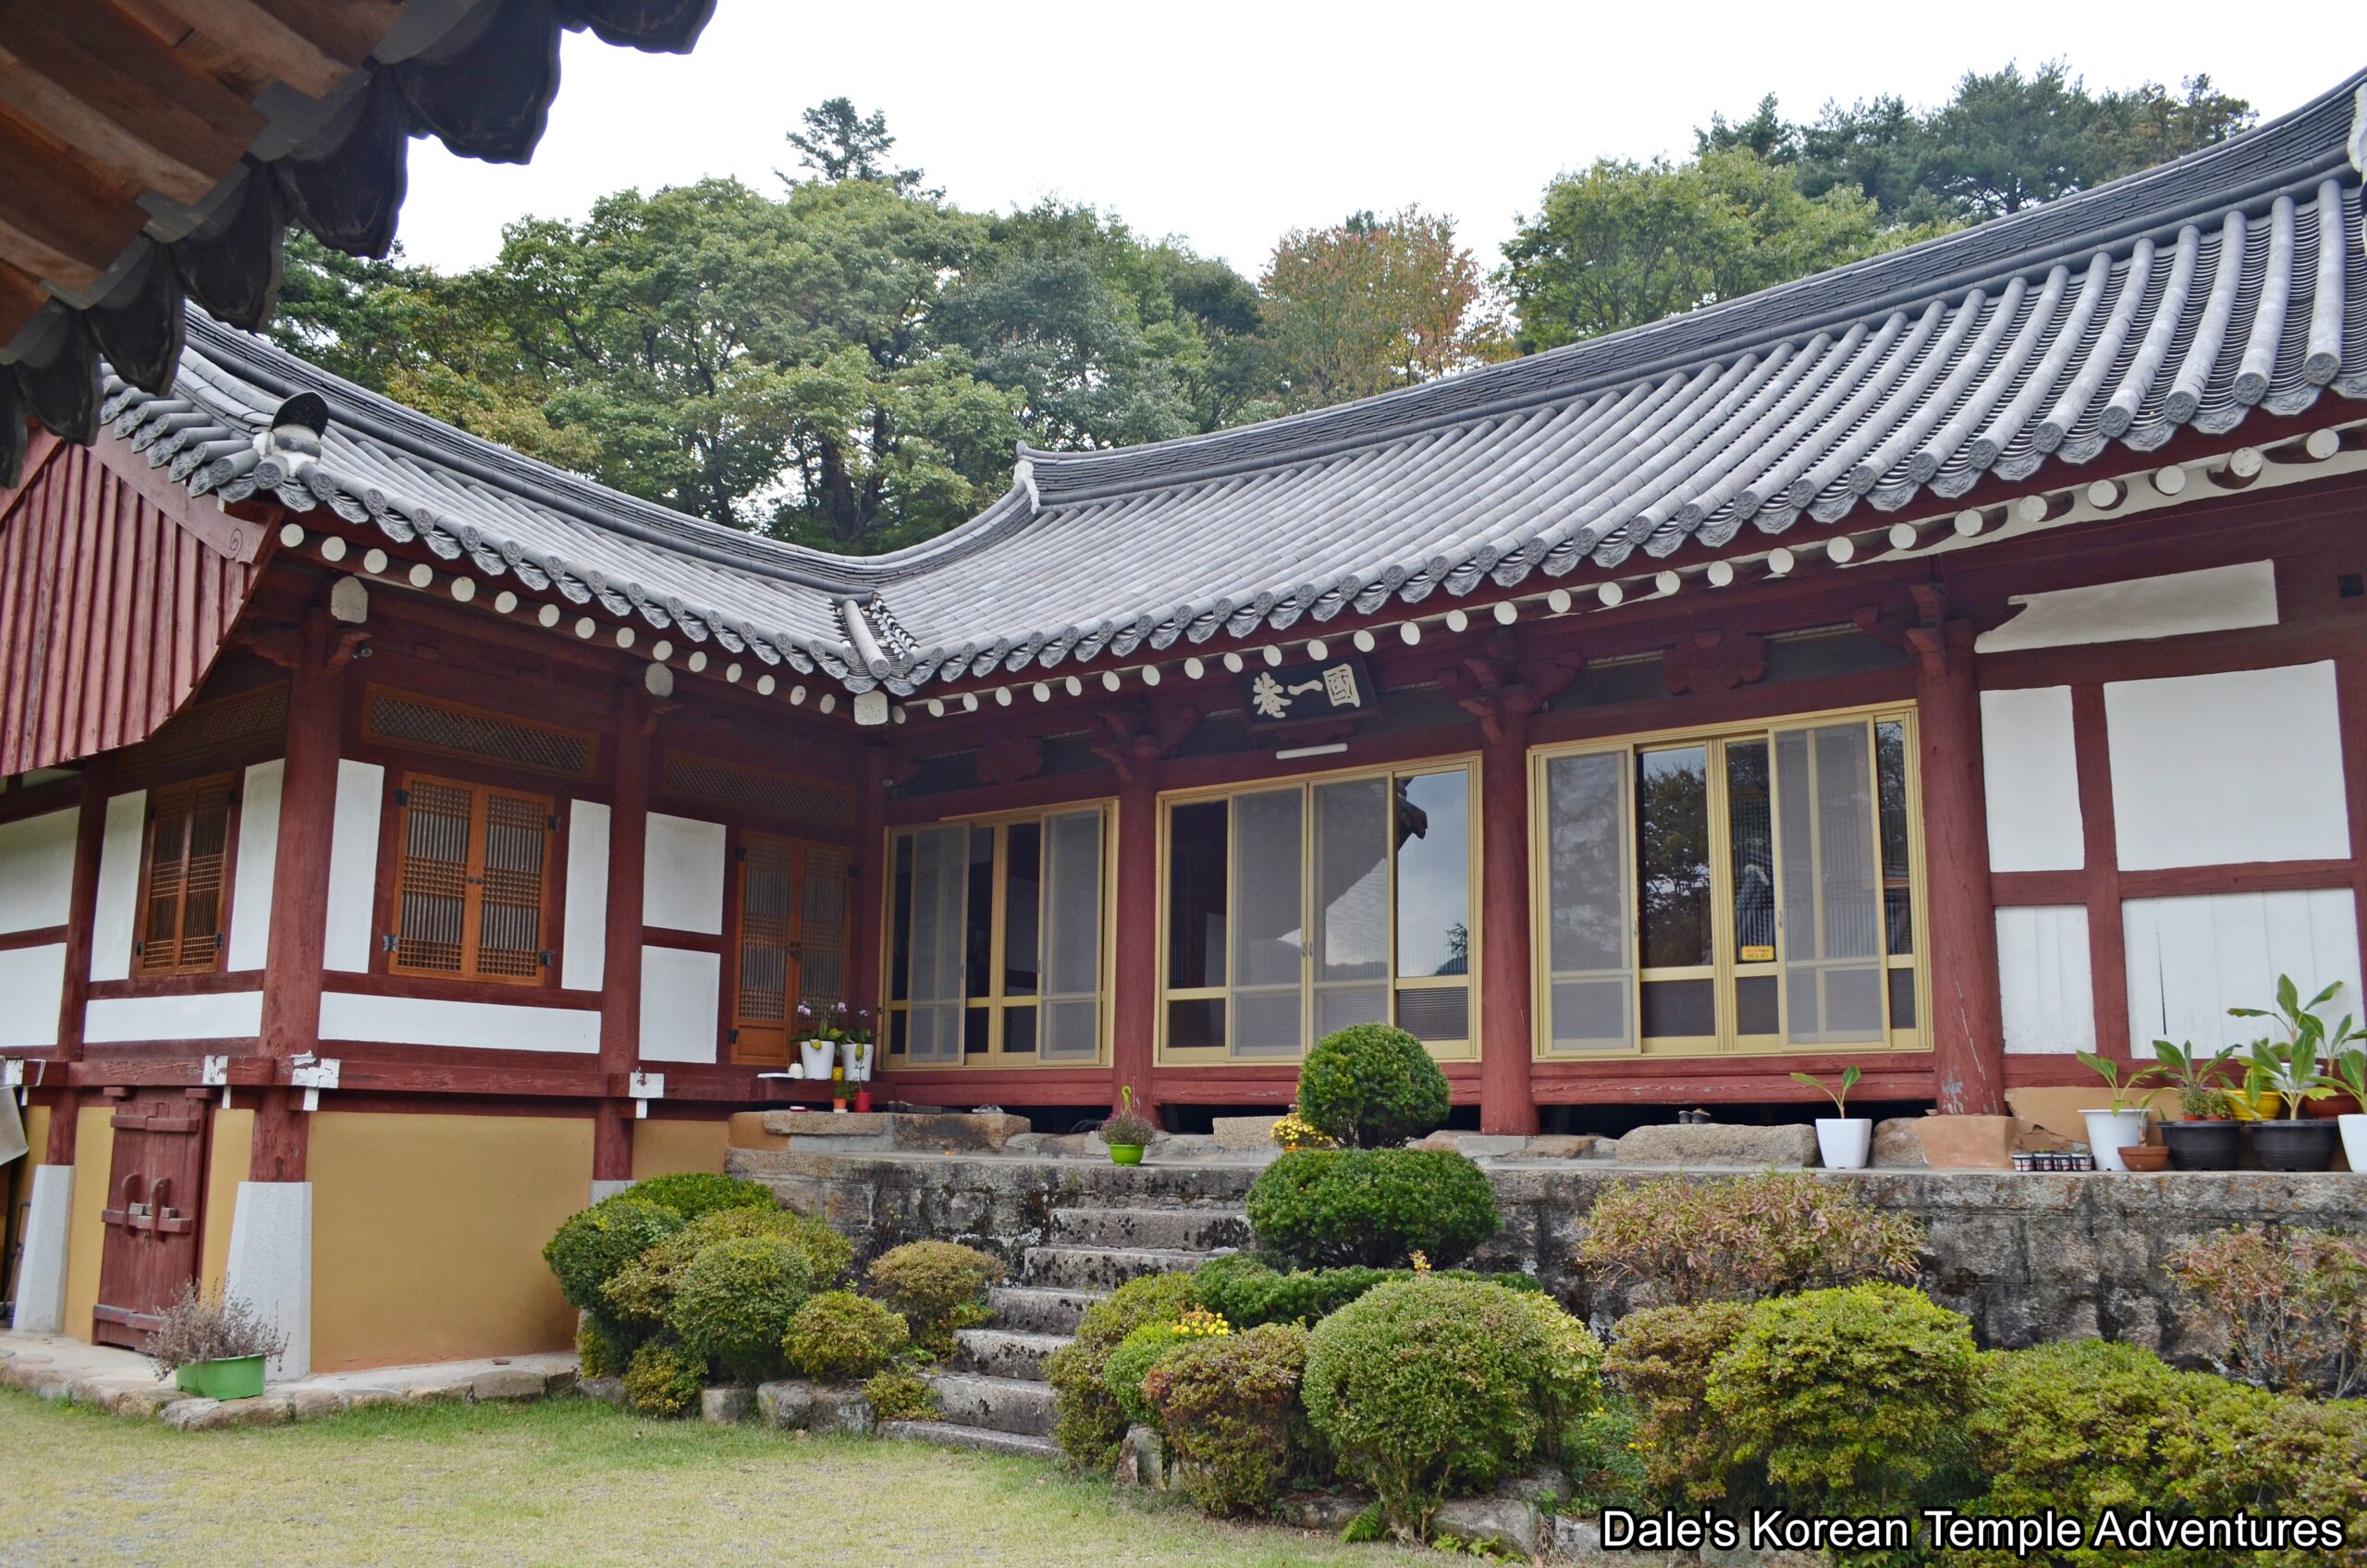
Gukilam Hermitage is undergoing a lot of renovations and construction lately. You’ll pass through a gate to the far right, which is part of a long building that also acts as dorms to the left. Entering into the outer courtyard, you’ll instantly notice what looks to be a newly built multi-purpose building. This L-shaped building acts as the administrative office, dorms, and kitchen to the hermitage. It was also in this area, and on the far right ledge of the building, that a basket of peppers was drying in the cool autumn air.
You’ll pass by two sites that are currently under construction on the far right side of the hermitage grounds. They appear to have once been nuns’ dorms; and perhaps in the not-too-distant future, they’ll be dorms, once more.
Between the building sites to the right and the newly constructed multi-purpose building to your left, you’ll enter into the outer courtyard at Gukilam Hermitage. In this part of the hermitage grounds, you’ll find the only shrine hall at Gukilam Hermitage. Like Yaksuam Hermitage and Bohyeonam Hermitage that are also on the Haeinsa Temple grounds, the main hall is well-hidden.
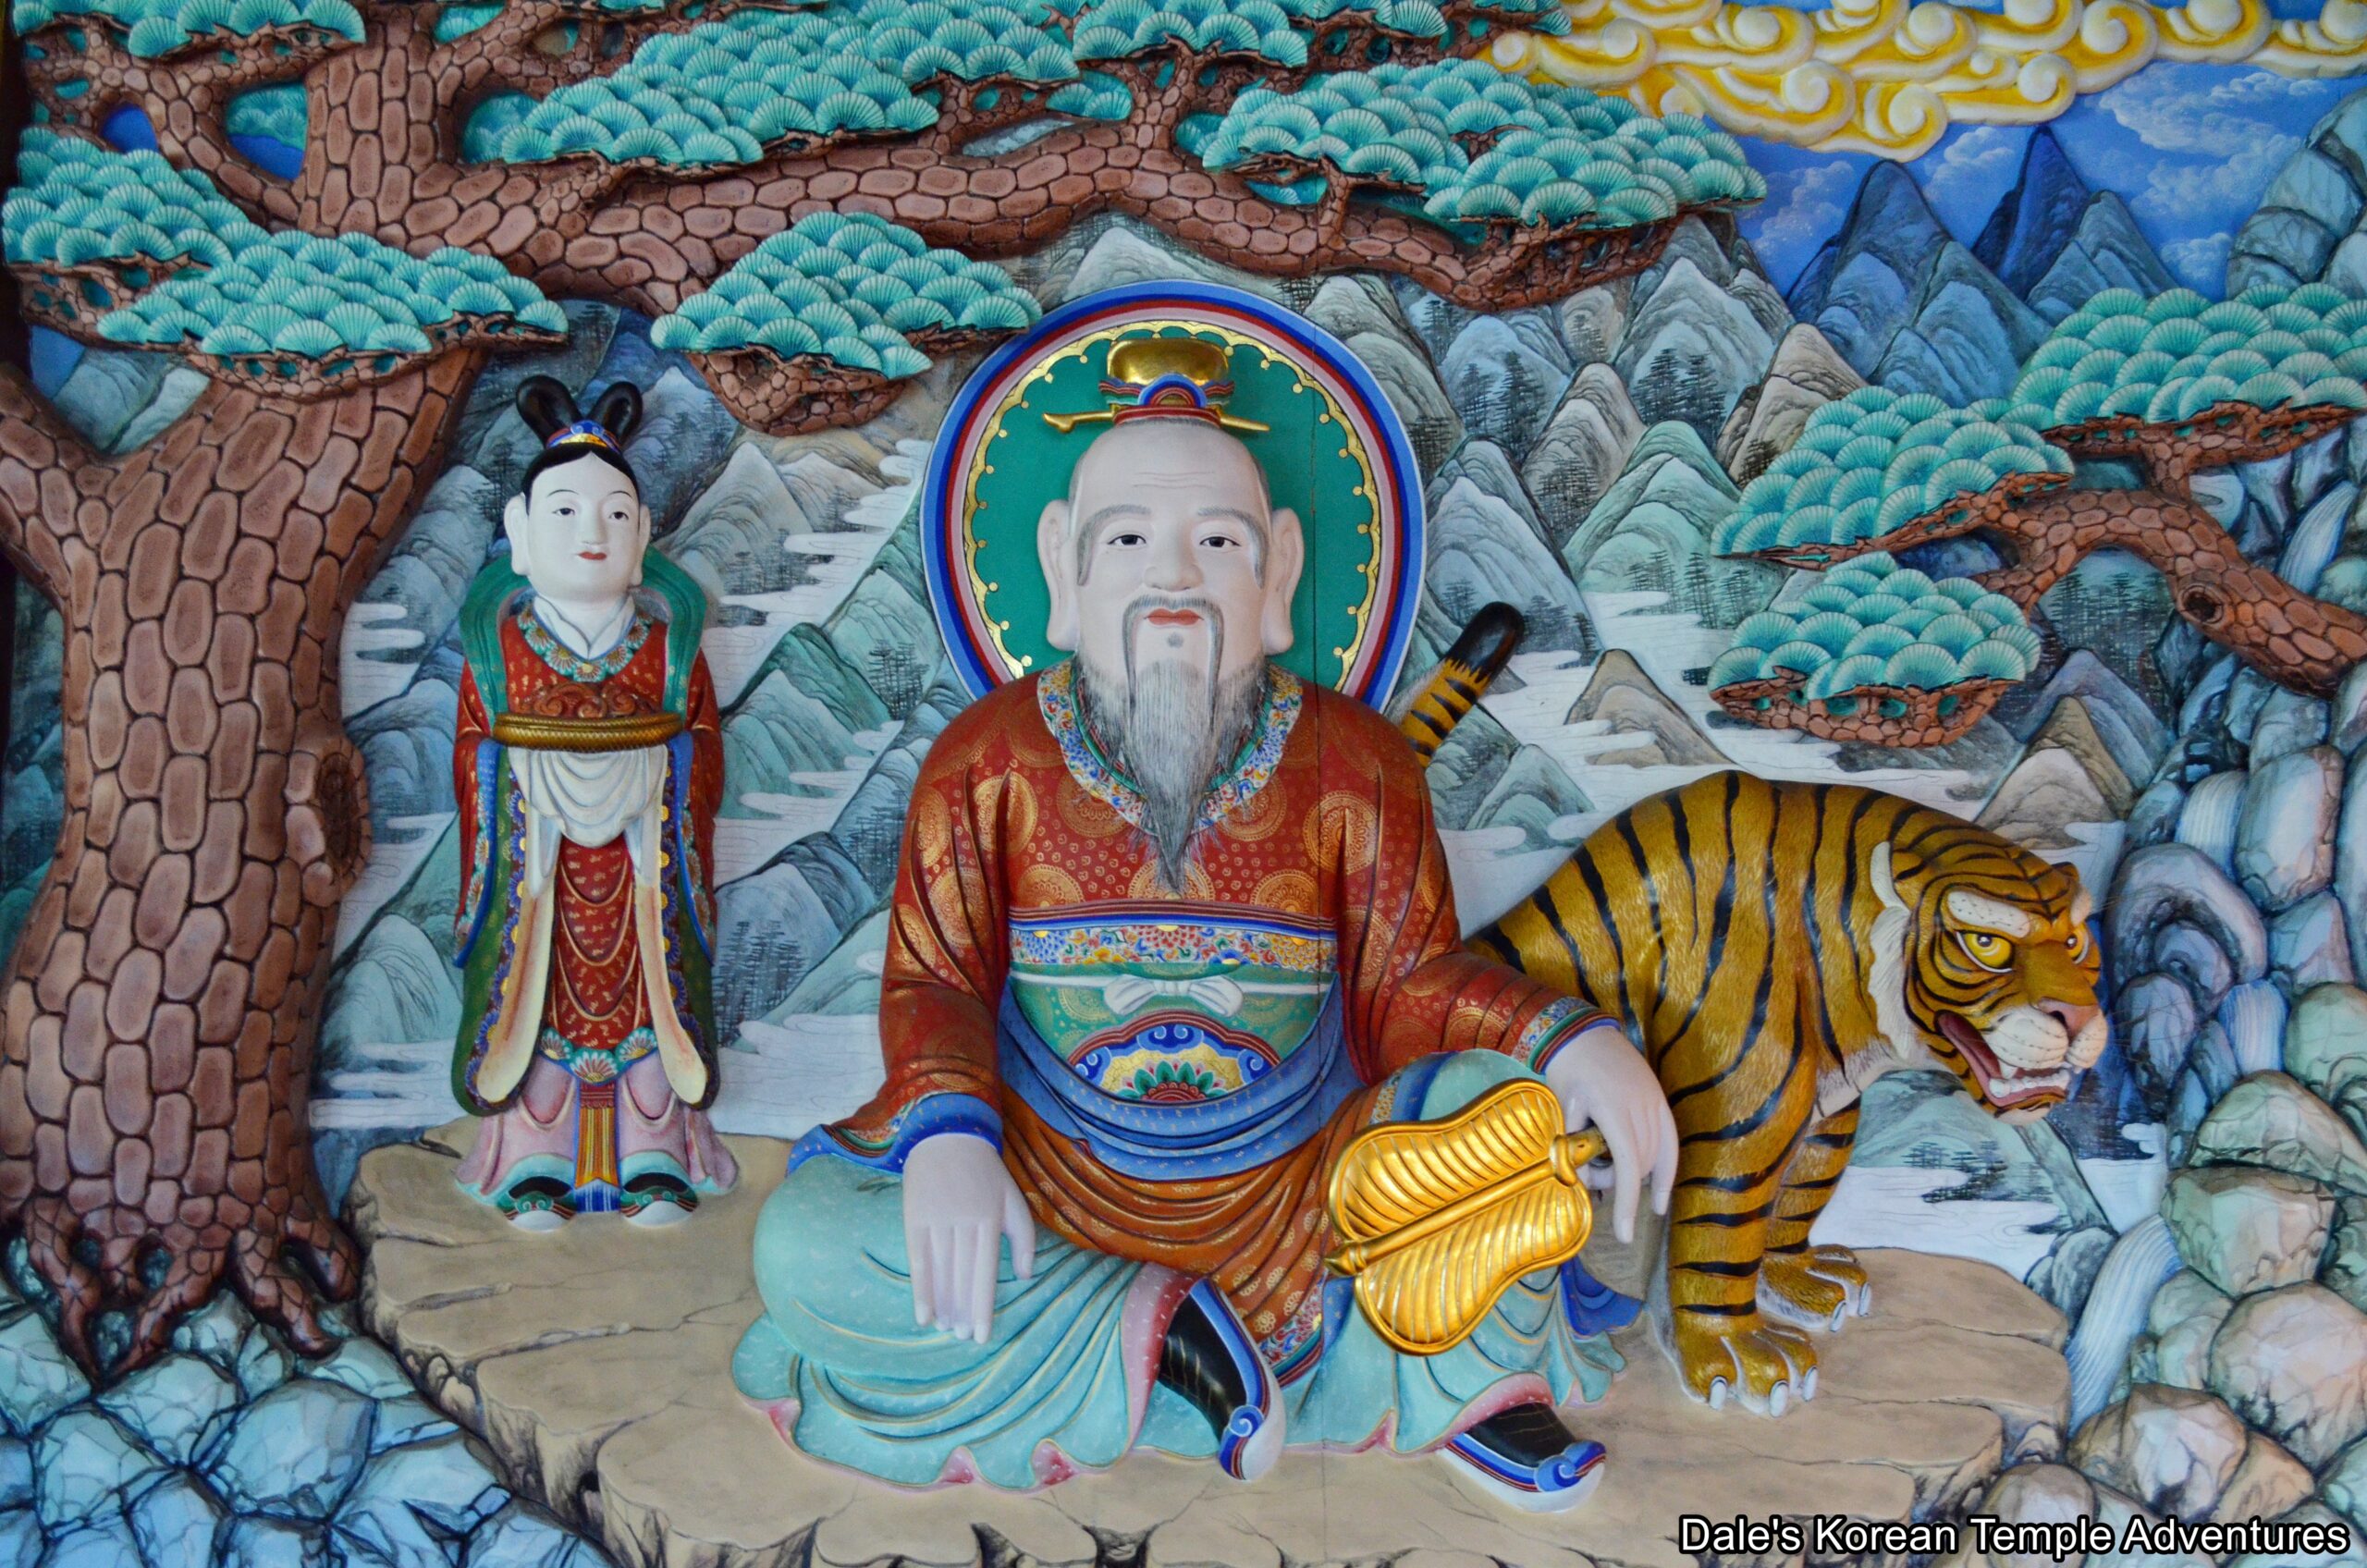
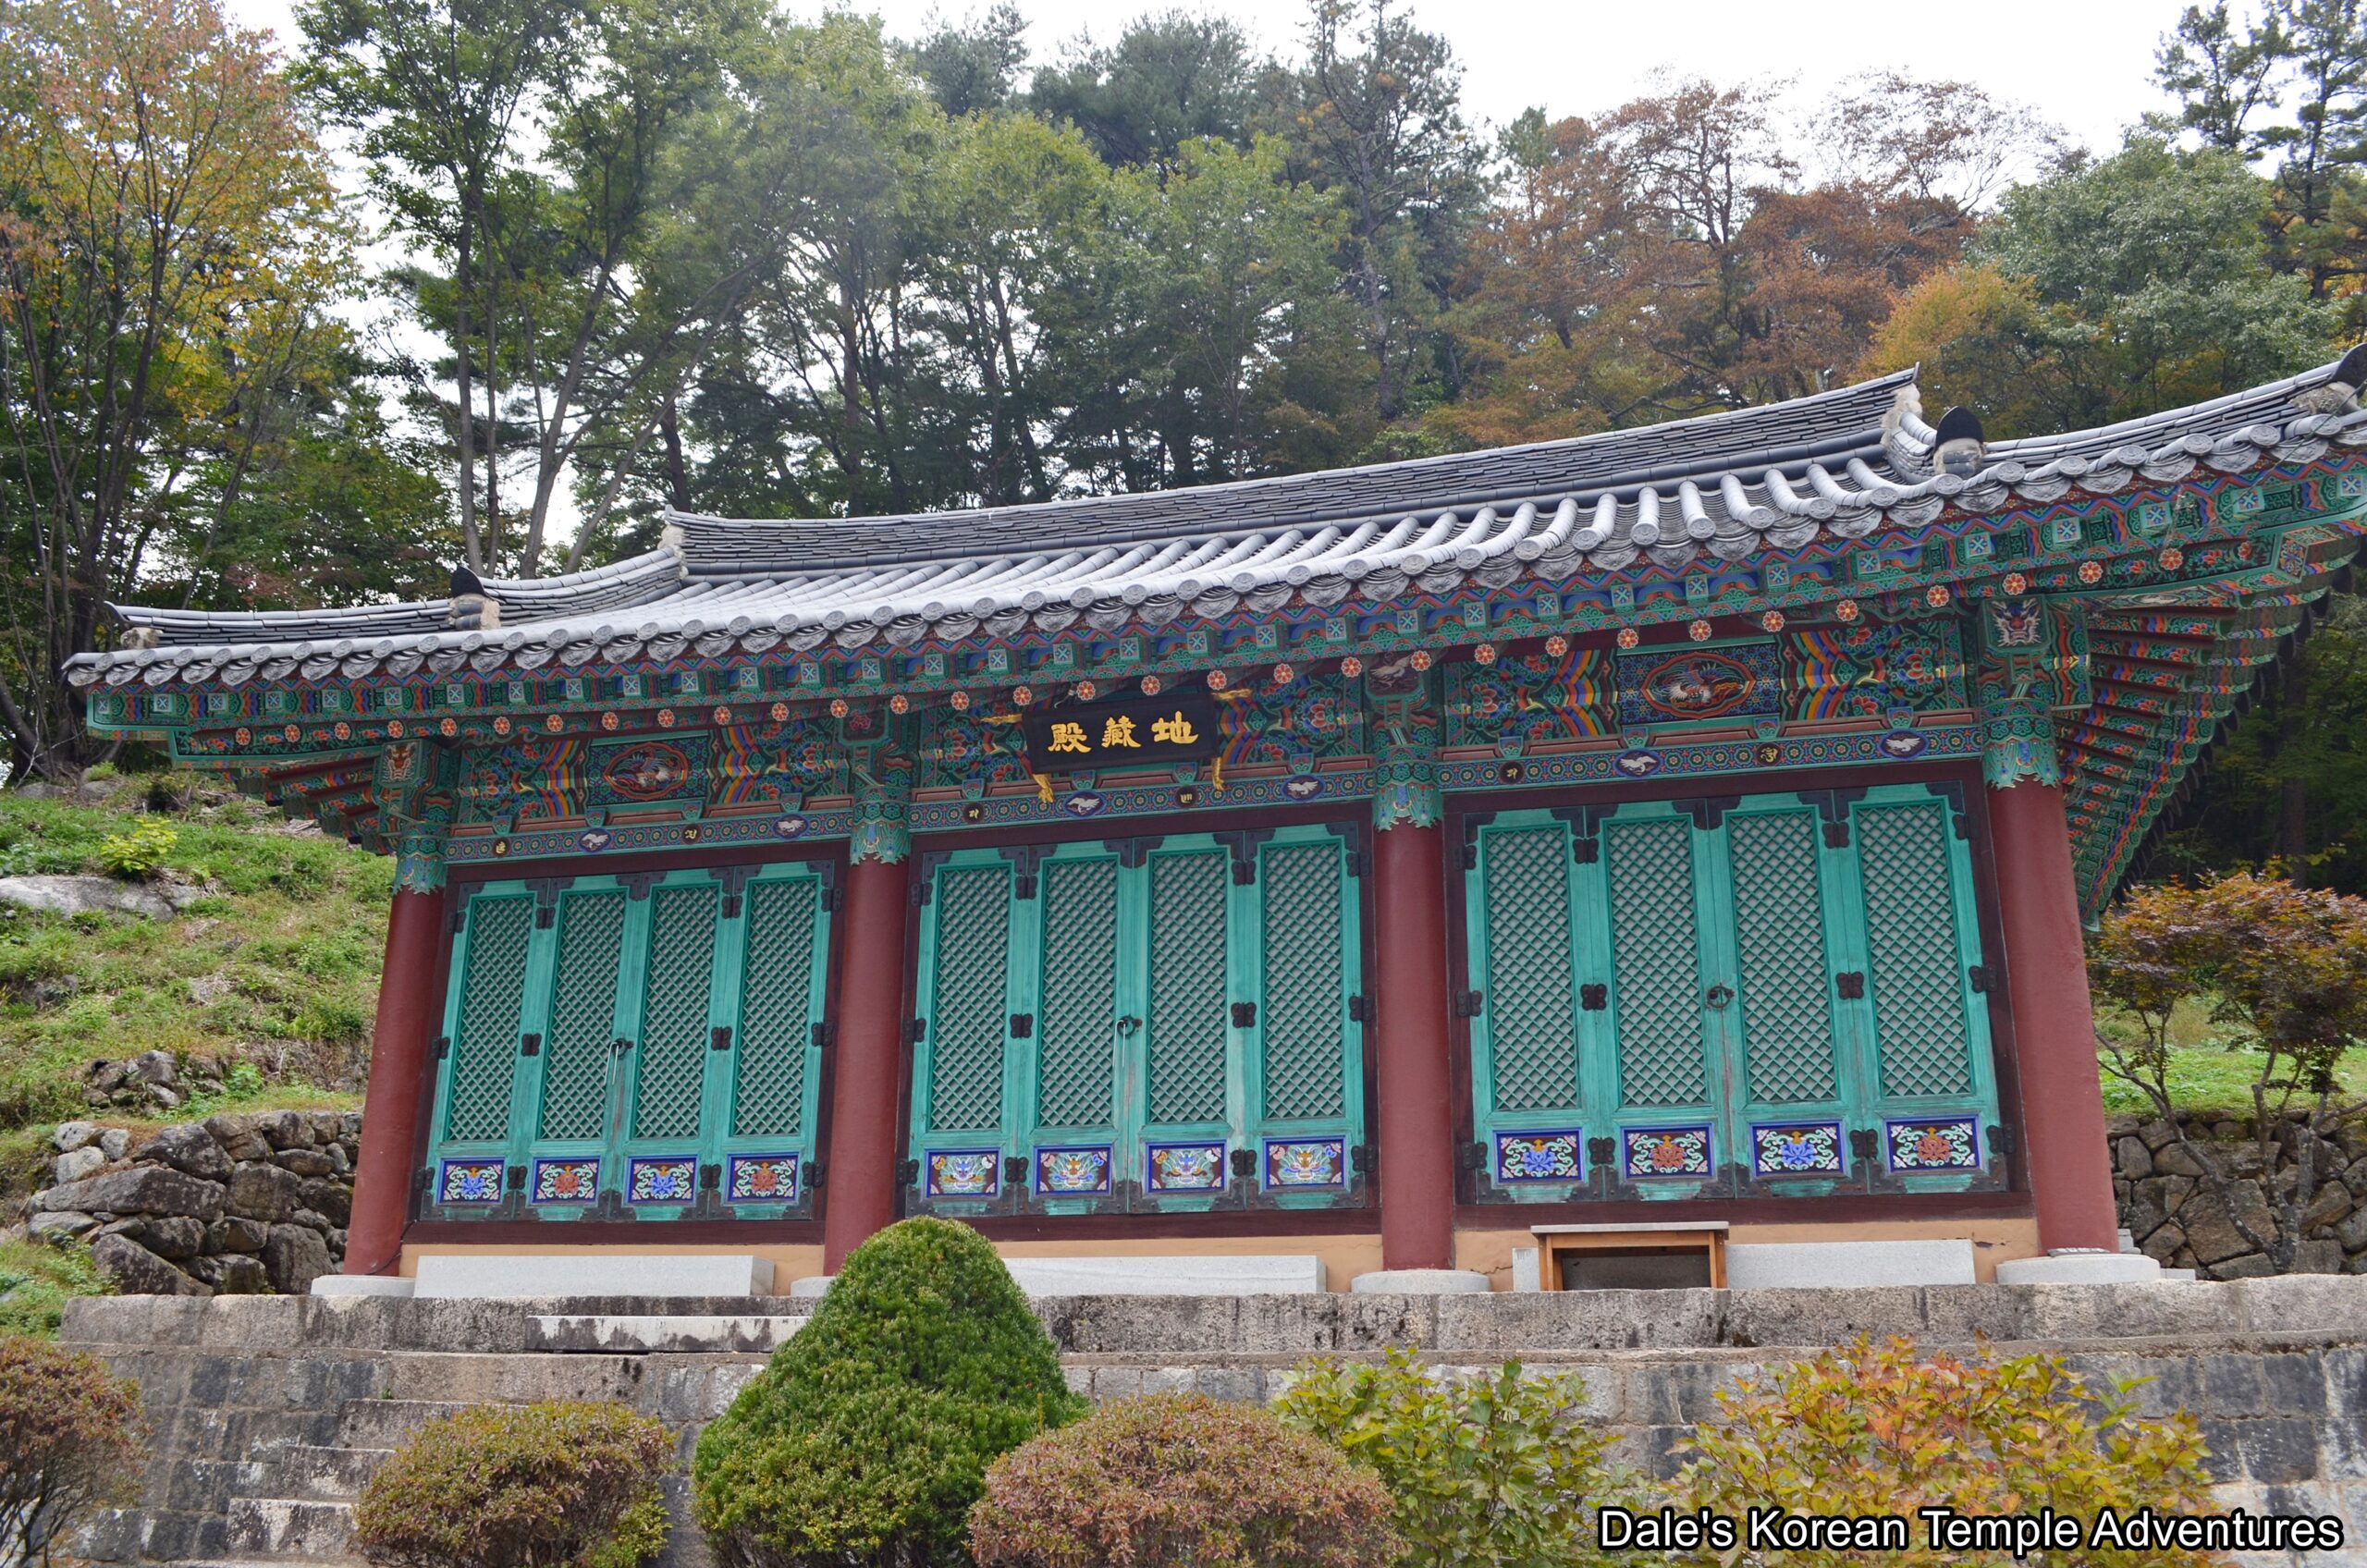
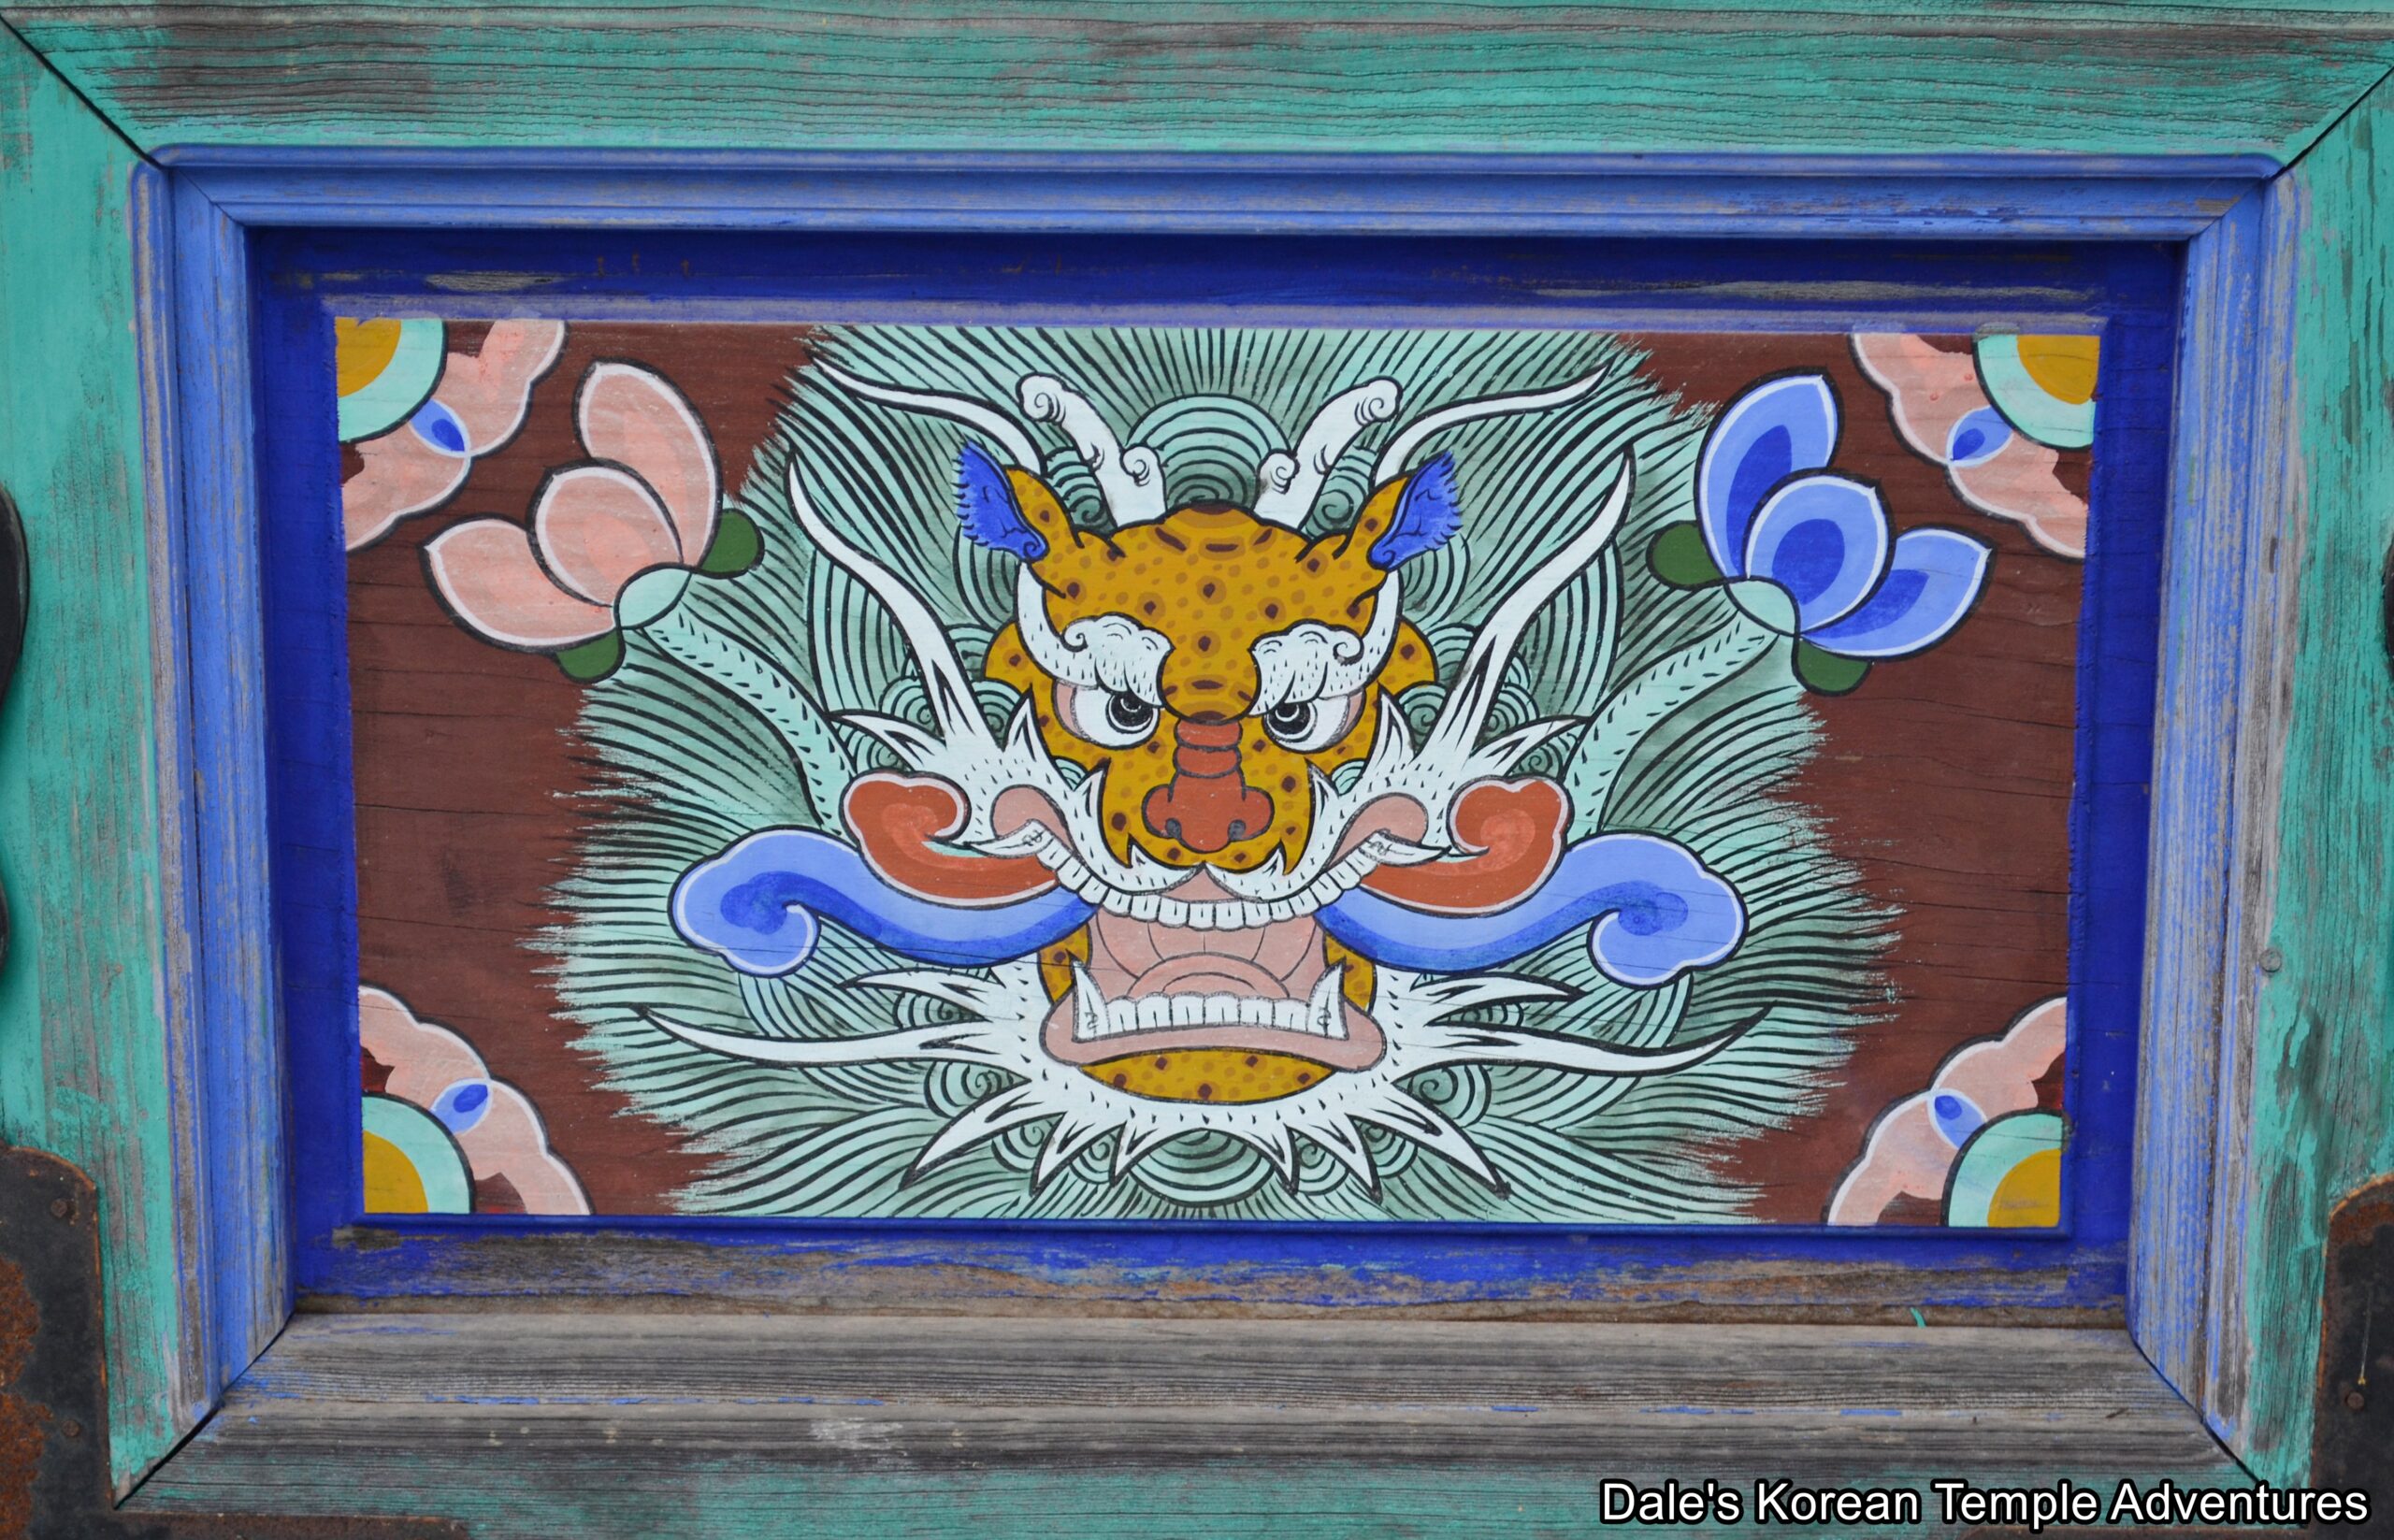
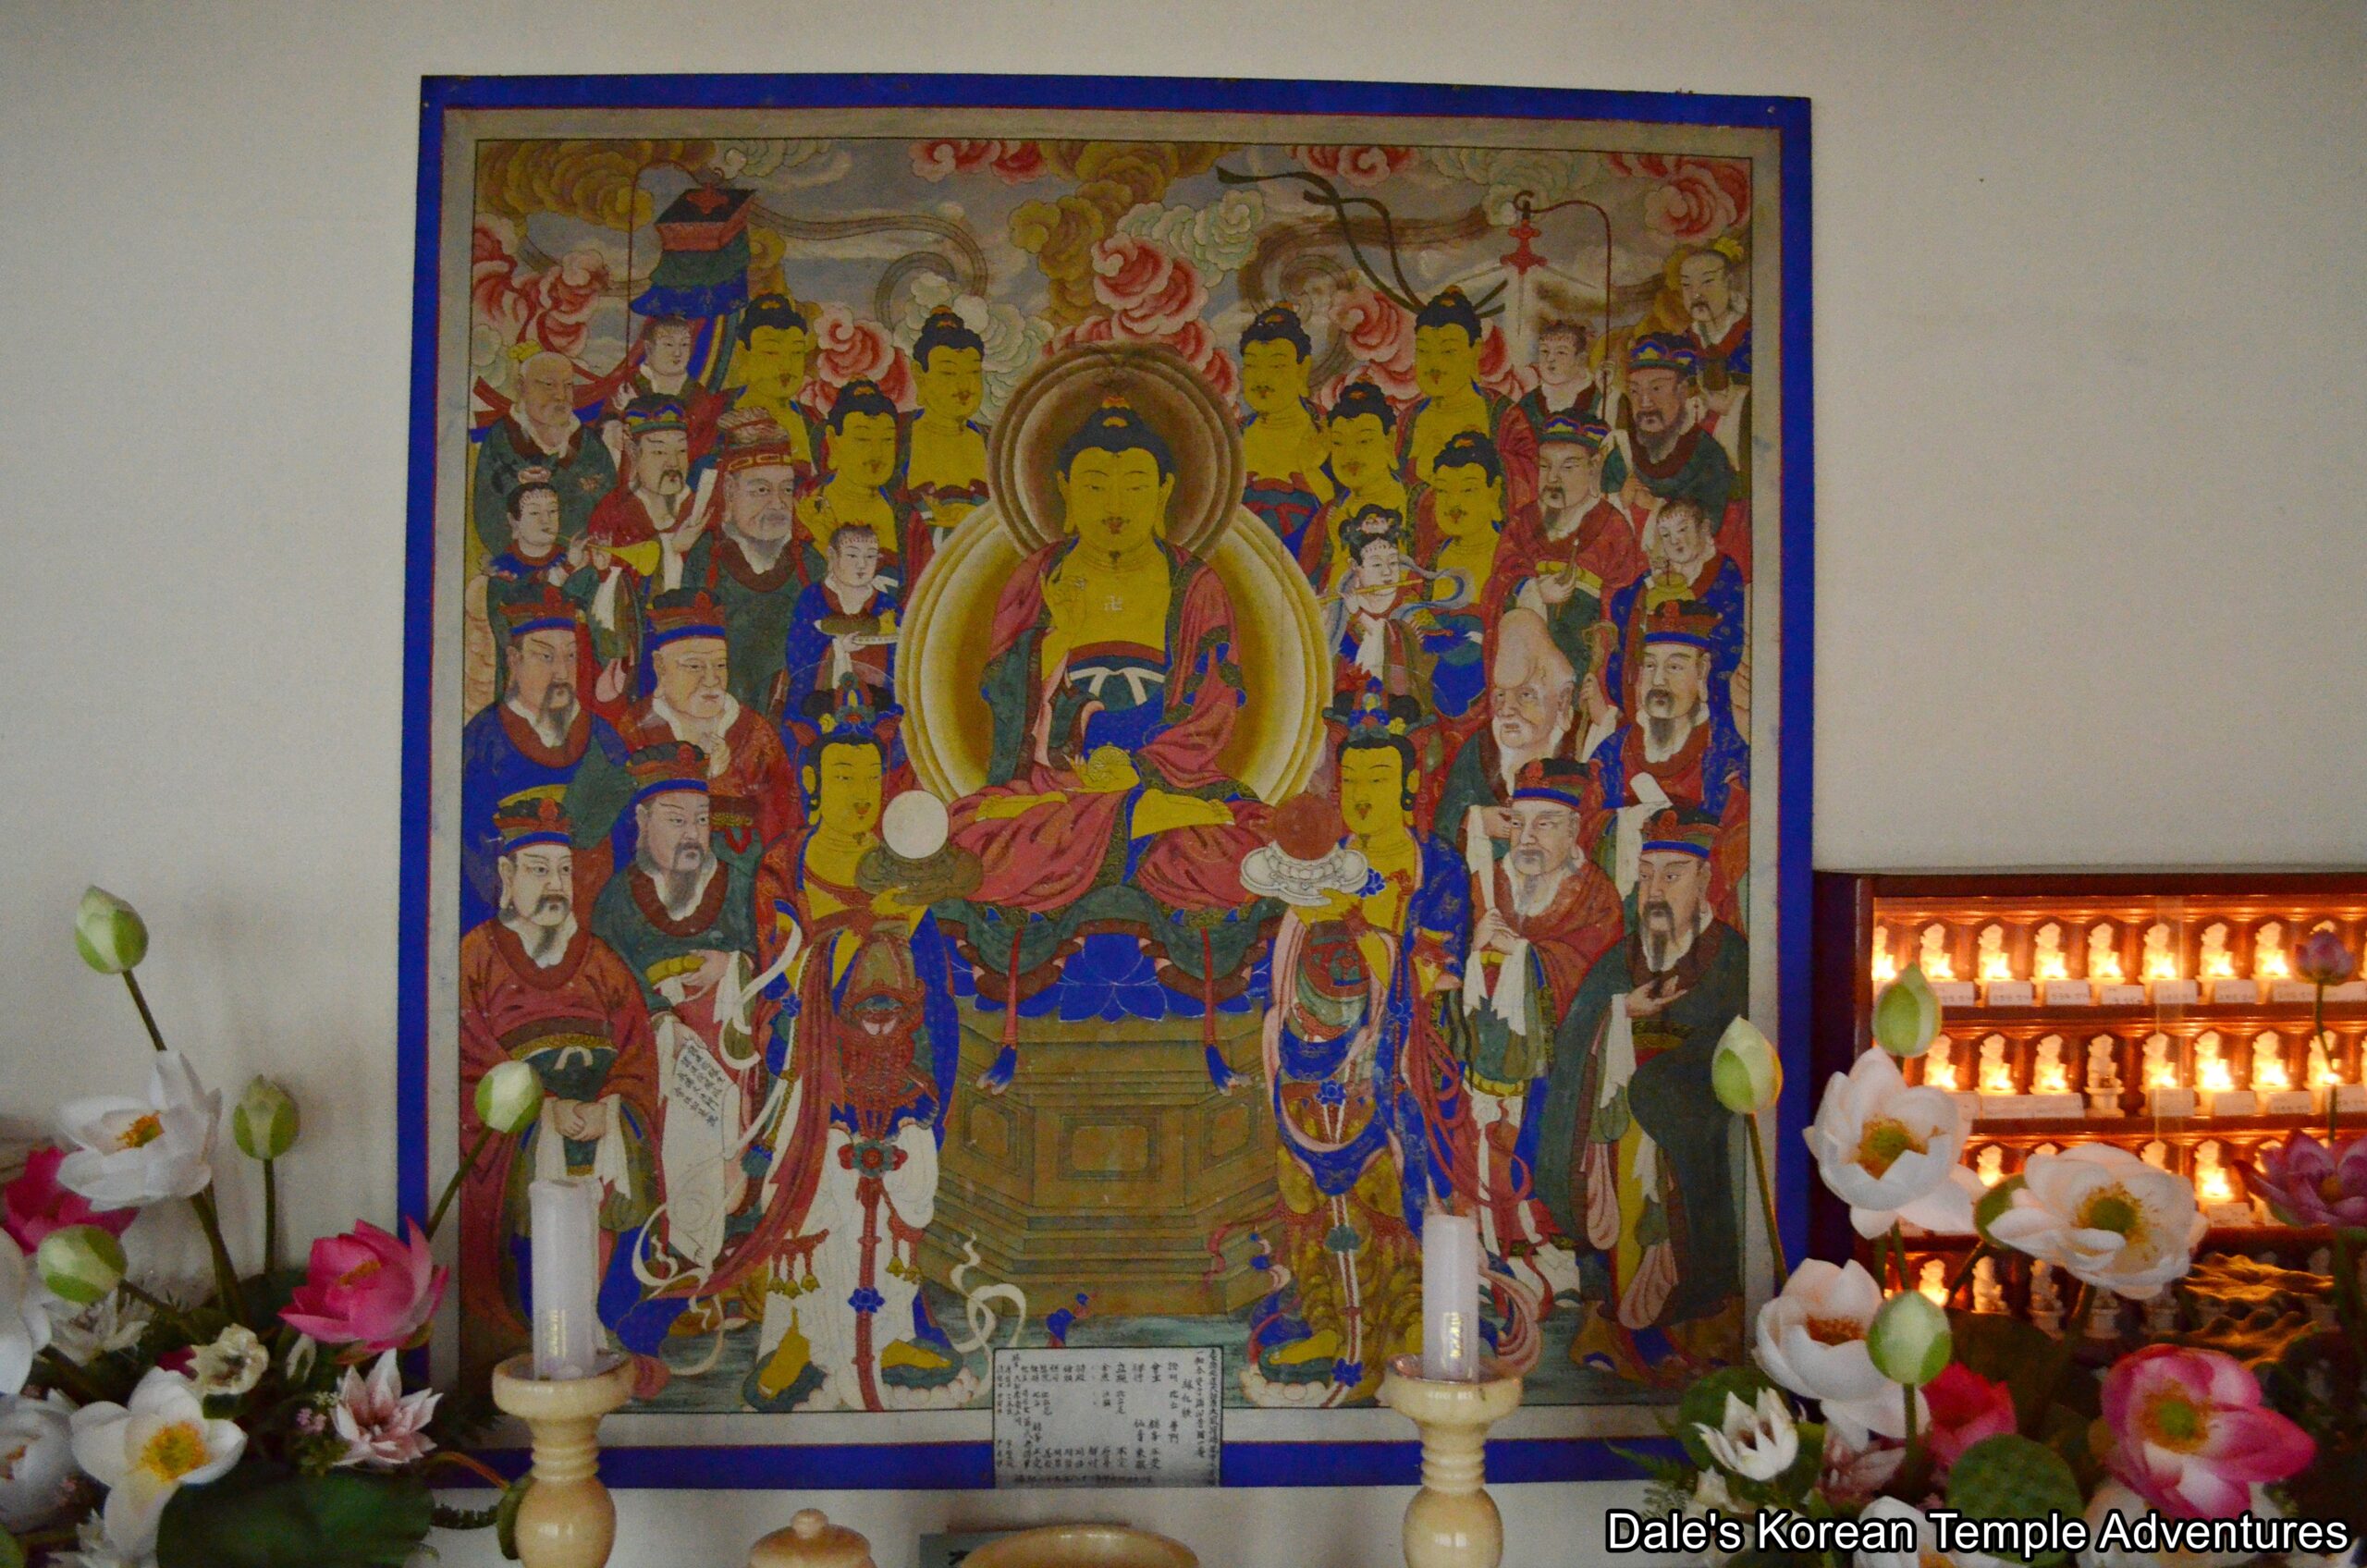
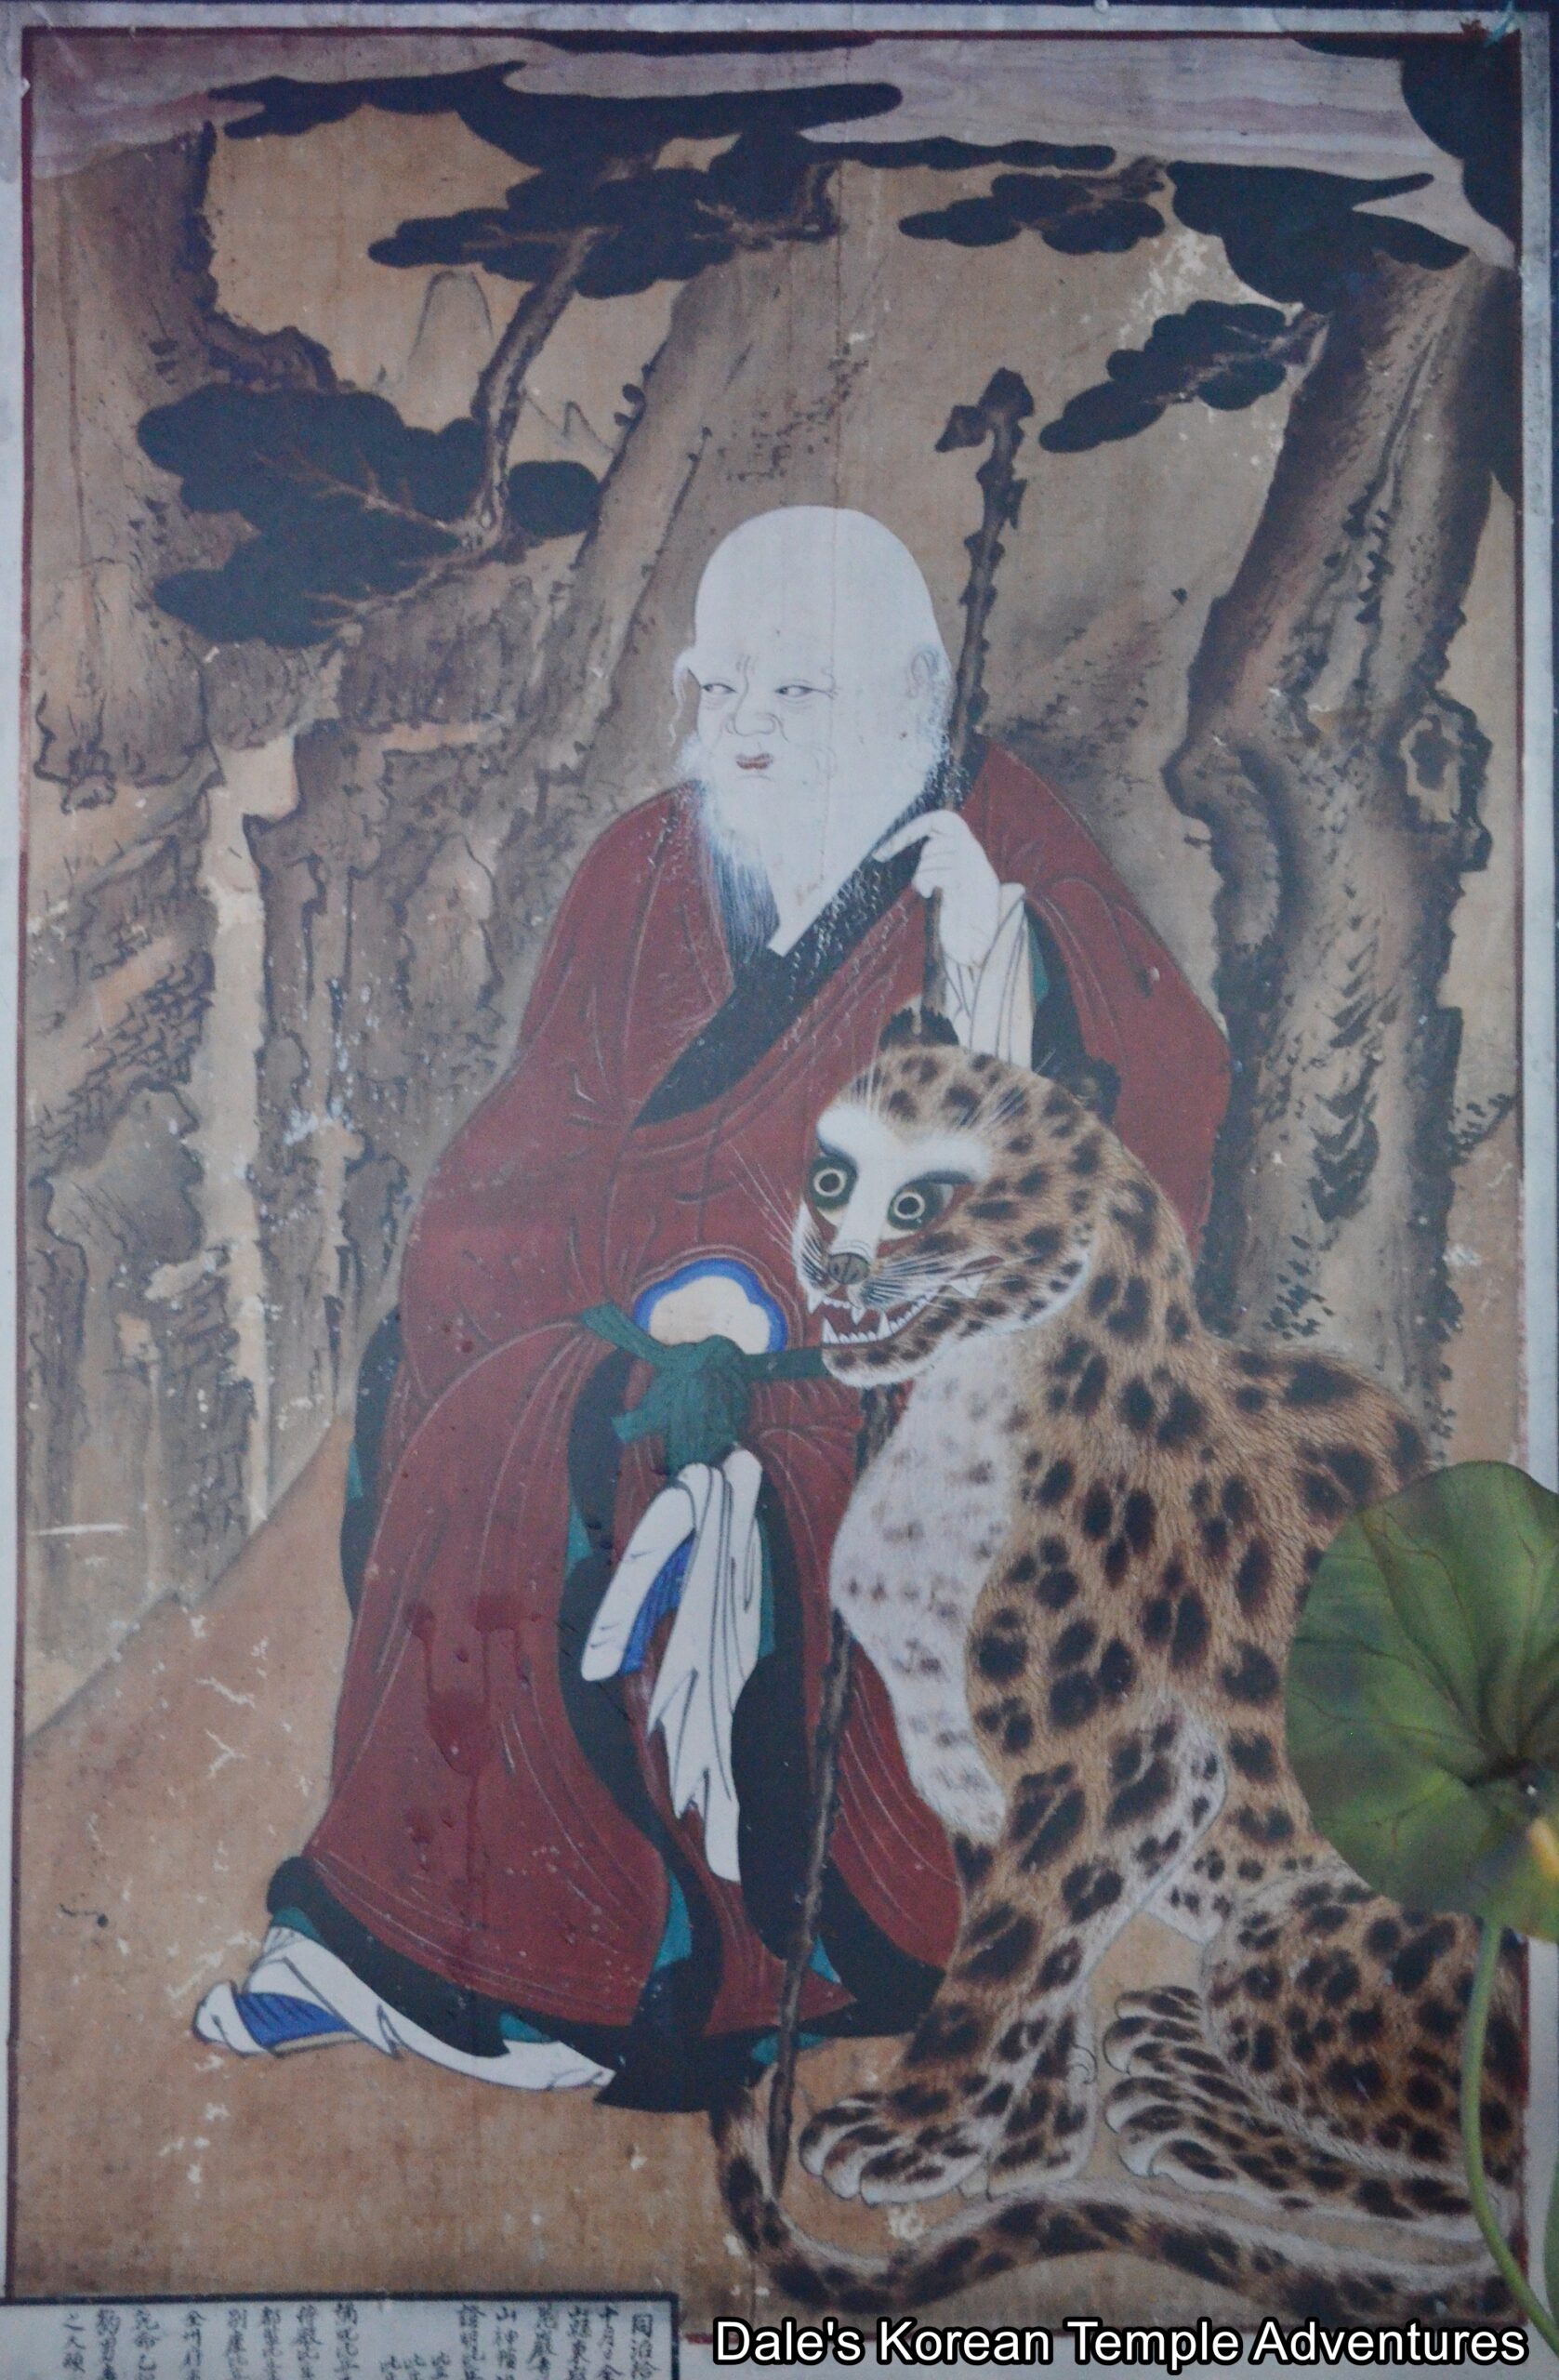
The main hall at Gukilam Hermitage appears to be a Myeongbu-jeon Hall. The exterior walls to this simplistic shrine hall are adorned with murals of the Sibiji-shin (The Twelve Spirit Generals). The plain green latticework at the front of the main hall are joined by whimsical Gwimyeon (Monster Mask) murals at the base of the front doors. Stepping inside the Myeongbu-jeon Hall, and hanging on the far right wall as you enter, you’ll notice the historic Shinjung Taenghwa. As for the main altar, you’ll find a solitary image of Jijang-bosal (The Bodhisattva of the Afterlife) inside a glass enclosure. And joining this main altar statue of Jijang-bosal to the left and right are a pair of paintings dedicated to Chilseong (The Seven Stars) and Sanshin (The Mountain Spirit). The image of Sanshin almost appears to be a conflation of Sanshin and Dokseong (The Lonely Saint) into one individual image. And joining this hybrid image of Sanshin is a leopard-like tiger that stares off into the distance with its black, gold, and green eyes.
How To Get There
To get to Gukilam Hermitage, you’ll first need to get to Haeinsa Temple. And to get to Haeinsa Temple, you’ll first need to get to the Seobu Bus Terminal in Daegu. From here, you can catch an express bus to Haeinsa Temple. This express bus departs every 40 minutes, and the bus ride lasts about an hour and a half. After arriving at Haeinsa Temple, you’ll need to head south from the Iljumun Gate. You’ll pass by a collection of biseok (stele) and budo (stupa) There is a mountain road with a large rock and sign markers that point you towards the four hermitages in this area of the Haeinsa Temple grounds. The first hermitage along the way is Gukilam Hermitage. From the Iljumun Gate to the hermitage, it’s about 500 metres. In total, and depending on how fast you walk, it should take 10 to 15 minutes to get to Gukilam Hermitage.
Overall Rating: 2/10
There wasn’t a lot to see or experience at Gukilam Hermitage before the construction on the hermitage grounds, and there is even less to see now. With that being said, Gukilam Hermitage is mostly for diehard temple adventurers that might want to see all of the hermitages on the Haeinsa Temple grounds. Outside of wanting to see all of these hermitages, the highlights at Gukilam Hermitage are the murals of the zodiac generals that adorn the exterior walls of the main hall, the historic Shinjung Taenghwa, and the older Sanshin (Mountain Spirit) mural inside the main hall.
As you first enter the outer courtyard at Gukilam Hermitage.
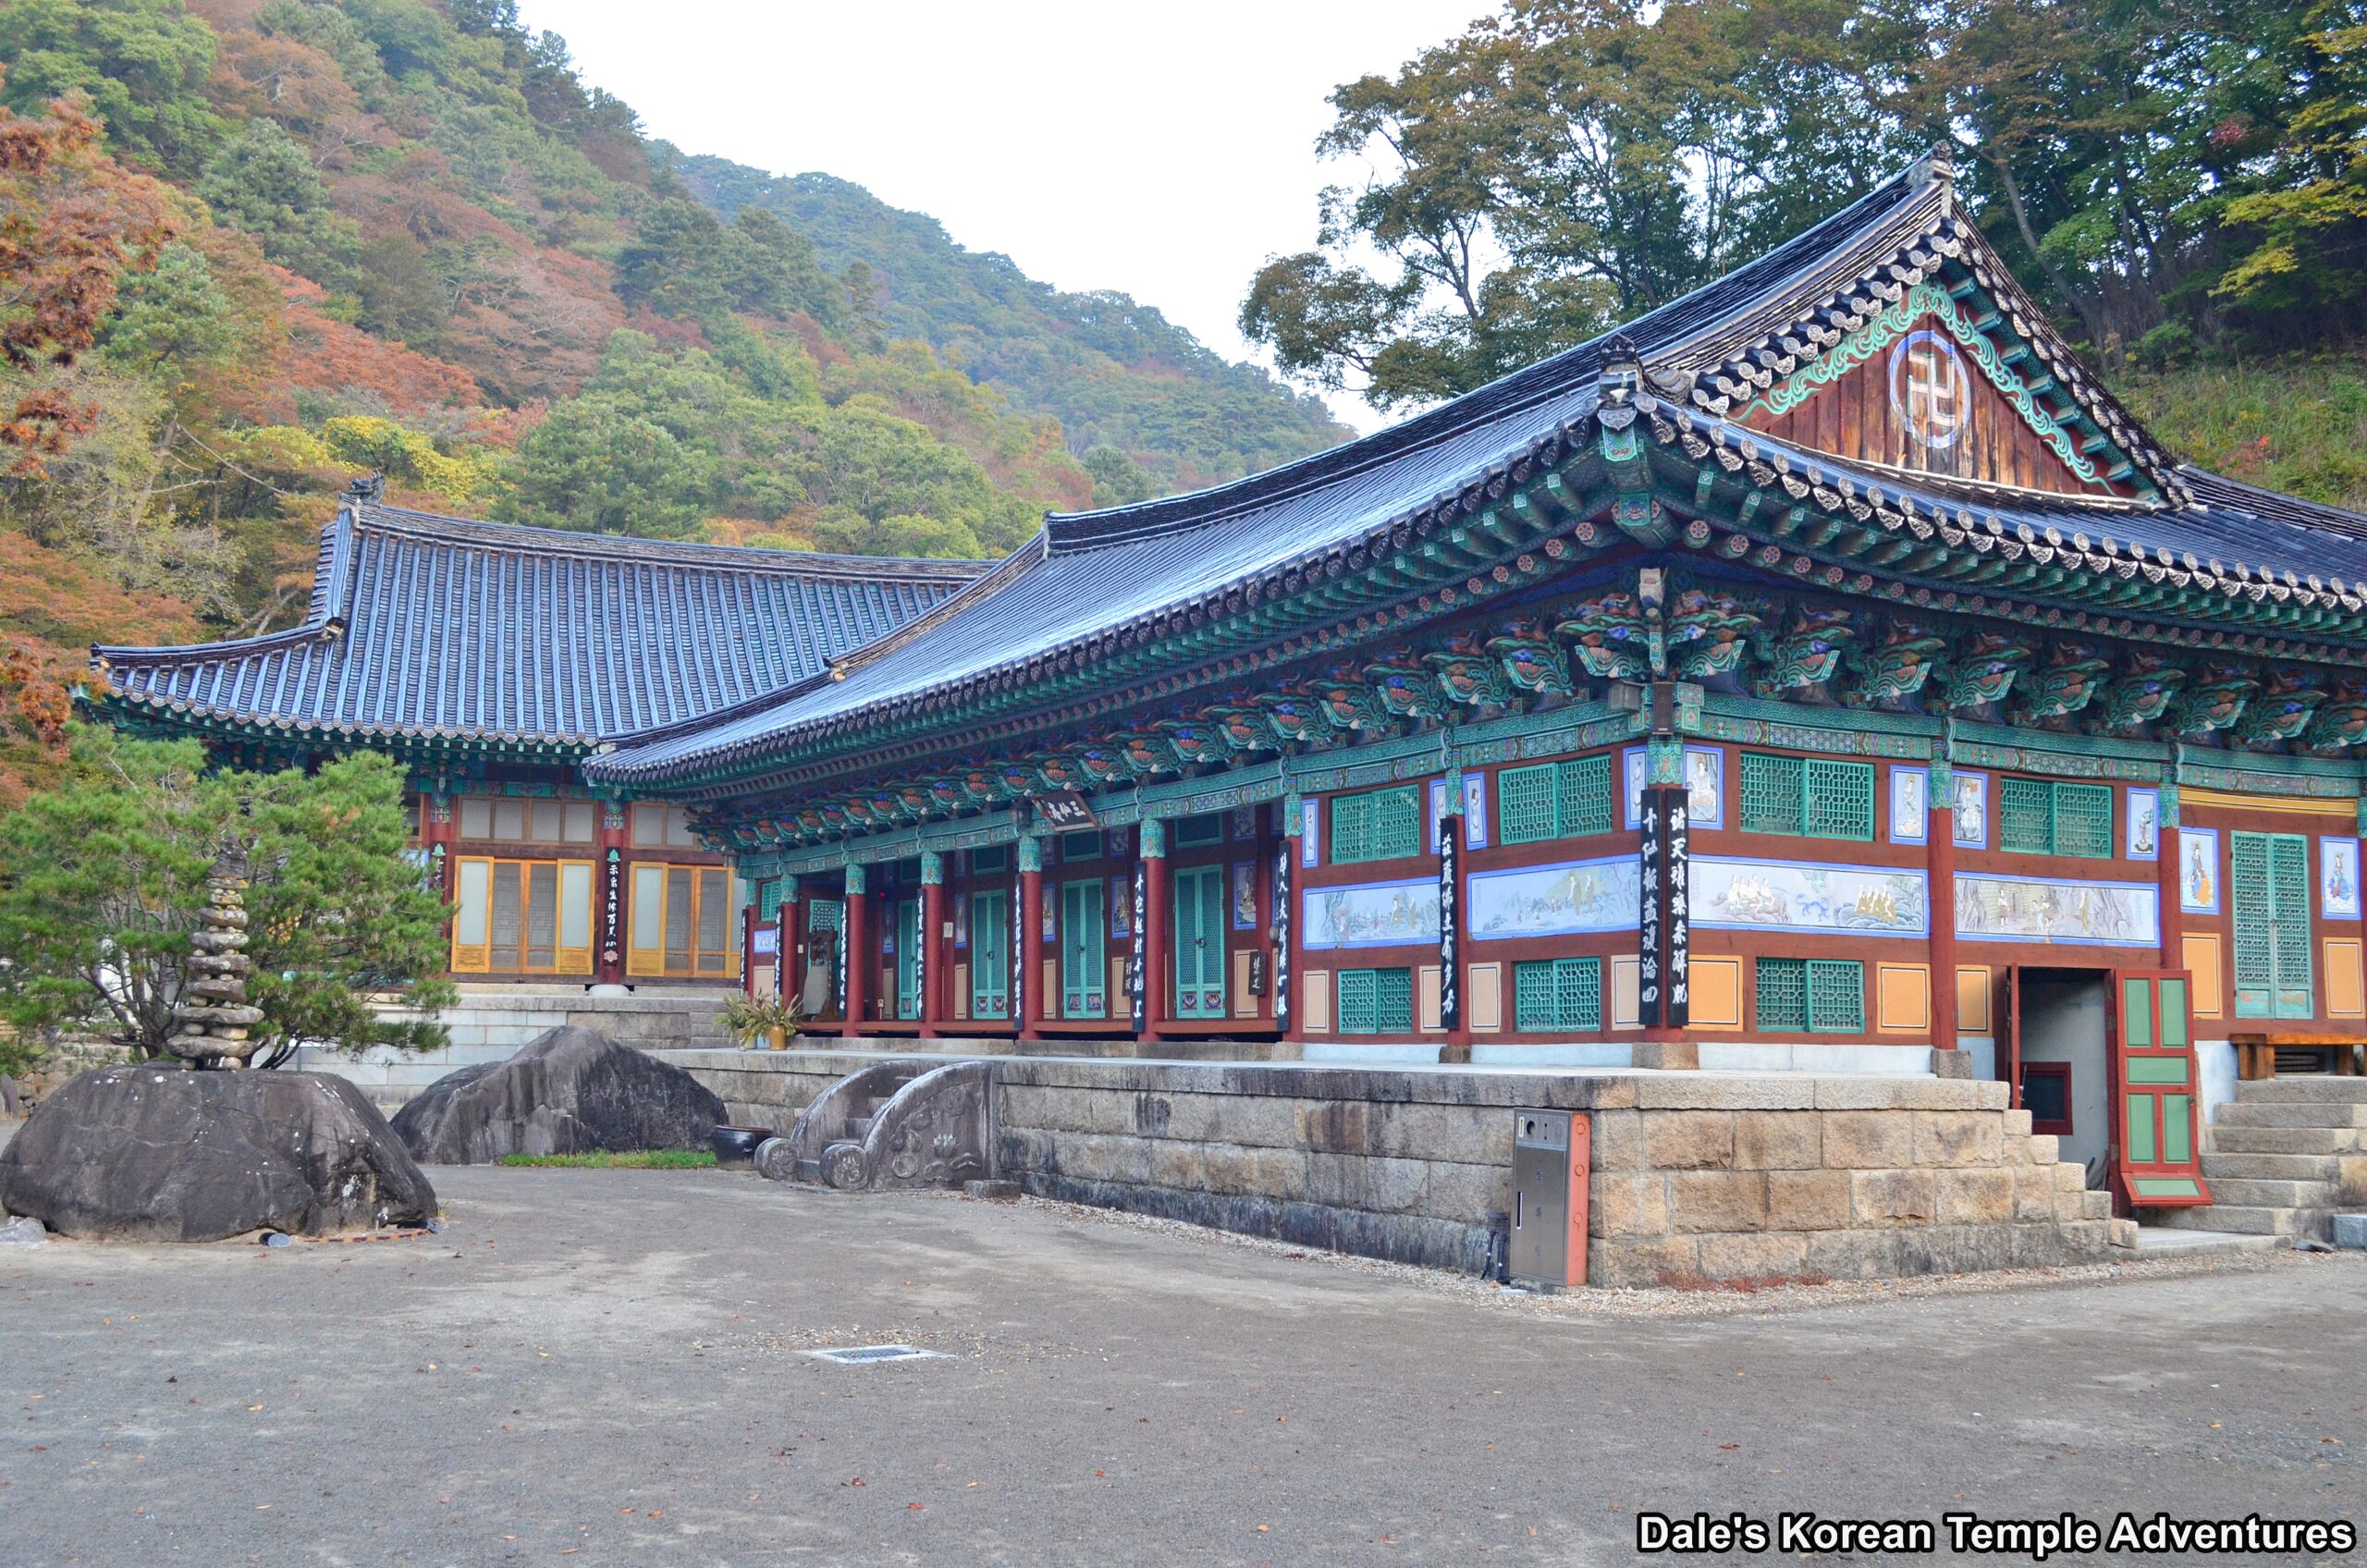
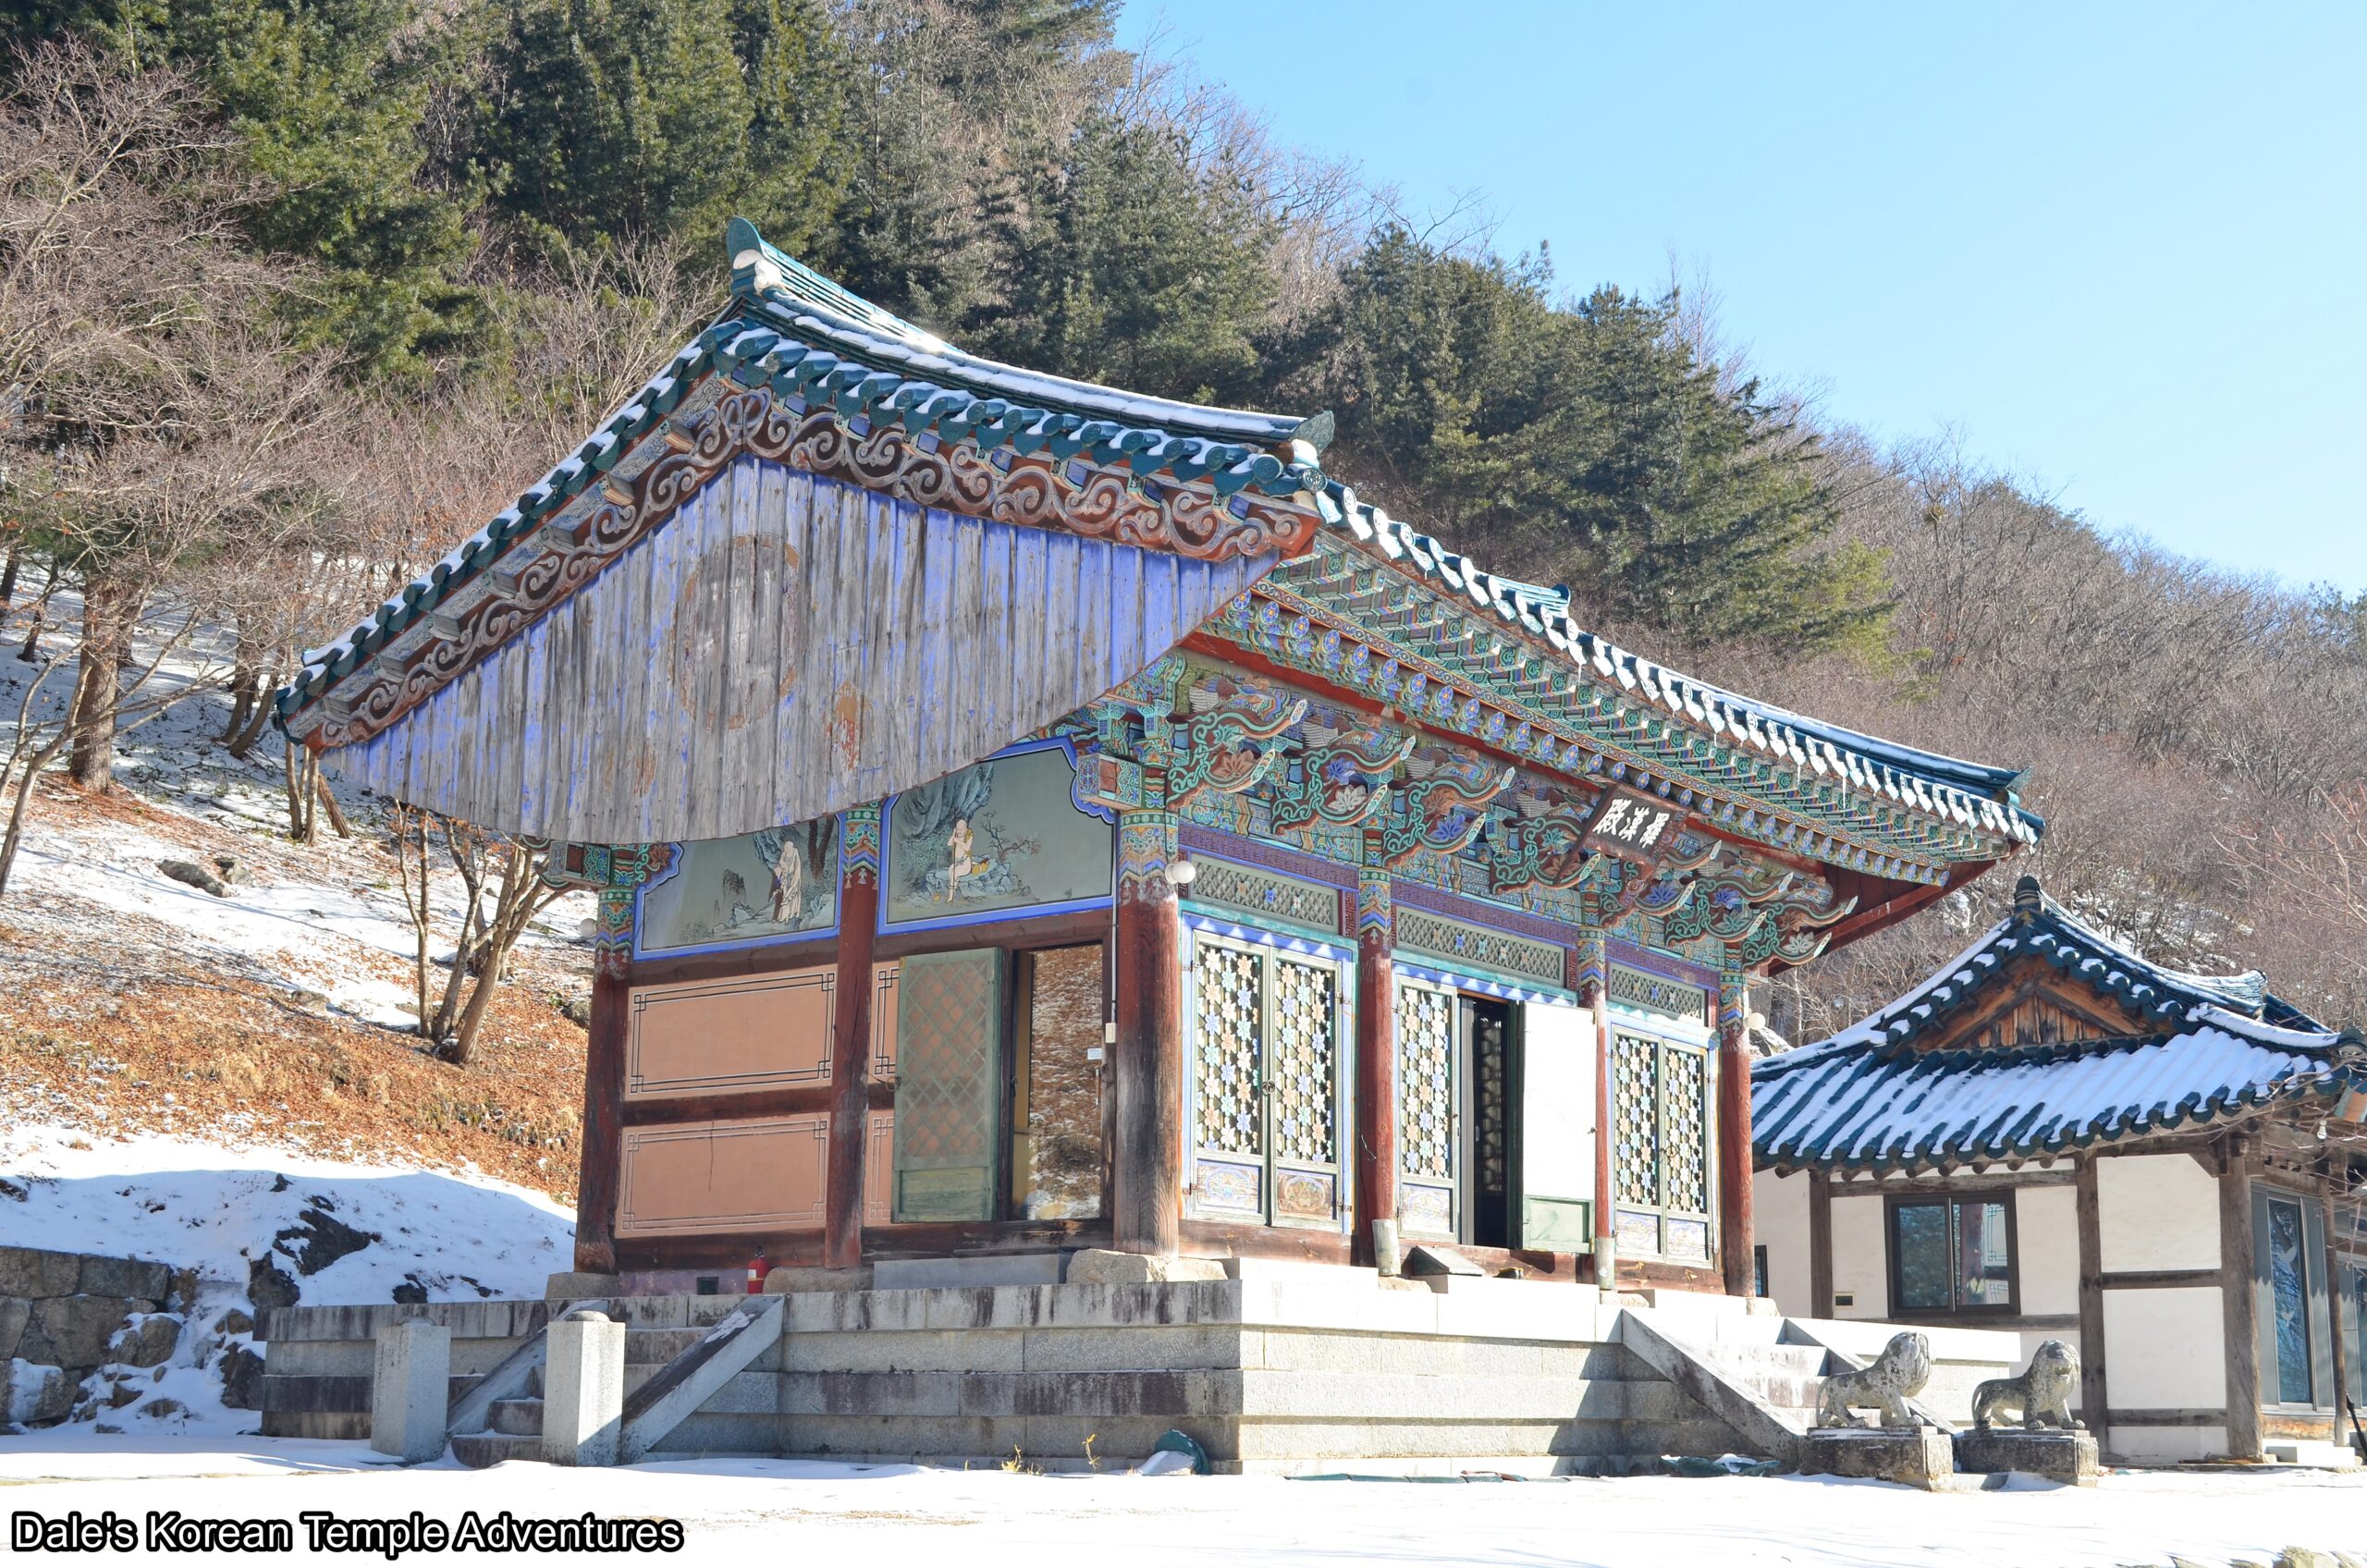
The main hall to the rear of the hermitage grounds.
One of the Gwimyeon (Monster Masks) that adorns the front doors of the Myeongbu-jeon Hall.
The View from the Samseong-gak Hall at Samseonam Hermitage on the Haeinsa Temple Grounds in Hapcheon, Gyeongsangnam-do.
Hermitage History
Samseonam Hermitage is located on the Haeinsa Temple grounds in the foothills of Mt. Gayasan (1,433 m) in Hapcheon, Gyeongsangnam-do. Samseonam Hermitage was first founded by the monk Jahong in 1893. It was later rebuilt in 1904 by two monks, Bochan and Jijong. The hermitage was rebuilt, once more, in 1971. Currently, Samseonam Hermitage is a nunnery (bikuni) meditation centre.
Hermitage Layout
From the hermitage parking lot, you’ll make your way towards a collection of buildings including a storage building to your left. Eventually you’ll pass through an entryway with a signboard that reads “Banya-seonwon – 반야선원 (般若禪院)” on it. To the right of this entryway are a row of nuns’ dorms. The ceiling of the entryway is adorned with beautiful lotus flower paintings, as well as vibrant painted guardians on the walls.
Having passed through the hermitage entryway, you’ll now be standing in the main hermitage courtyard. Straight ahead of you is a impromptu natural rock pagoda. It’s unclear if the nuns’ at the hermitage built it, or whether it was visitors. Either way, it stands precariously on a large black boulder.
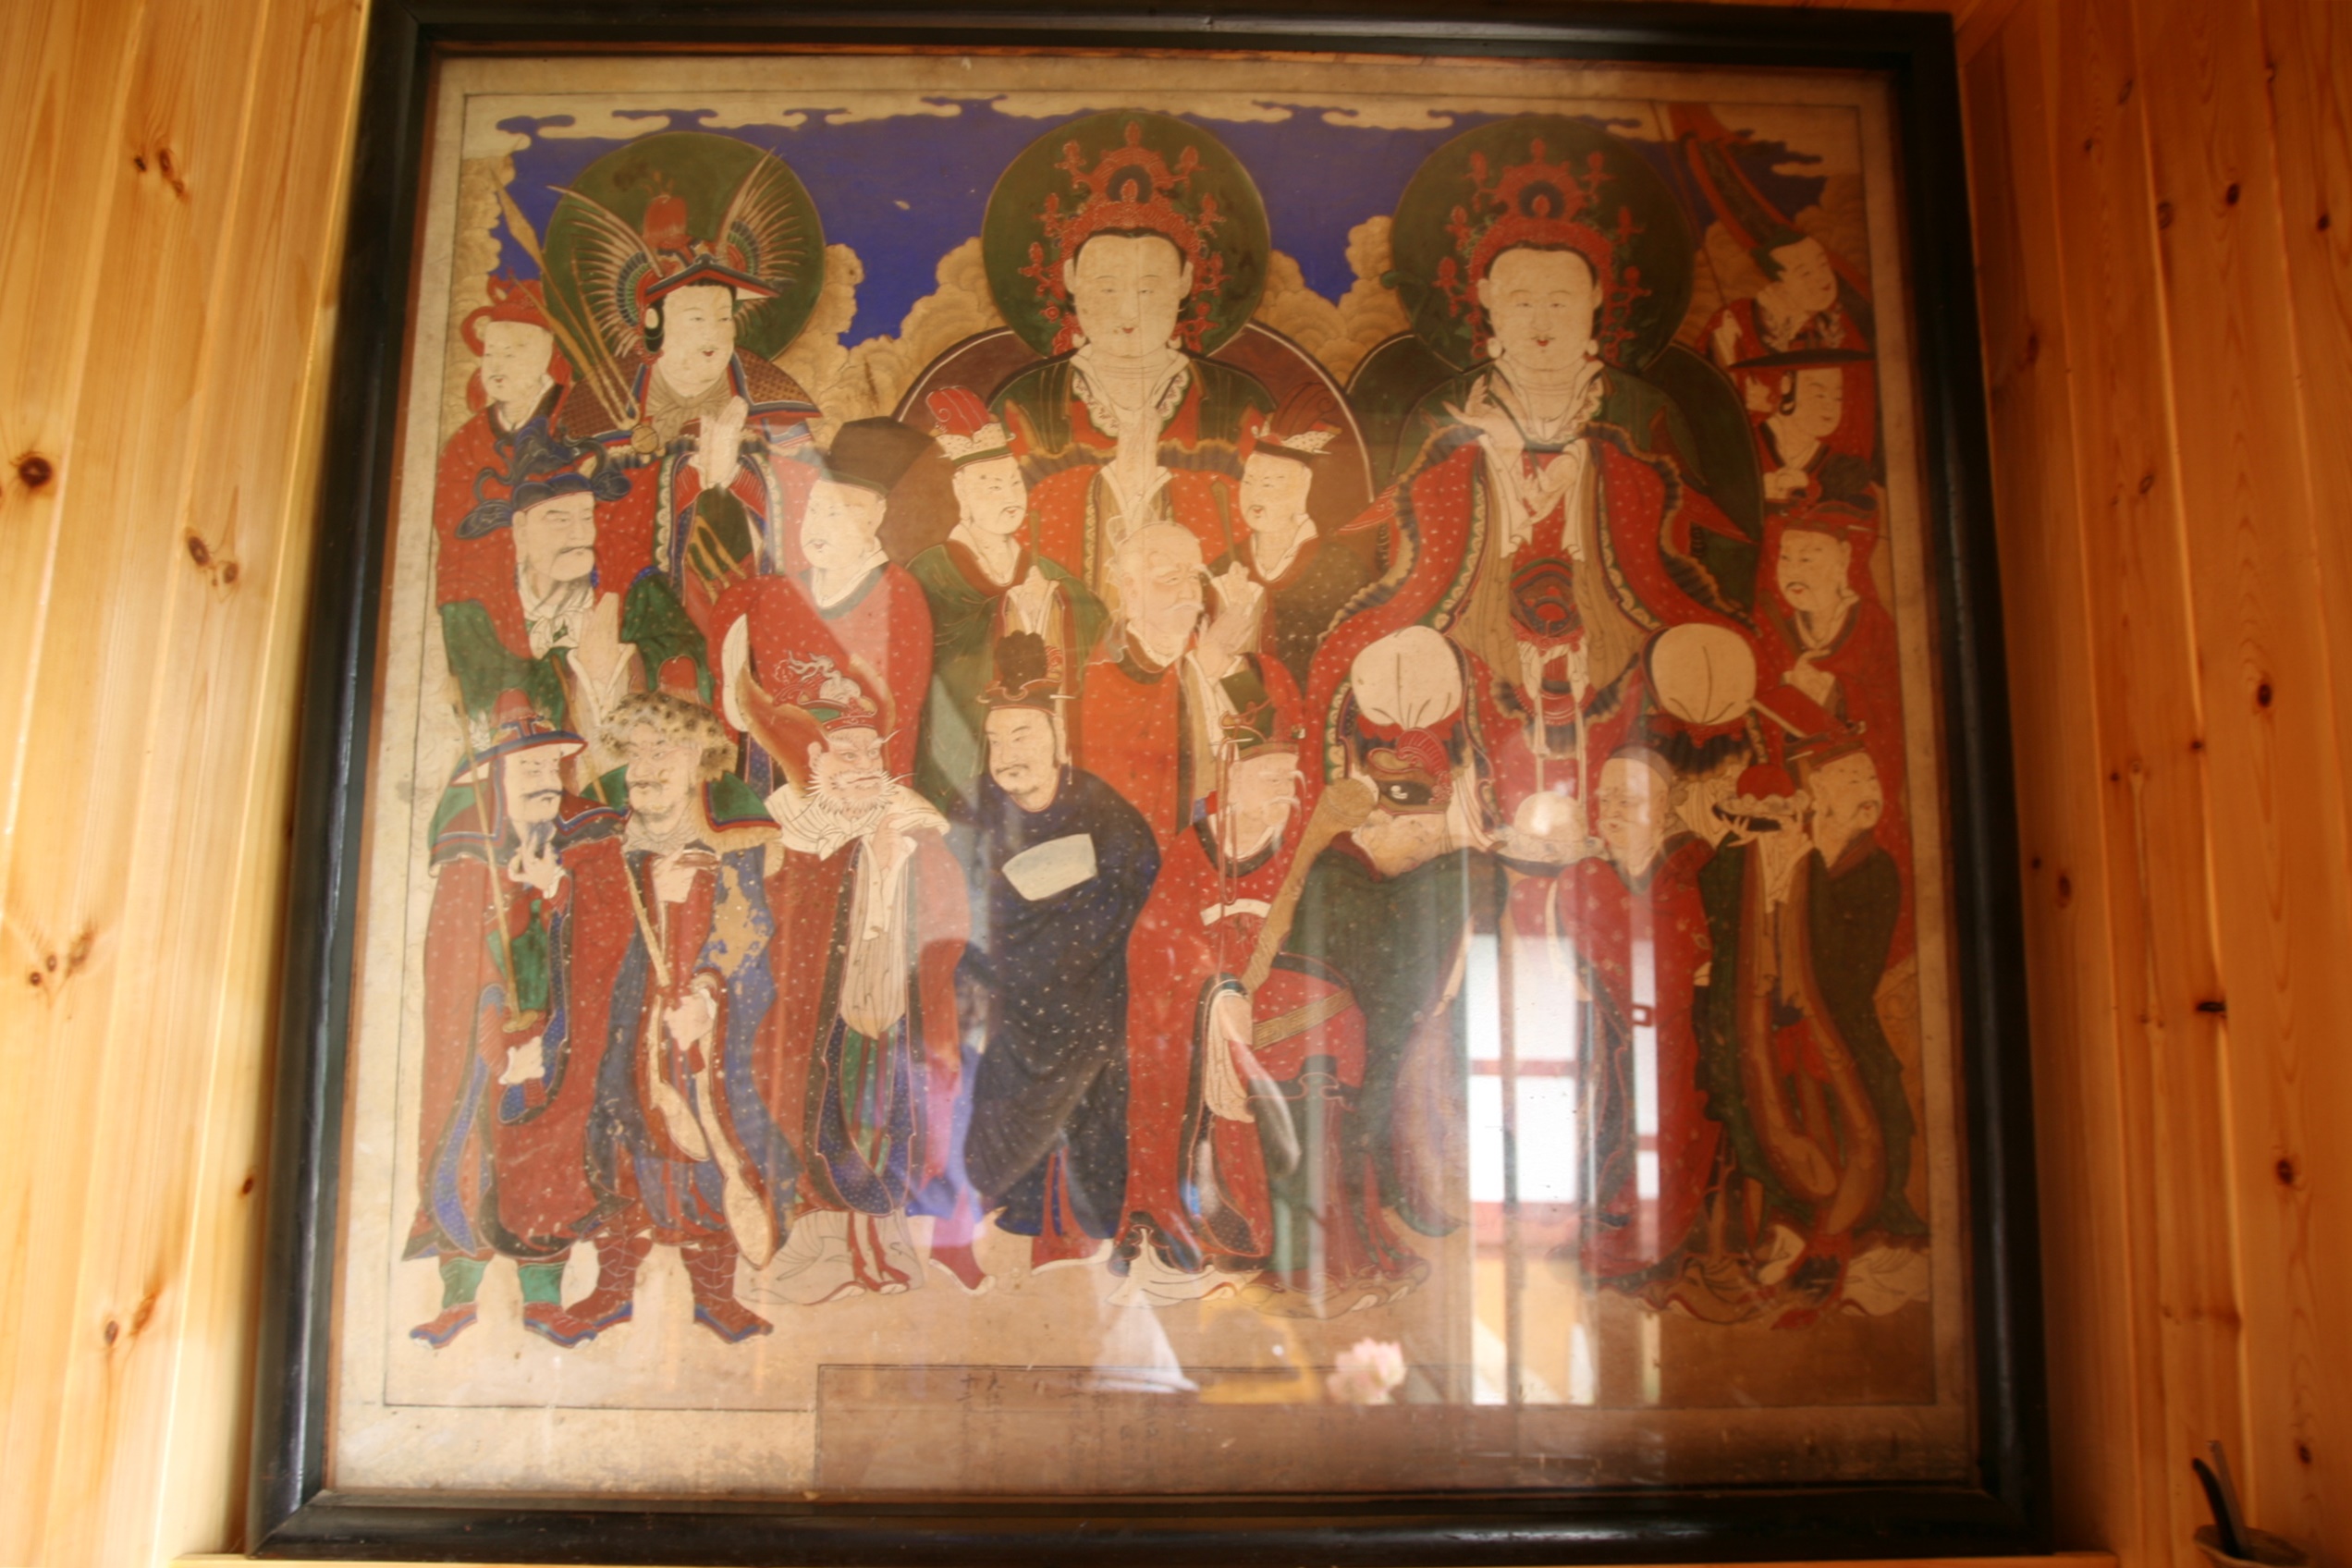
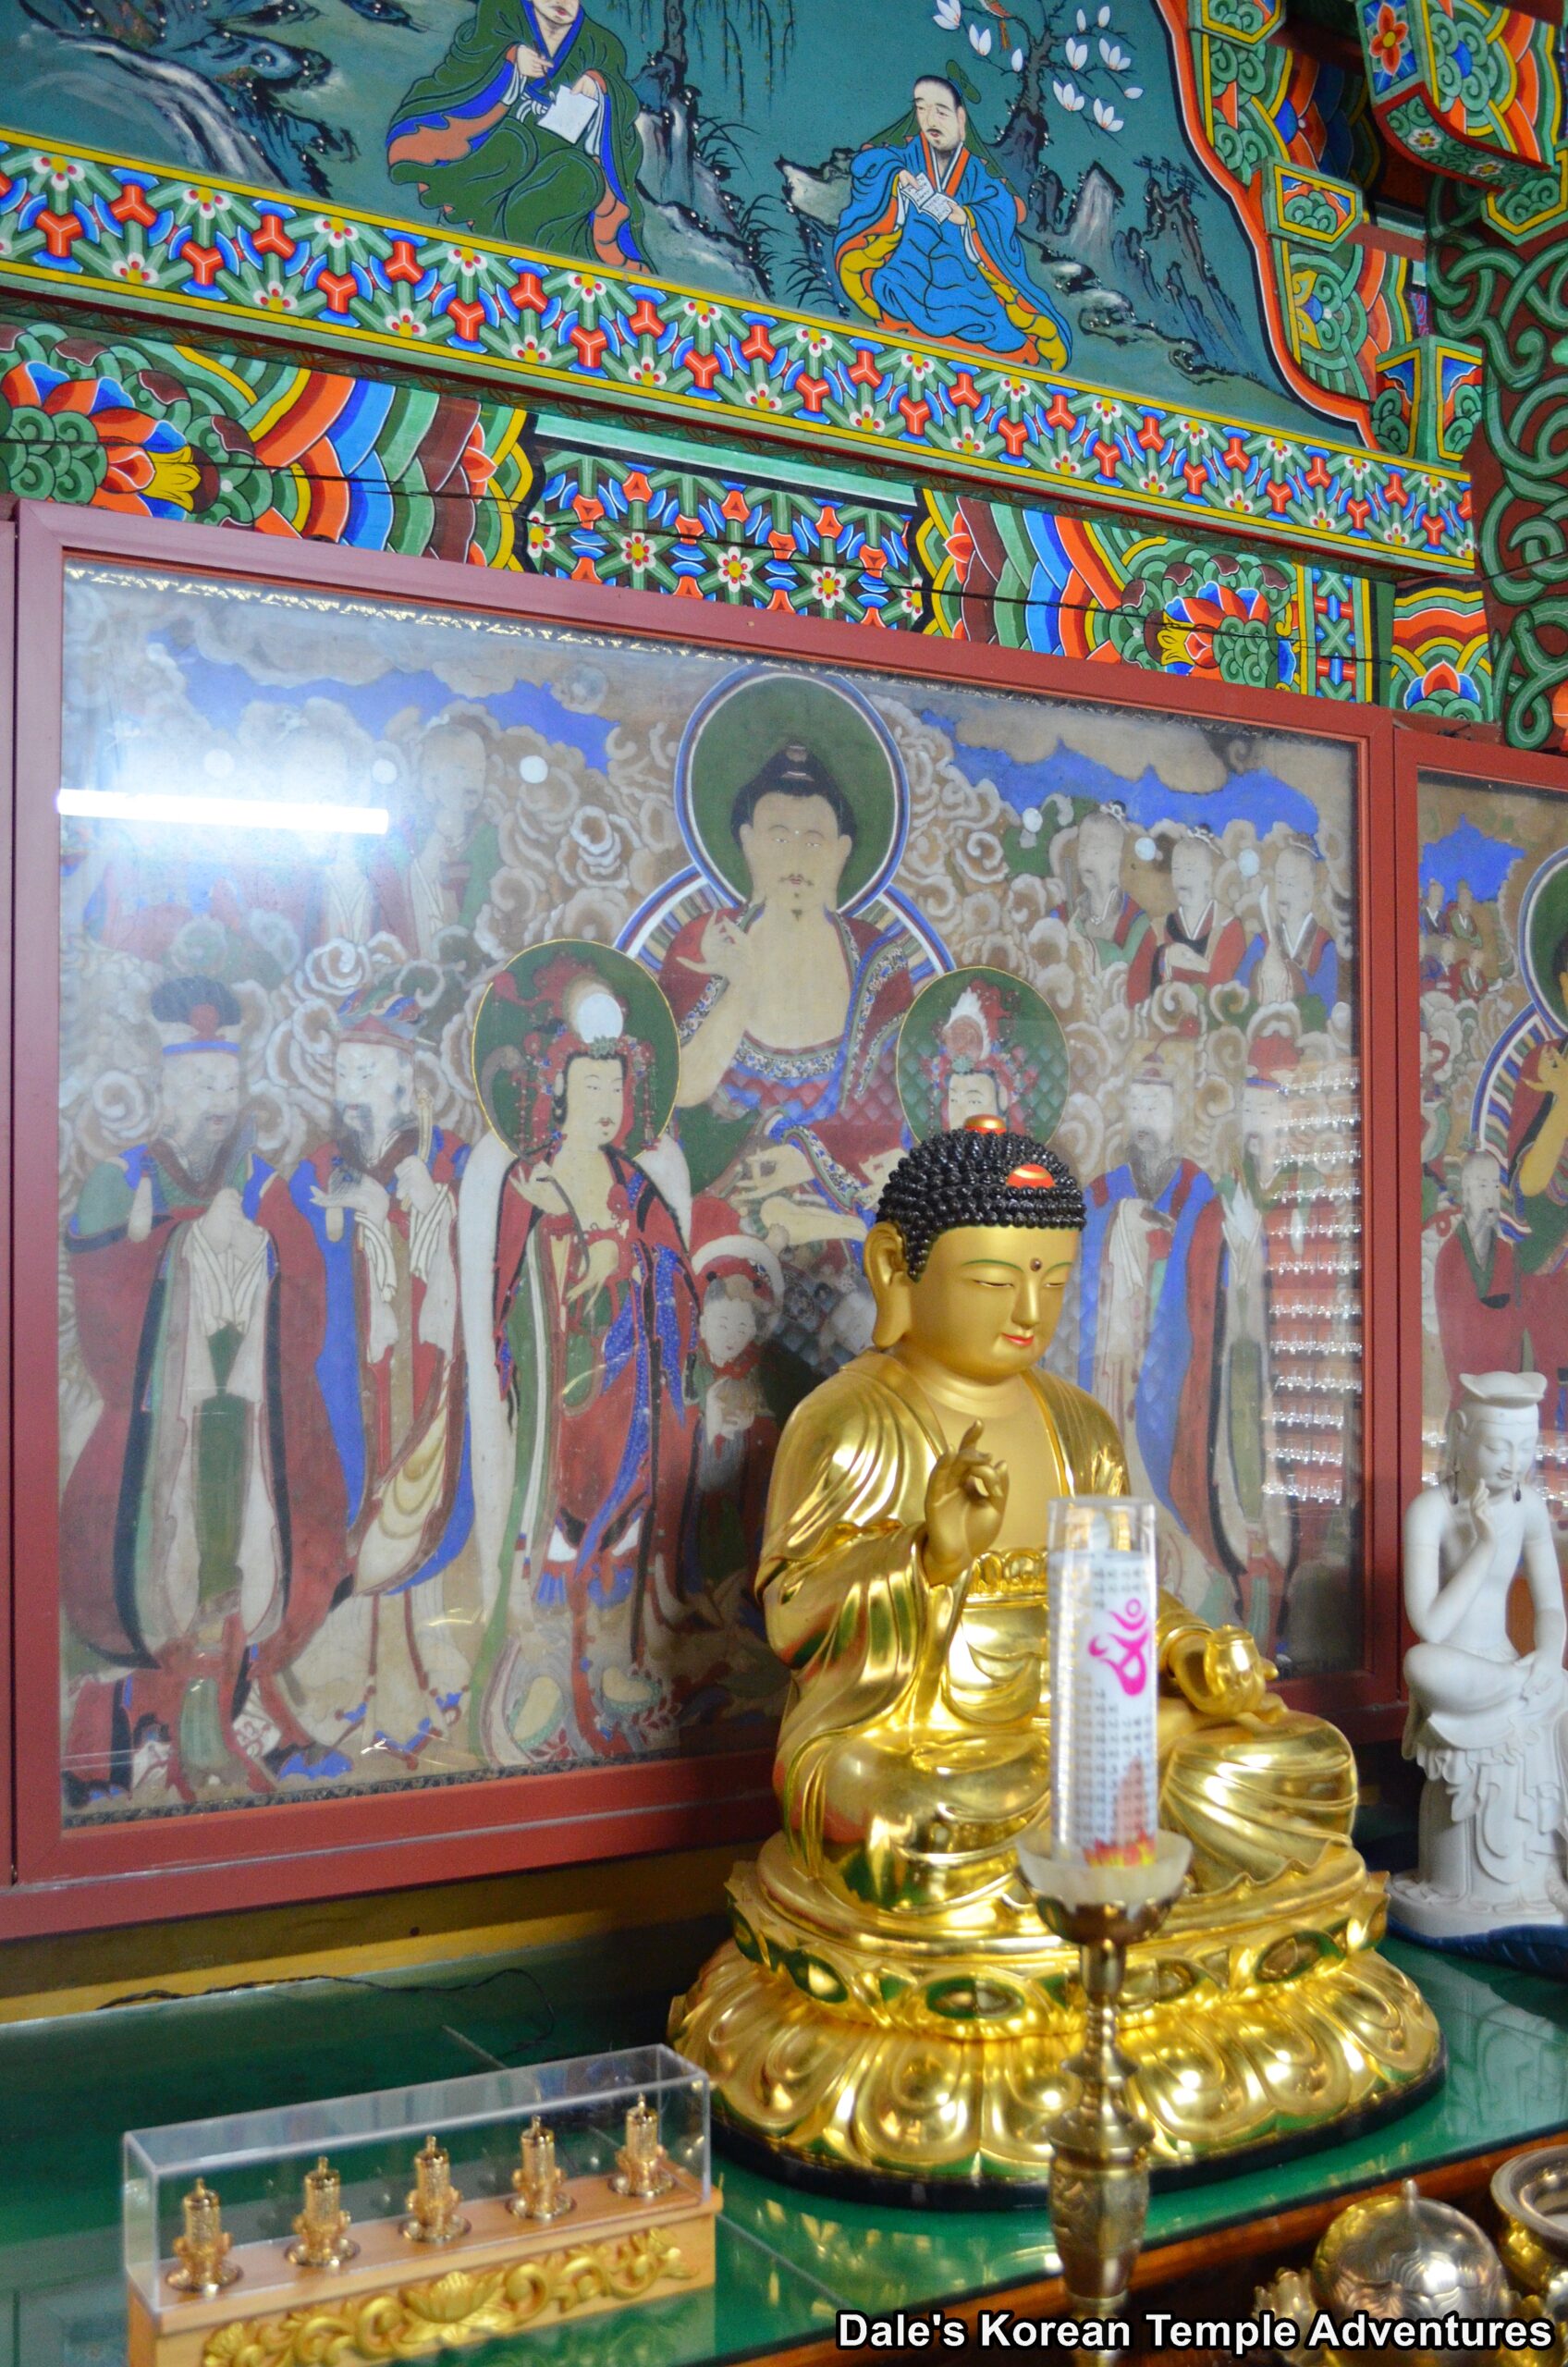
Behind the rock pagoda is the main hall at Samseonam Hermitage, the Geukrak-jeon Hall. There are several entryways to this multi-purpose shrine hall. The entryway in the centre is the entryway to the Geukrak-jeon Hall. Before entering the main hall, you’ll notice that there is a long wooden corridor that links all of the doors together. The left doors are entrances for various meeting areas and meditation. And on the far right side of the corridor, and under protective glass, you’ll find an older Shinjung Taenghwa (Guardian Mural). Stepping inside the Geukrak-jeon Hall, you’ll find a simple main altar. Underneath an understated datjib (canopy), and housed inside a glass enclosure, you’ll find the main altar triad. The central statue is that of Amita-bul (The Buddha of the Western Paradise). This central image is joined on either side by Gwanseeum-bosal (The Bodhisattva of Compassion) and Jijang-bosal (The Bodhisattva of the Afterlife).
To the left of this multi-purpose shrine hall that includes the Geukrak-jeon Hall, you’ll find the administrative office and dorms. But it’s to the right of this central building, and around the corner from this multi-purpose building that also houses the hermitages kitchen and painting dedicated to Jowang-shin (The Fireplace King Spirit), that you’ll find the hillside Samseong-gak Hall. This elevated shaman shrine hall rests between the rows of nuns’ dorms to your right and the multi-purpose building to the left.
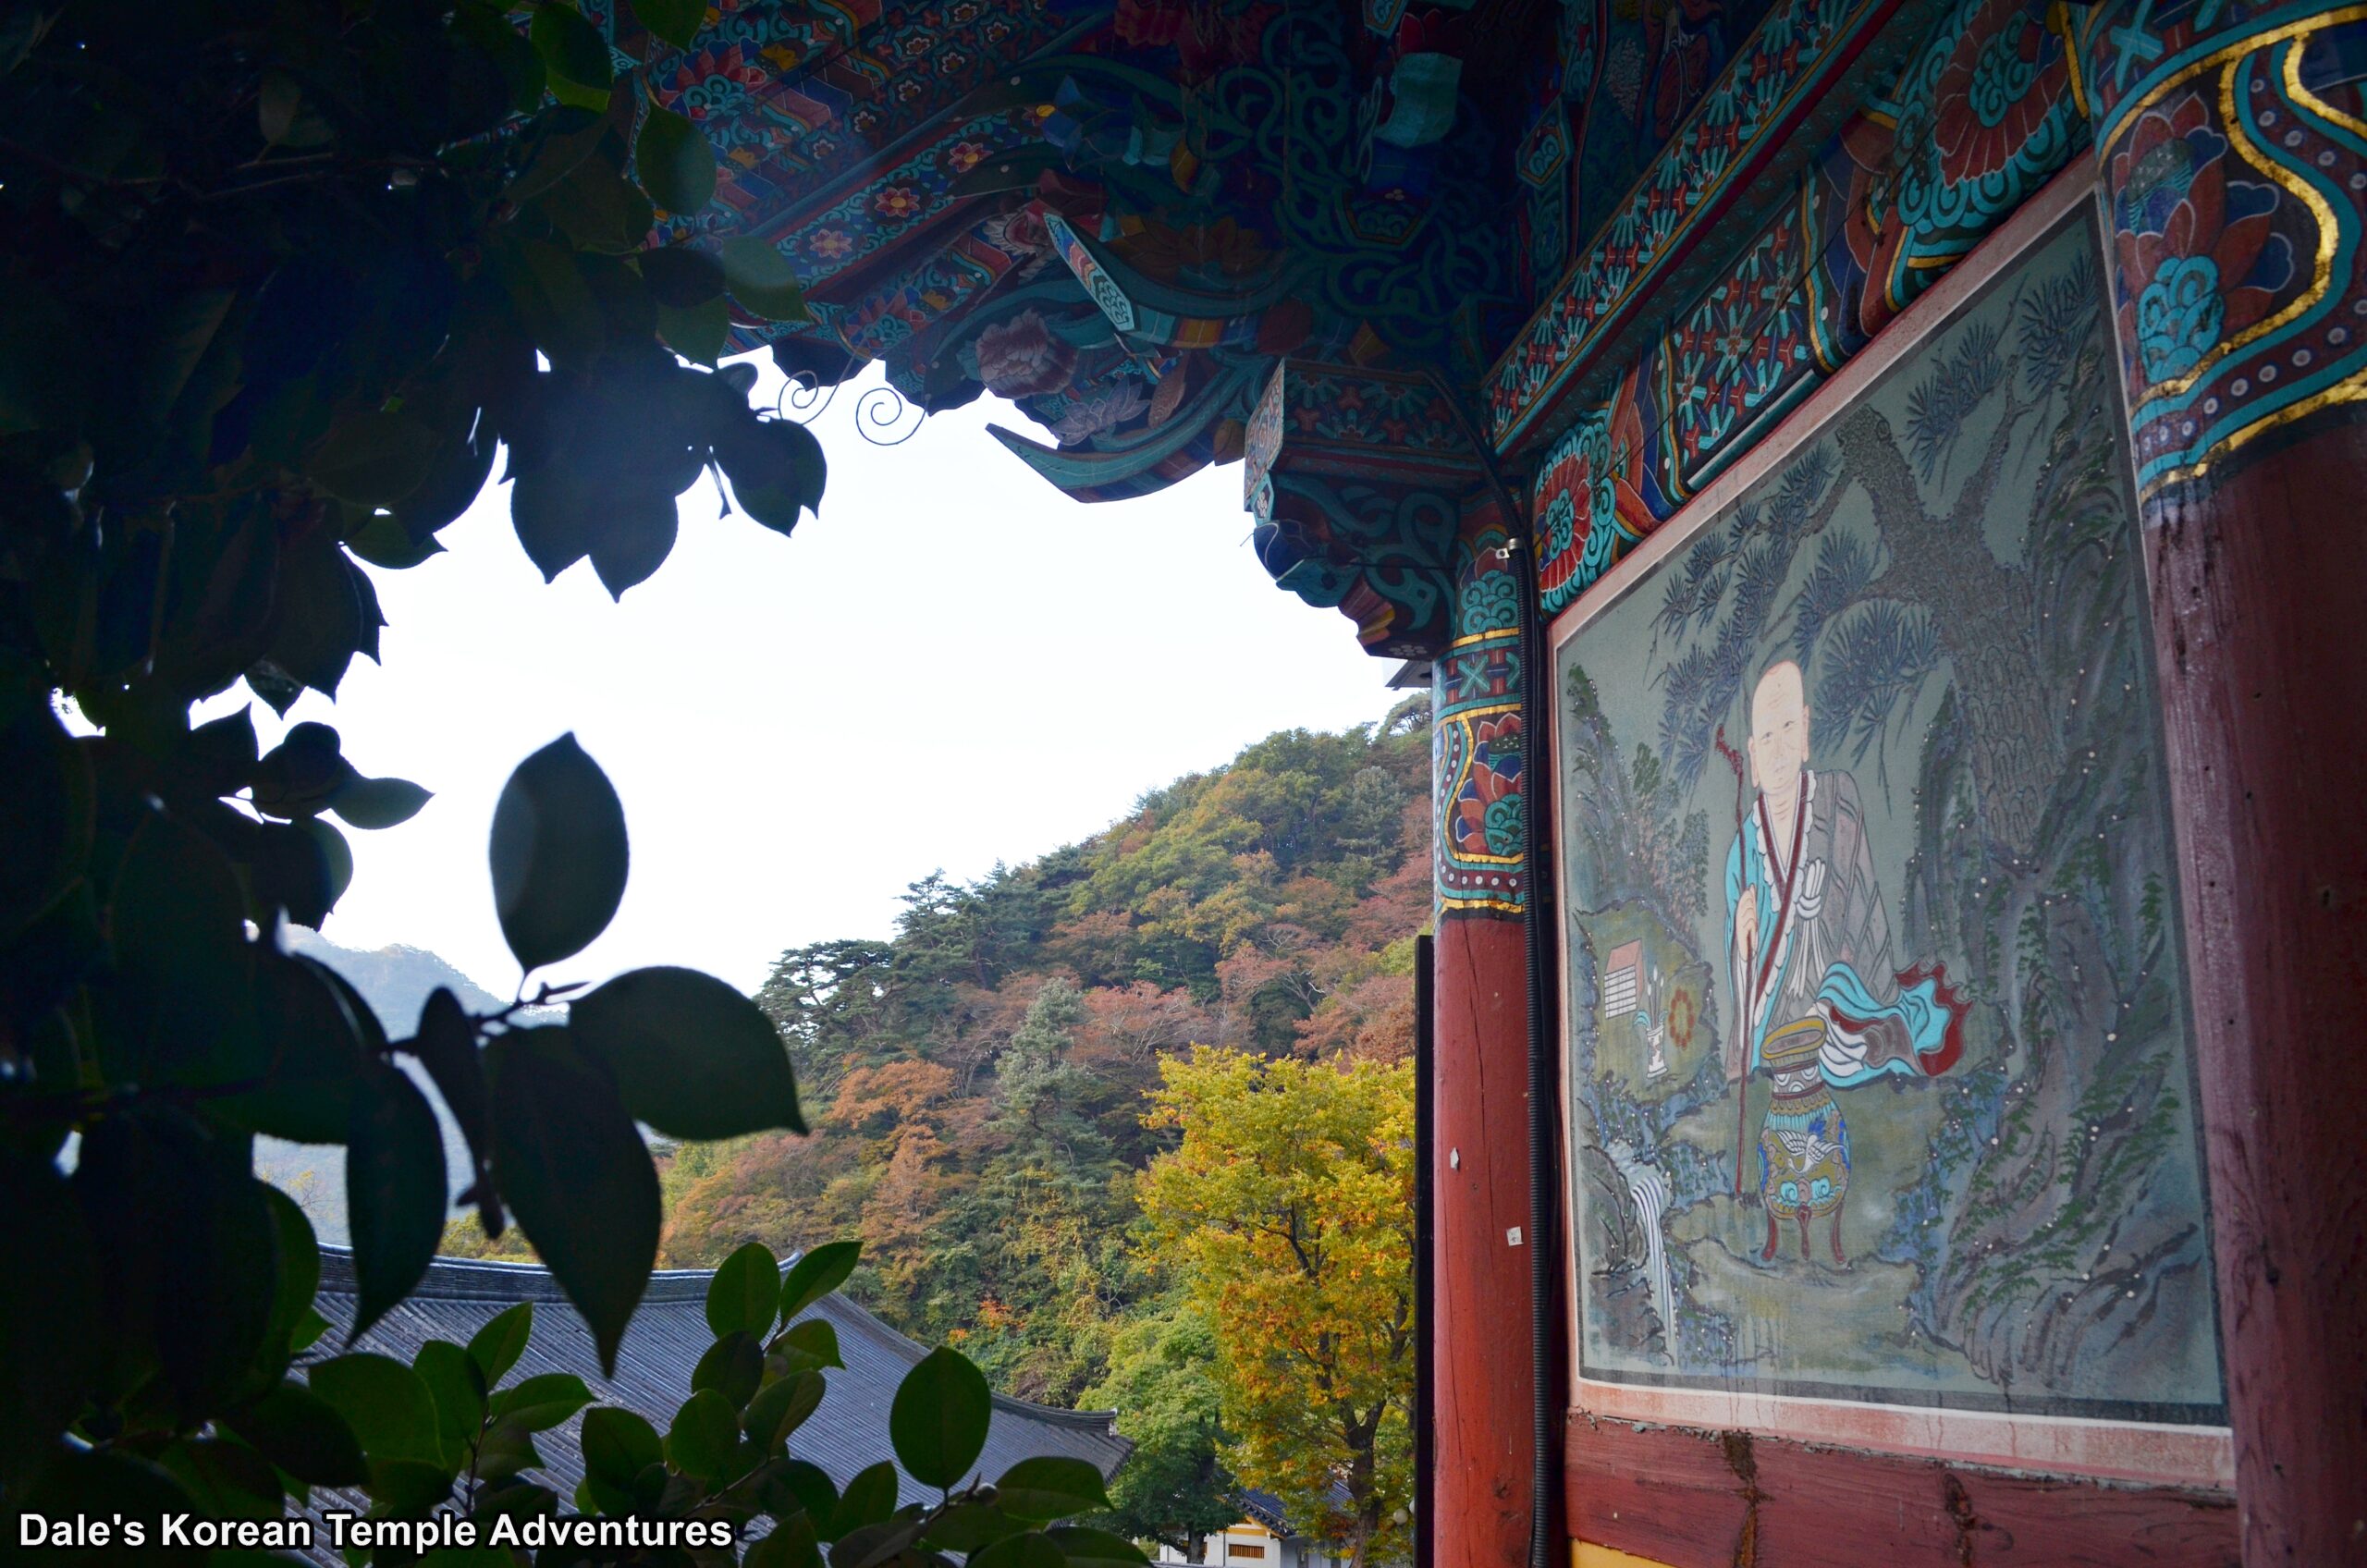
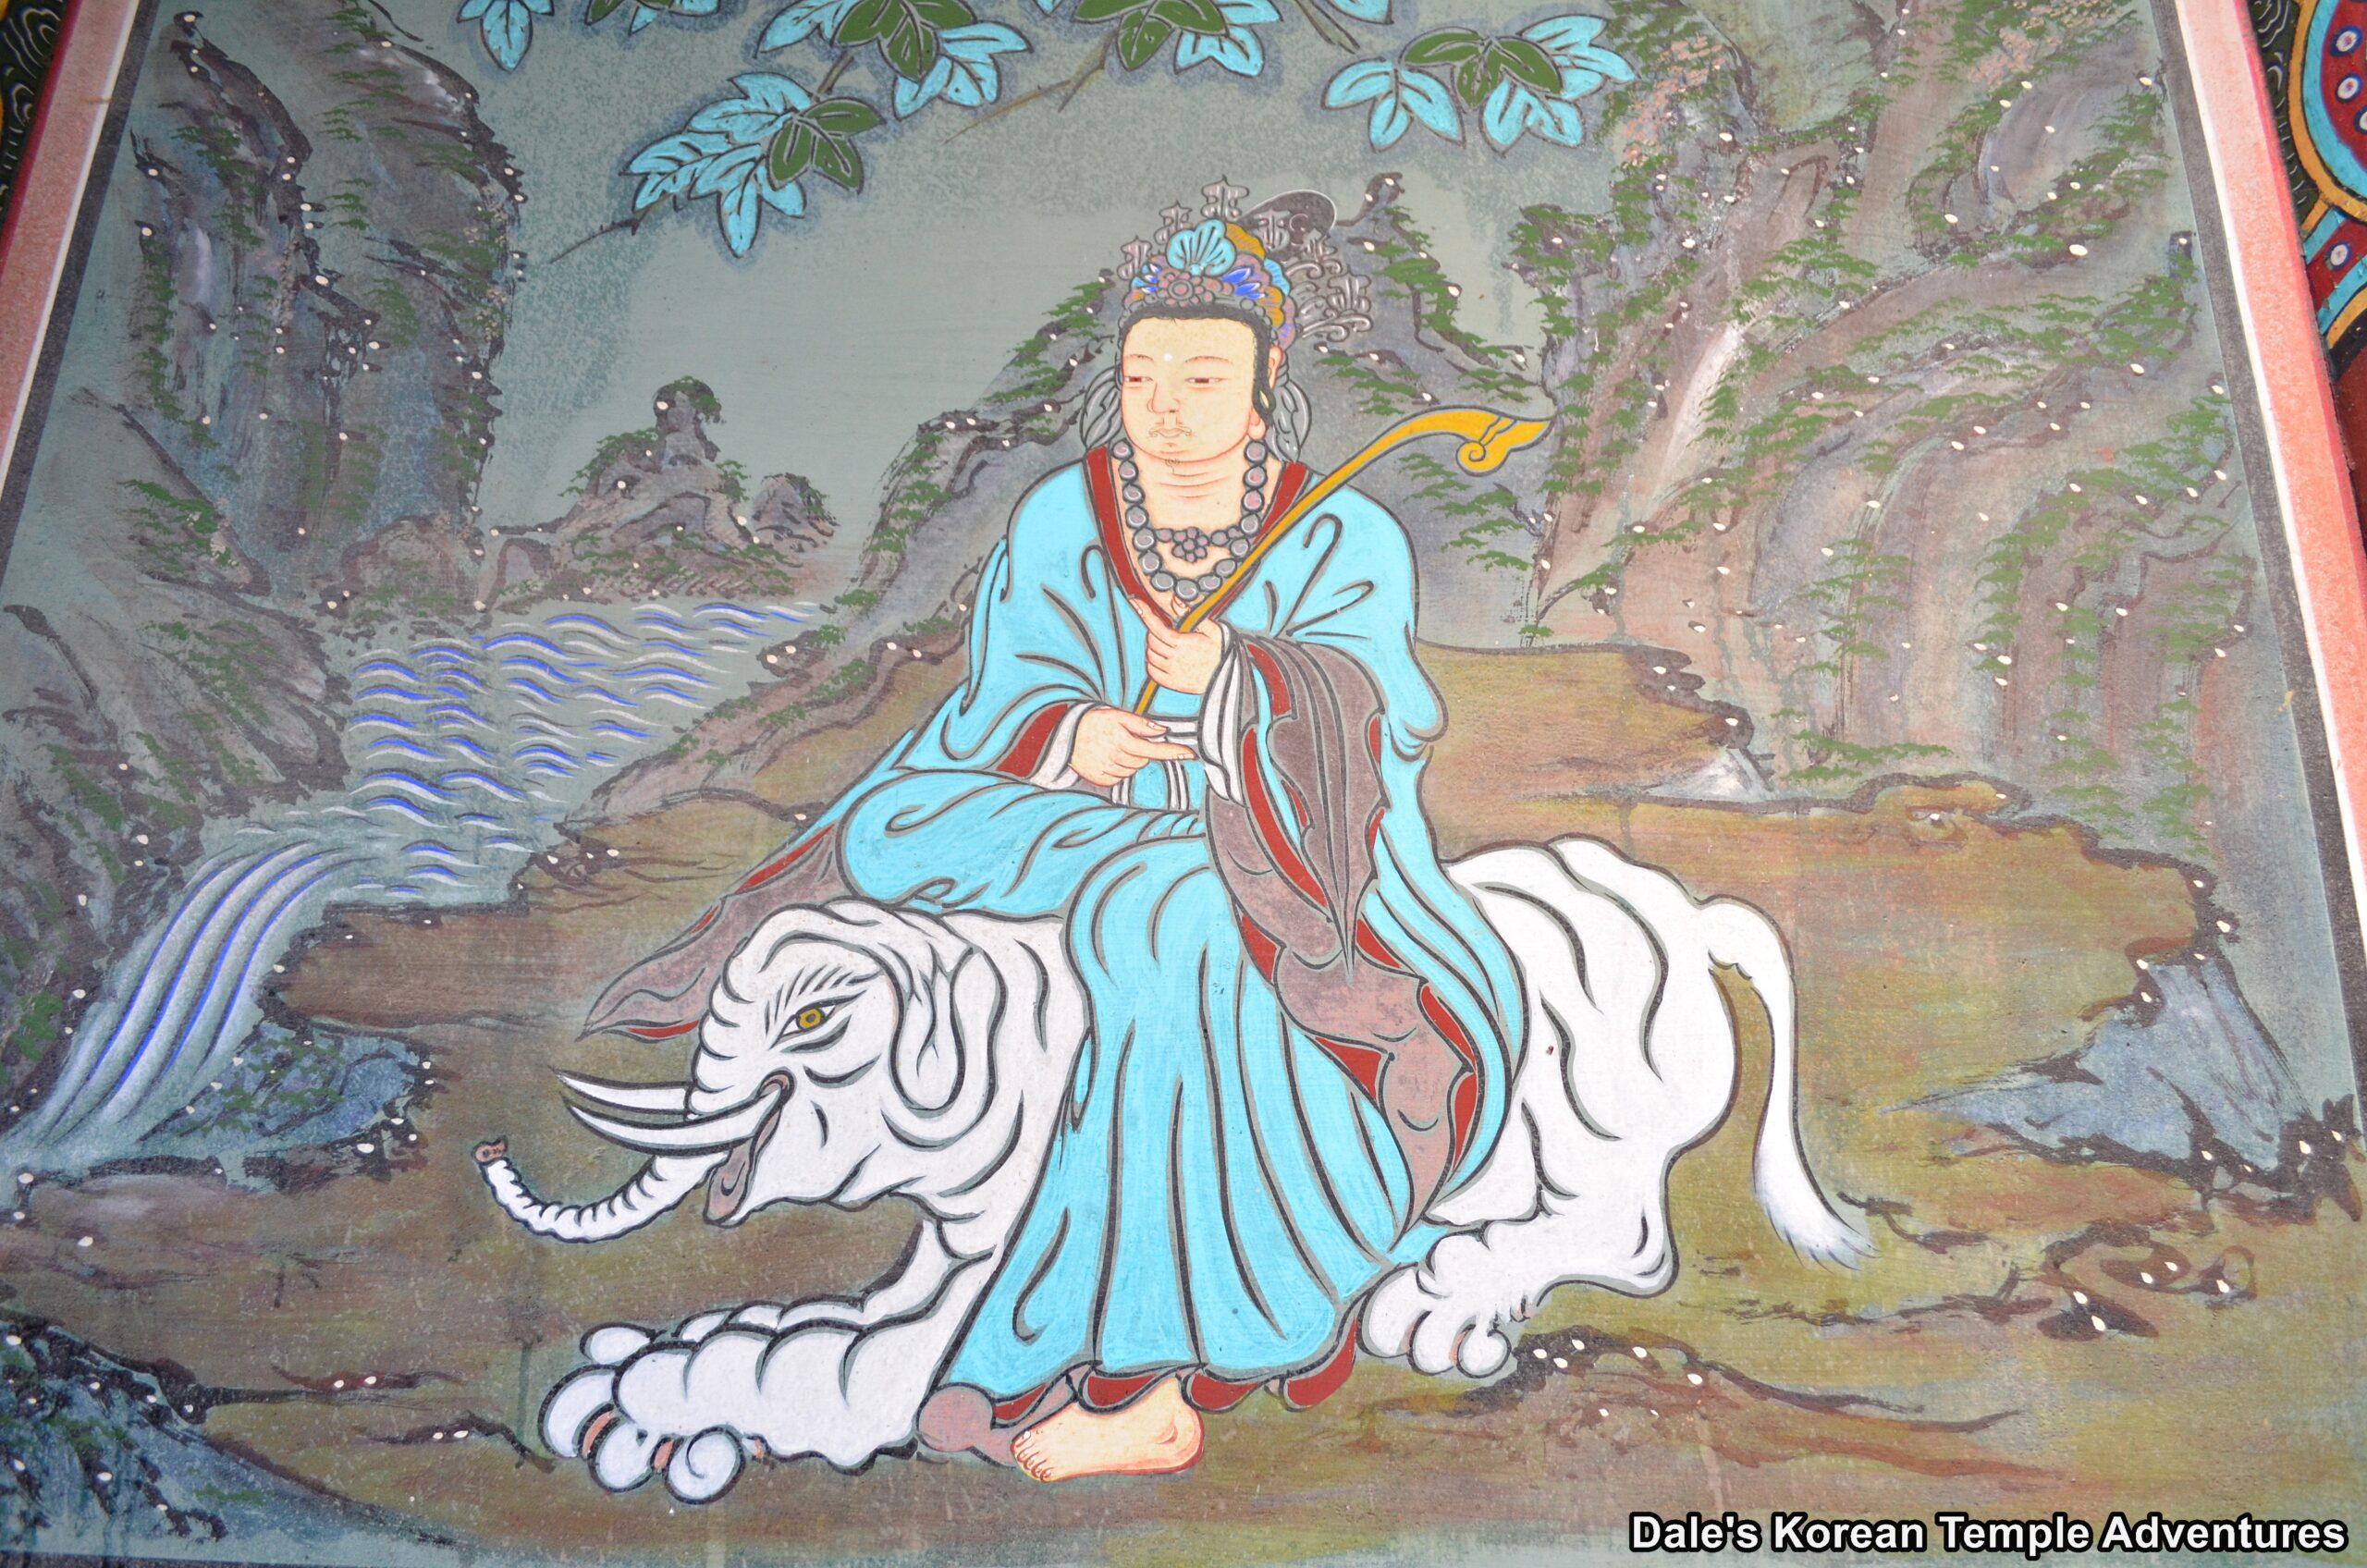
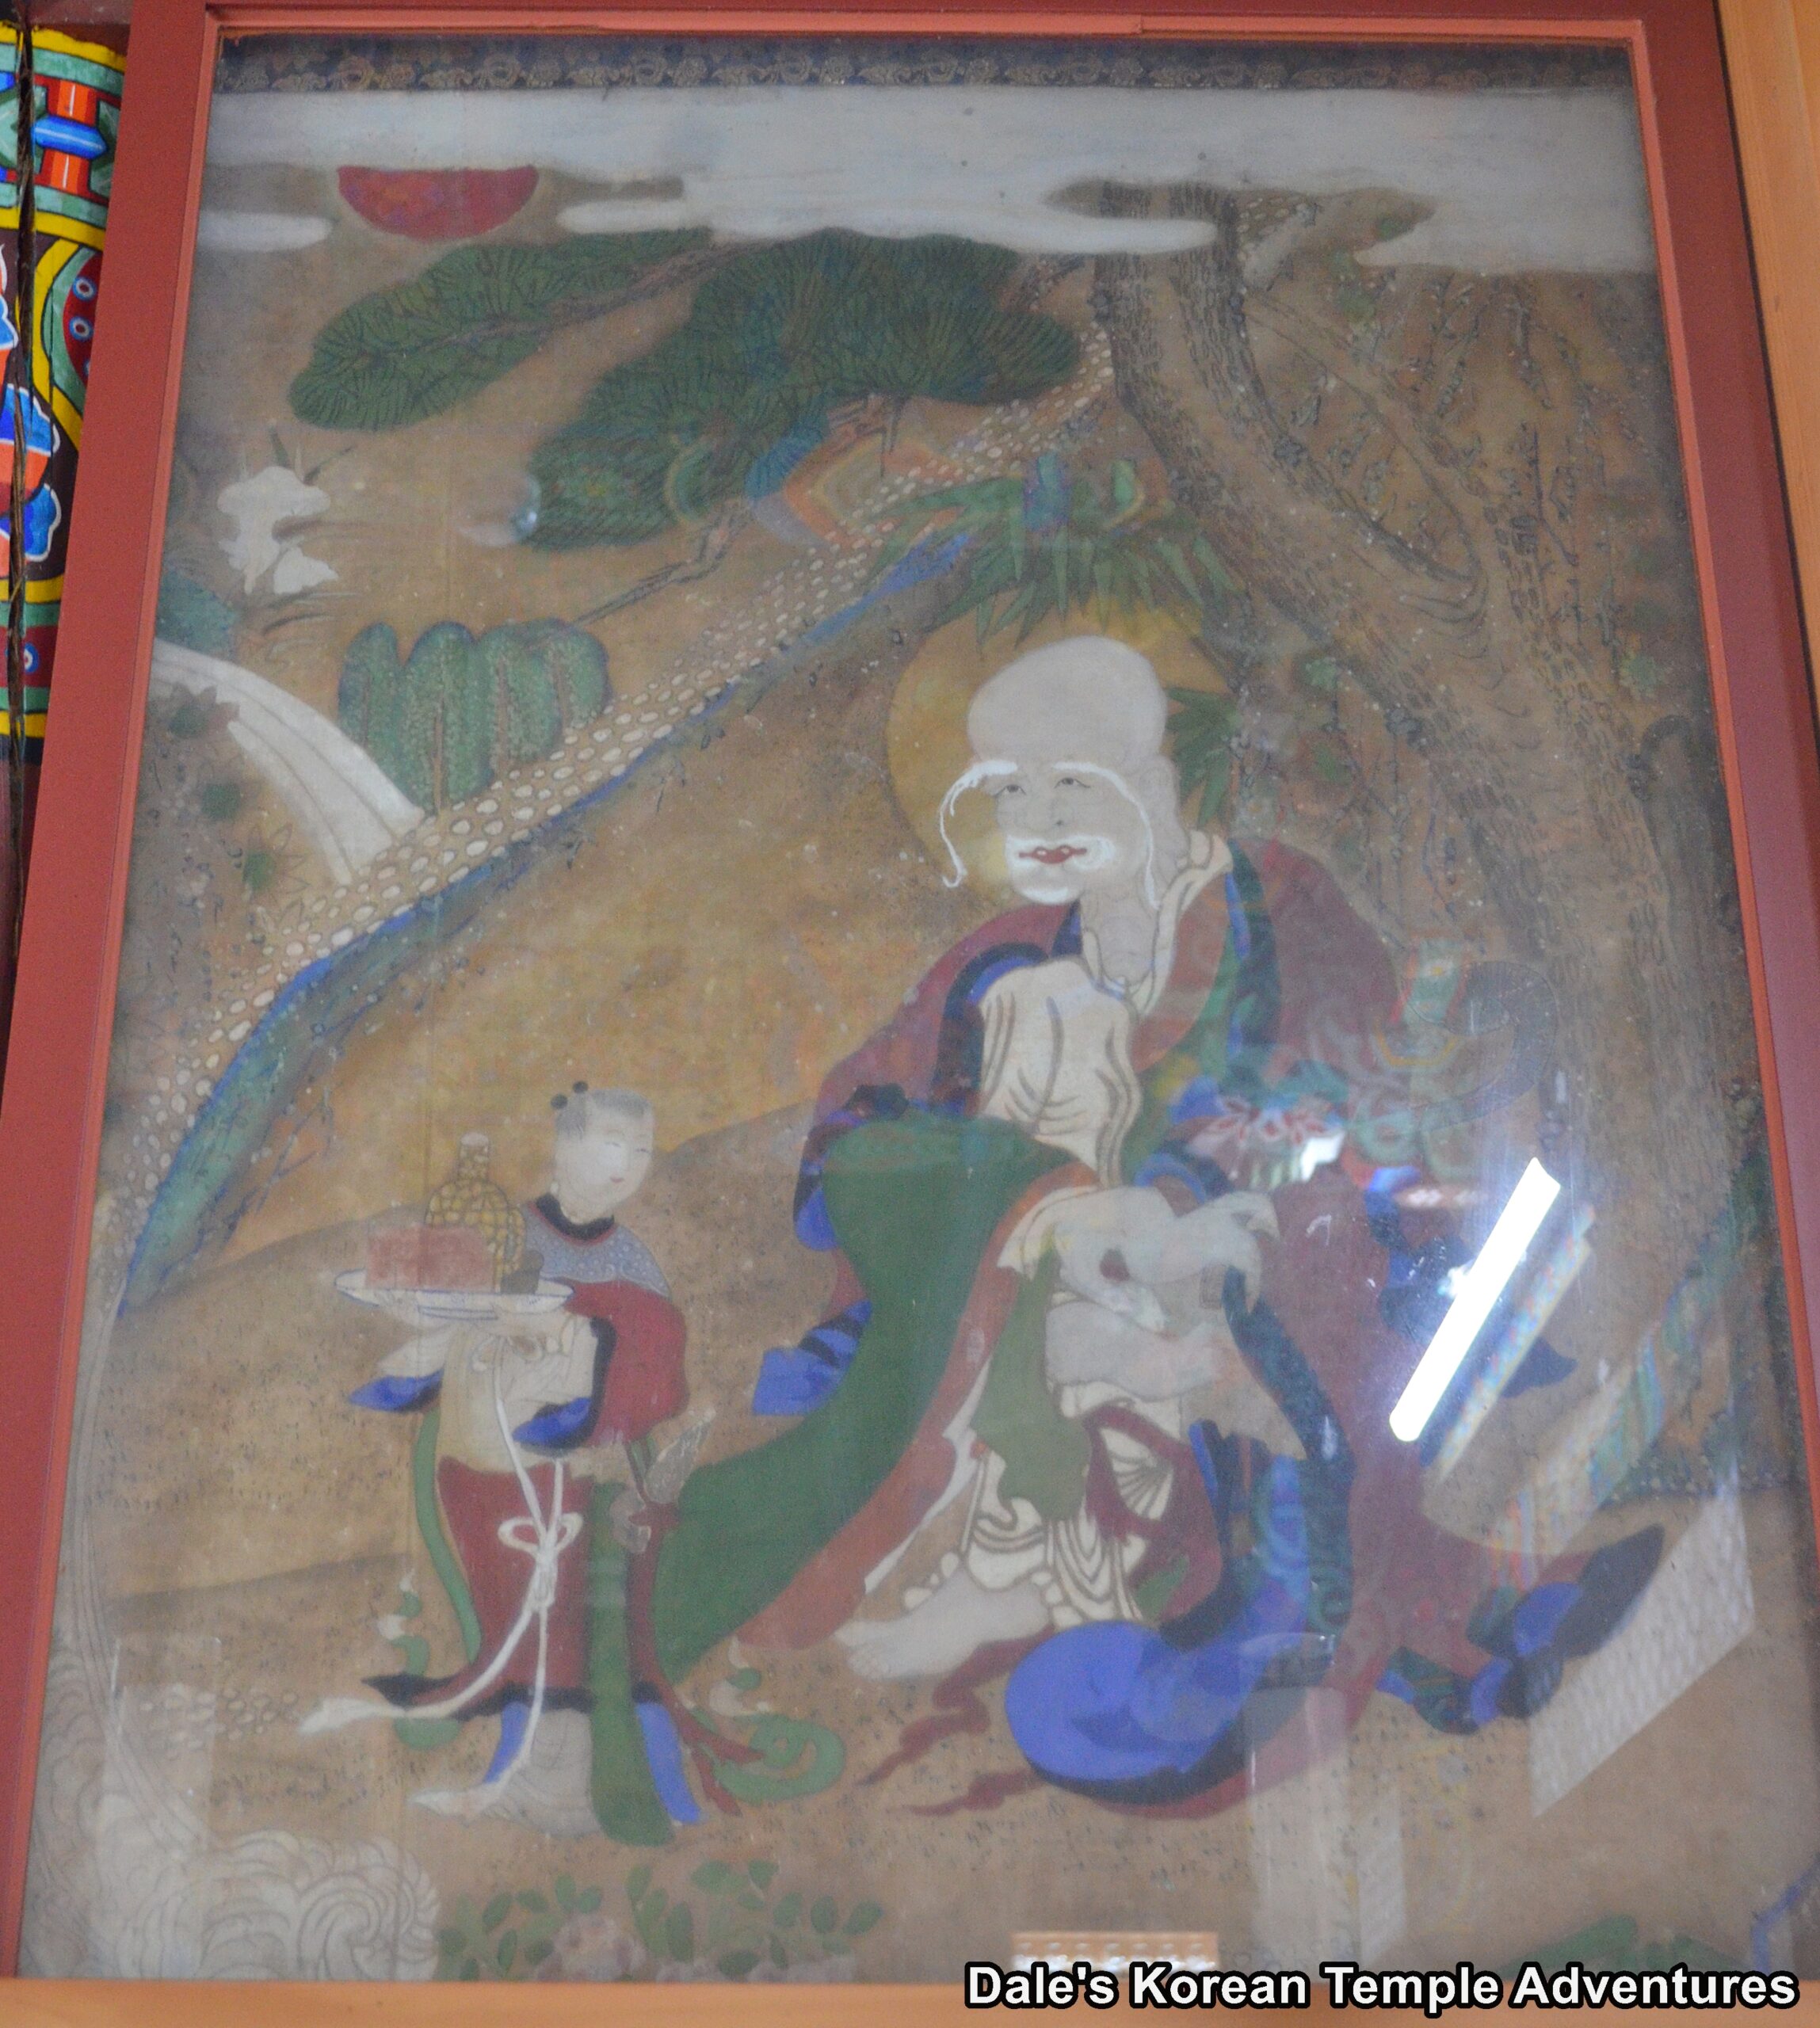
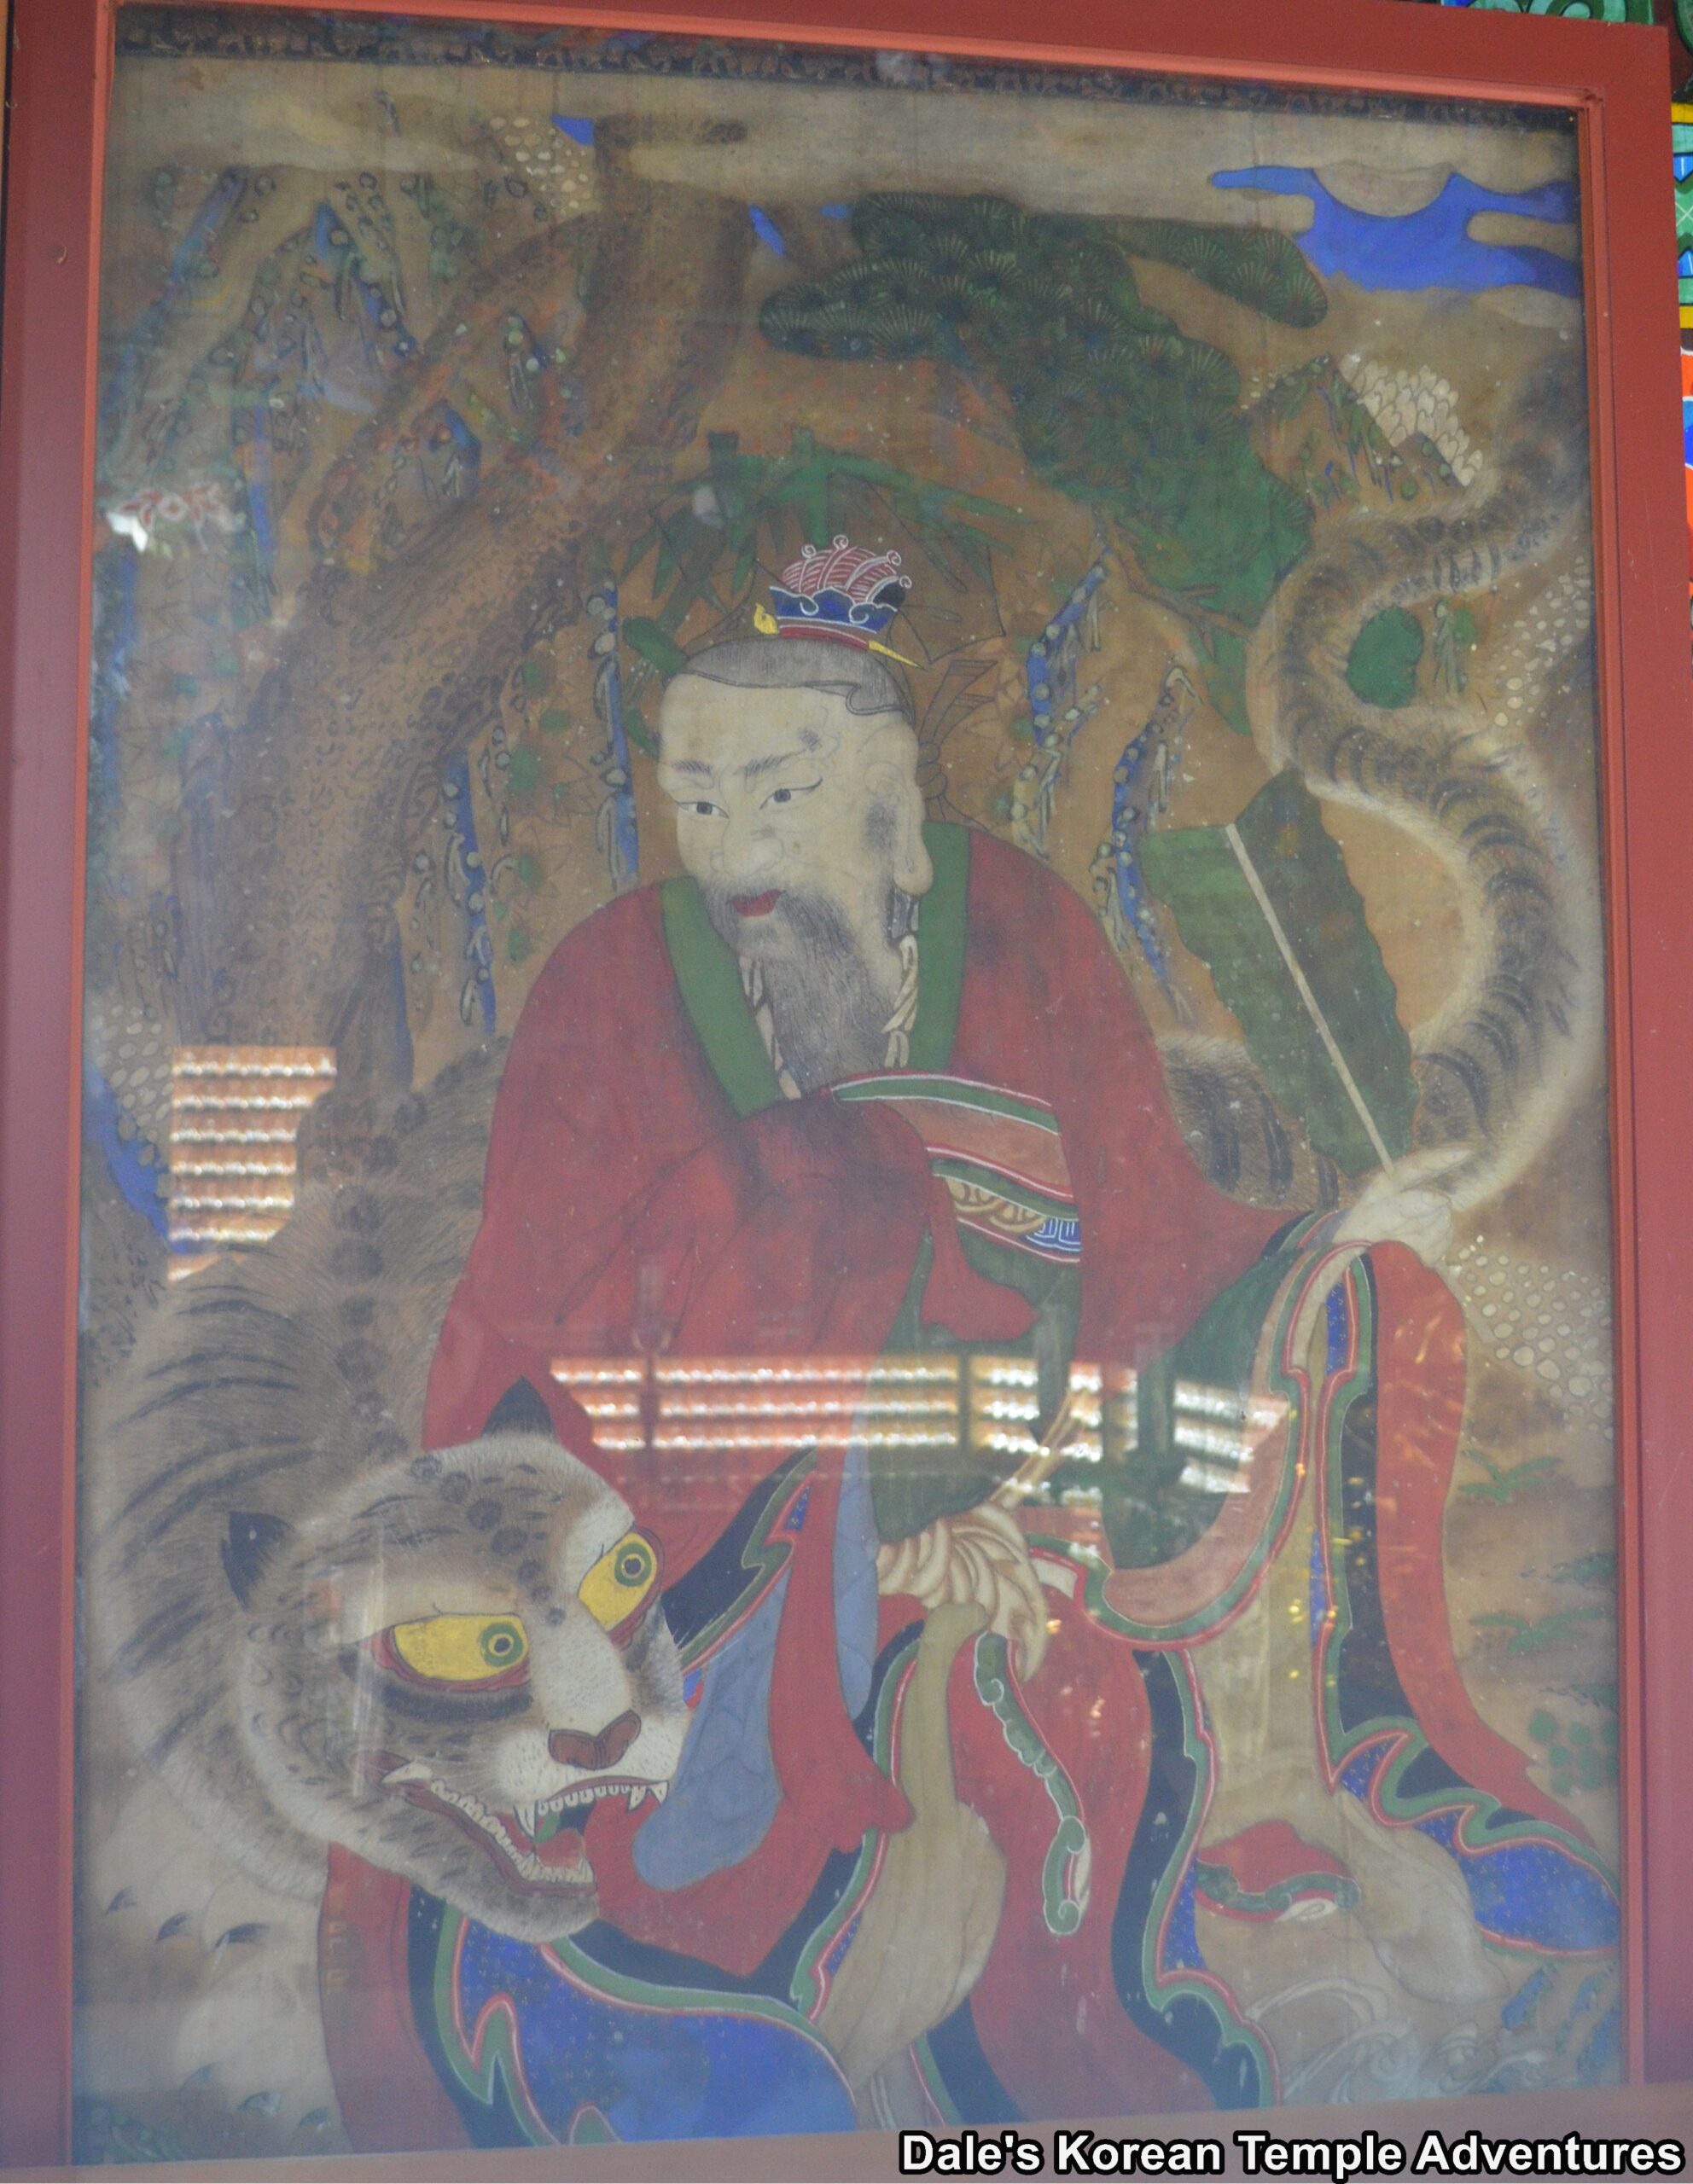
Climbing a steep, aged set of stone stairs, the exterior walls to the Samseong-gak Hall are adorned with murals dedicated to various shaman deities, as well as murals dedicated to an all-white Gwanseeum-bosal and a white elephant riding Bohyeon-bosal (The Bodhisattva of Power). Stepping inside the Samseong-gak Hall, you’ll see a beautiful collection of older shaman deity paintings. Hanging on the far right wall is a mural dedicated to Dokseong (The Lonely Saint). Hanging on the far left wall is a mural dedicated to Sanshin (The Mountain Spirit). And hanging in between these two murals are seven different mural depictions of Chilseong (The Seven Stars). It’s a beautiful collection!
How To Get There
To get to Samseonam Hermitage, you’ll first need to get to Haeinsa Temple. From the Hapcheon Intercity Bus Terminal, you’ll need to board a bus bound for Haeinsa Temple. The bus ride is about 5,000 won. From where the bus lets you off at Haeinsa Temple, you’ll need to find the trail that leads up to Haeinsa Temple. The walk is about one kilometre, and the trail starts to the left of the Haeinsa Temple museum. About 500 metres up this trek, a part of this trail will fork to the left. You’ll need to head up this trail for an additional 200 metres. Eventually, you’ll arrive at Samseonam Hermitage.
Overall Rating: 3.5/10
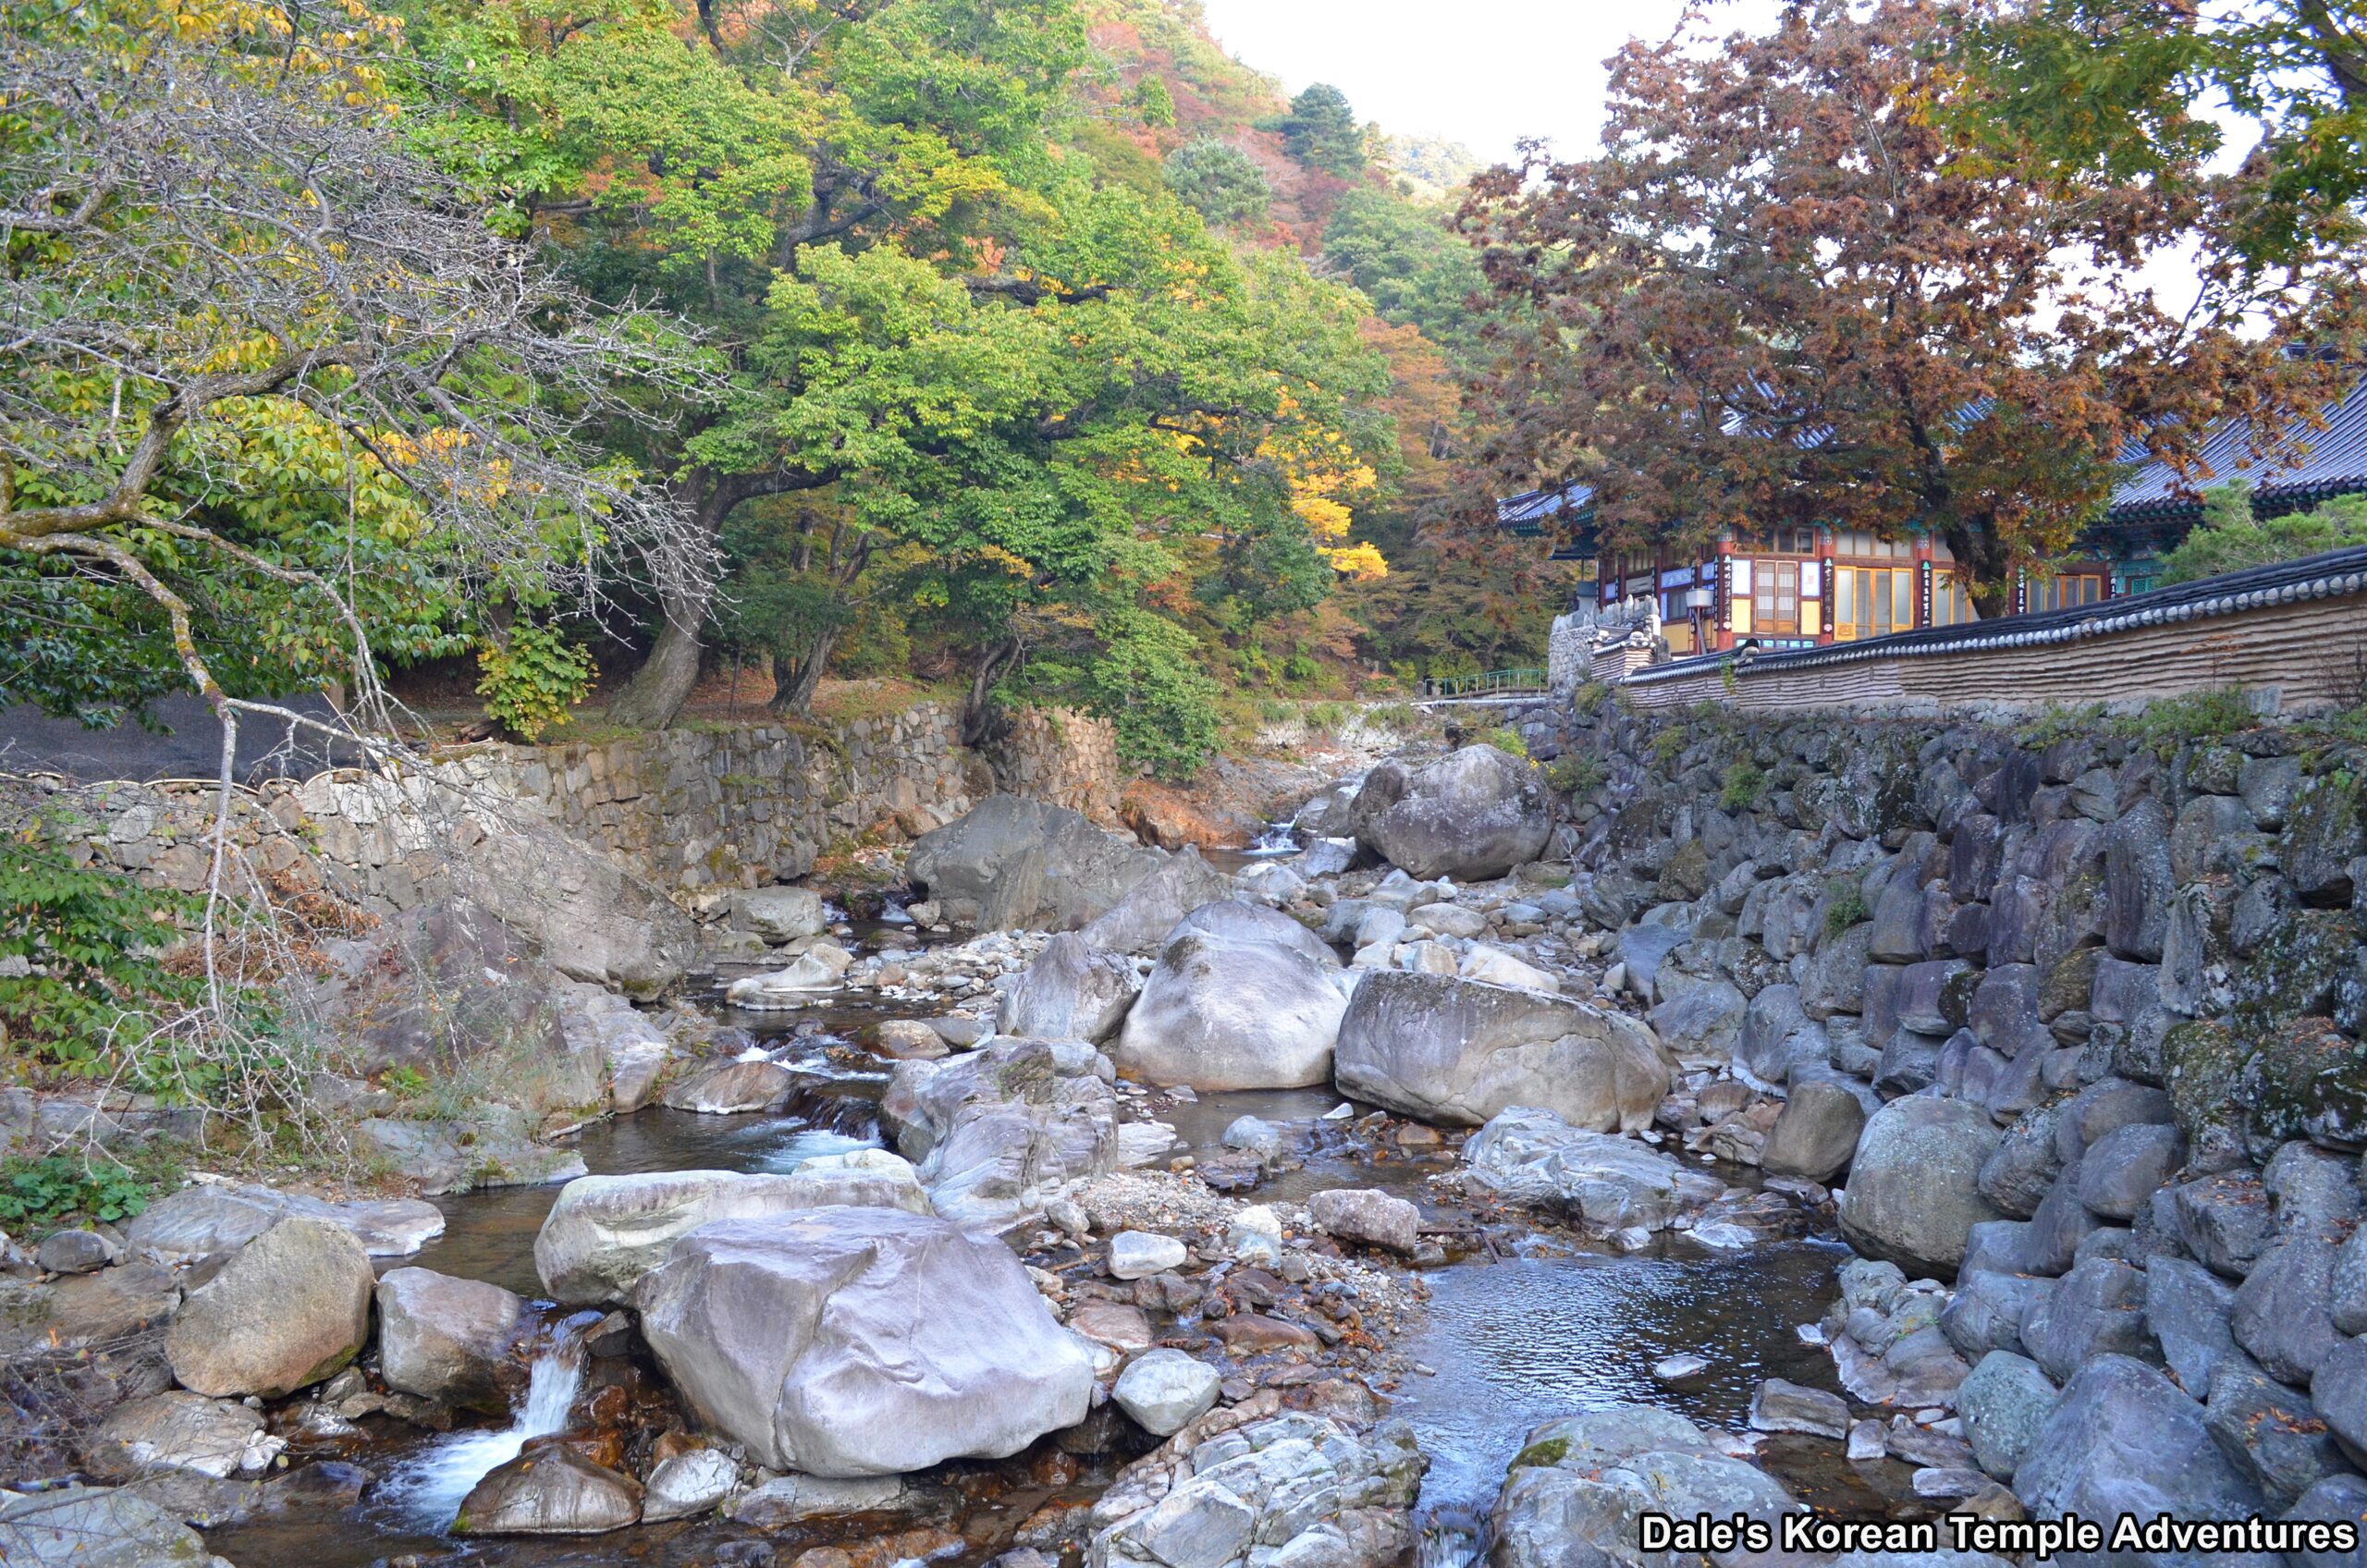
The definitive highlight at Samseonam Hermitage is the Samseong-gak Hall. Both the outdoor aesthetic and how it’s positioned on the hillside to the beautiful, old shaman murals housed inside it, the Samseong-gak Hall is a must-see at the hermitage. Additionally, the hermitage is beautifully positioned by a meandering stream to the west. Samseonam Hermitage has an overall tranquility to it.
The meandering stream next to the hermitage grounds.
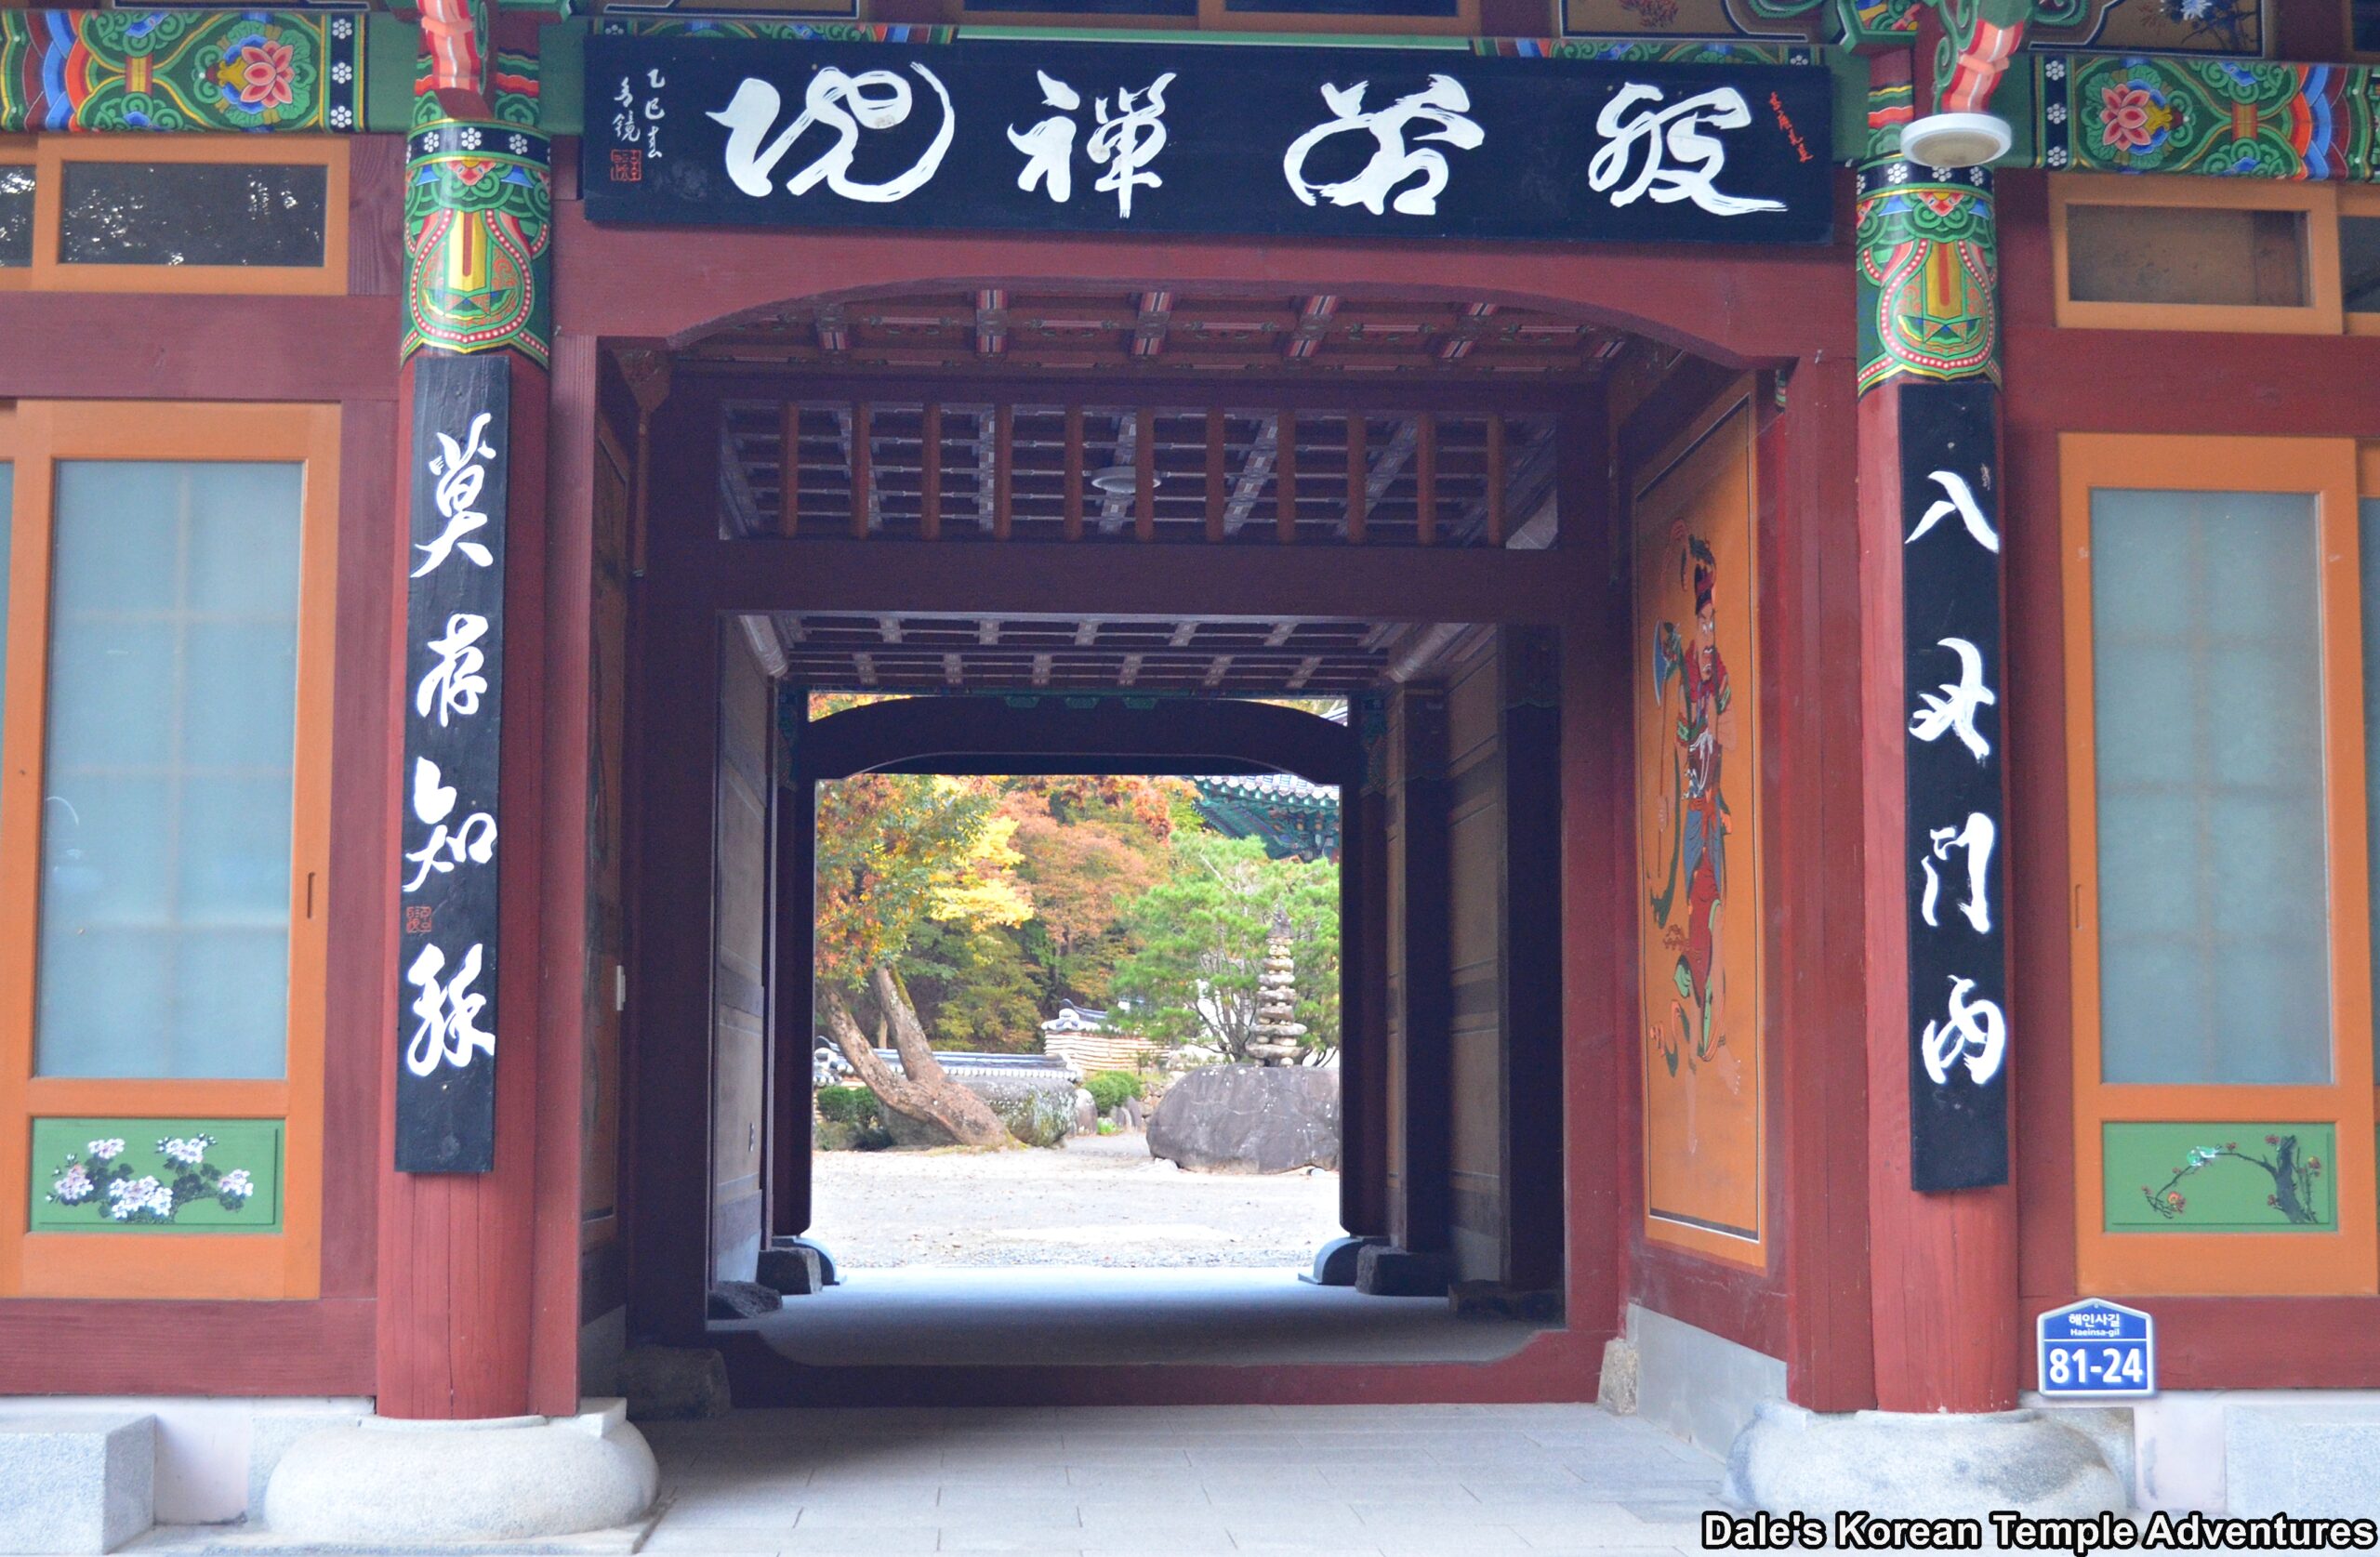
The Banya-seonwon entry to Samseonam Hermitage.
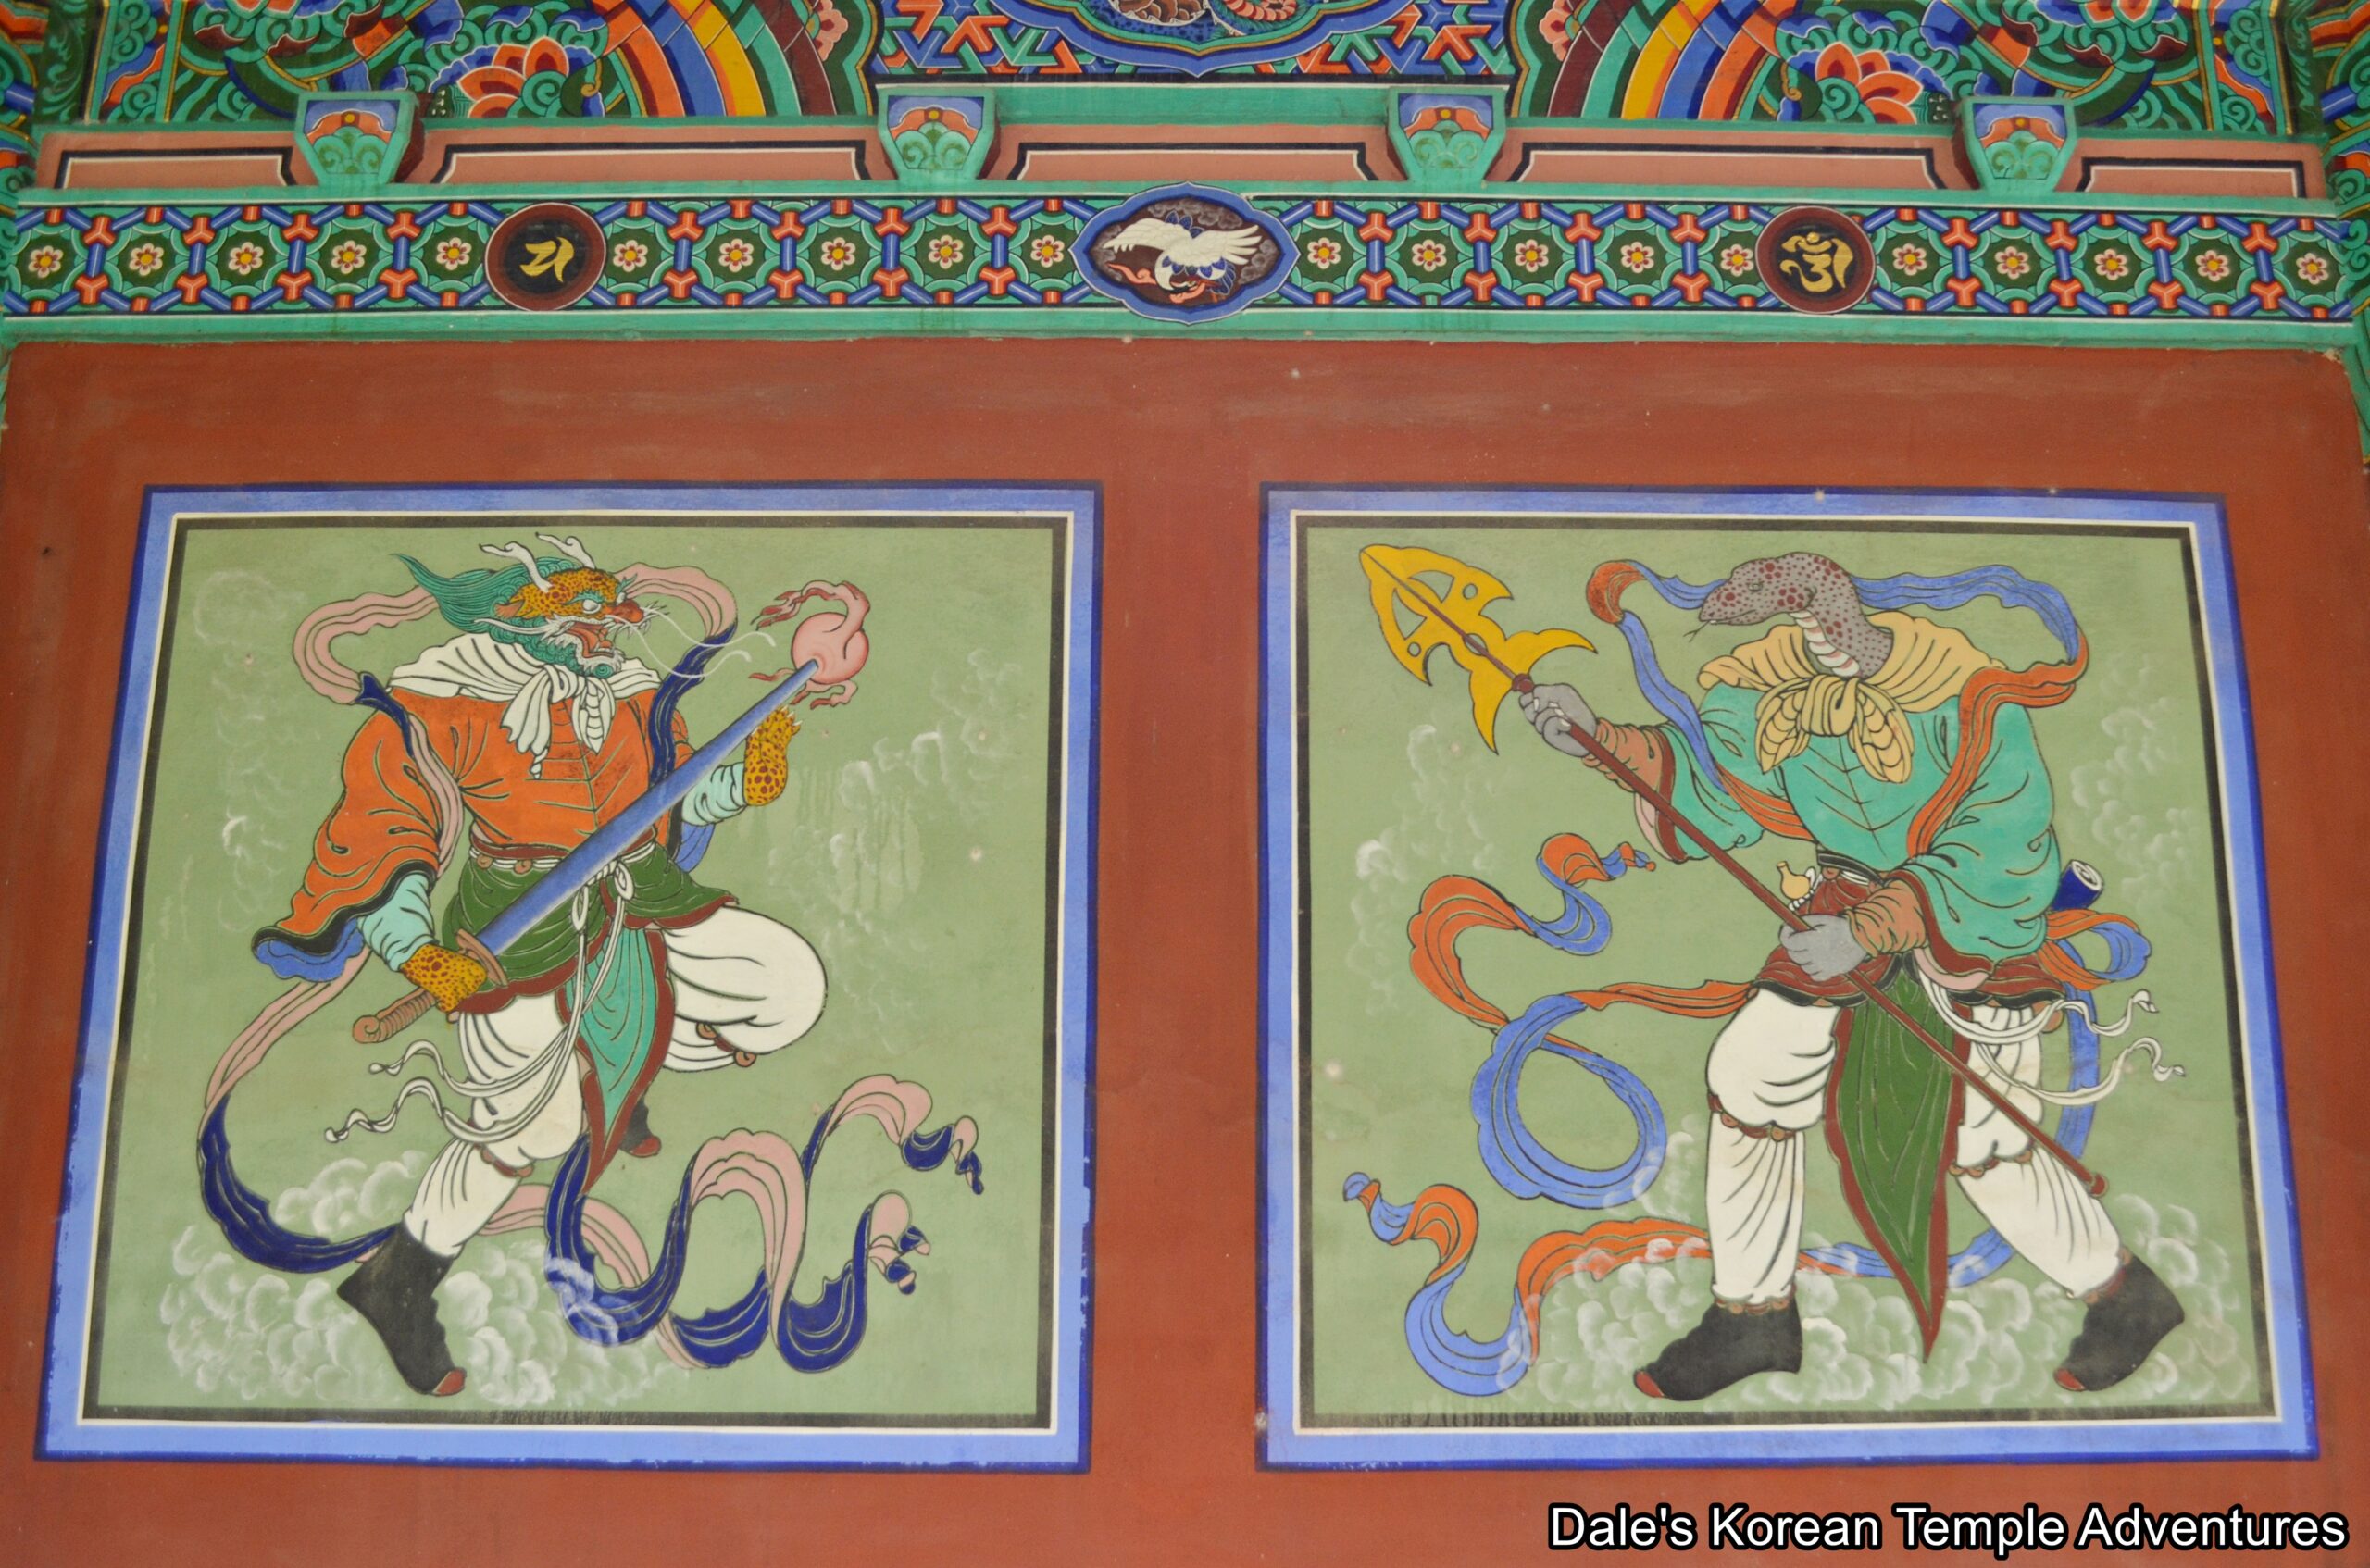
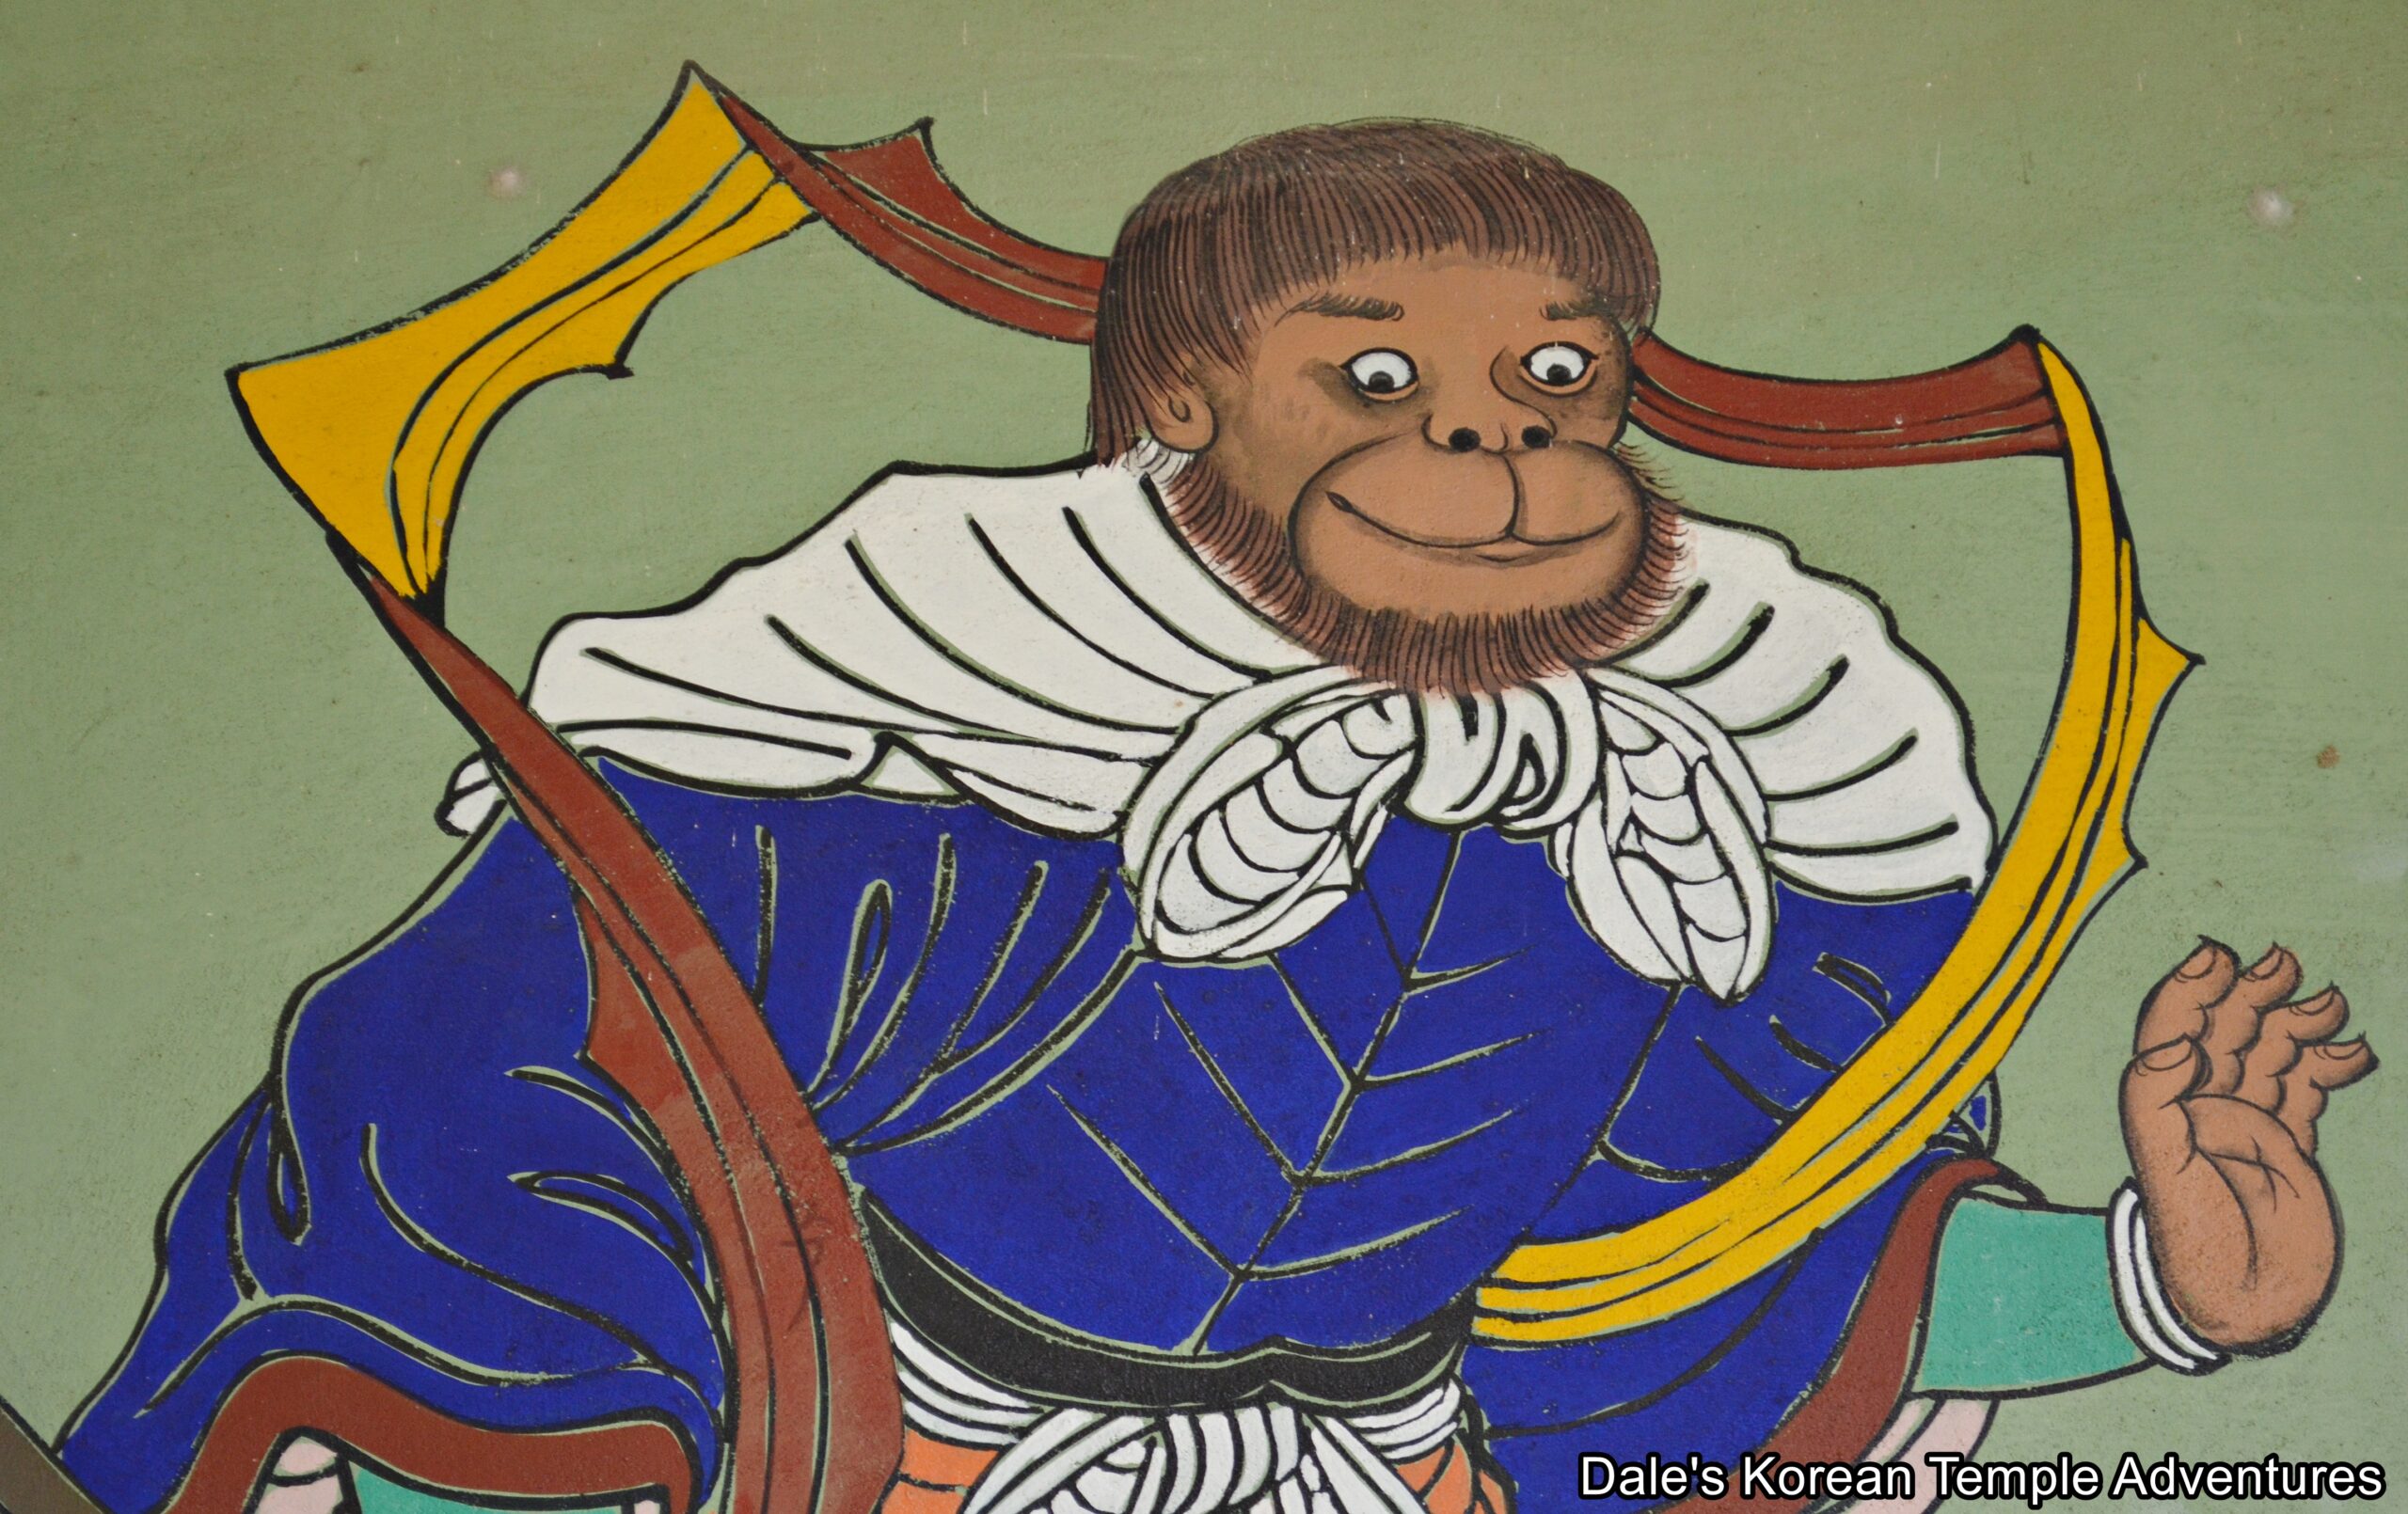
One of the guardian paintings that adorns the entryway.
The multi-purpose shrine hall at Samseonam Hermitage.
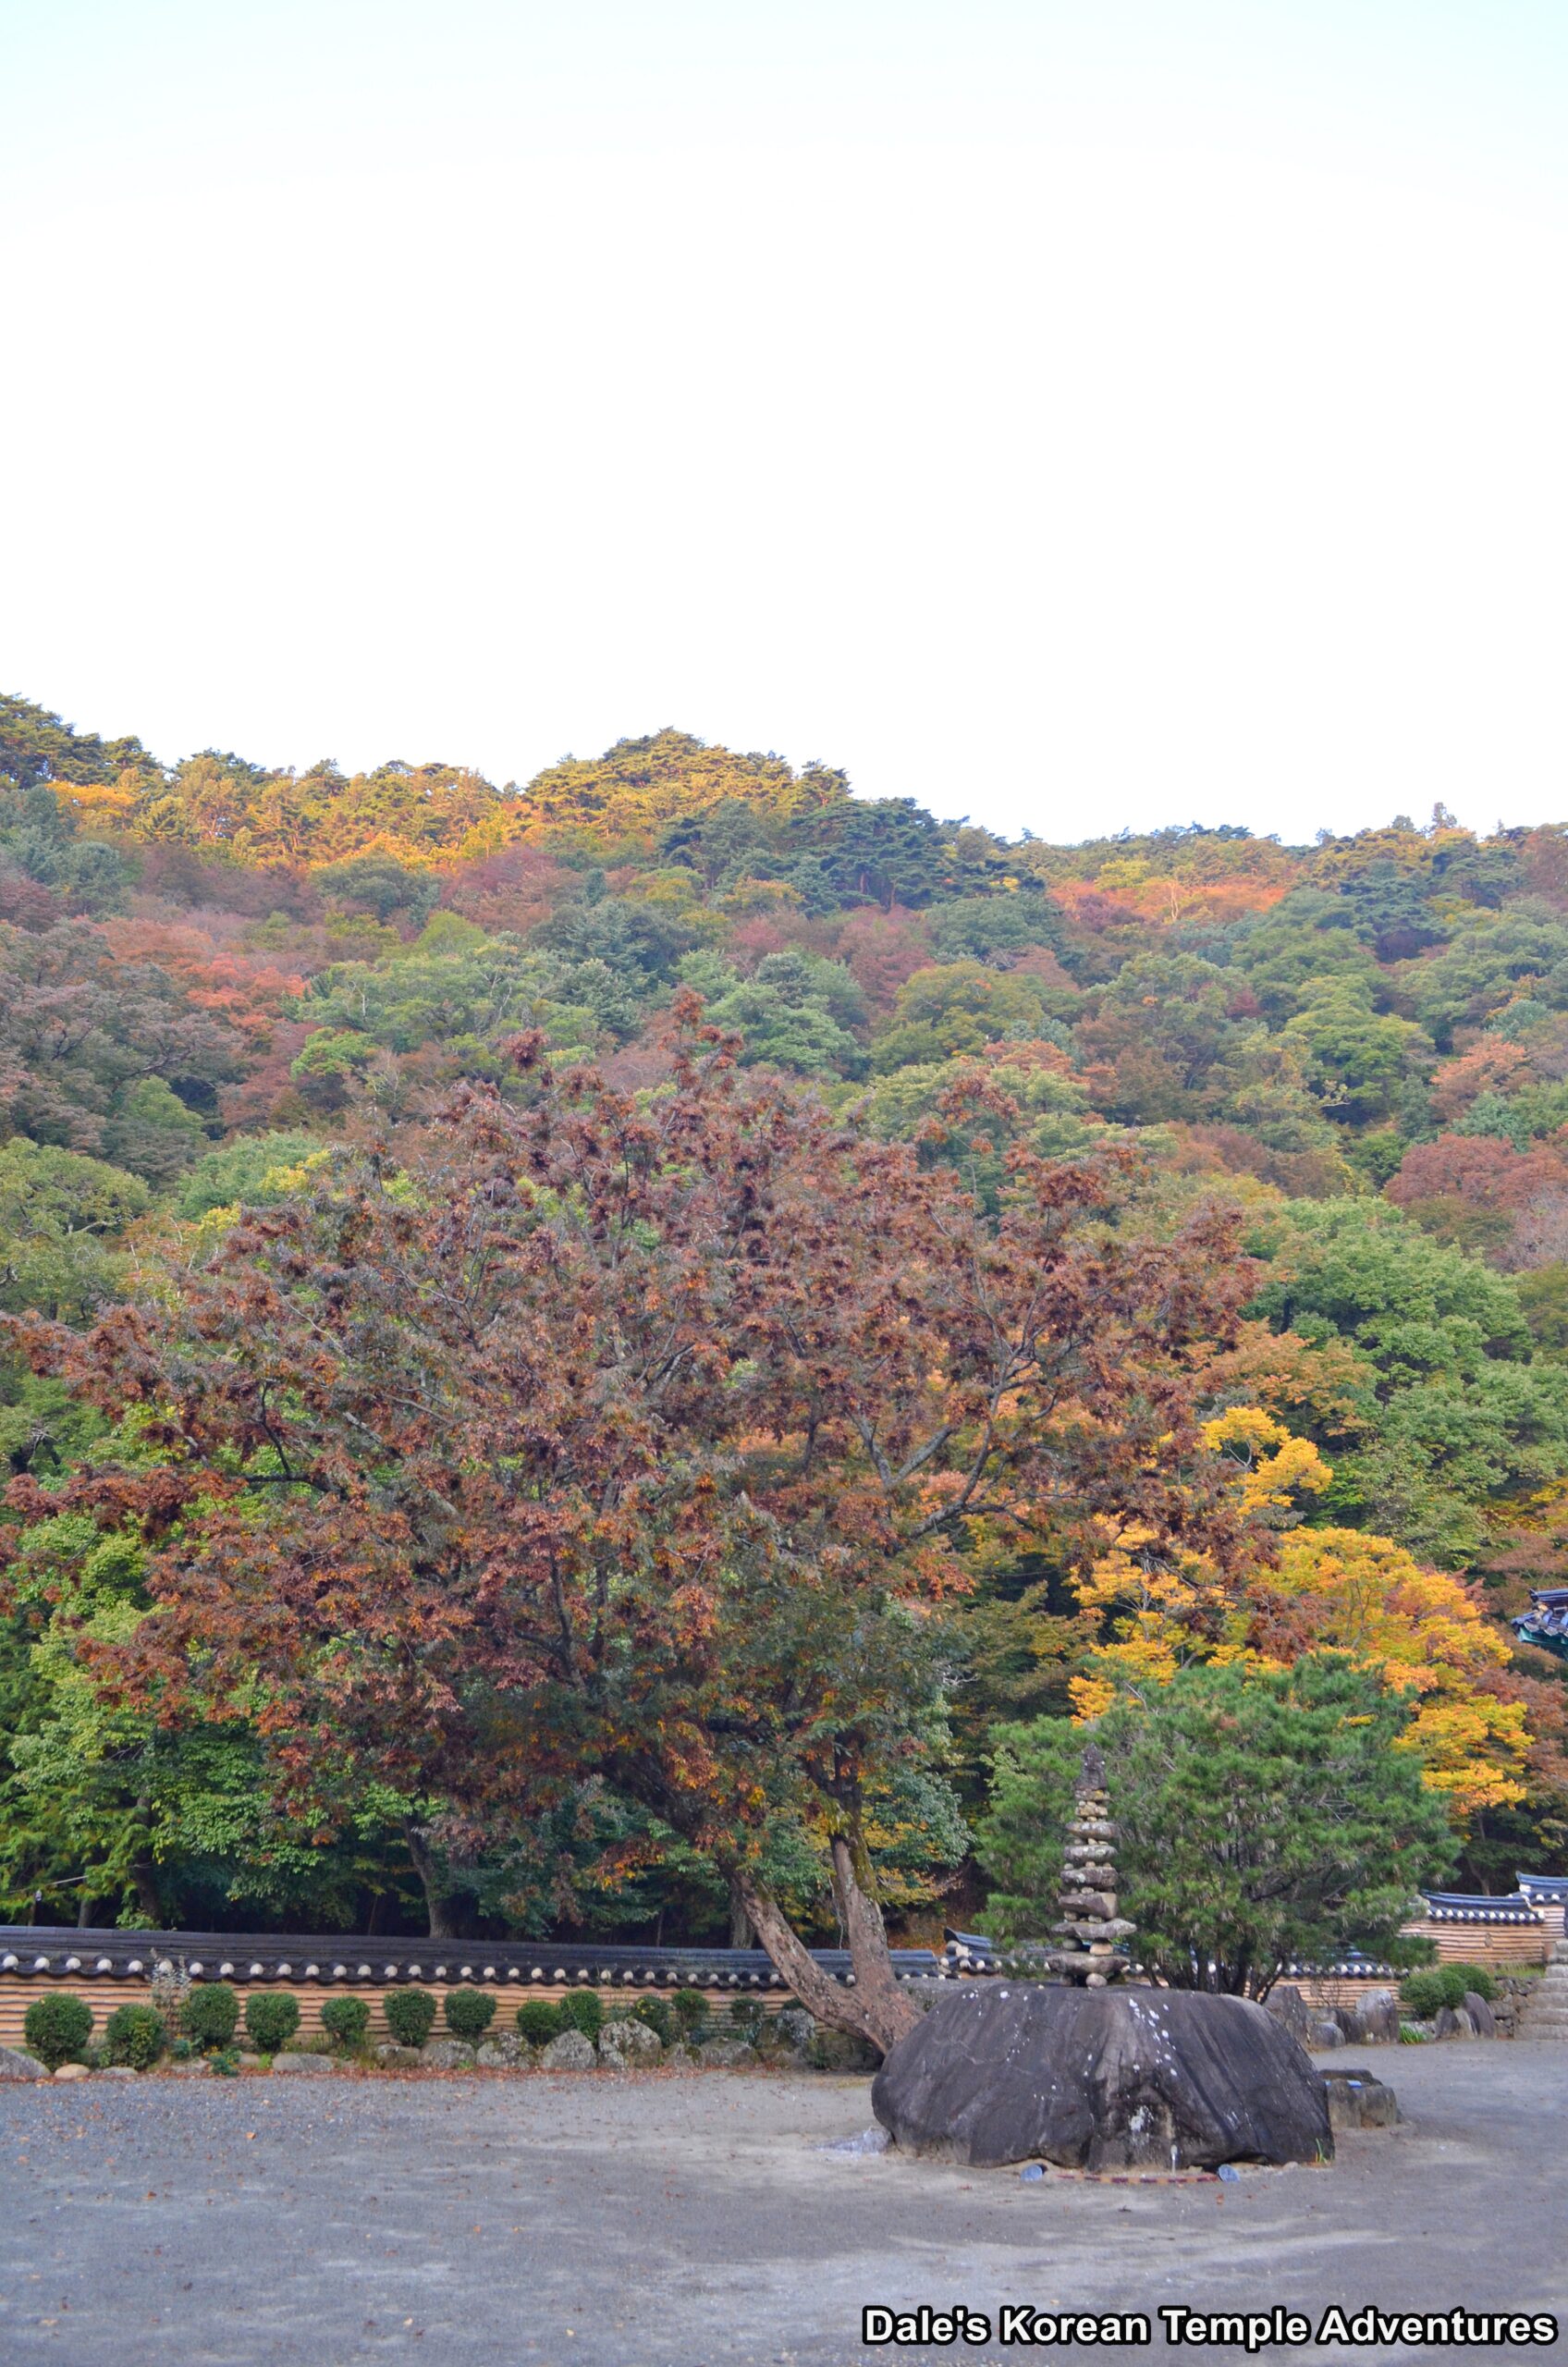
Fall foliage and the rock pagoda in the hermitage courtyard.
A look down the long shrine hall.
The main altar inside the Geukrak-jeon Hall.
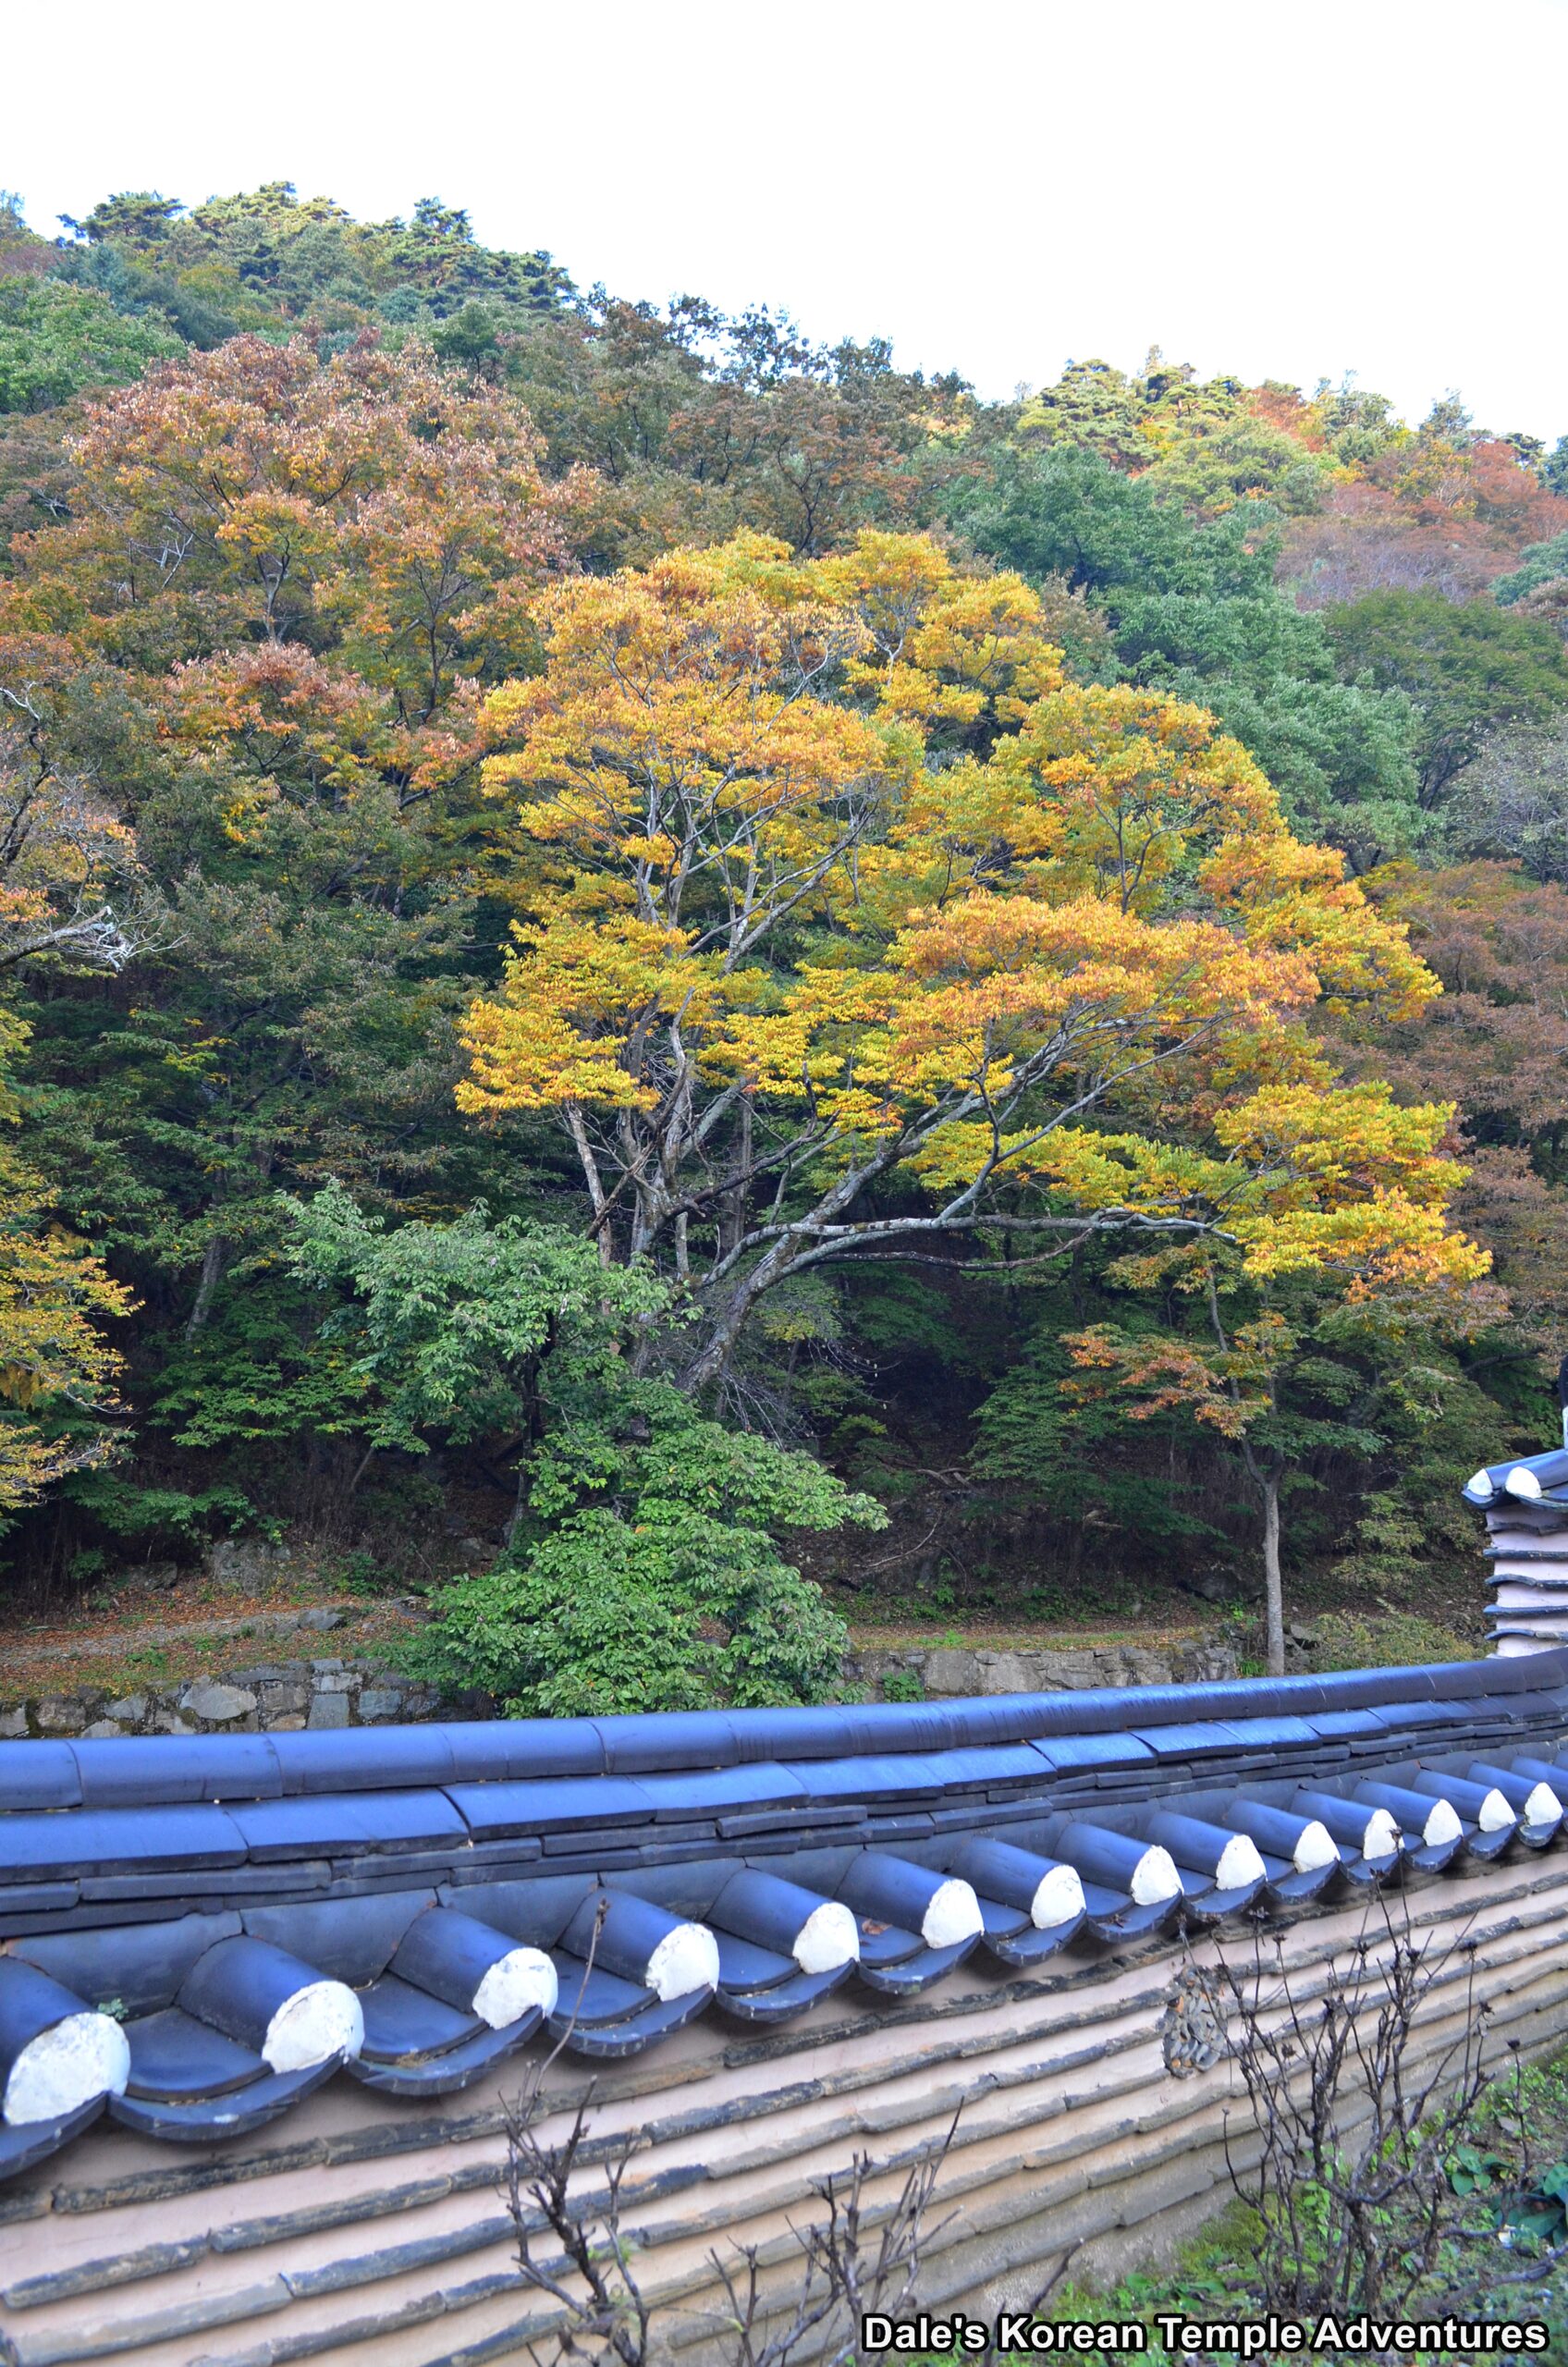
Some more of the beautiful fall foliage at the hermitage.
A blurry image of Jowang-shin (The Fireplace King Spirit).
The hillside Samseong-gak Hall.
One of the exterior walls is adorned with this image of Bohyeon-bosal (The Bodhisattva of Power).
The central images dedicated to Chilseong (The Seven Stars) inside the shaman shrine hall.
Joined by this older image dedicated to Dokseong (The Lonely Saint).
And an older image of Sanshin (The Mountain Spirit), as well.
즘 and 쯤 are used in different ways and it's important to know their differences. This video explains how to use 즘, 즈음, and 쯤, which are used to mean "about" or "around."
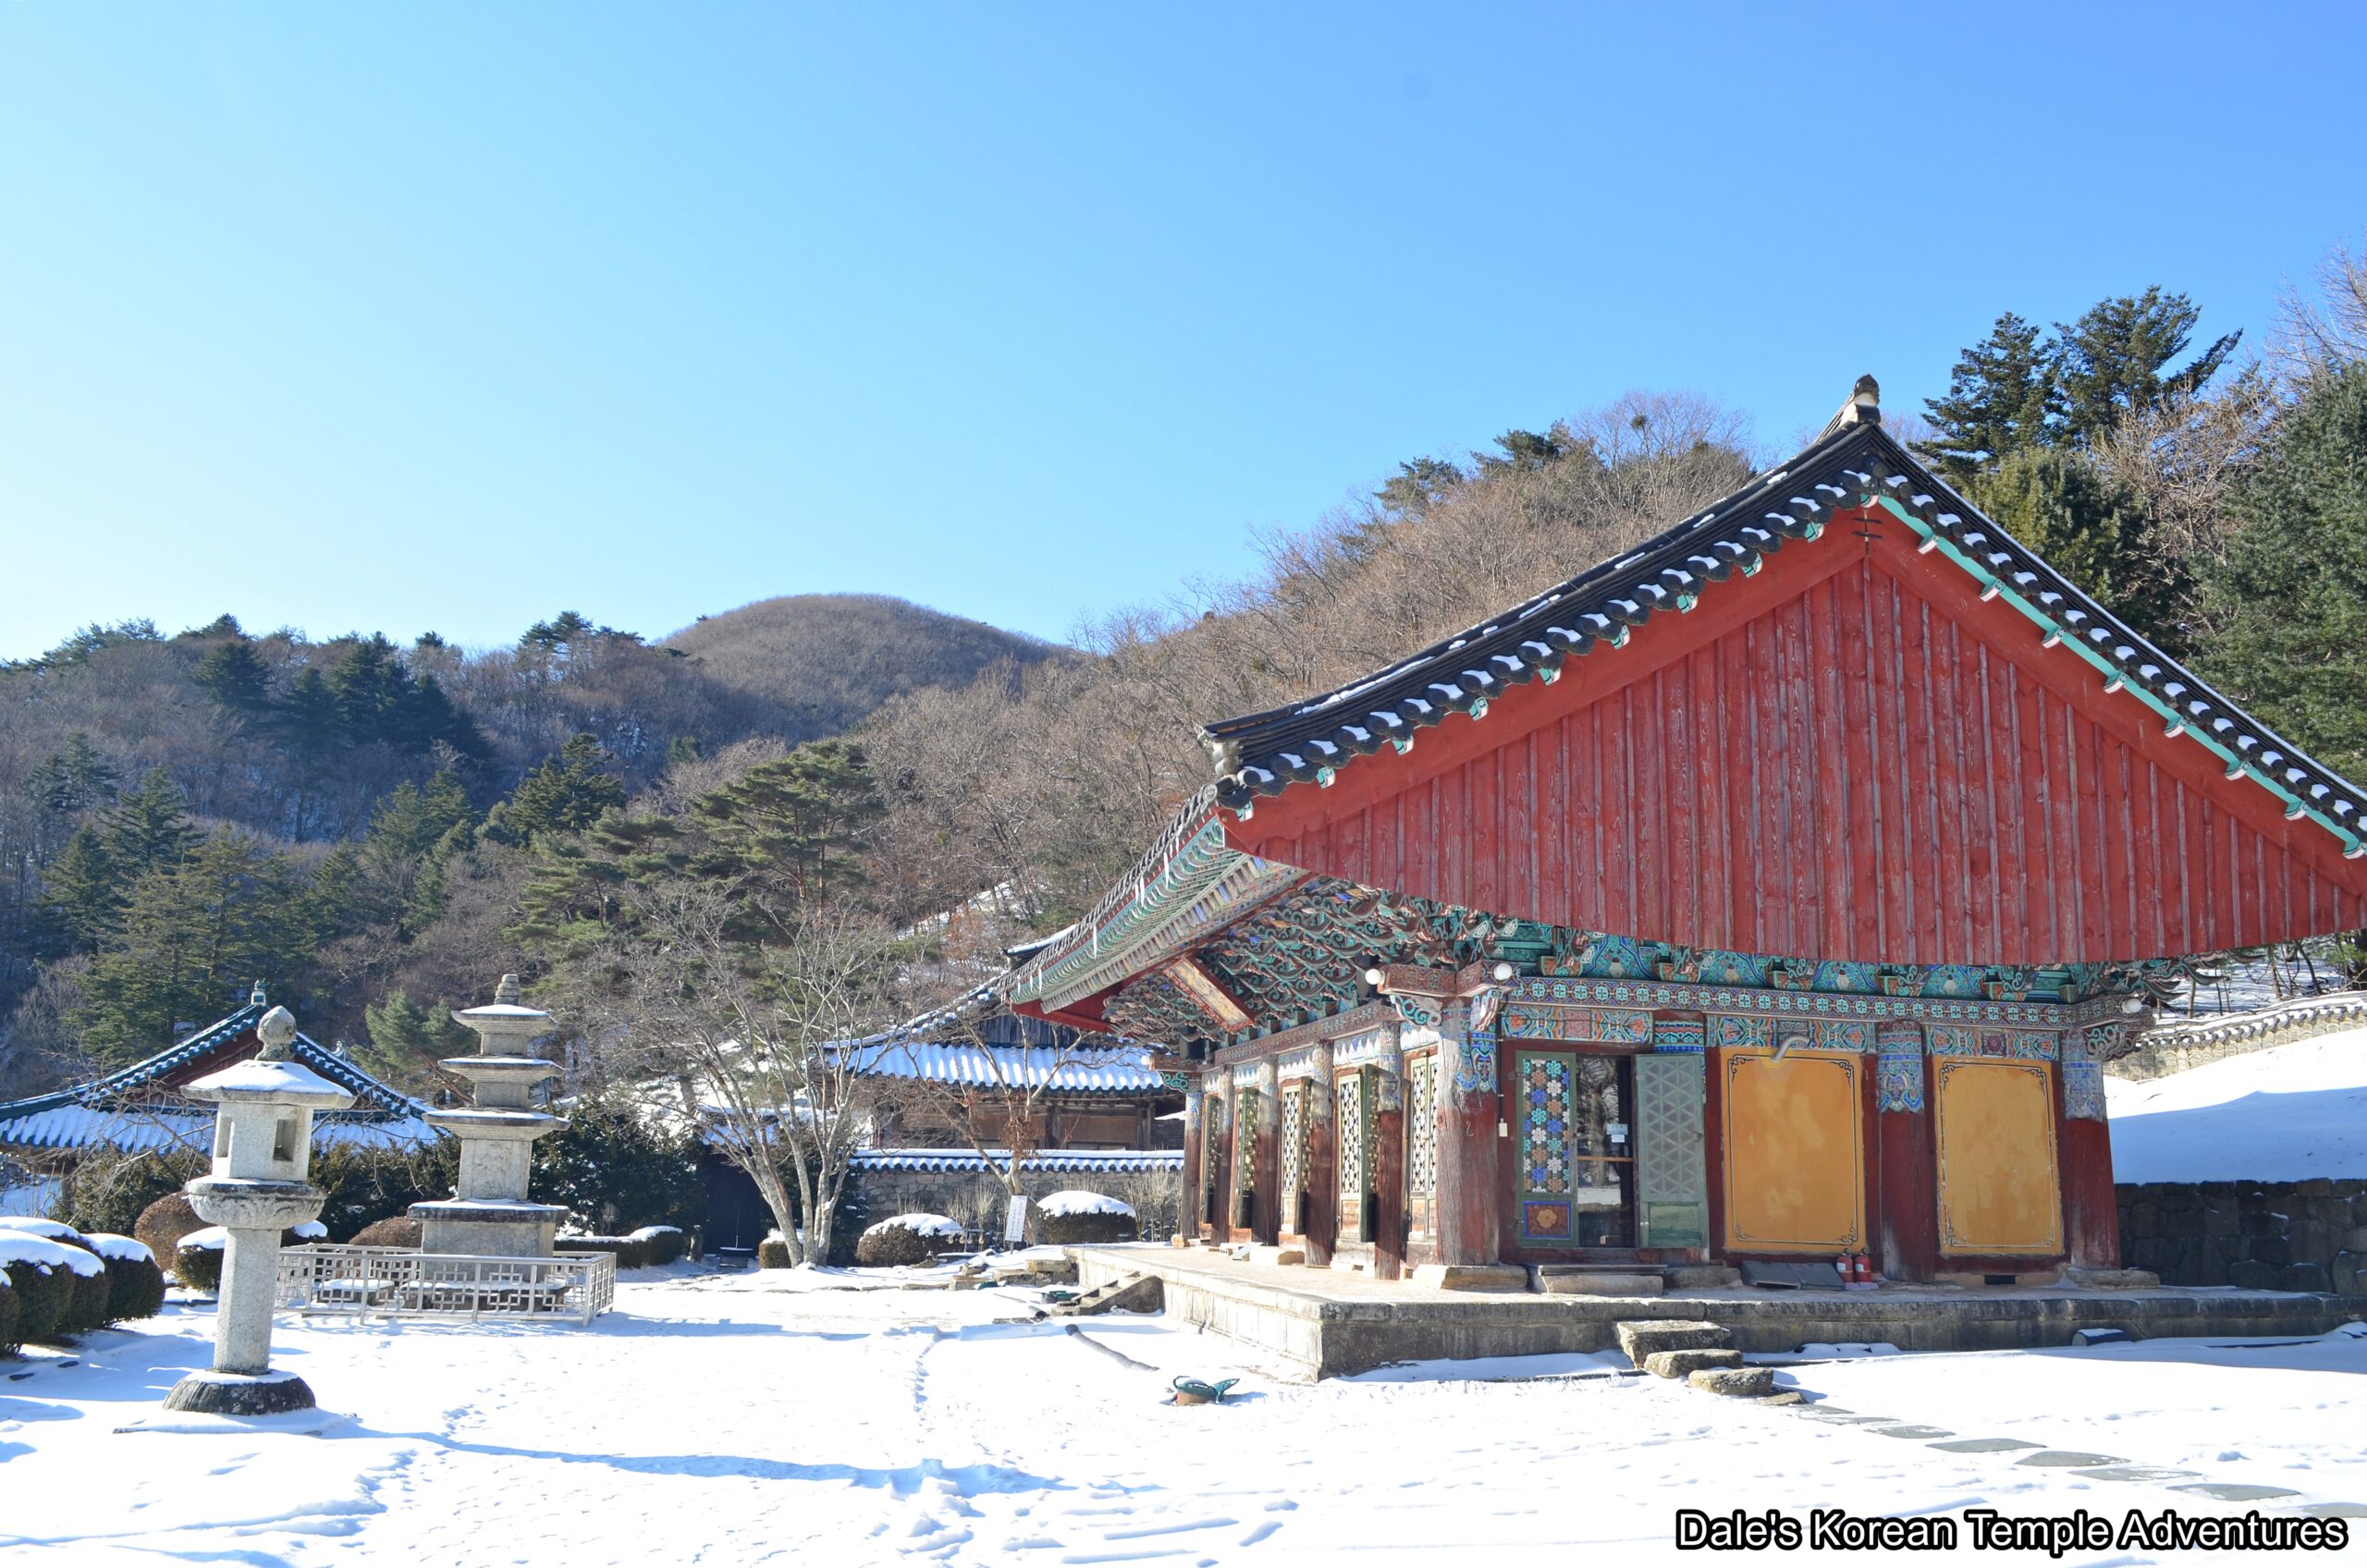
Sudoam Hermitage on the Cheongamsa Temple Grounds in Gimcheon, Gyeongsangbuk-do.
Hermitage History
Sudoam Hermitage is a hermitage that belongs to Cheongamsa Temple in Gimcheon, Gyeongsangbuk-do. The hermitage is located south of the main temple on Mt. Sudosan (1,317.3 m). Sudoam Hermitage means “Practicing the Way Hermitage” in English. Like Cheongamsa Temple, Sudoam Hermitage was founded by Doseon-guksa (826-898 A.D.) in 859 A.D. Originally, the hermitage belonged to Ssanggyesa Temple. However, throughout the centuries, very little is known about the hermitage’s history after it was first founded. Later, Sudoam Hermitage was completely destroyed by fire in 1894 during the Donghak Peasant Revolution (1894-95). In 1900, the hermitage was rebuilt, which was around the same time as Cheongamsa Temple was rebuilt, as well. Sudoam Hermitage was rebuilt at this time by the monk Poeung-hwasang. The hermitage is also where Gyeongheo (1849–1912) and Hanam Jungwon (1876-1951) first met. It’s also where the monk Kusan (1909-83) gained his initial enlightenment.
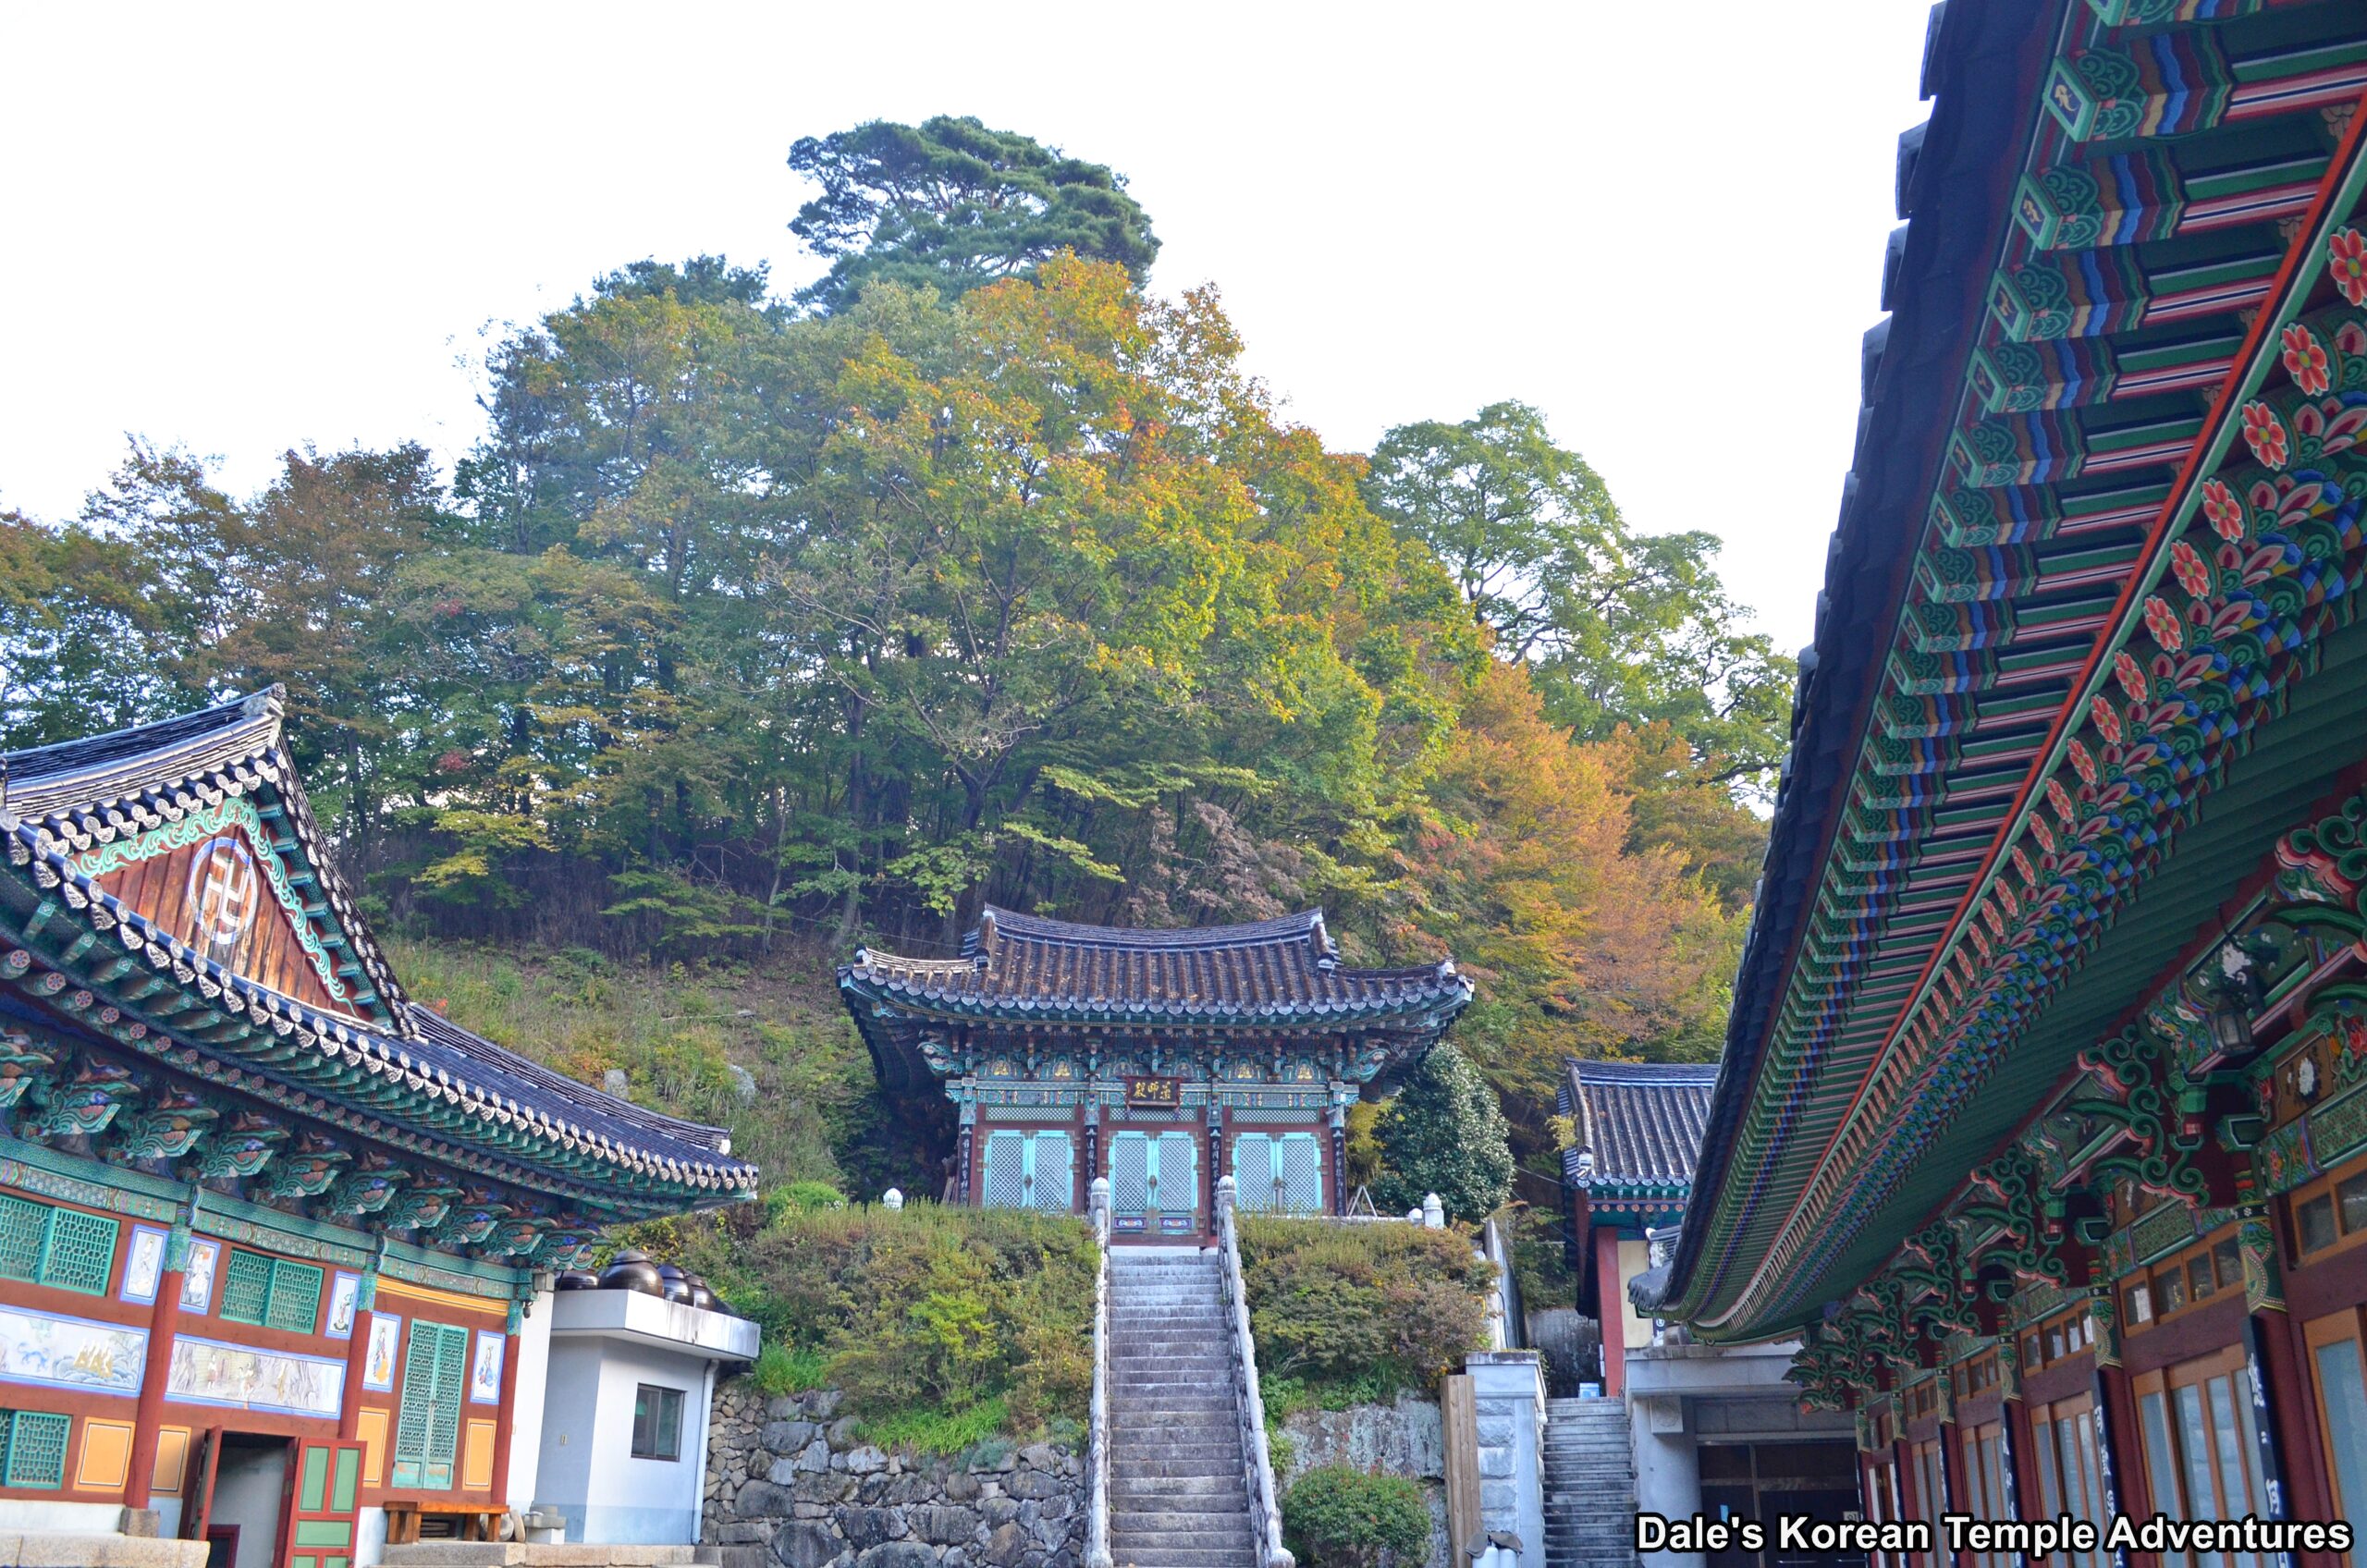
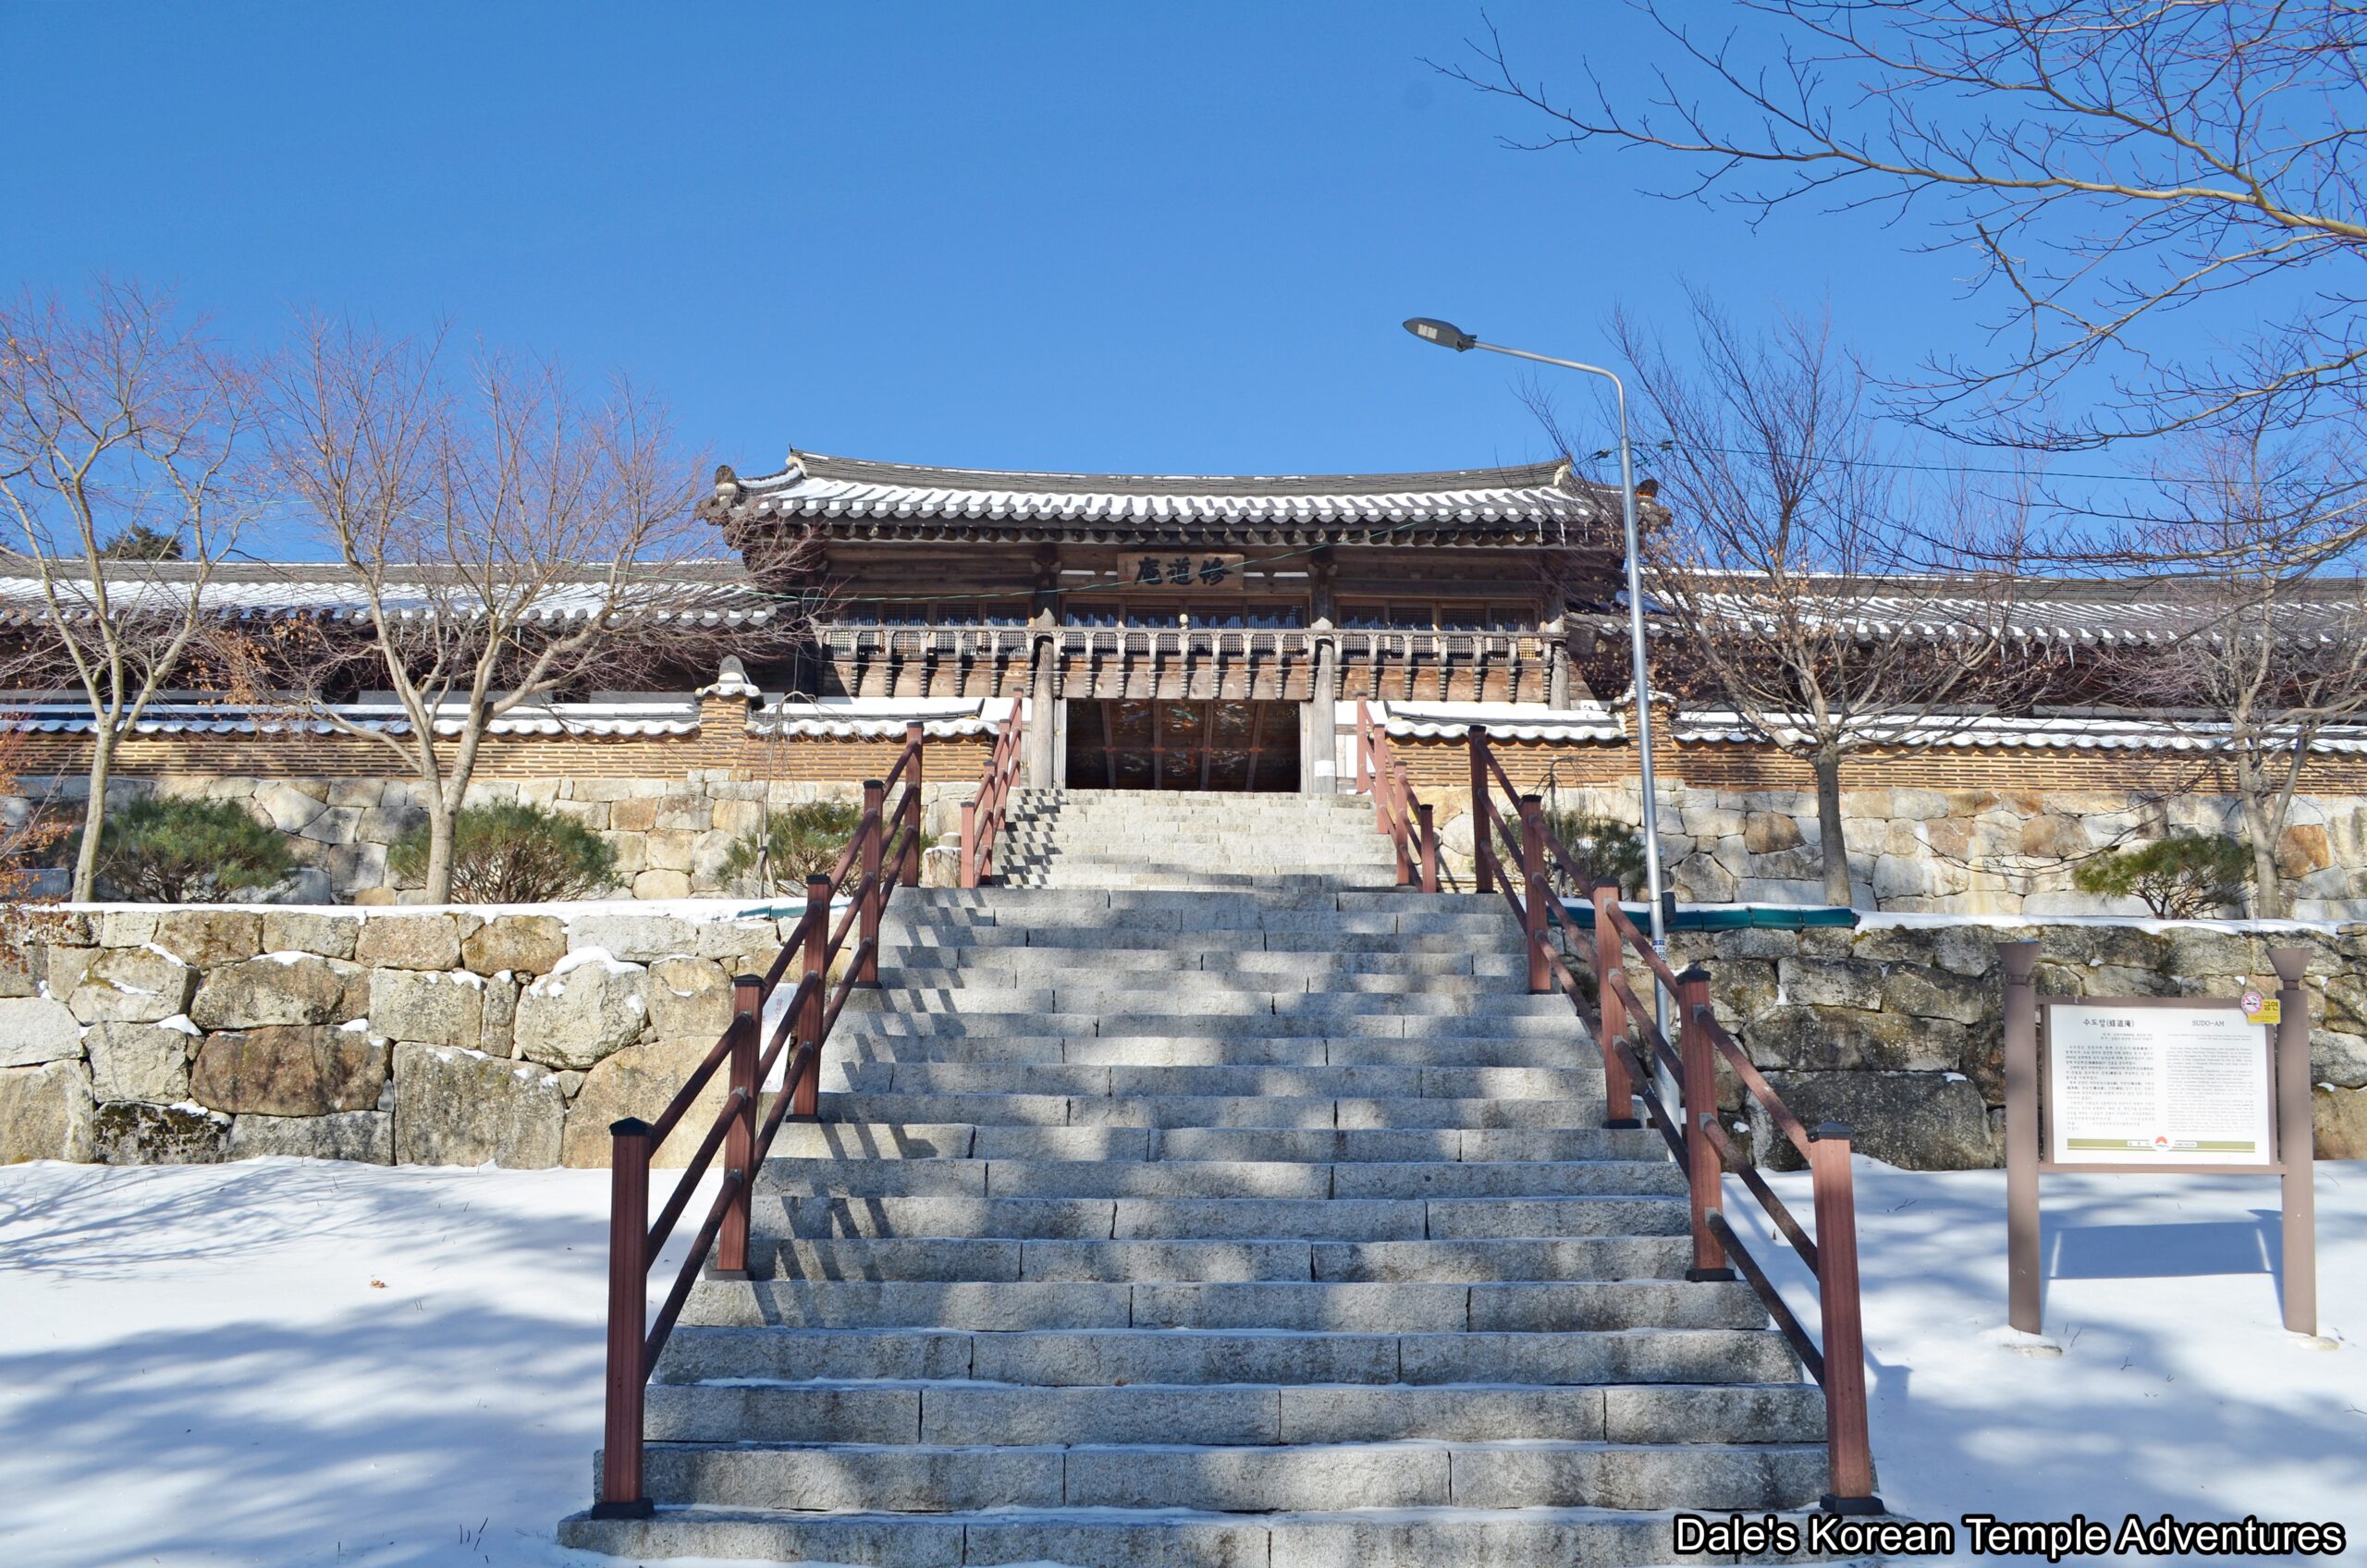
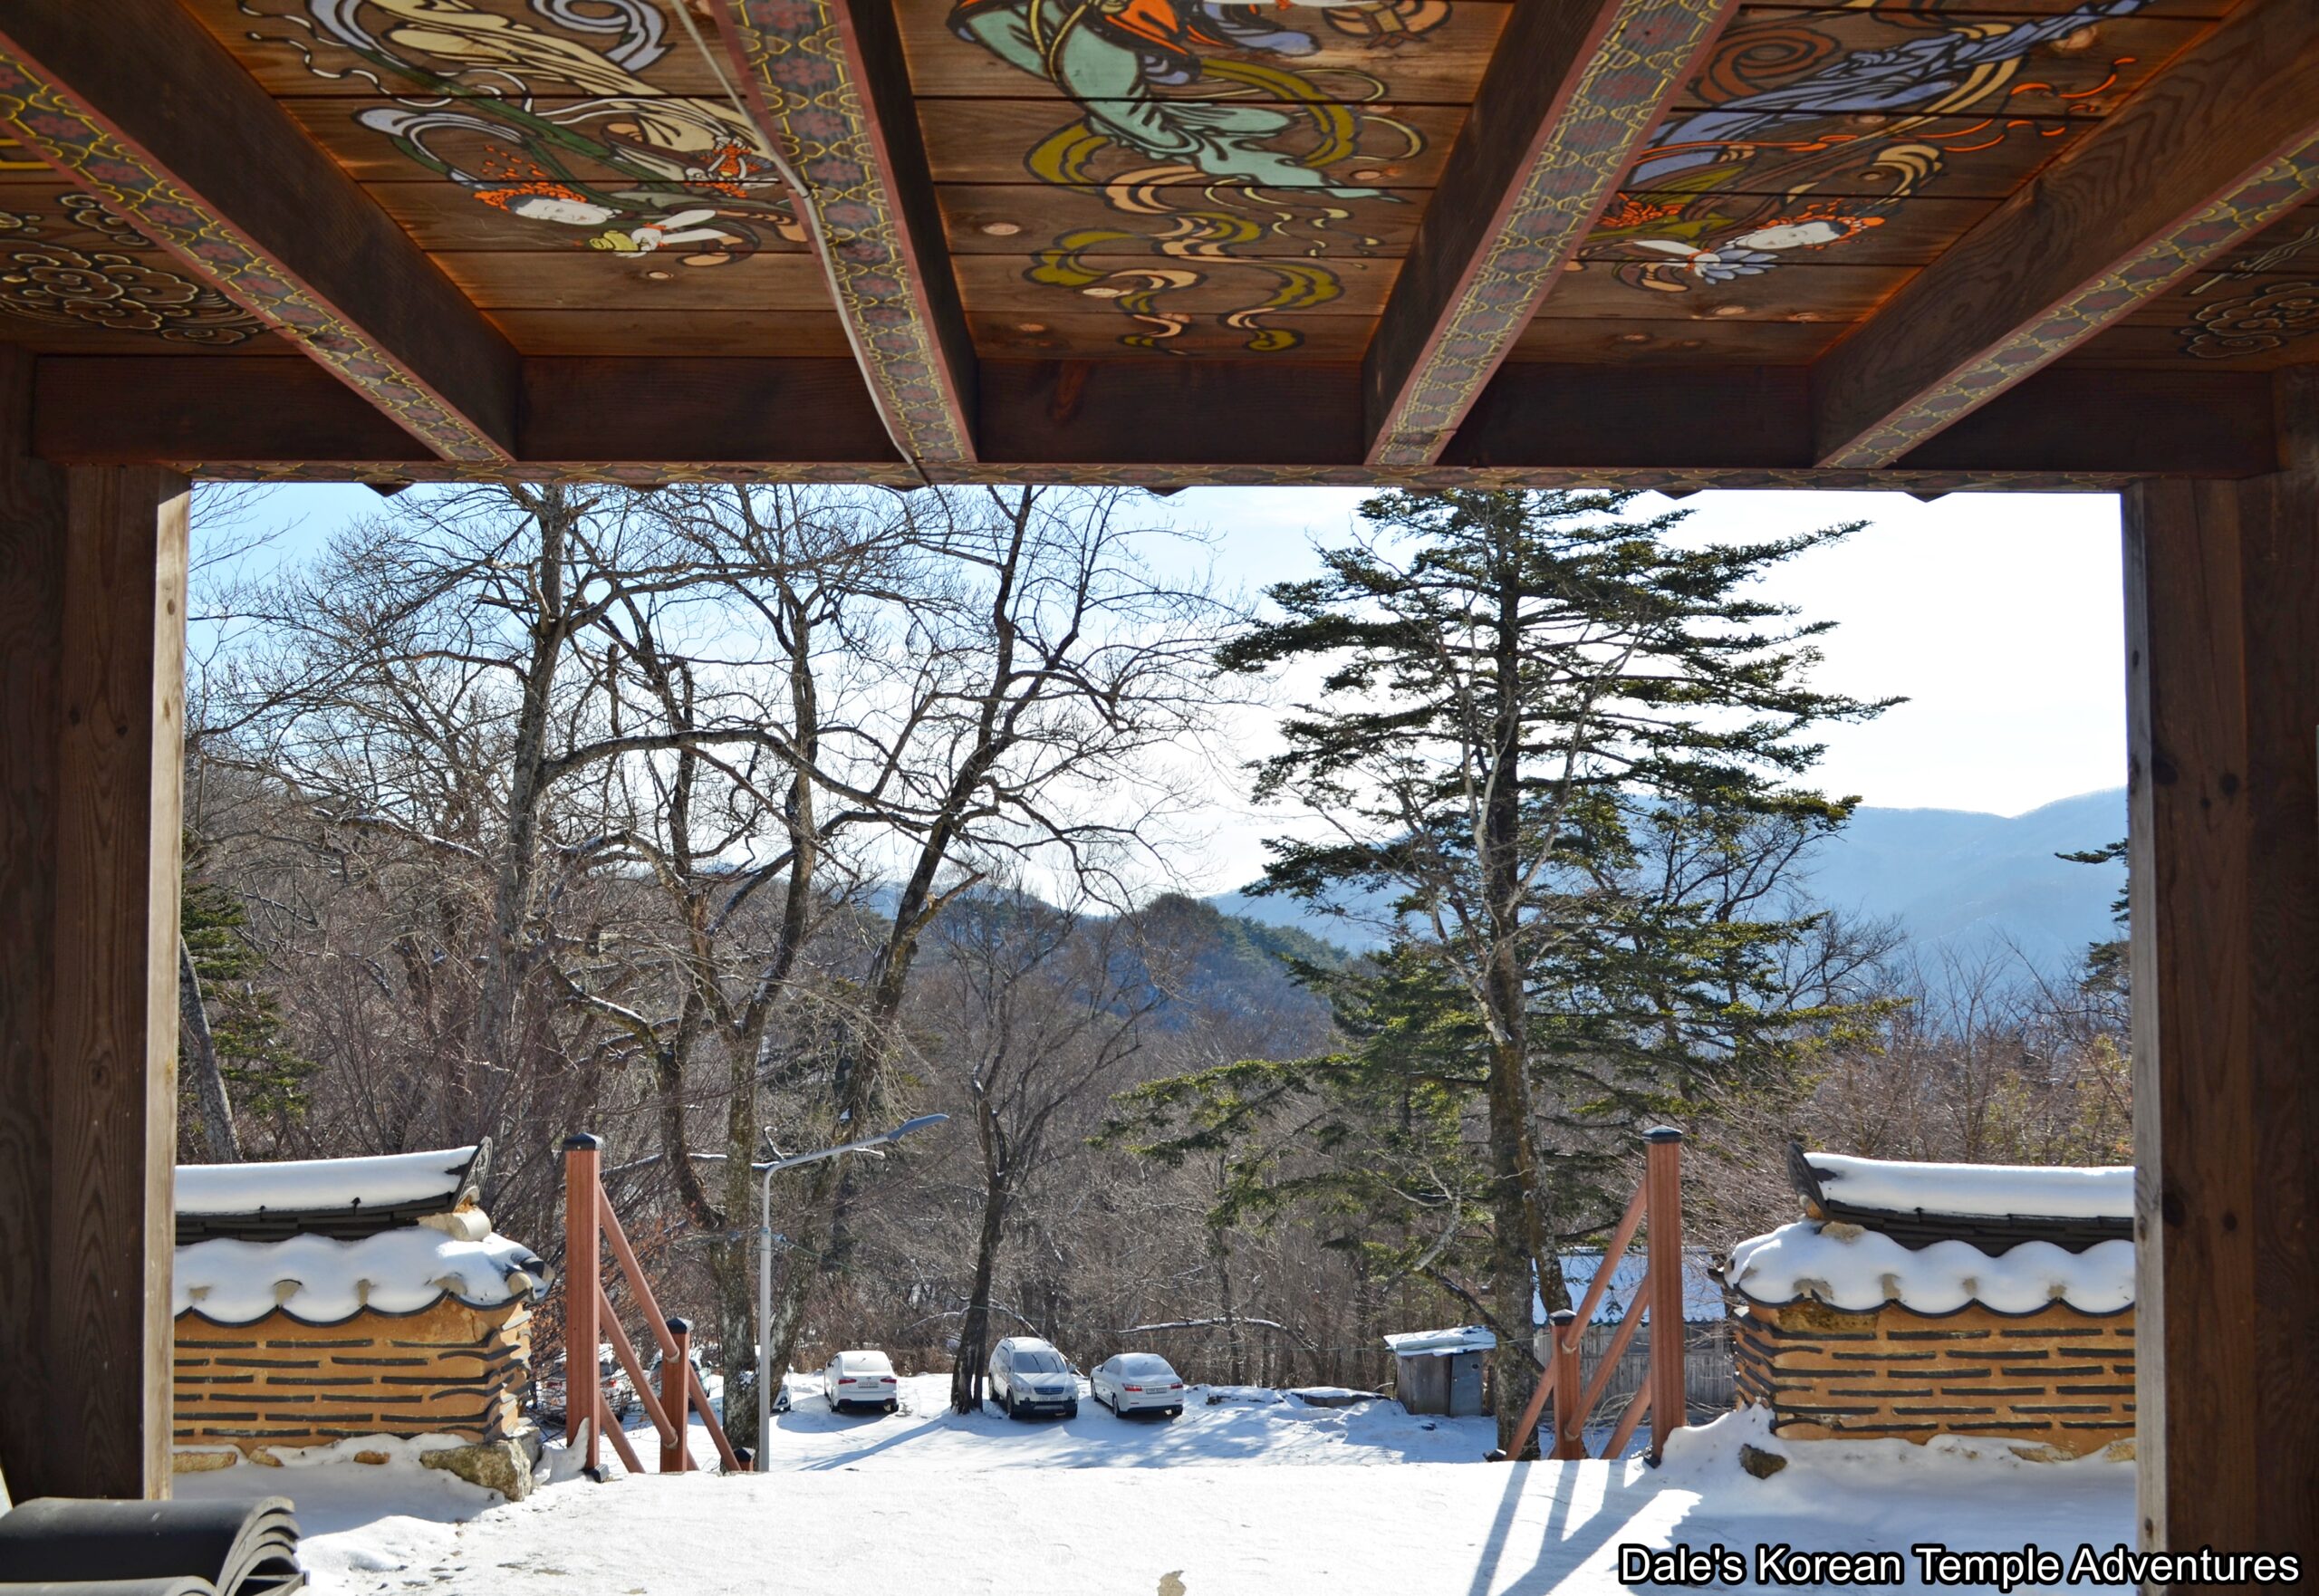
From the hermitage parking lot, you can look up and see the Boje-ru Pavilion. The pavilion is quite long with dorms to the right and left of the central entryway to the hermitage grounds. Passing through the entryway, and if you look up, you’ll notice Bicheon (Flying Heavenly Deities) painted on the ceiling of the structure. And if you look back, you’ll notice the rolling hills and valley off in the distance.
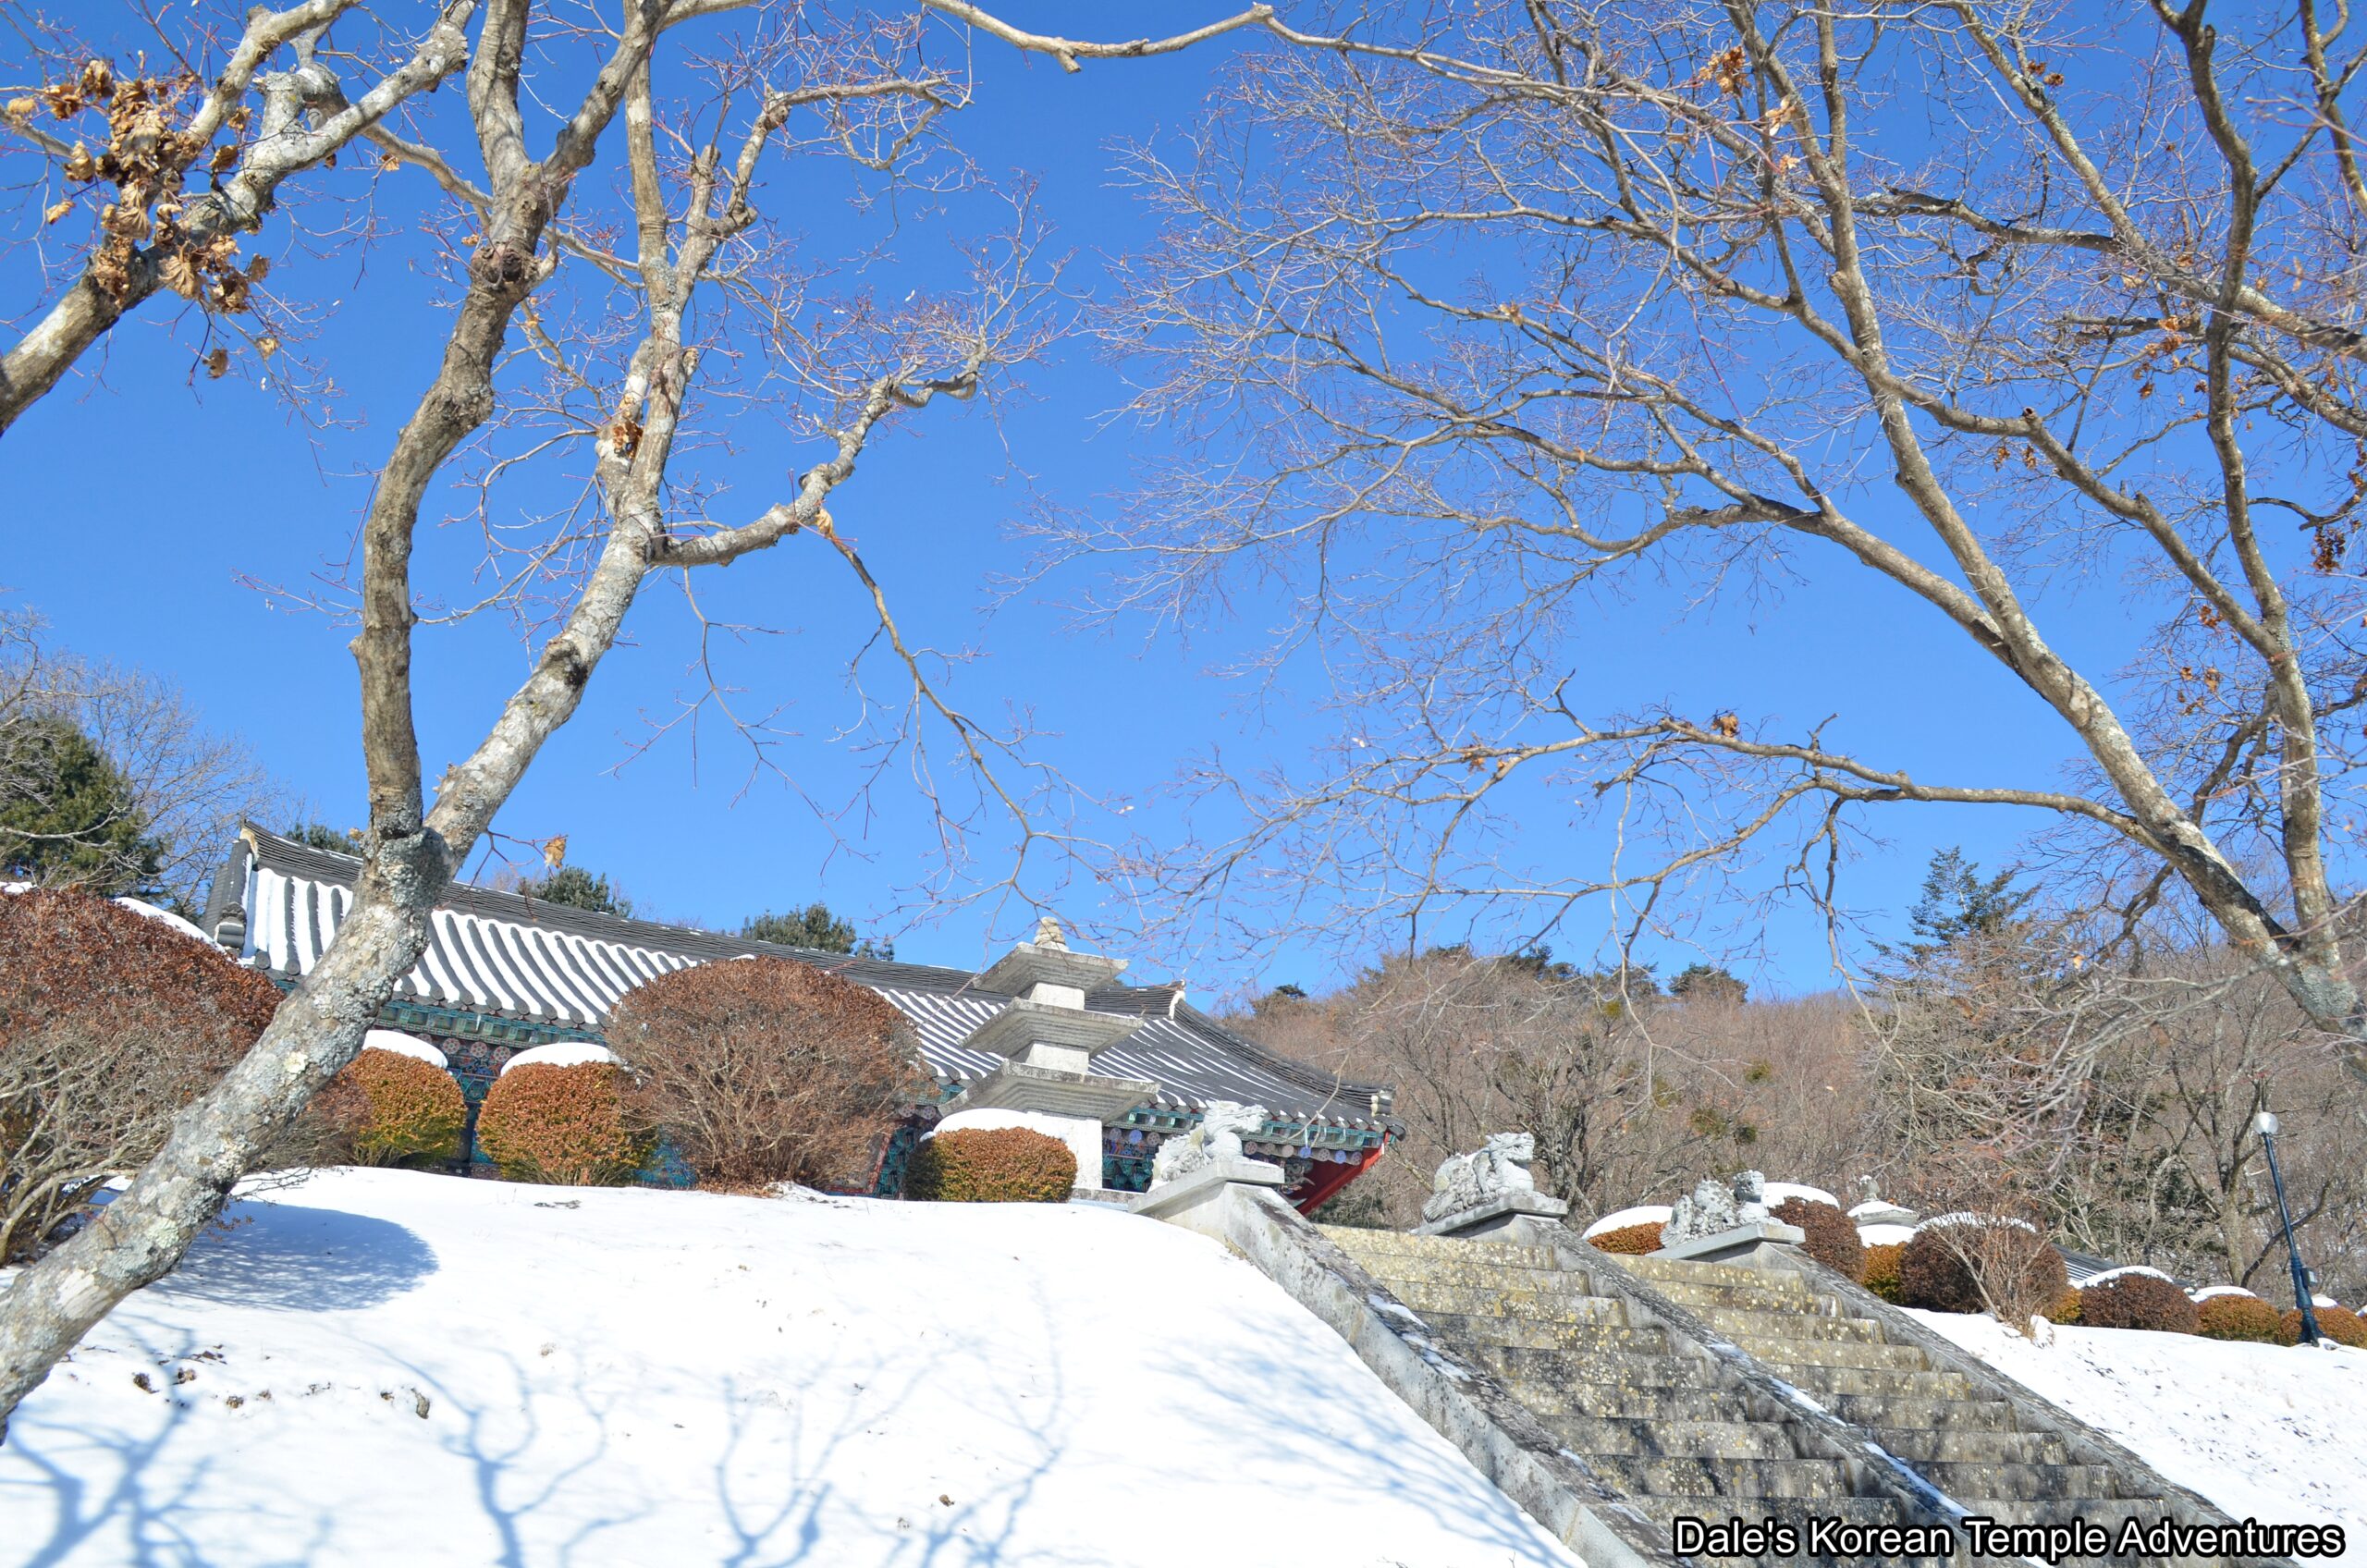
Having passed through the Boje-ru Pavilion, you’ll now be standing in the upper parking lot. To your direct right is an administrative building, but it’s straight ahead that you’ll want to go. You’ll see a long set of stairs fronted by three stone lions. At the top of these stairs, you’ll find three more statues. These stone statues are dragon statues. At the top of these stairs, and a little further up the pathway, you’ll see another set of stairs. These stairs are fronted by two book-ending stone lanterns and a central stone lion. Climbing these next set of stairs, and past the three additional dragon statues, you’ll come face-to-face with one of the two pagodas that comprise the “East and West Three-Story Stone Pagodas at Sudoam Hermitage of Cheongamsa Temple.”
This first pagoda is the west pagoda. The east pagoda is located about fifty metres away. And between the two pagodas are a stone lantern and a stone marker that’s inscribed with hanja characters. As for the pagodas, they are twin pagodas. It’s believed that these pagodas were made by Doseon-guksa. Because of the narrow ridge that the shrine halls and pagodas are located on at Sudoam Hermitage, they are close in proximity to both shrine halls in this area. The west pagoda is a three-story structure that stands on a two-story pedestal. The second tier is much smaller than the first tier. A column pattern is engraved along the edge of the first body stone. Also appearing in this stone is an image of a seated Bodhisattva relief. The roof stones to each story are thinner and broader than the east pagoda’s.
As for the east pagoda, it stands on a single tier pedestal. It also has three stories. The side of each pedestal is engraved with a column pattern. What makes this pagoda different than its western neighbour is that the east pagoda’s first body narrows towards the top. Also, the Bodhisattvas in the first body stone are engraved inside a rectangular box. As for the second and third body stones, they are engraved with column patterns on all sides. The roof stones are slightly thicker and less thin than the west pagoda at Sudoam Hermitage. Judging by the design and carvings on the pagodas, they are both believed to date back to the middle of the Silla Dynasty (57 B.C. – 935 A.D.).
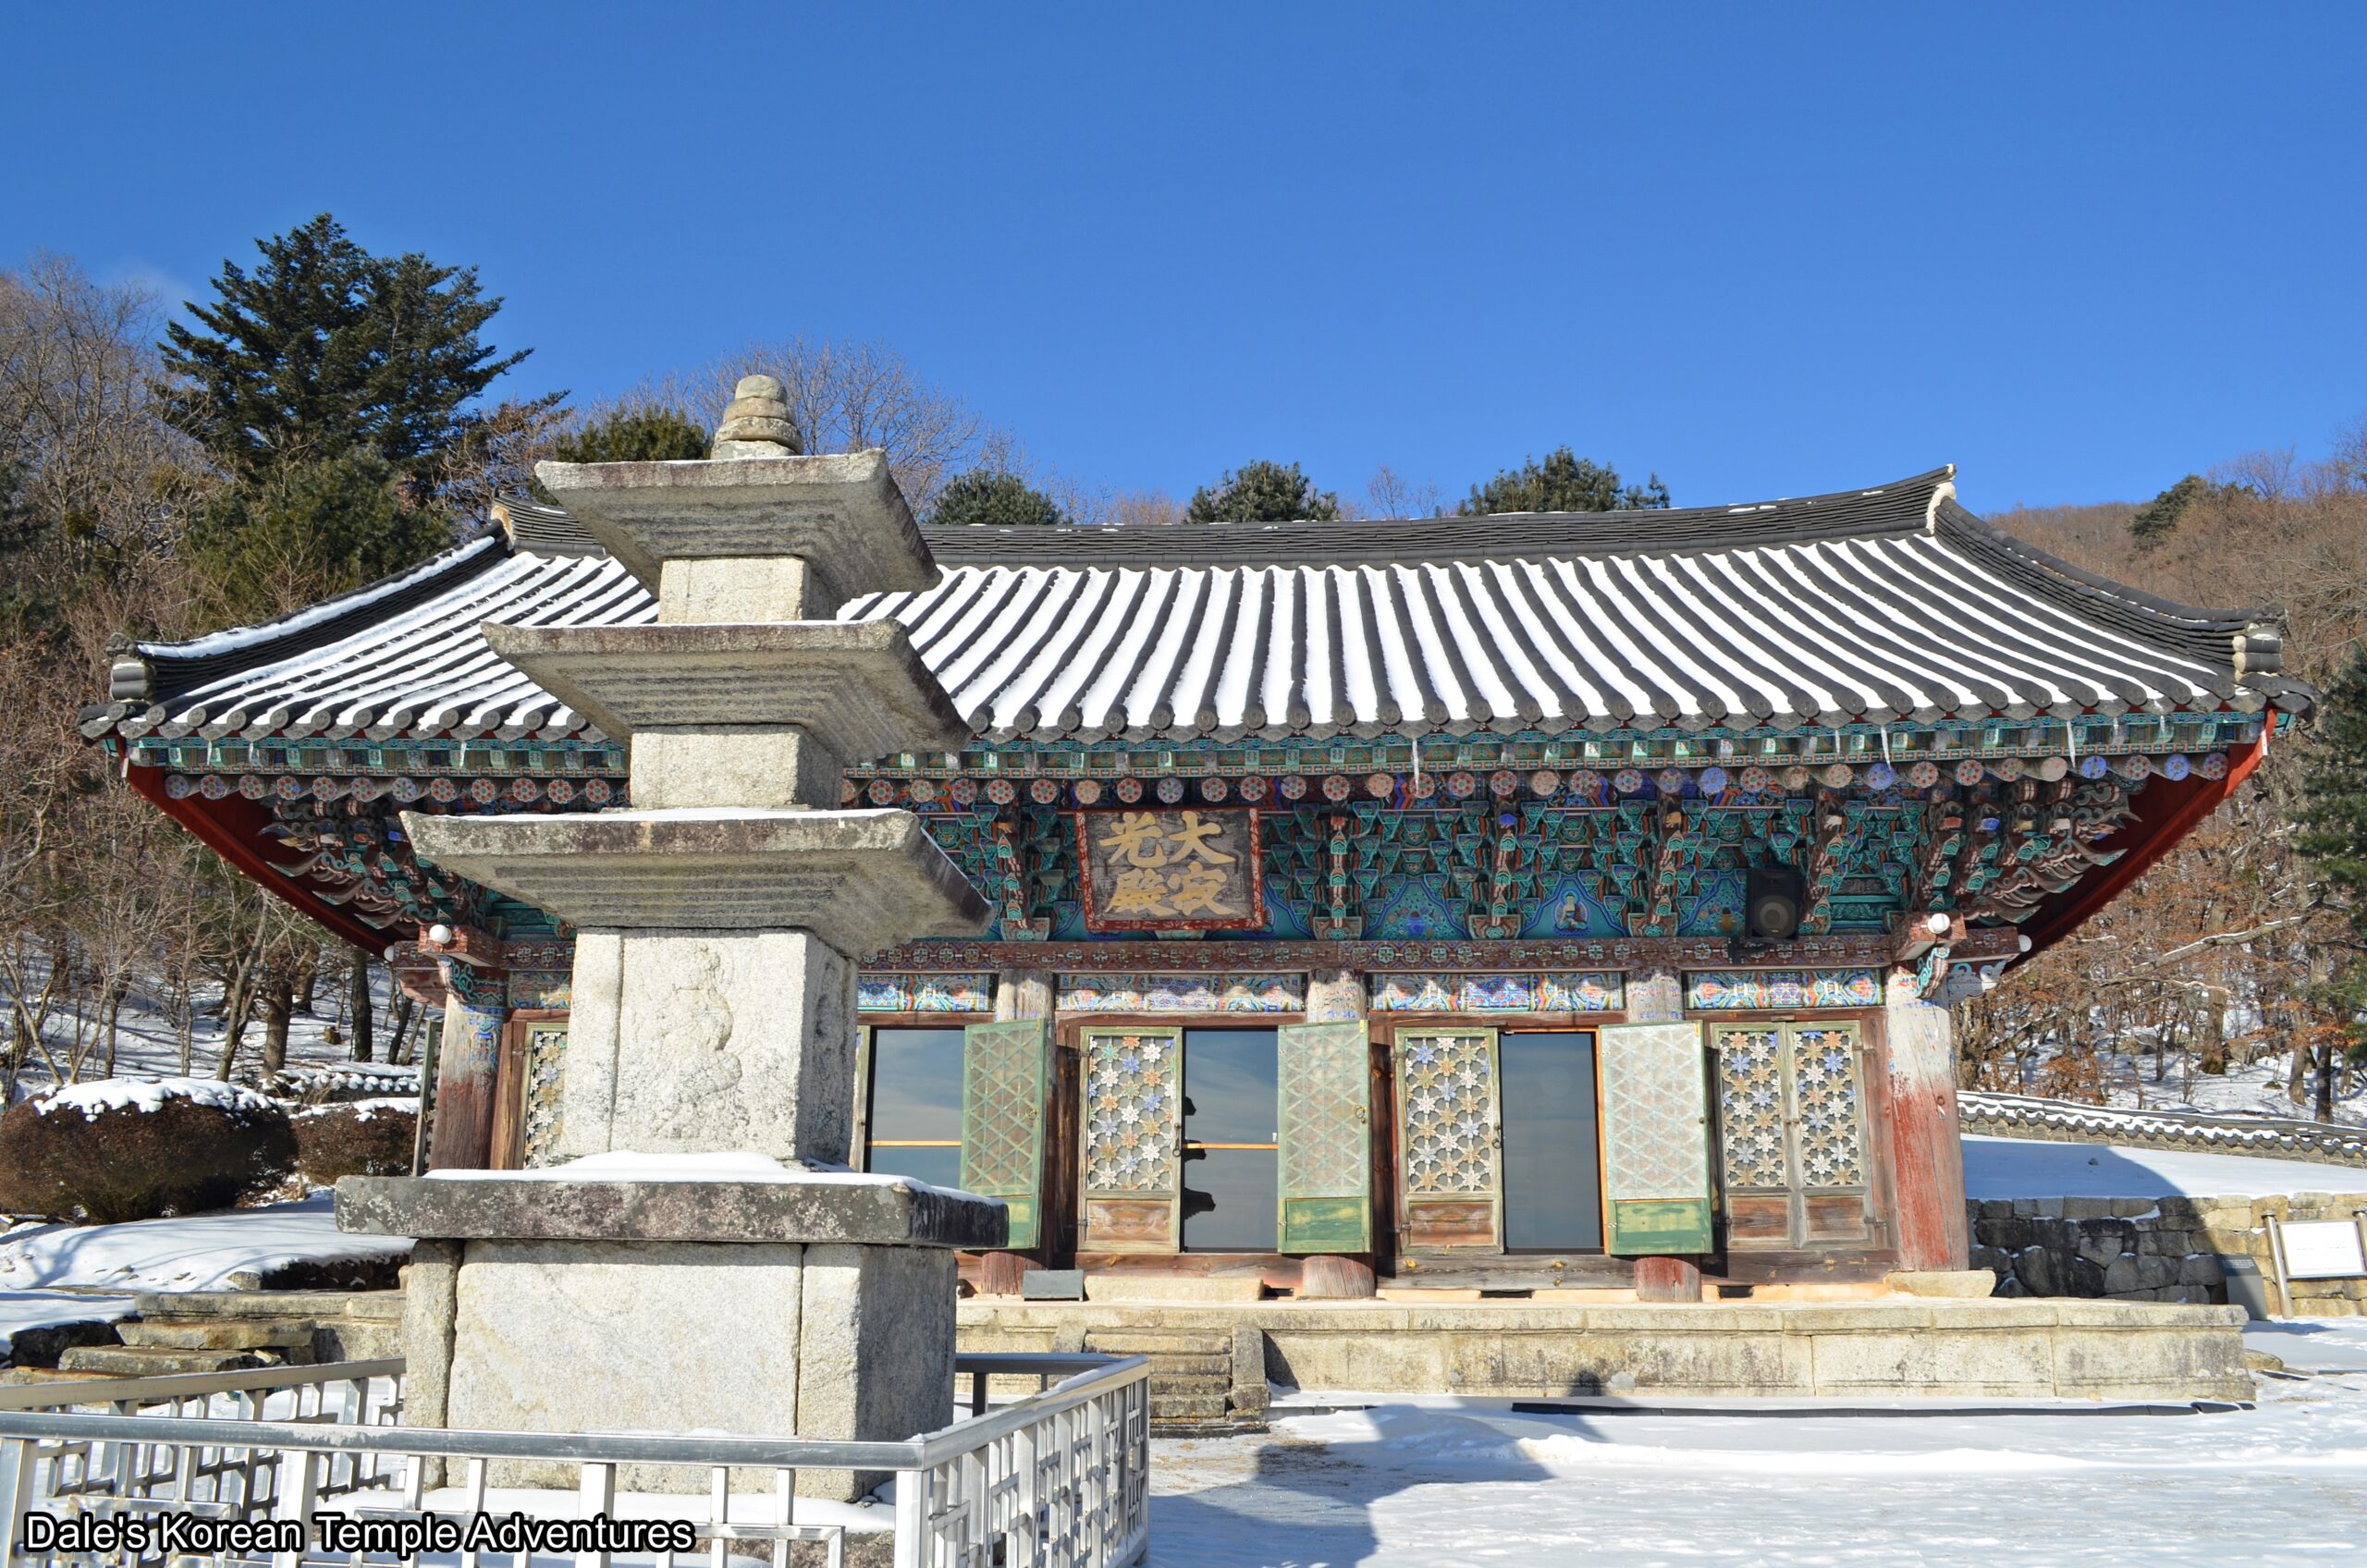
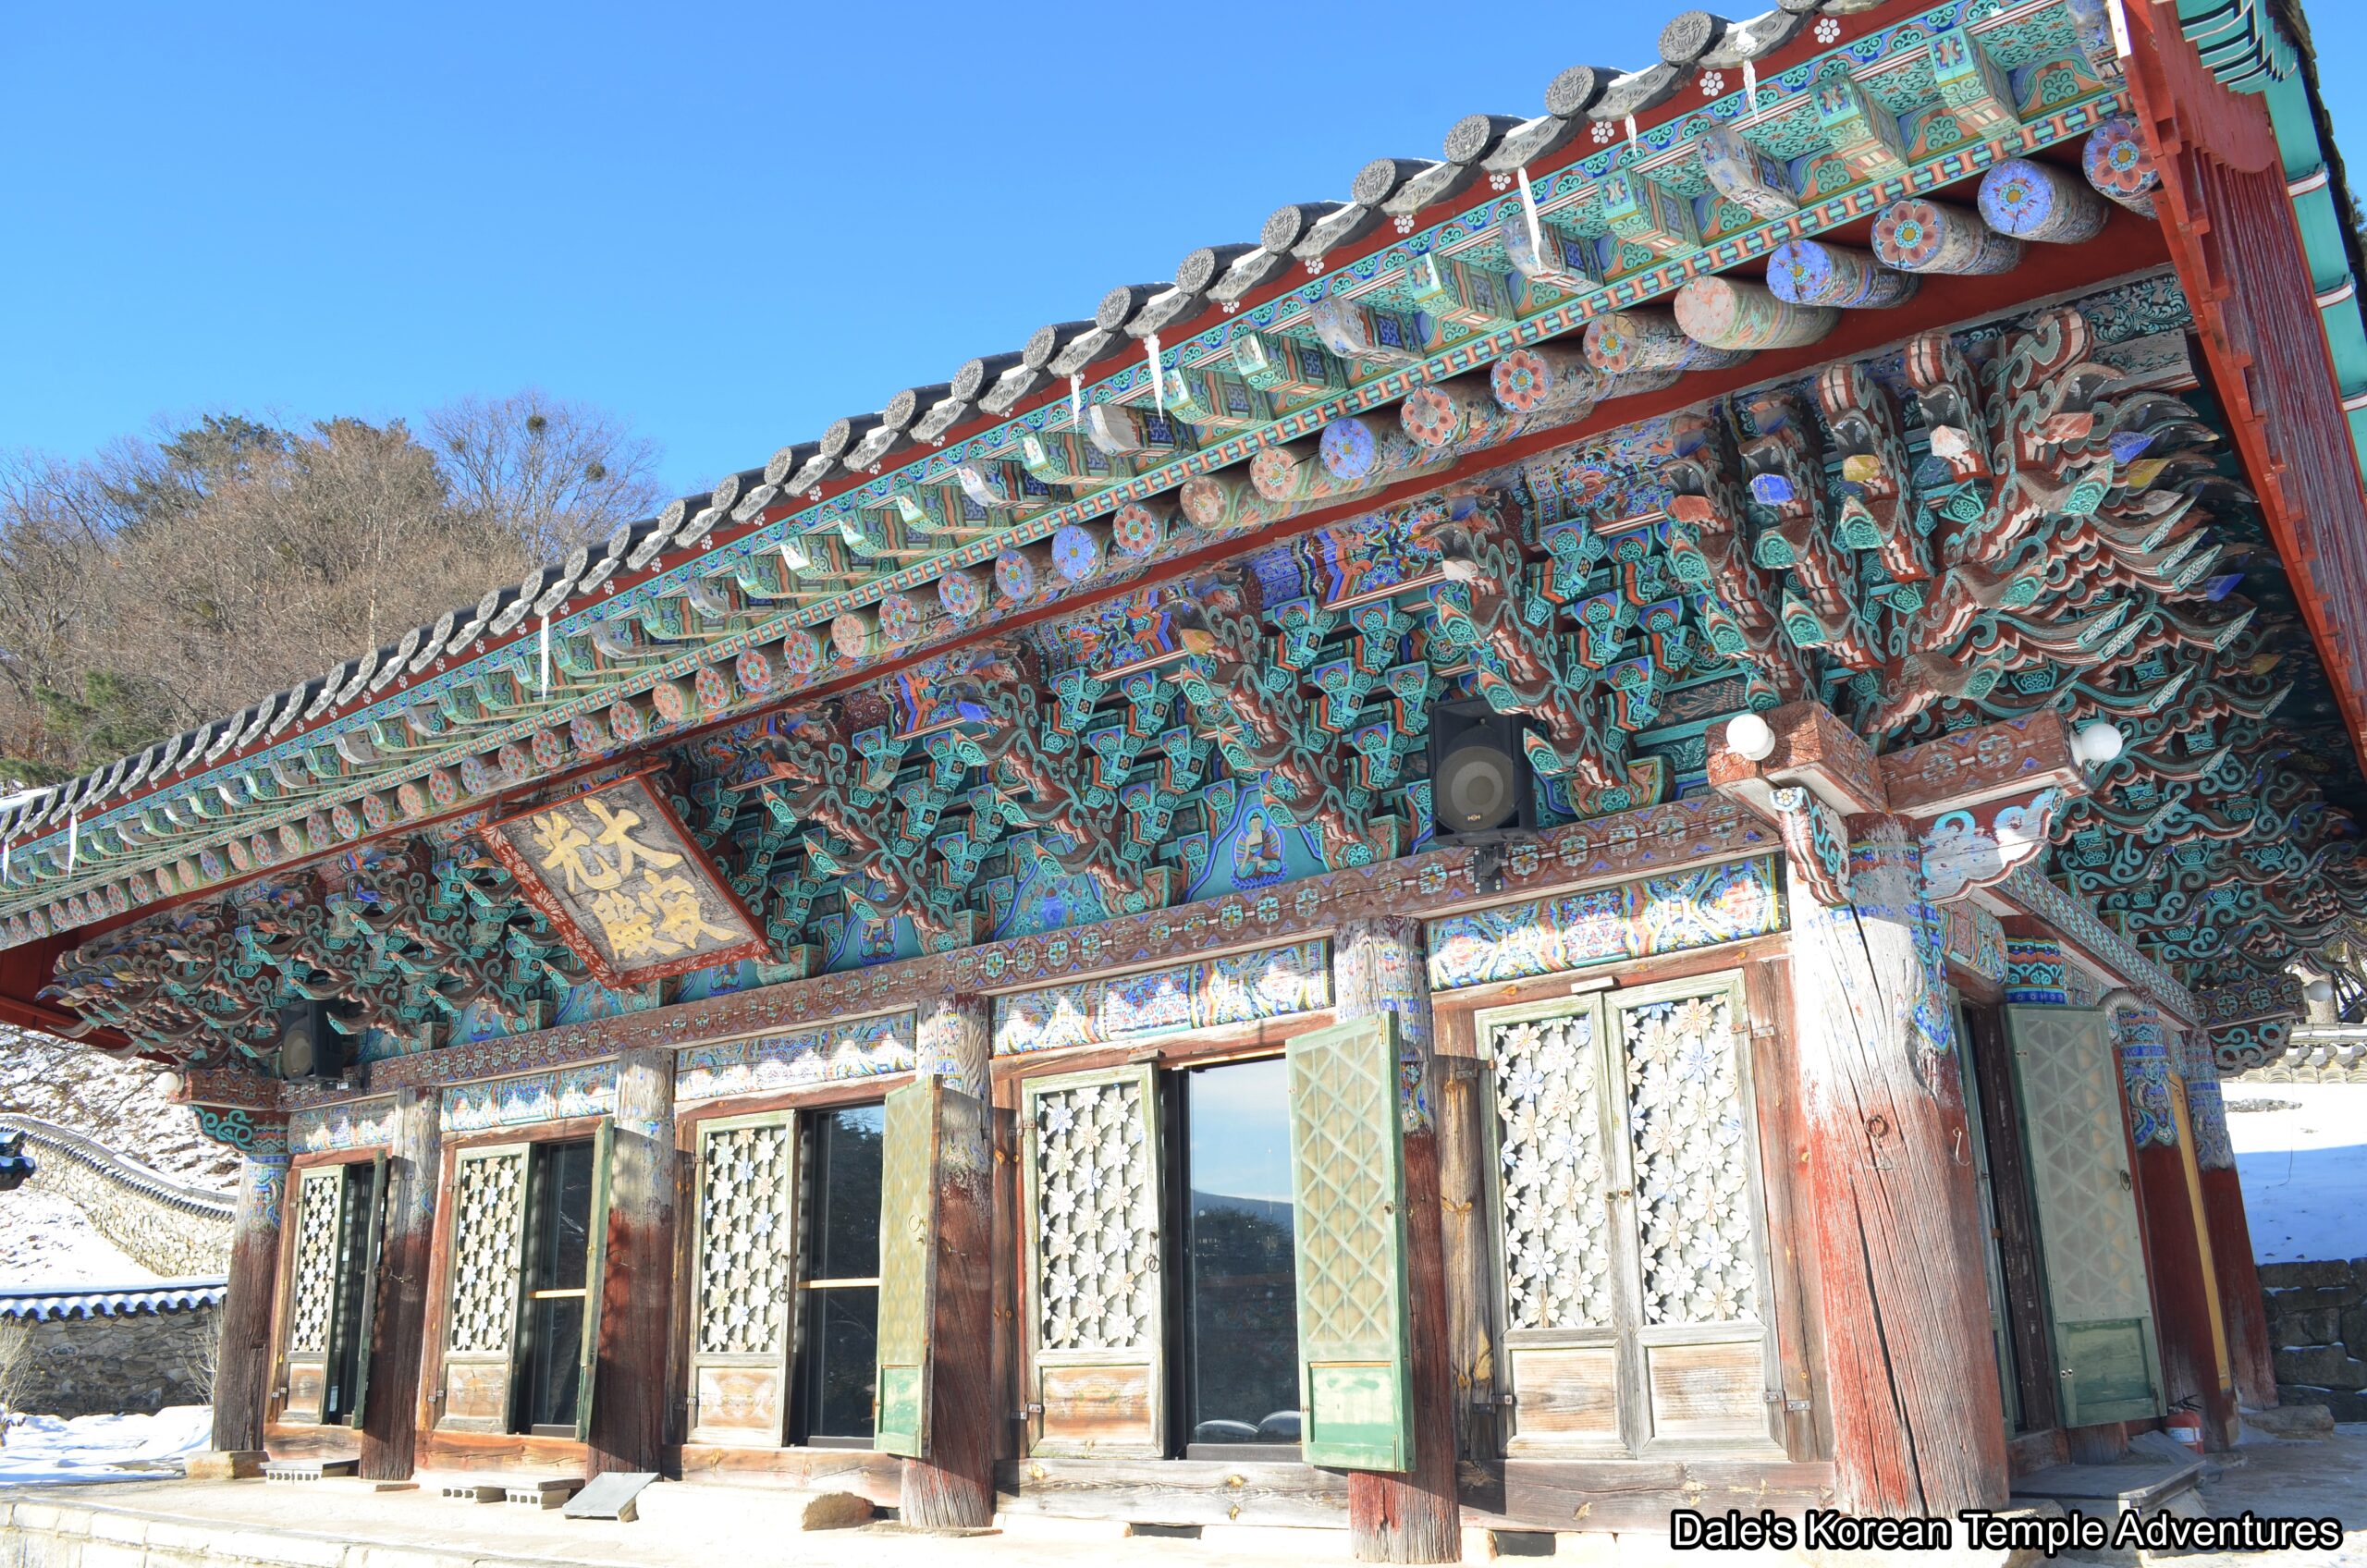
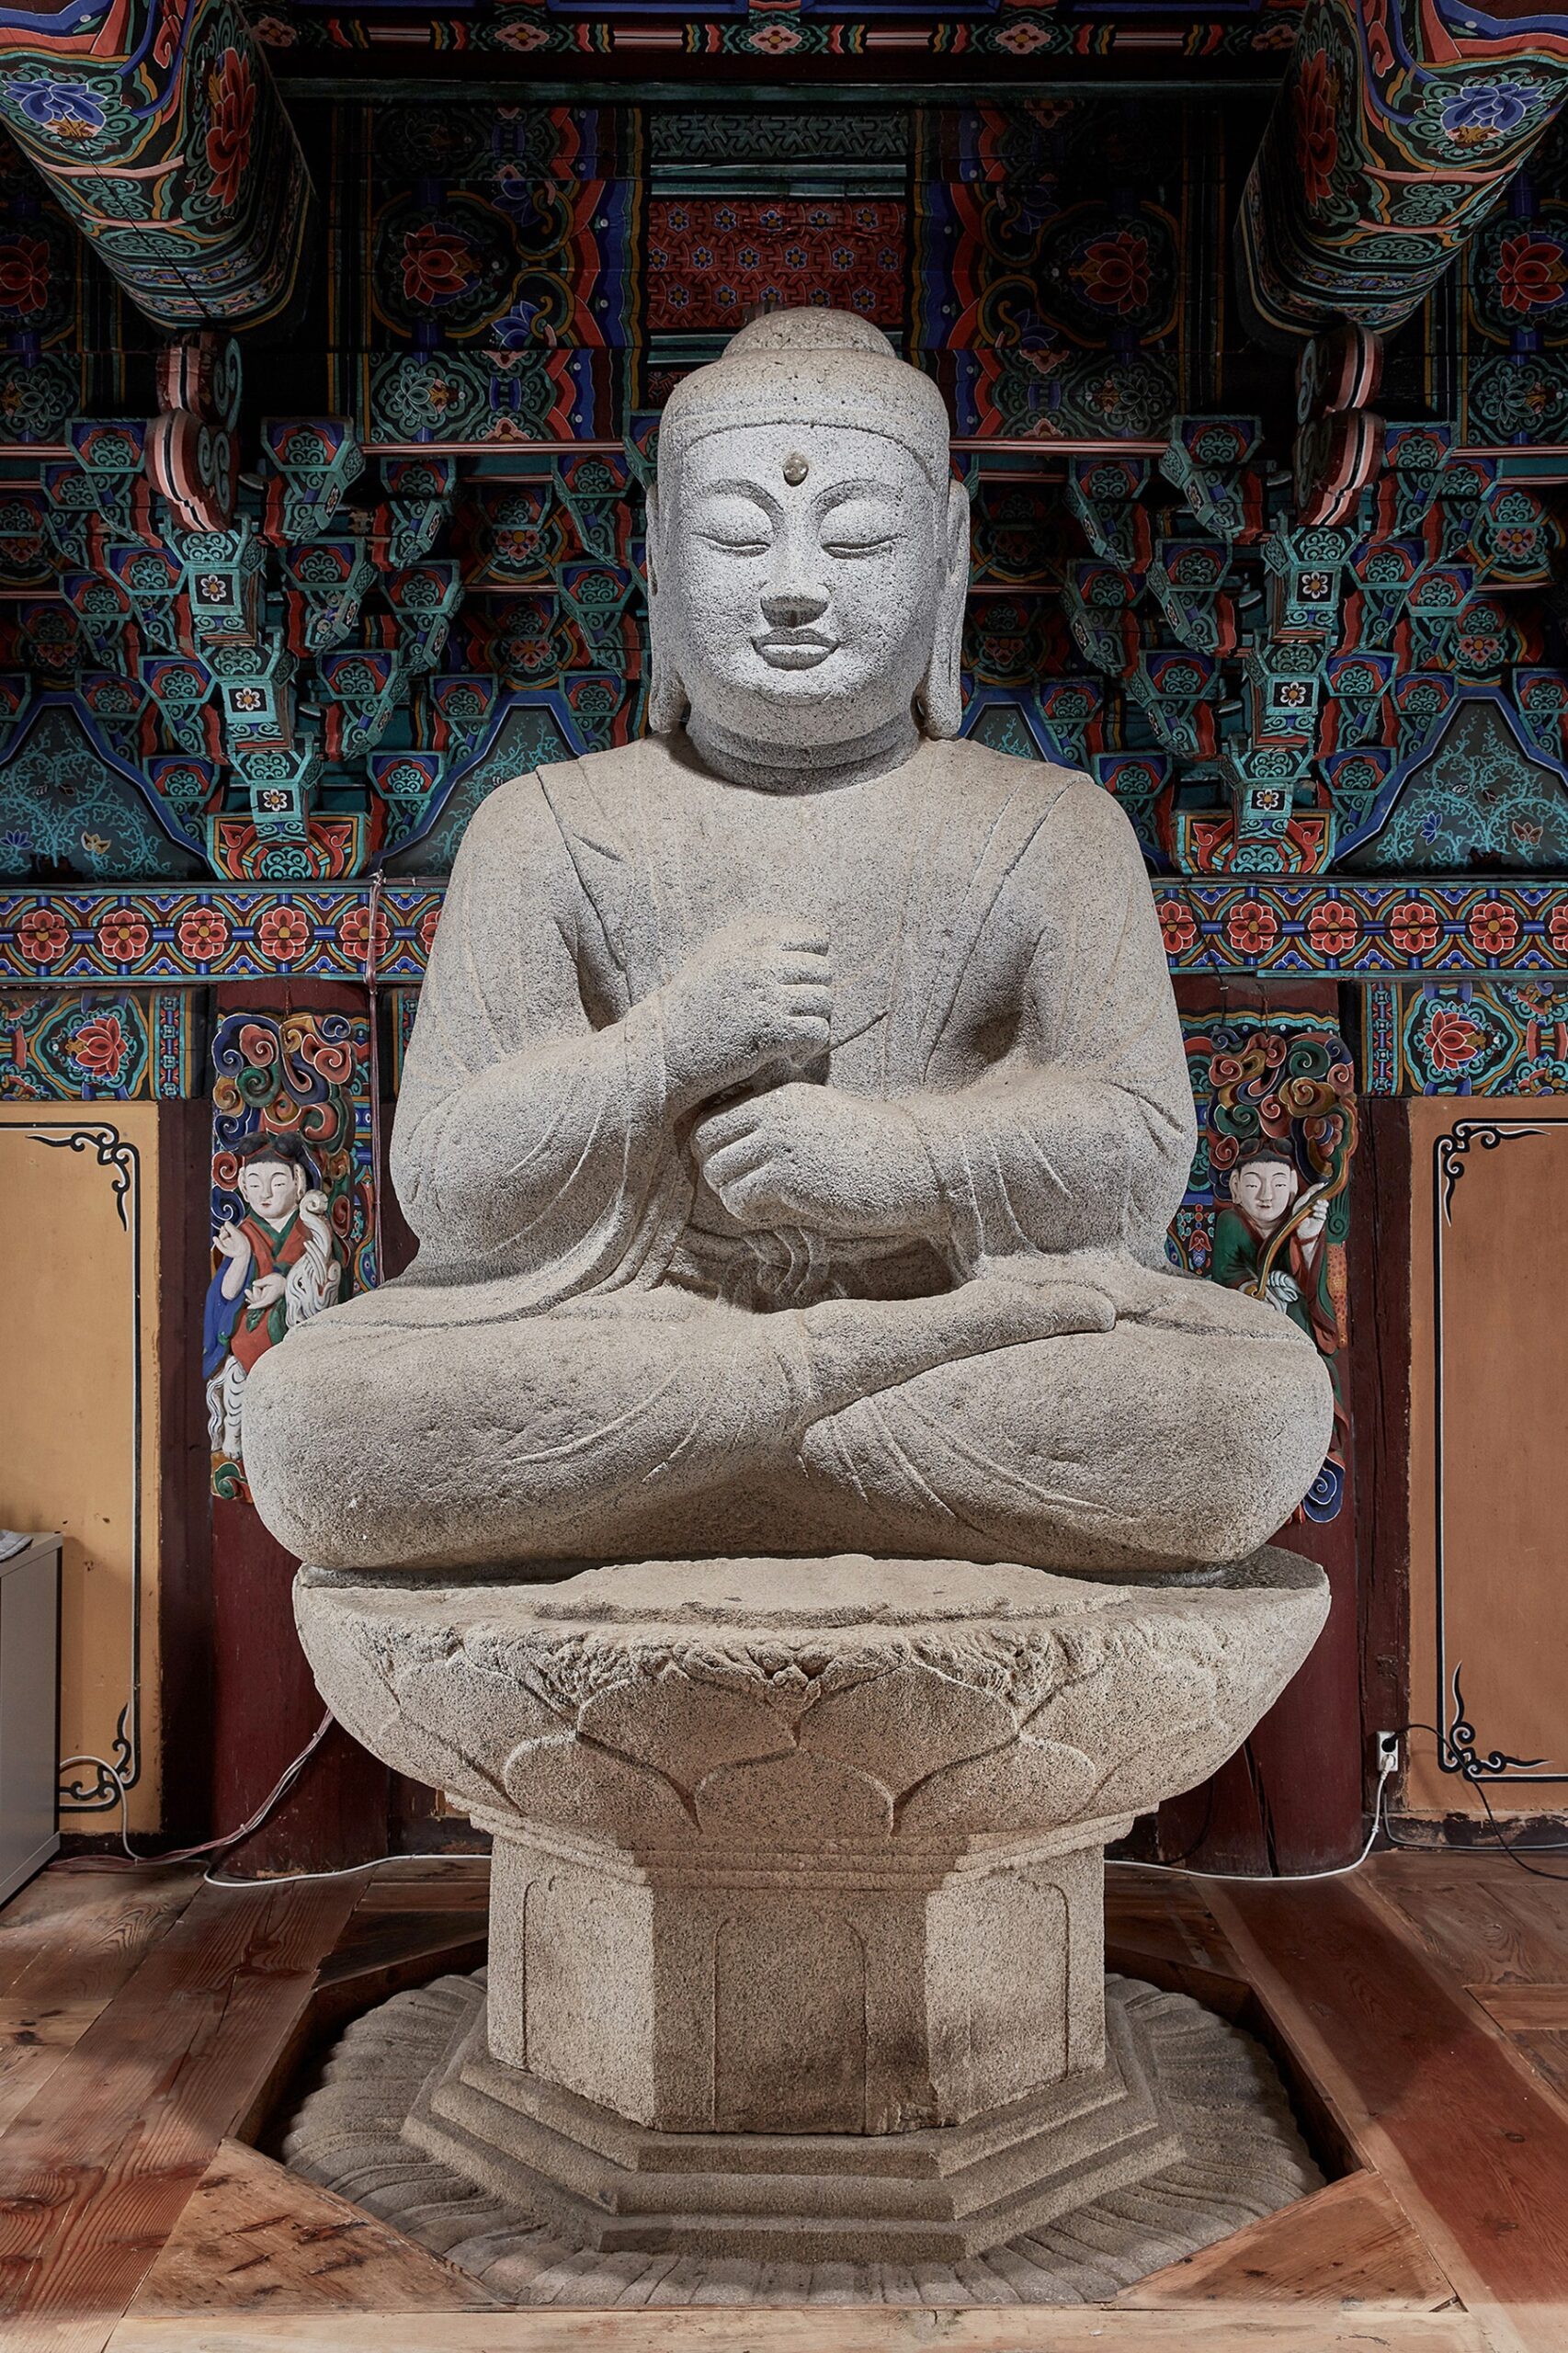
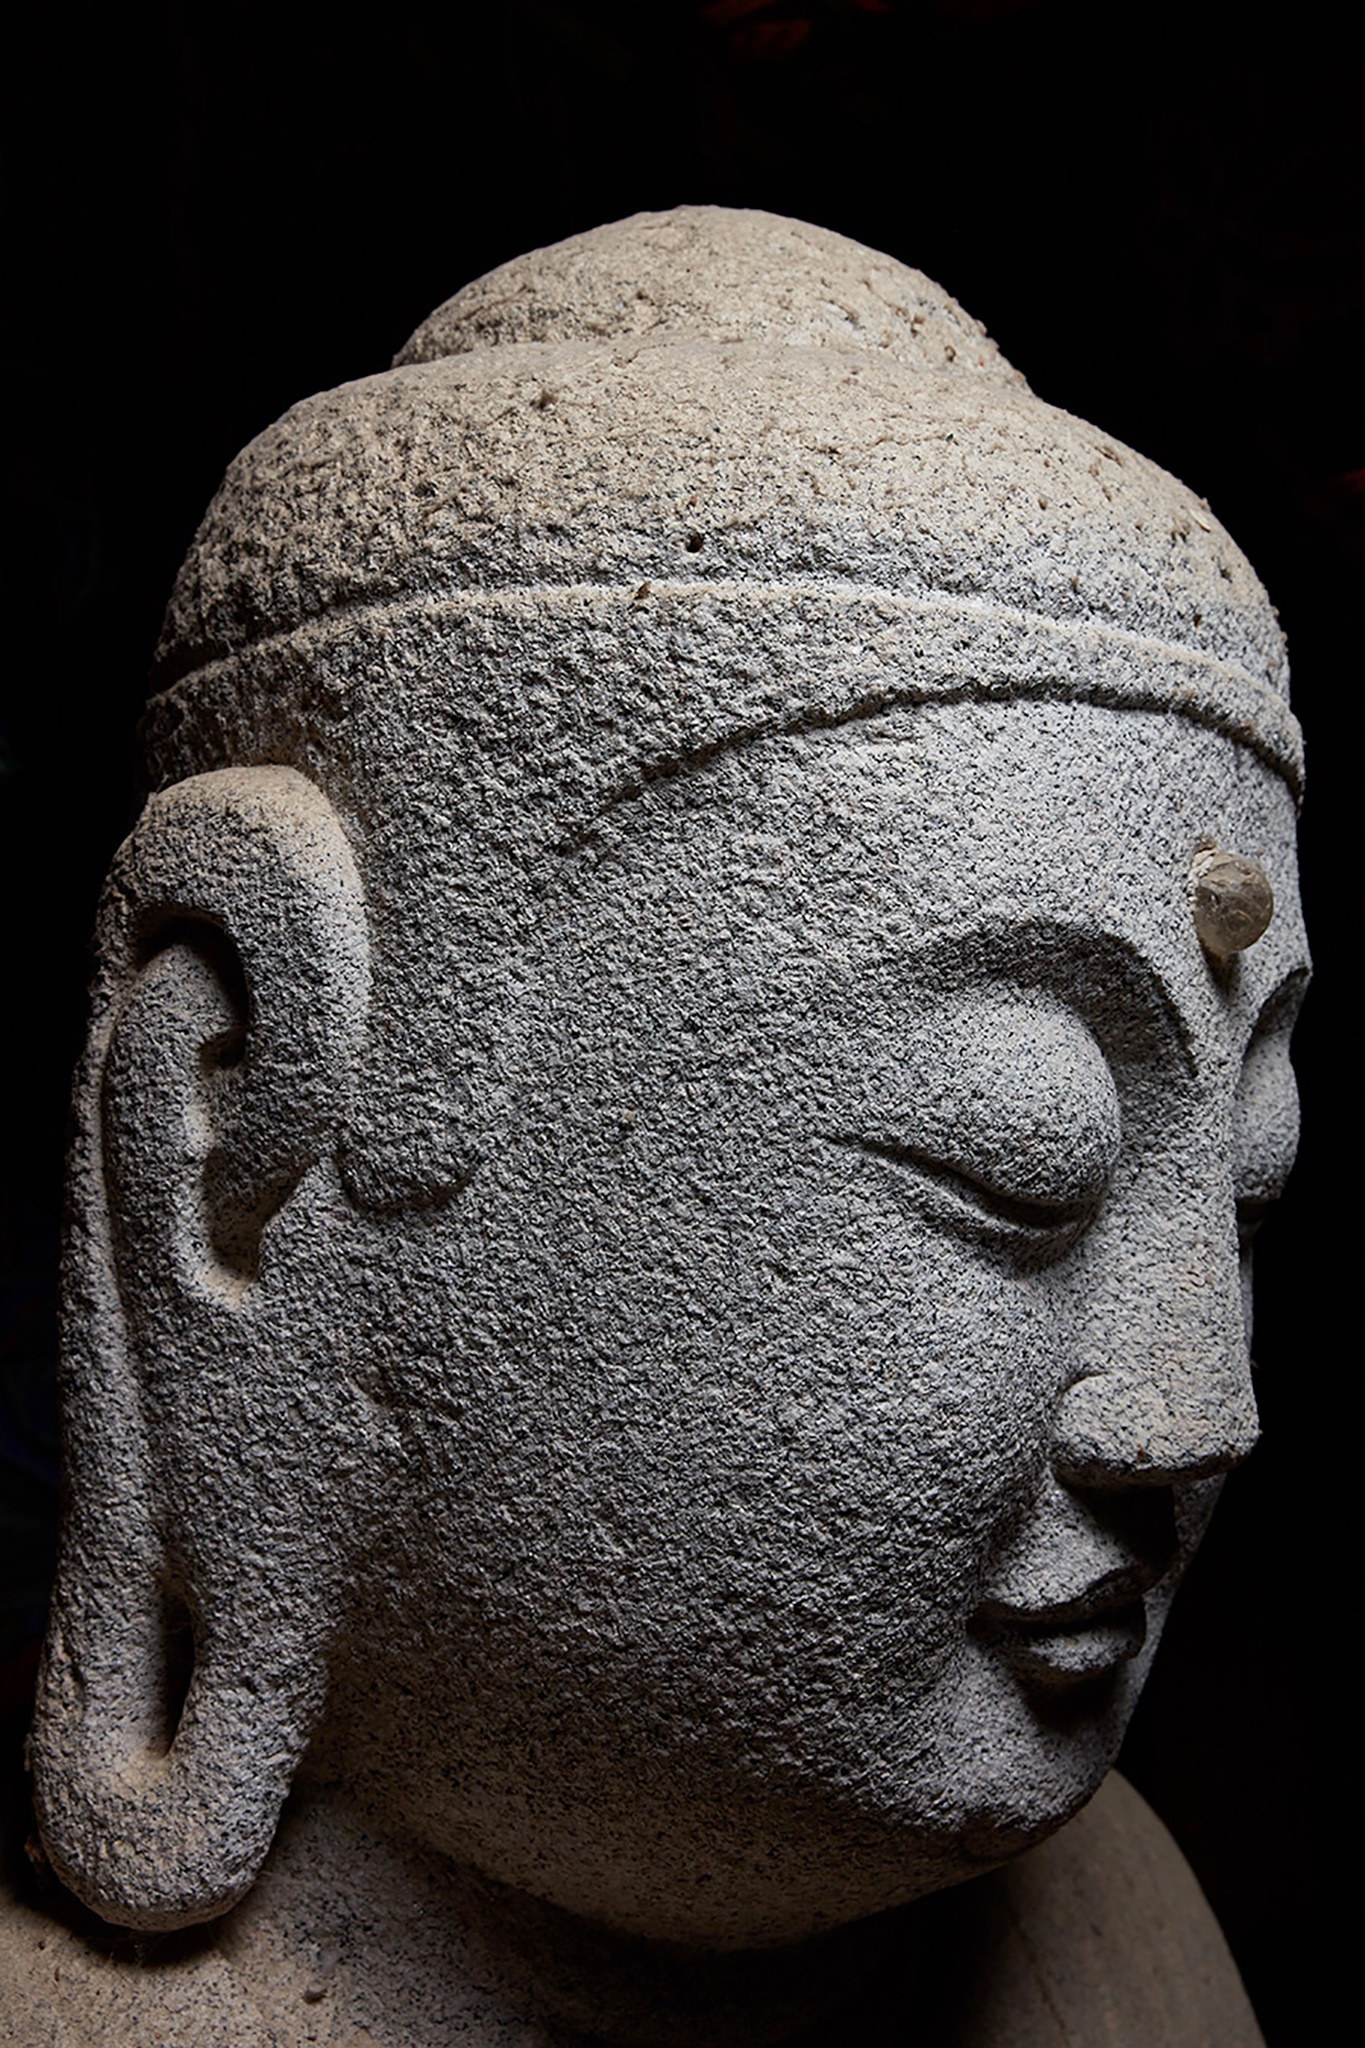
Backing the west pagoda is the hermitage’s Daejeokgwang-jeon Hall. The exterior walls to the main hall are adorned with standard dancheong colours. However, the intricate eaves work is quite extensive and colourful. Stepping inside the Daejeokgwang-jeon Hall, you’ll find a solitary stone statue of Birojana-bul (The Buddha of Cosmic Energy). This is the “Stone Seated Vairocana Buddha at Sudoam Hermitage of Cheongamsa Temple.” The seated image is 2.51 metres in height, and it appears to be from late Unified Silla Dynasty (668-935 A.D.). Appearing on the top of Birojana-bul’s head is a topknot on top of a bald head. It’s both small and obvious. The face is square and plump with serene half-closed meditative eyes. It has long earlobes that come down to its shoulders. The robe covers both of its shoulders. The right hand covers the left index finger. This mudra (ritualized hand gesture) is known as the “diamond fist.” The statue rests upon a pedestal that’s divided into three parts. The bottom part is octagonal with an upside down lotus flower relief. The middle part of the pedestal is 45 cm in height with octagonal panels. There are two lines of lotus flowers crossing in a half circle at the top. There are also three lion images and a dragonhead carved at the front in the upper part of the pedestal, as well.
To the right of the Daejeokgwang-jeon Hall is Yakgwang-jeon Hall. The exterior walls are adorned with various murals that include flowers, birds, and Bicheon (Flying Heavenly Deities). The dancheong is vibrant. And the floral latticework that adorns both the front and side doors of this shrine hall are intricate.
Stepping inside the Yakgwang-jeon Hall, you’ll find even more murals of flowers and birds. But the main highlight to the shrine hall is the “Stone Seated Bodhisattva at Sudoam Hermitage of Cheongamsa Temple.” This seated stone statue is believed to date back to the early Goryeo Dynasty (918-1392). Often this statue is mistaken for a Bodhisattva because of the crown it wears. However, because of the mandorla, pedestal, and other features of the statue, this statue is in fact an image of the Buddha. A lot of the features of the face have faded over time. Both shoulders are covered by its robe. The hands are joined together. The mandorla that surrounds the entire body and head of the statue are adorned with lotus flower designs and flame patterns. The top of the square pedestal that the statue rests upon is shaped like a lotus flower. There are panel decorations in the middle part of the pedestal. And the bottom part of the pedestal is shaped like an upside down lotus flower. The statue is absolutely stunning.
To the far left of these shrine halls is the hermitage’s farmland as well as the monks’ dorms. And to the right of these shrine halls, and to the right of the upper parking lot, you’ll find a trail that leads you towards the Nahan-jeon Hall at Sudoam Hermitage. The exterior walls of the Nahan-jeon Hall are adorned with Nahan (The Historical Disciples of the Buddha). And up near the roof of the structure, you’ll see a fading manja image. Stepping inside the Nahan-jeon Hall, you’ll see a collection of sixteen colourful stone Nahan statues housed inside glass enclosures. And on the main altar, there’s a white triad of statues centred by a stone image of Seokgamoni-bul (The Historical Buddha). And joining this central image on either side are white, crowned images of Mireuk-bul (The Future Buddha) and Yeondeung-bul (The Past Buddha).
How To Get There
The easiest way to get to Sudoam Hermitage from the Gimcheon Intercity Bus Terminal is to simply take a taxi. However, the taxi ride will take 50 minutes and cost 50,000 won (one way), so this probably isn’t an option.
If you want to take public transportation from the Gimcheon Intercity Bus Terminal, you’ll need to board Bus #886-2. The bus ride will take about 60 minutes over 52 stops. You’ll need to get off at the “Pyeongchon – 평촌” stop. From this stop, you’ll need to walk an incredible 8 km up a mountain. In total, the hike should take at least 2 hours. So this probably isn’t an option either.
Simply put, the easiest and best way to get to this hard to reach hermitage is to simply have your own mode of transportation, but that isn’t always possible. The hermitage is definitely worth a visit, but it’s one of the harder ones to get to.
Overall Rating: 7/10
Sudoam Hermitage is one of the most impressive hermitages that you’ll see in Korea. It has three Korean Treasures, it’s beautifully situated, and it has a rich modern monastic history. The only drawback about the hermitage is that it’s hard to get to. But this aside, you really couldn’t ask for much more from a Buddhist hermitage in Korea. It simply checks all the boxes scenically, monastically, and artistically.
The Boje-ru Pavilion at Sudoam Hermitage.
A look back through the entryway.
A look up at the entry of the Boje-ru Pavilion at one of the Bicheon (Flying Heavenly Deities) that adorns the ceiling of the structure.
A look towards the upper courtyard at Sudoam Hermitage.
The west pagoda of the “East and West Three-Story Stone Pagodas at Sudoam Hermitage of Cheongamsa Temple” with the Daejeokgwang-jeon Hall in the background.
A closer look at the icy Daejeokgwang-jeon Hall.
The “Stone Seated Vairocana Buddha at Sudoam Hermitage of Cheongamsa Temple,” which is Korean Treasure #307. (Picture courtesy of the CHA).
An up-close of the face of the “Stone Seated Vairocana Buddha at Sudoam Hermitage of Cheongamsa Temple.” (Picture courtesy of the CHA).
A look towards the Yakgwang-jeon Hall with a stone lantern in the foreground and the east pagoda of the “East and West Three-Story Stone Pagodas at Sudoam Hermitage of Cheongamsa Temple” in the background.
A closer look at the east pagoda.
The Yakgwang-jeon Hall.
A look inside the Yakgwang-jeon Hall at the “Stone Seated Bodhisattva at Sudoam Hermitage of Cheongamsa Temple,” which is Korean Treasure #296.
The beautiful Korean Treasure from a different angle.
The snowy landscape at Sudoam Hermitage.
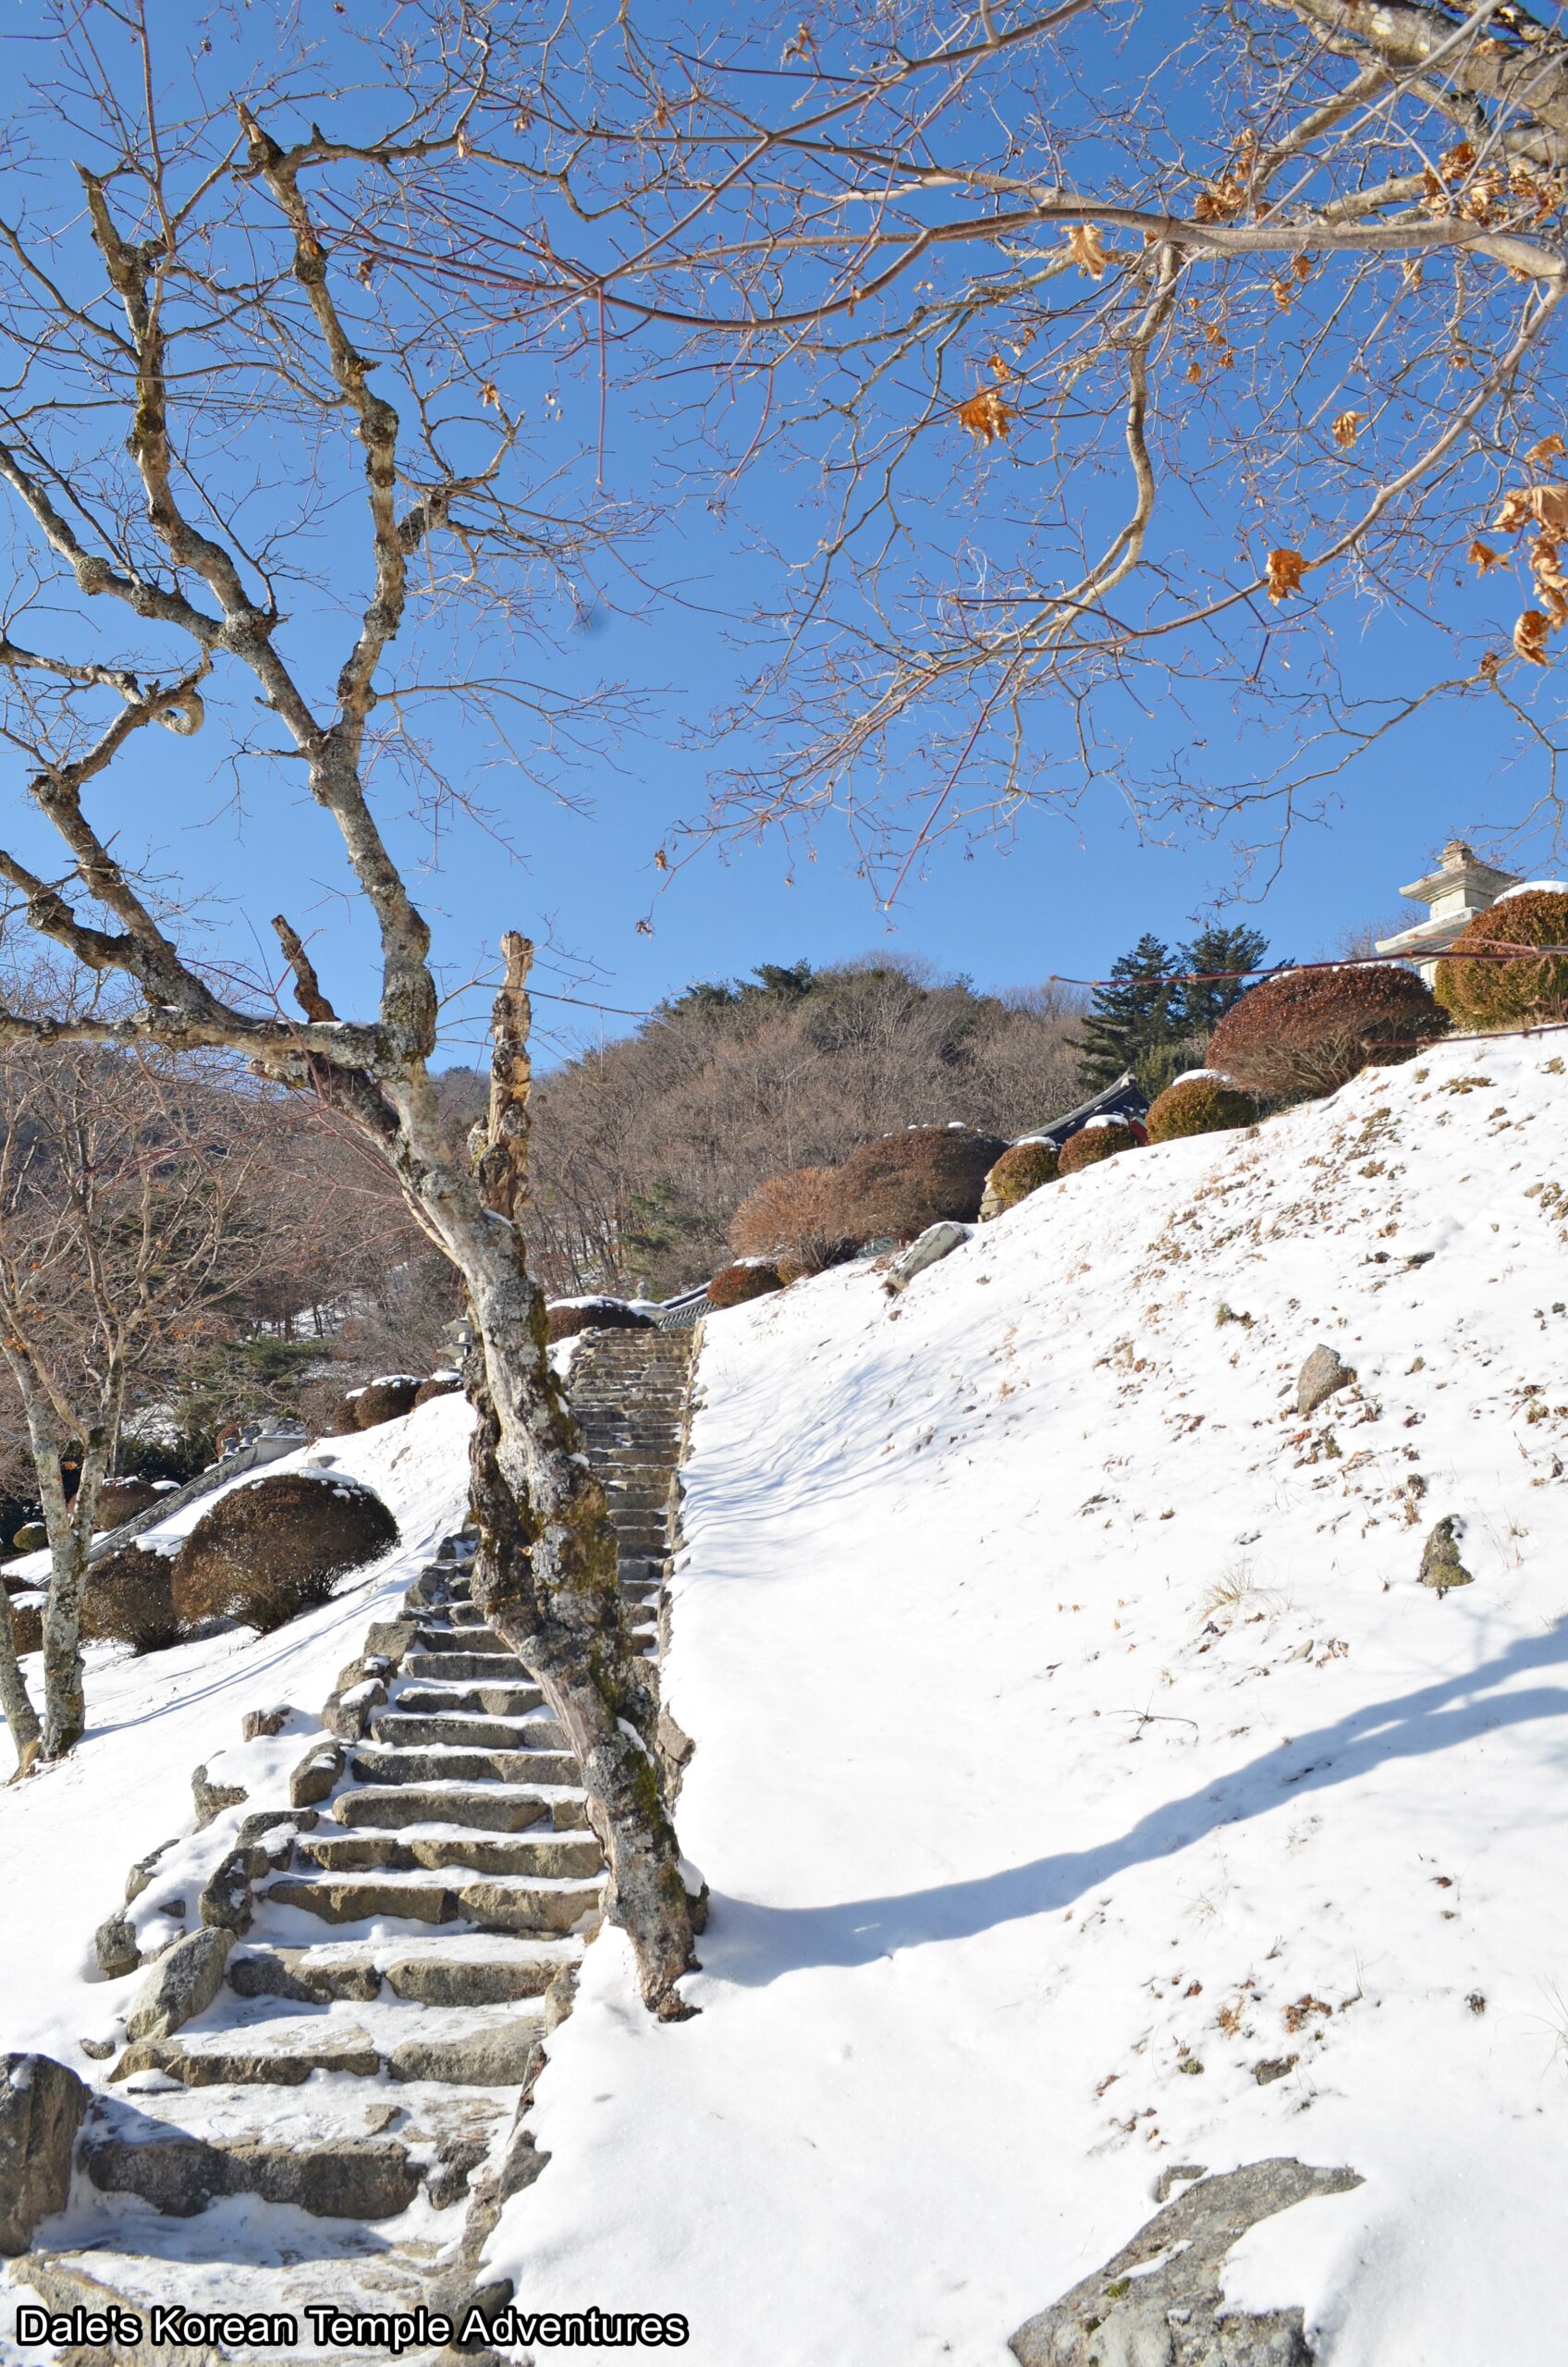
The snowy hillside and stairs that lead down towards the Nahan-jeon Hall.
Mornings at Jinha Beach are a magnet for Korean photographers, and for good reason – it’s a stunning location that never fails to inspire. Last week, I ventured out with the itch to capture the beauty that only the early hours could offer. In this blog post, I want to share my experience and emphasize the importance of going out without expectations, allowing the morning to unfold its magic.
The Itch to Capture
As a photographer, there’s an undeniable feeling in your bones that signals it’s time to head out and capture moments. Last week, that itch propelled me to Jinha Beach, driven by the anticipation of what the morning might reveal.
Embracing the Unexpected
This particular morning, I was running a bit late due to traffic, but I still managed to arrive before sunrise. Here’s a valuable lesson – sometimes, you have to embrace the unexpected. Just go out, see what unfolds, and let the morning surprise you. Whether good or bad, the key is that you got out.
The No Filter Shots
Before diving into long-exposure photography, I always take a few initial shots without any filters. This serves as a reference point and allows me to capture the full essence of the location before delving into the intricacies of long exposures.
Long-exposure photography requires time to achieve the correct exposure. Using the magnetic filter set from K&F Concept has proven invaluable. The ease of popping the 10-stop filter on and off swiftly enhances the efficiency of the process.
Unexpected Delights: Surfers in January… in Ulsan
Despite the chilly January weather in Korea, I was pleasantly surprised to find surfers at Jinha Beach at this time of year. Their presence added a unique dimension to my shots. Timing was crucial; I seized the opportunity when one surfer walked down the beach, waiting for the perfect wave. Quick adjustments to camera settings ensured I captured the fleeting moment.
Photography often demands quick decision-making. Moments come and go swiftly, especially with dynamic elements like surfers. I worked fast, experimenting with various settings to ensure I got the shot before the opportunity passed.
Closing Thoughts
In a matter of moments, the surfer was out in the water, and I decided to wrap up my session. As I packed my gear, I reflected on the importance of spontaneity in photography. Sometimes, you just need to go out, gear in hand, and see what unfolds. The unpredictability of these moments often leads to the most rewarding captures. So, my advice today is simple: go out, get some photos, and let the magic of the morning surprise you.
Over the past decade I've heard all sorts of language learning tips. Most have been useful and valid, and I've used several tips and shortcuts along the way to help my own learning. However I've also encountered a large amount of tips that are less than helpful, as well as several "shortcuts" for learning that can slow down learners - and so has my friend Forrest. We met up and discussed some of the most common "lies" about language learning, and how someone can avoid them.
The form ~해 가지가 (or ~갖고) is often compared to ~서 as being an informal version, but they're actually not interchangeable in many cases. In Sunday's live stream I covered how they're similar and how they're different, and gave several examples of this form. The abridged version is here to watch and is only 10 minutes long.


Recent comments