

Recent Blog Posts


Download the audio content for "Korean Conversation Made Simple" for free!
Thank you to all of my supporters for helping me to be able to keep making large projects like this one!
Here's what you get:
- Over half an hour of natural Korean conversations, recorded by native speakers.
- Each conversation is separated and organized by track and title.
- All 25 conversations from "Korean Conversation Made Simple."
These audio files were made to be used together with "Korean Conversation Made Simple."
The files have been carefully created to be used both while at home, and while out and about. You can listen to them while studying at your desk, commuting to work, or during exercise.
Click here to download the audio files for "Korean Conversation Made Simple."
The post Download the audio content for "Korean Conversation Made Simple" for free! appeared first on Learn Korean with GO! Billy Korean.
How to Learn Korean in 7 Days – Your Complete Guide
Is learning Korean in 7 days possible? Yes, you can. If you follow our study plan in this guide, you will be able to learn the basics of Korean in 7 days.
We will cover things such as what results you can expect, an overview of the language, and a 7-day structured study plan you can use right away.
Quick Summary
Before we head on to the comprehensive guide below, here’s a summary of the important points that you will be learning:
- Hangul was created by King Sejong in the 15th century. It is the foundation of Korean language learning, covering grammar, pronunciation, and basic vocabulary.
- The 7-day study plan will help you quickly grasp the Korean alphabet, essential phrases, grammar, vocabulary, and numbers. This means you can have basic conversations and an understanding of K-pop and K-dramas.
- Incorporating Korean dramas, music, and variety shows into study routines enhances language skills and cultural understanding.
- Within 7 days, you can expect to start basic conversations, read signs, enjoy K-pop, and follow K-dramas. This sets the groundwork for future fluency in Korean, which requires around 2400 hours of study.
7-Day Study Plan Expectations
Here are some things you can expect to learn in 7 days.
- Have basic conversations in Korean
- Read signs and social media posts in Hangeul
- Understand parts of K-pop lyrics
- Connect with K-dramas on a deeper level
Becoming fluent in Korean takes about 2400 hours. It takes about 90 days to be able to have a 3-minute conversation in Korean.
Understanding the Basics of the Korean Language
Before you head on to the steps you need to take if you want to learn Korean fast, knowing the basics will always come first. The Korean language features a unique alphabet, simple grammar structure, unique pronunciation, and a practical vocabulary. Here is a quick overview to start:
Hangul (The Korean Alphabet)
Hangeul, a scientific design and easy language to learn, was created by King Sejong in the 15th century. Hangeul consists of 24 letters in total, with 14 consonants and 10 vowels. These letters are grouped into syllable blocks.
Related article: Korean Alphabet
Basic Korean Grammar
- Subject-Object-Verb (SOV): Korean sentences typically end with verbs. This is the first grammatical difference you notice when you first learn Korean because it is different from the SVO order in English.
- Particles: One of the important things to understand in Korean sentence structure is particles. Particles attached to nouns represent their roles in sentences (topics, objects, locations, etc.).
- Honorifics: The Korean words used vary depending on the relationship between speakers. Honorifics are used to show respect, and verb ends change accordingly.
Related article: Korean Sentence Structure, Korean Particles, Korean Honorifics
Korean Pronunciation
Some sounds are native to Korean and require some practice. For example, distinguishing between tense, aspirated, and plain sounds.
Accents can affect sentence meaning. Therefore, the practice of listening carefully and imitating native Korean speakers is necessary.
Related article: Korean Pronunciation
Essential Korean Vocabulary
- Greetings: Start with greetings like “안녕하세요” (annyeonghaseyo – Hello), “감사합니다” (gamsahamnida – Thank you), and “죄송합니다” (joesonghamnida – Sorry).
- Numbers: Learn the two numbering systems in the Korean language (Native Korean and Sino-Korean) and their different usage.
- Daily Expressions: Learn phrases about activities in daily life, directions, food orders, and expressing what you like and dislike.
Related article: Korean Words, Korean Greetings
Structured Korean Learning Plan
To create a structured Korean language learning plan for a week, you should focus on the basic elements, integrate effective learning strategies, and emphasize Korean words and phrases with high frequency. Here is a summary of a beginner’s customized plan to build a strong foundation and ignite a passion for continuous learning.
- Day 1: Introducing the Korean alphabetRelated lesson: How to learn the Korean alphabetBegin learning basic consonants and vowels. Use visual aids and pronunciation guides. Practice writing the characters you learned. Try to memorize their sounds.
- Day 2: Completing HangulRelated lessons: Korean consonants, Korean vowelsLearn the rest of the consonants and vowels, including double consonants and double consonants. Then, practice combining consonants and vowels into syllable blocks and make simple words. Test your reading skills with online resources or apps designed for Hangeul practice.
- Day 3: Basic Phrases and GreetingsRelated lessons: Korean Phrases, Hello in Korean, Thank you in KoreanLearn essential greetings and phrases. Listen carefully to the pronunciation and intonation of phrases such as “안녕하세요” (Hello), “감사합니다” (Thank you), and “실례합니다” (Excuse me) and use recordings to mimic a native Korean speaker.
- Day 4: Introduction to Basic GrammarRelated lessons: Korean GrammarUnderstand the sentence structure of Subject-Object-Verbs (SOV) and Korean particles. Try to write simple sentences using high-frequency verbs such as 가다 (to go), 먹다 (to eat), and 있다 (to have). Use the basic words and vocabulary you learned to write sentences in your journal to review.
- Day 5: High-frequency vocabularyRelated lessons: Korean Nouns, Korean AdjectivesIt focuses on the acquisition of high-frequency nouns and adjectives related to daily life (family, food, places, emotions). Use a flashcard or a spaced repetition system (SRS) to memorize these words. Try to identify the Korean word you’ve learned while watching simple Korean videos or listening to songs.
- Day 6: Numbers and TimesRelated lesson: Korean Numbers, Telling time in Korean, Months in KoreanLearn the two Korean numbering systems (Native Korean and Sino-Korean number systems). Practice speaking and writing about the time, date, age, and number of things. Play interactive games or quizzes online to enhance your knowledge of numbers.
- Day 7: Review and PracticeRelated lesson: Korean PracticeReview what you learned in the week, focusing on the more difficult parts. Participate in a comprehensive practice session that combines how to read, write, listen, and speak Korean. Reflect and plan future learning goals based on your experiences and areas of interest.
Benefits of Learning Korean
By following the learning plan above, you are giving yourself the chance to experience the Korean language on a different level. Here are some of the many benefits you’ll experience in learning Korean.
- Learning Korean can make you connect with K-pop on another level! If you can understand the lyrics of BTS, BLACKPINK, or your favorite K-pop group, you will feel a stronger connection to the artist and their messages. Learning Korean can make you connect with K-pop on another level!
- Knowing the Korean language will make your K-Drama viewing experience more immersive and enjoyable. It will allow for capturing the subtle humor or cultural references that subtitles can’t fully convey.
- Language can be a bridge to making new friends. Participating in language exchange meetups, forums, and social media groups with the same interest as you will create more opportunities for cultural exchange and making new friends.
- Have you ever dreamed of visiting Seoul? Imagine navigating the city and being able to order food or drinks that you wish to try in Korean confidently! Speaking in Korean will also be a sign of respect to locals, showing your effort to learn their language and culture.
- Korean language proficiency can be a valuable asset. Considering the global influence of Korean companies and the entertainment industry, especially if you want a career related to international business, translation, tourism, and entertainment.
Incorporating Multimedia Resources
You can improve your listening, comprehension, and speaking abilities significantly by incorporating multimedia resources into your Korean learning journey. Here are ways to strengthen language learning by effectively using Korean media and interactive tools:
Korean Dramas and Films
Switch subtitles from English to Korean when your comprehension skills improve. This helps connect spoken languages with text. Practice listening and picking up new vocabulary by rewatching scenes. Mimic the actors’ pronunciation and intonation. Pause and repeat what you heard and compare your pronunciation to the actors.
Related articles: Korean Dramas, Korean Movies
K-Pop and Korean Music
Look up translations to understand the meaning and practice singing your favorite songs. This helps with memorization and pronunciation.
Related articles: What is K-pop?, K-Pop songs
Korean Variety Shows and YouTube Channels
Korean variety shows are great for learning casual language. It is a fun way to learn Korean humor, slang, and real-life dialogues.
There are educational channels created by Korean YouTubers who specialize in teaching Korean grammar, vocabulary, and pronunciation.
Also, watching Korean vlogs could give you insight into everyday vocabulary, slang, and phrases. It helps make the learning experience more contextual and engaging.
Related articles: YouTube in Korean
Language Learning Apps and Websites
Use language learning apps like Duolingo, Anki, or Memrise for daily vocabulary and grammar practice. You can practice conversation with natives on platforms like HelloTalk or Tandem. Also, there are online courses that provide structured lessons. Choose one that suits your level and preferred study methods.
Related article: Korean Apps
Social Media and News
If you want to learn more about colloquial language and current slang, following Korean social media accounts on Instagram or Twitter can be helpful.
If you want to improve your understanding of formal language and current events, listen to news broadcasts or podcasts in Korean.
Related article: Korean News
How to implement Multimedia to your learning
Make it a daily routine by dedicating specific times of the day to different types of media. For example, while you commute, you can listen to Korean music. In the evening you can watch an episode of a Korean drama. Before bed, spend time using language apps for 30 minutes.
Reflect and practice afterward by writing down new vocabulary or phrases and trying to use them in sentences. Note whether you learned new cultural aspects and how they relate to language use.
Practical Language Use in Everyday Situations
You can learn language by using it in situations, not just studying. Here are some common scenarios that you can practice using Korean language:
Greetings and Basic Expressions:
When you meet someone, say 안녕하세요 (annyeonghaseyo | Hello). If it’s your first time meeting the person, say 만나서 반갑습니다 (mannaseo bangapseumnida | Nice to meet you).
It can also be very useful to learn to introduce yourself, such as 제 이름은 ___입니다. (je ireumeun ___imnida | My name is [name]), 저는 ___ 사람입니다. ( jeoneun ___ saramimnida | I’m from [country]).
Use 감사합니다 (gamsahamnida | Thank you) to thank someone.
Use 건배! (geonbae | Cheers!) when you are having some drinks with your Korean friends or Korean learners.
For shopping, 얼마예요? (eolmayeyo | How much is it?), 영수증 주세요 (yeongsujeung juseyo | Please give me a receipt) are practical.
When your phone is ringing, answer your call by saying “여보세요” (yeoboseyo | Hello).
Use 네 (ne | yes) and 아니요 (aniyo | no) or 알겠어요 (algesseoyo | I understand) and 모르겠어요 (moreugesseoyo | I don’t know/I’m not sure) in your conversation.
Daily Activities and Navigation:
When you are lost, use 저기요 (jeogiyo | Excuse me) to get someone’s attention or 도와주세요 (dowajuseyo | Please help me) for emergencies.
Learning to ask for directions and the location of places, for example, 화장실은 어디에 있어요? (hwajangsireun eodie isseoyo | Where is the bathroom?) can be incredibly helpful.
Challenges and Tips for Rapid Learning
Fast learning comes with a series of challenges, especially regarding language acquisition. These obstacles can sometimes slow the progression or lead to frustration. However, understanding and navigating these challenges can make the learning process smoother and more effective.
Here are some common obstacles:
- Information overload
When you try to learn too much in a short time, it can overwhelm your brain. This makes maintaining new information difficult. - Burnout
Learning without enough breaks can cause us to be mentally exhausted and have poor motivation and efficiency. - PlateauAfter a certain time, there may be a time when progression slows down, causing frustration, which seems to lead to decreased motivation.
- Language SpecificsEach language has its problems. For example, pronunciation, certain grammar rules, and cultural nuances can be difficult for some people when learning.
How can you overcome the difficulties? Here are some tips:
- Break down learning goals into manageable chunks to maintain focus and motivation.
- Build a strong Foundation. This makes it easier to understand more complex concepts later on.
- Have regular breaks. To avoid burnout and improve retention, schedule many short, frequent breaks.
- Accept plateaus. Plateaus are a normal part of the learning process. Take this time to review and stabilize what you’ve learned.
- Engage with the language in real life. Practice speaking Korean, listening, reading, and writing to make your learning more relevant.
- Get regular feedback from native speakers or language partners. This can correct mistakes early and improve your language skills quickly.
- Use different resources. By doing this, you can keep the learning experience interesting while making it cover all aspects of the language.
- Stay positive towards your learning, and be patient with yourself. Often, the progress of learning a language is non-linear.
Continuing Your Korean Language Journey Beyond 7 Days
Continuing your Korean language journey beyond 7 days means setting realistic long-term goals and having a plan.
Use this guide: https://www.90daykorean.com/learn-korean/
Make sure you are enjoying the process of learning and discoveries along the way.
Remember, becoming fluent in a language doesn’t just come from studying. Instead, it comes from living a language by steady and regular engagement, being immersed in the culture, and relationships with others. Stay motivated, keep moving, and enjoy the journey of becoming more and more fluent in Korean!
Sign up for our structured program: https://www.90daykorean.com/koreanlessons/
Conclusion
Learning a foreign language is a journey with many ups and downs, but the rewards are immeasurable. Connecting with other cultures on a deeper level is a very special experience. So let your love for K-Pop, K-dramas, and Korean culture motivate you, and start this exciting adventure with an open mind and heart. 화이팅 (hwaiting)!
The post How to Learn Korean in 7 Days – Your Complete Guide appeared first on 90 Day Korean.
—
 Learn to read Korean and be having simple conversations, taking taxis and ordering in Korean within a week with our FREE Hangeul Hacks series: http://www.90DayKorean.com/learn
Korean lessons * Korean Phrases * Korean Vocabulary * Learn Korean * Learn Korean alphabet * Learn Korean fast * Motivation * Study Korean
Please share, help Korean spread!


Chasing the Frozen Sunrise: A Photographer’s Journey at Jujeon Port
In the wee hours of a biting winter morning, when most souls slumber in the comfort of warmth, there exists a breed of adventurers stirred by a calling of creativity. This is the tale of one such dawn, where the frigid embrace of the sea beckoned, and a photographer answered.


Could I have lingered under the covers, succumbing to the lure of a few more hours’ rest? Certainly. Could I have waited for a milder morn to embark on my quest? Perhaps. But destiny whispered otherwise. It insisted that today, at Jujeon Port, beneath the canvas of a unique sunrise, a story awaited its chronicler.

Emerging from the coziness of my bed, doubts swirled like steam from my morning brew. Some photographers chase the warmth of a studio and the beauty of a scantily-clad model, but I? I choose the rugged allure of landscapes, the untamed majesty of winter waves crashing against the Jujeon shores.

Enchantment resides in the deep red pagoda-shaped lighthouse, and the stoic rocks that punctuate the coastline, rendering Jujeon a stage for nature’s raw drama. Yet, beyond its aesthetic allure, lies a practicality—it’s an accessible haven for those racing against time to capture the unfolding spectacle of dawn.

As the horizon blushed with hues of sunrise, it wasn’t the sky’s palette that stole the show, but the tempestuous sea, its waves a symphony of unrestrained fury against the rocky bastions.

Unexpectedly, ice danced upon the landscape, a rarity even in Ulsan’s winter grasp. The saline sheen on rocks and rails bespoke a wintry tale seldom told. Undeterred, I pressed forward, tripod in hand, navigating the treacherous ground with the grace of a tightrope walker.

With each click of the shutter, I surrendered to the intoxicating beauty. Even as icy waters threatened, I stood steadfast, my camera cocooned within my parka, a guardian against the elements. Though drenched and chilled to the bone, my spirit remained unyielding—a testament to the resilience forged in moments of elemental communion.

As I shed my soaked layers, memories of another wilderness encounter flooded my mind—a bond shared with my father amidst the unforgiving terrain of northern Manitoba. His words, uttered in moments of triumph and adversity alike, echoed in my solitude.

Yet, in the silence that followed, a longing stirred—a wish to share this conquest with a soul no longer earthbound. The absence of a tangible connection to the heavens lent a poignant hue to the moment, tempered only by the assurance of paternal vigilance from realms beyond.

Jujeon Port, nestled near Nammock in Ulsan, offers sanctuary to summer revelers and glampers alike. Amidst its rugged charm, it beckons the intrepid, the oddities who dare to embrace the winter’s icy embrace in pursuit of frozen beauty.
The post Chasing the Frozen Sunrise: A Photographer’s Journey at Jujeon Port appeared first on The Sajin.


This Filler Word Can Make You Sound Like a Beginner
I met up with Minji of "Minji Teaches Korean" and we shared some of the most essential Korean filler words, along with how you can use them more naturally.
Some of the filler words we covered included 막, 글쎄(요), 그, 저, 그냥, 뭐, 약간, 이제, 좀, and many more.
The post This Filler Word Can Make You Sound Like a Beginner appeared first on Learn Korean with GO! Billy Korean.
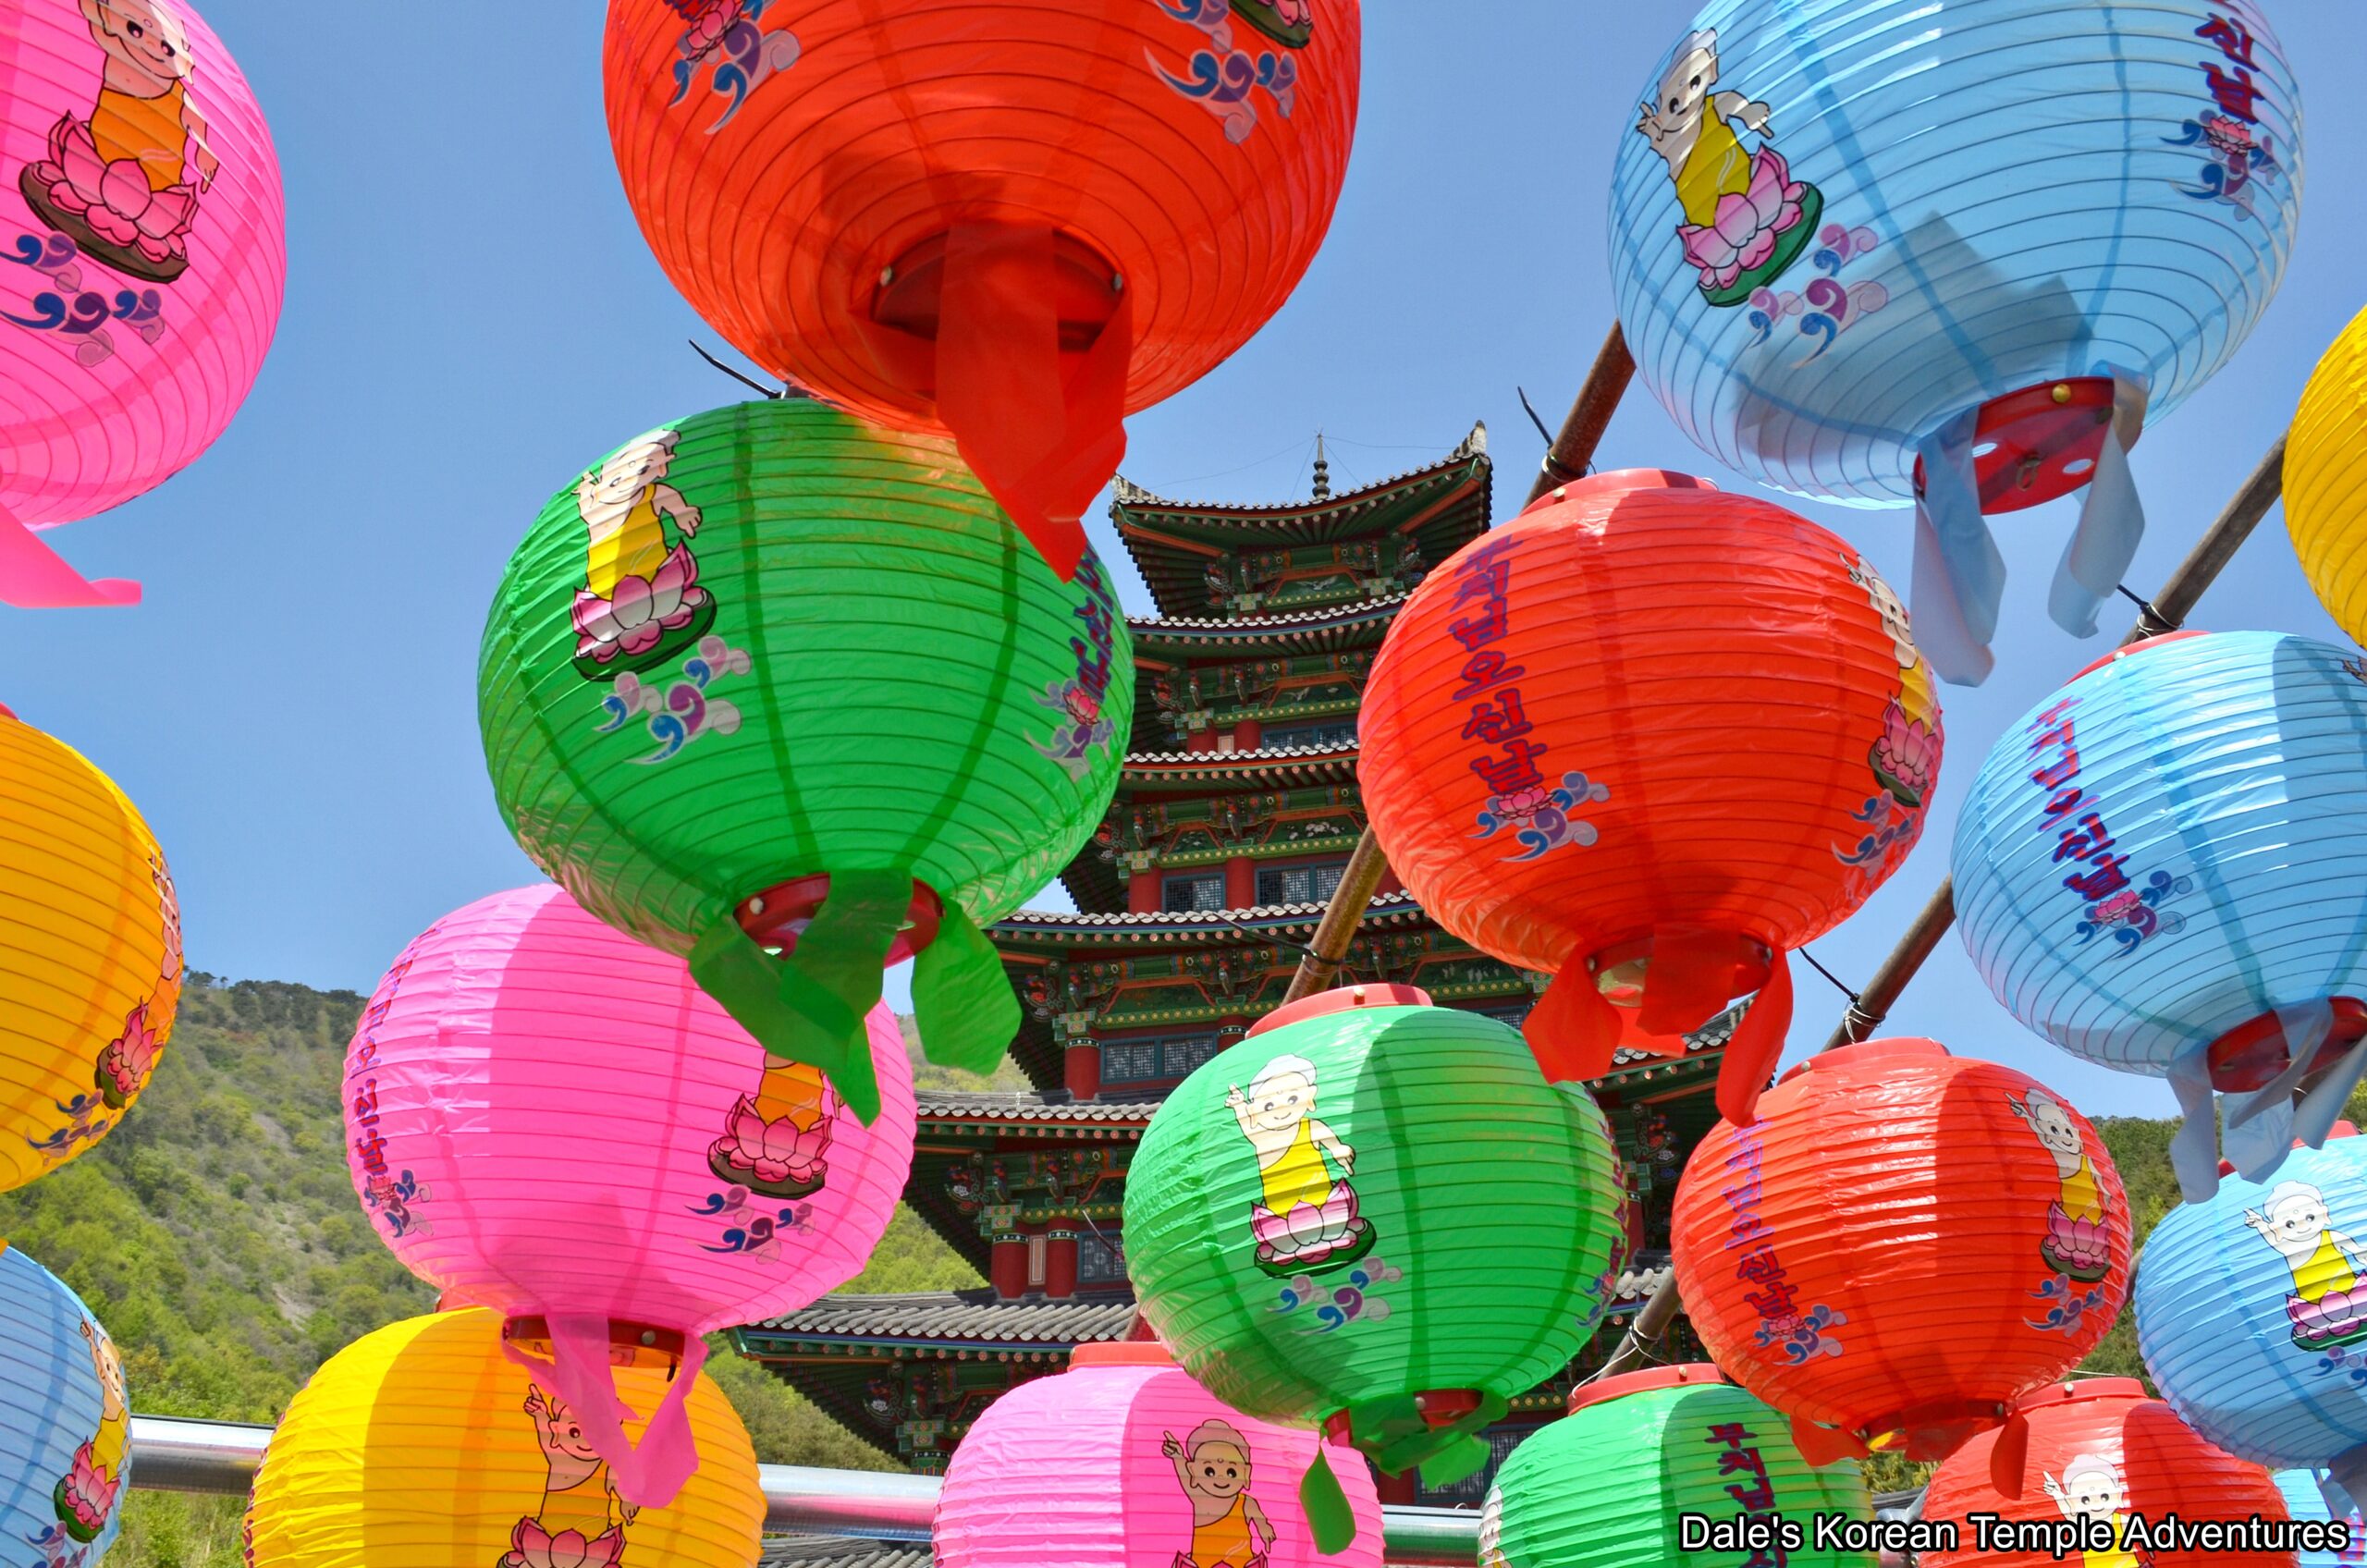
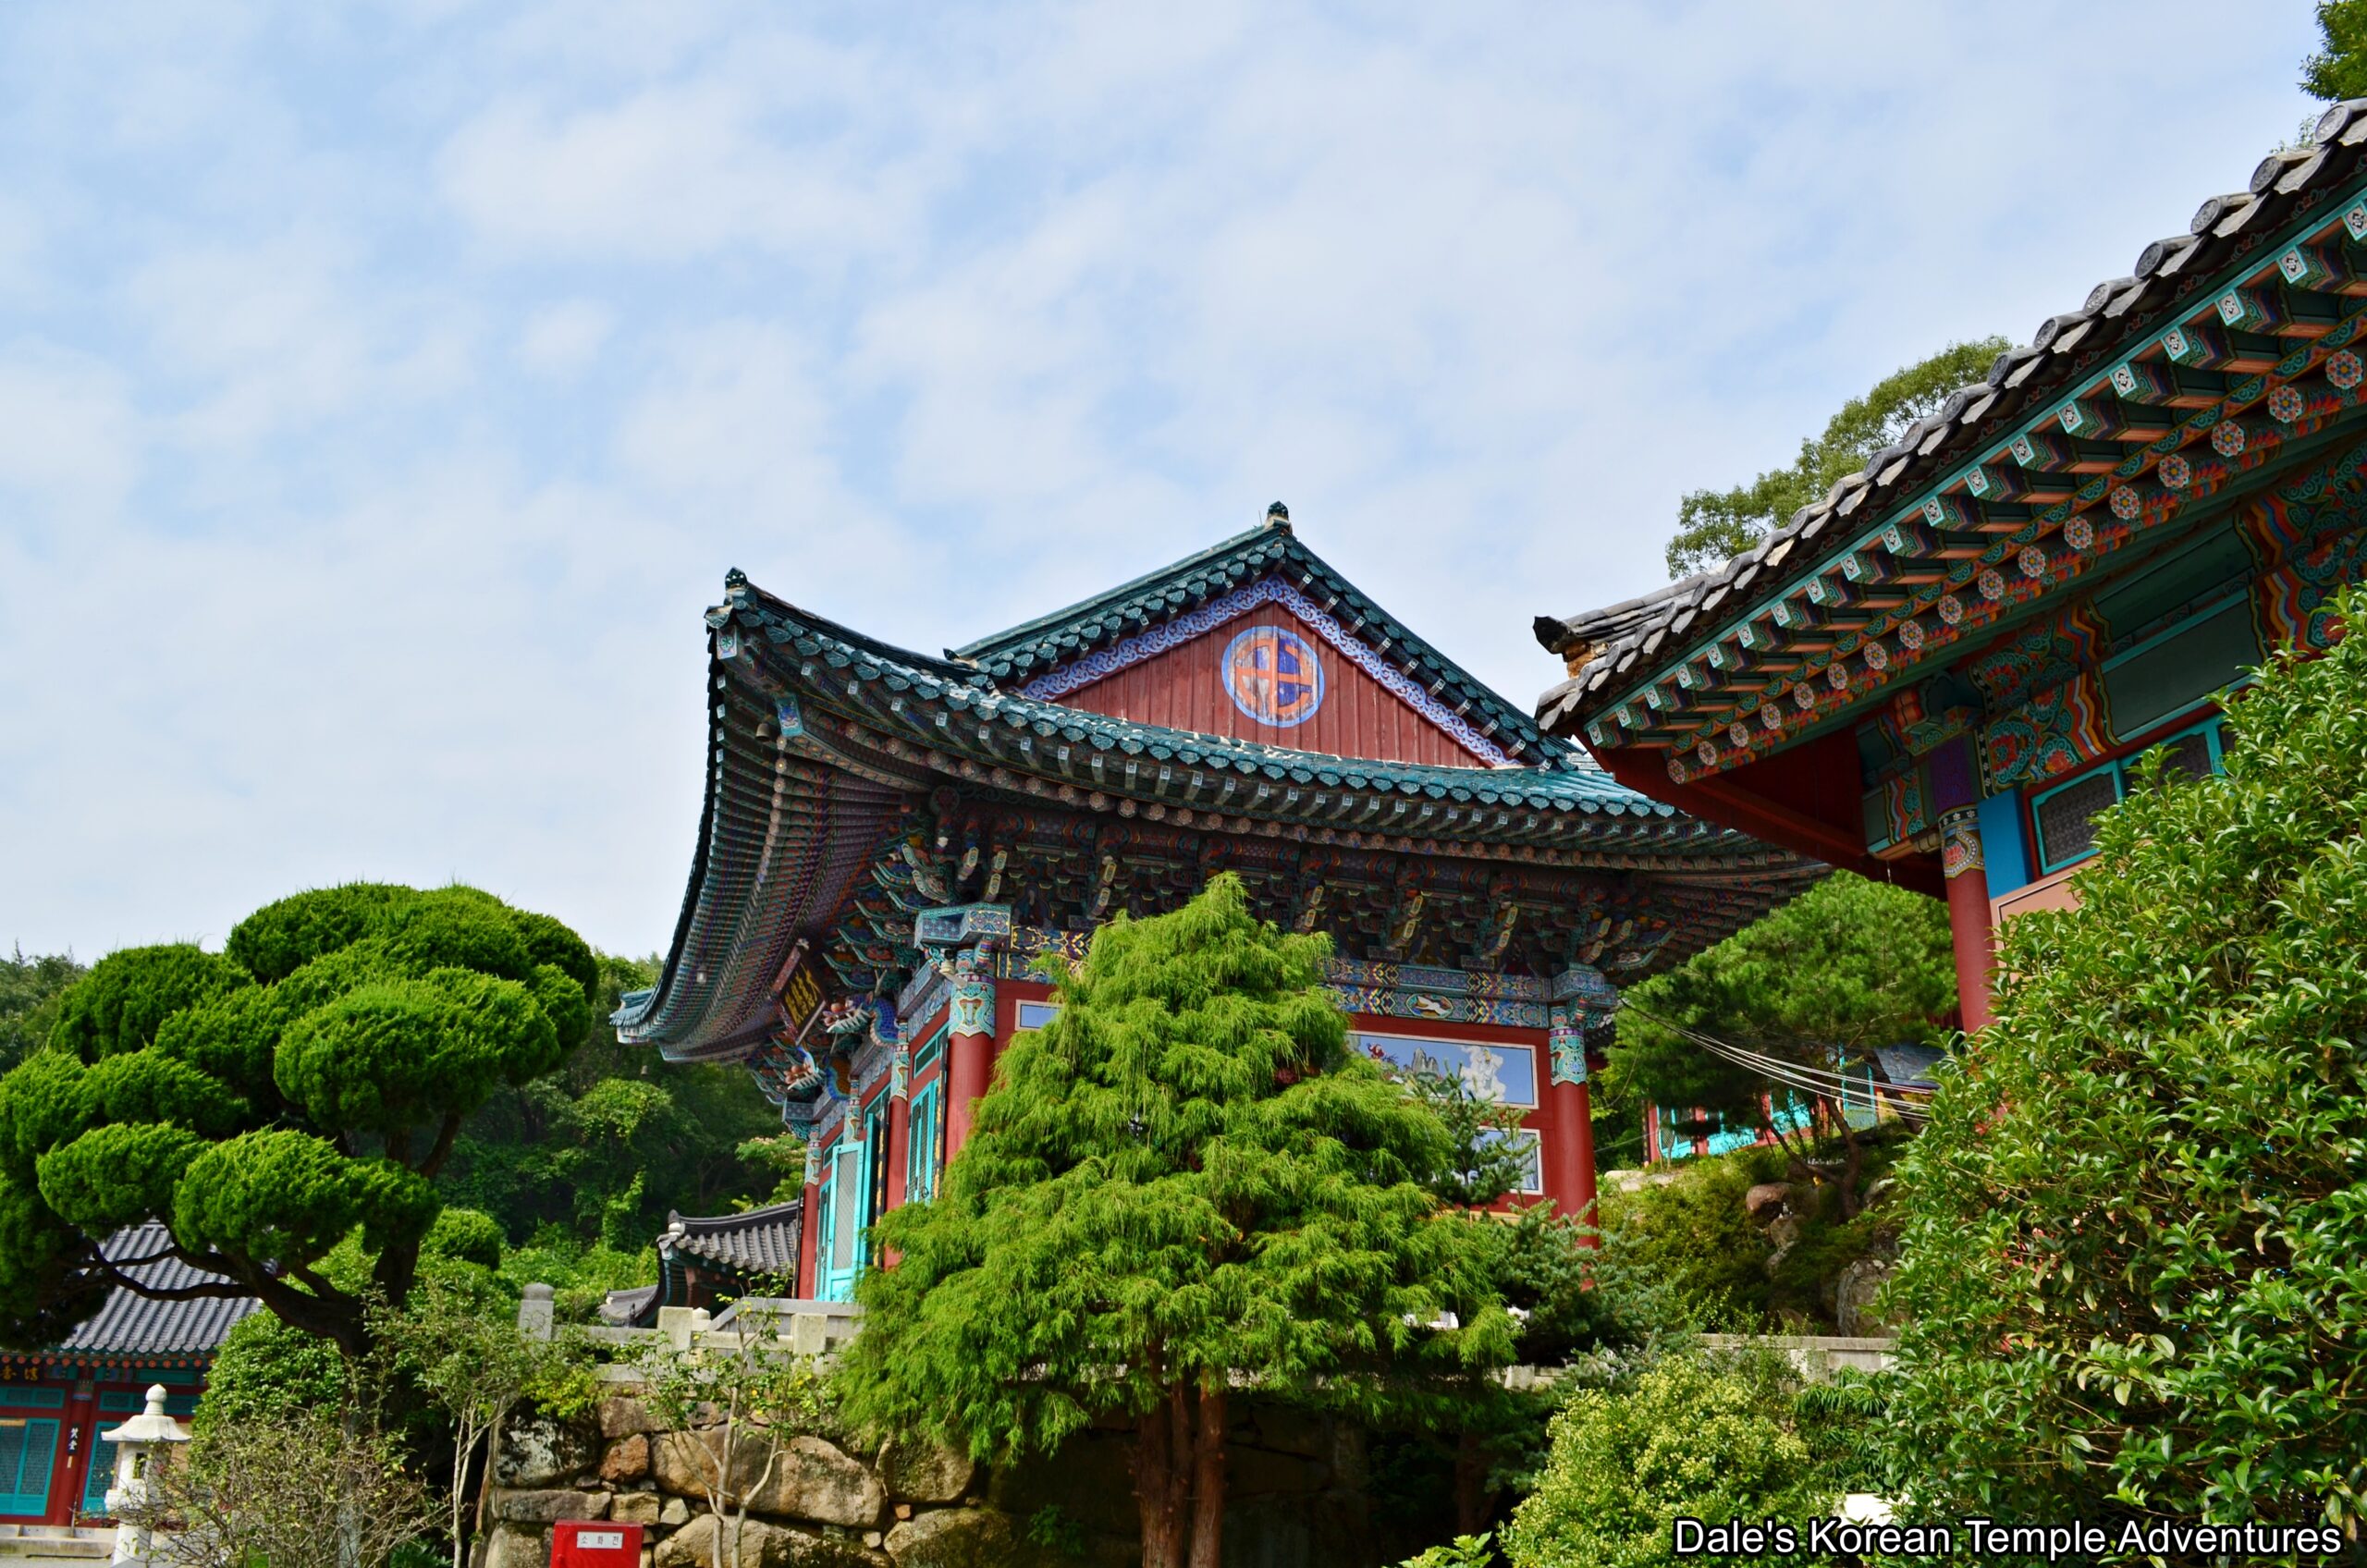
Yeongsanjeongsa Temple – 영산정사 (Miryang, Gyeongsangnam-do)
Temple History
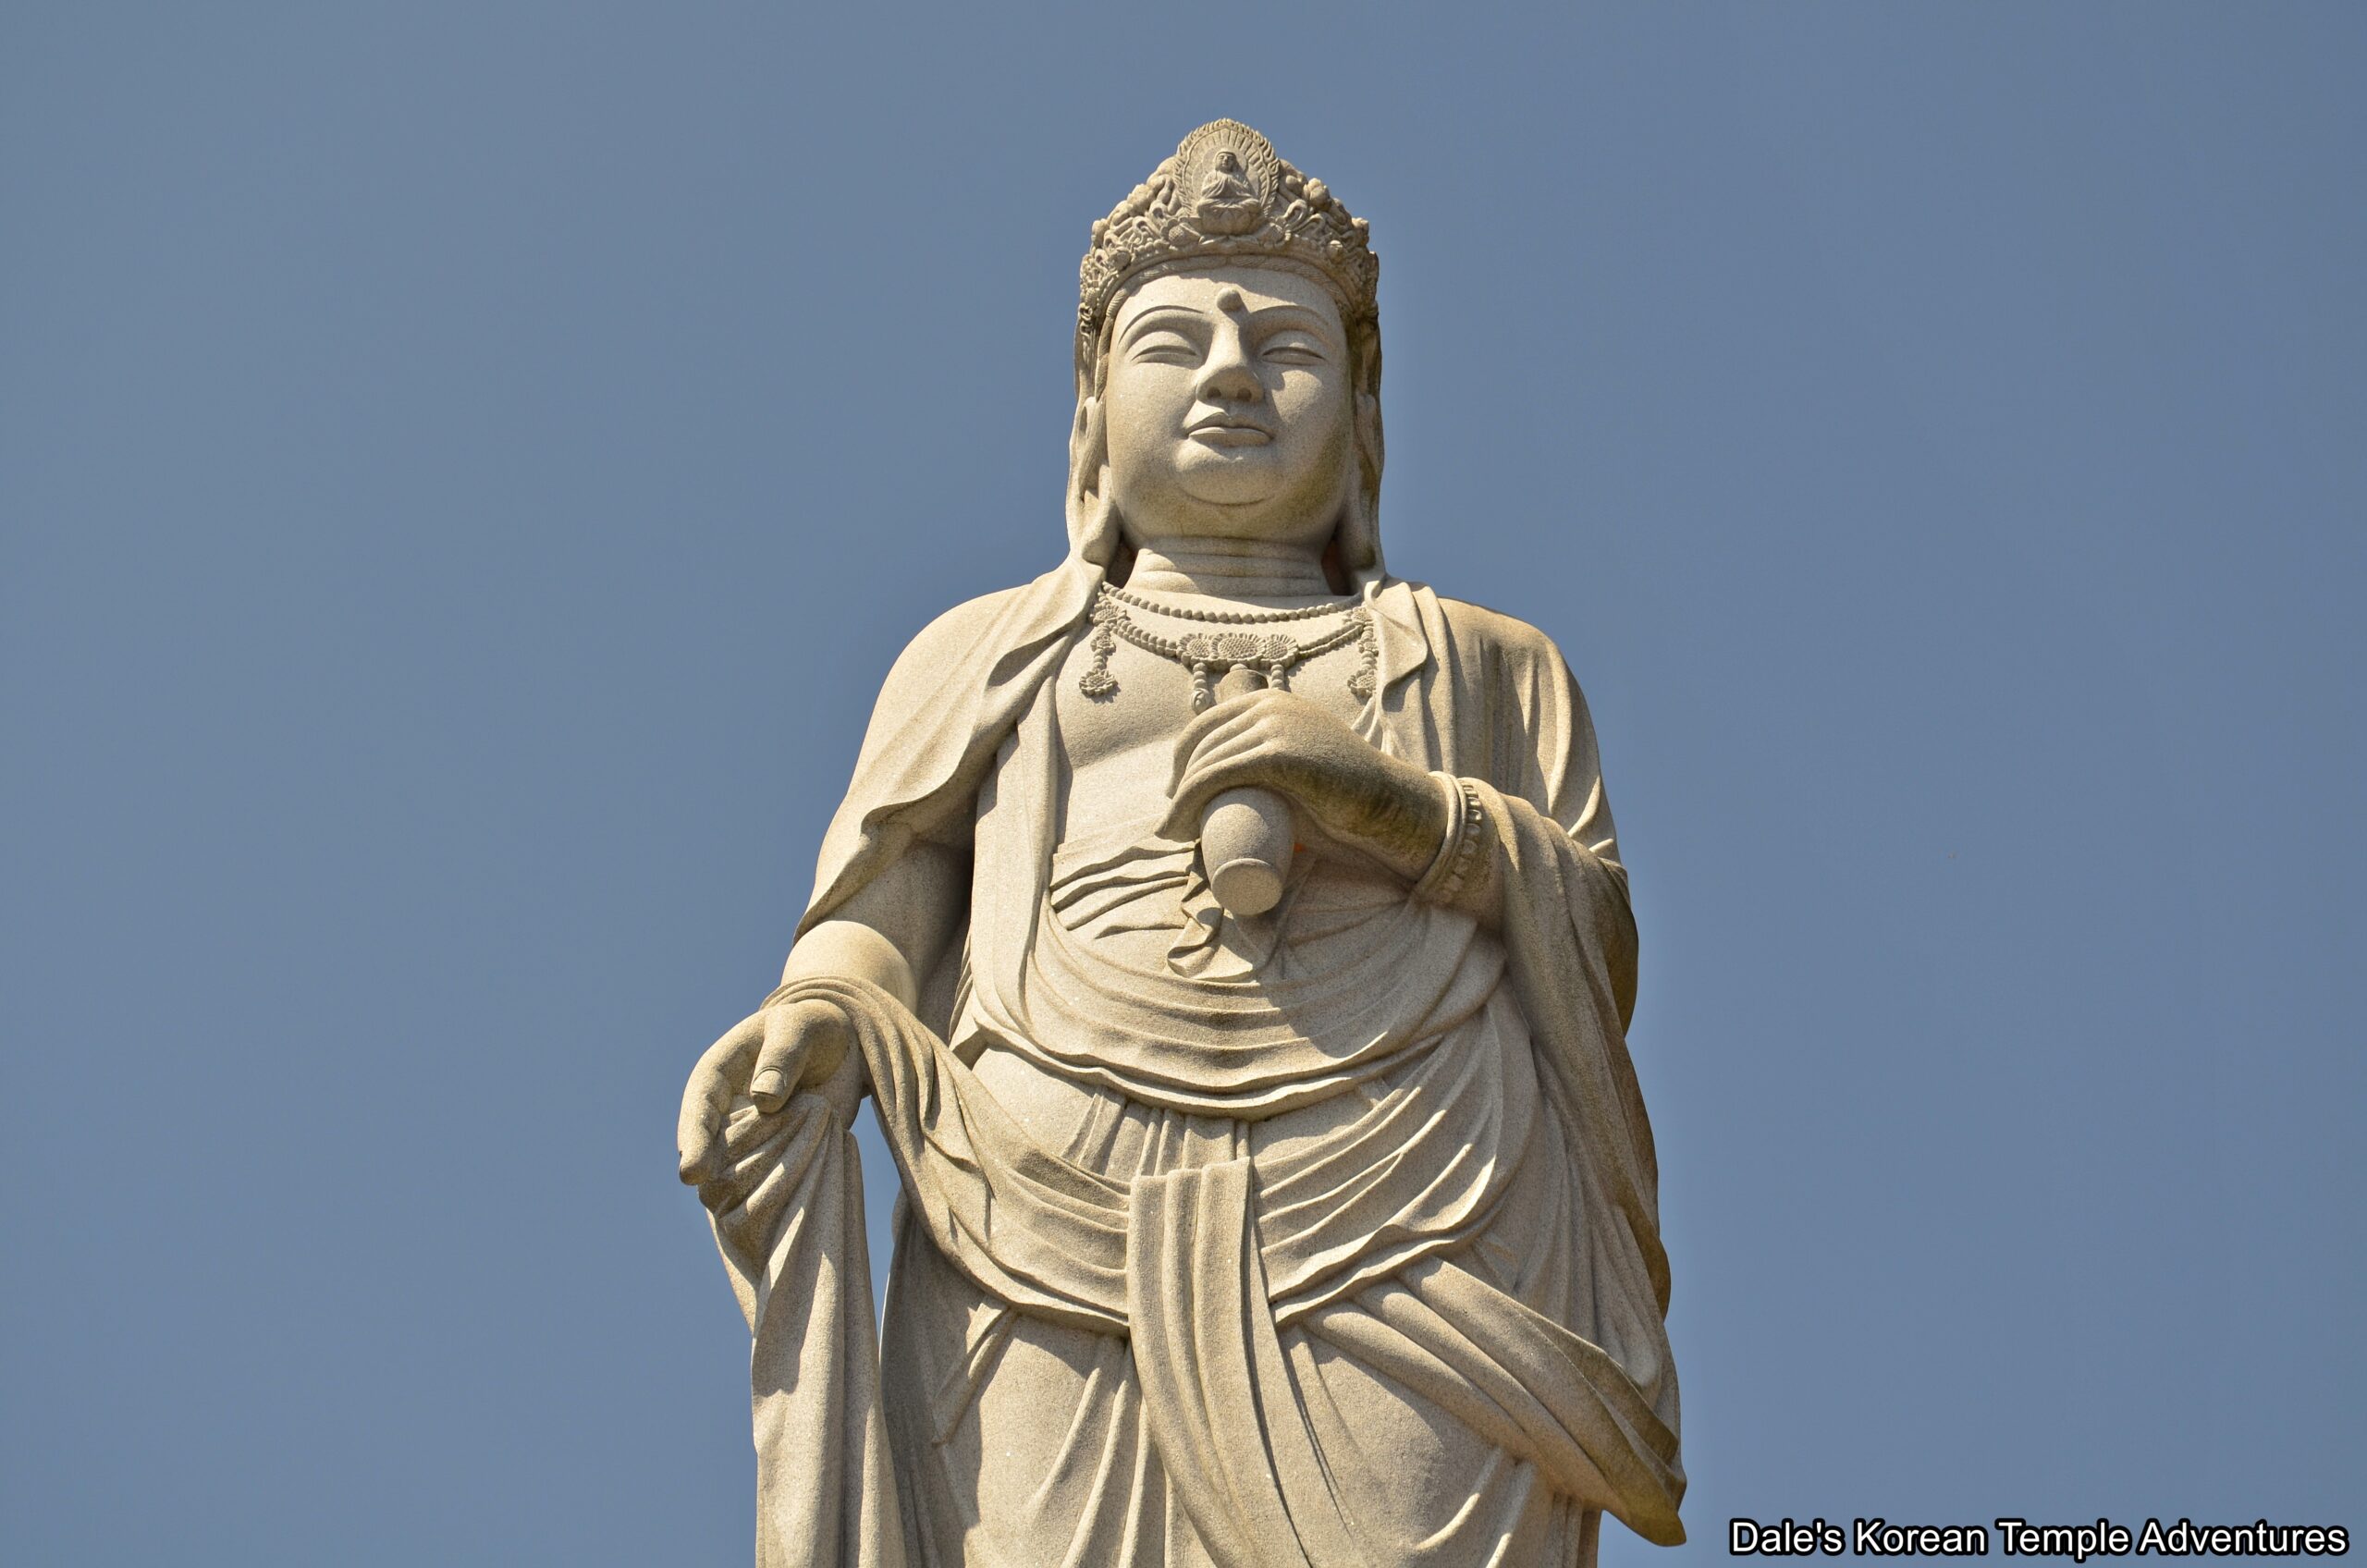
Yeongsanjeongsa Temple, which is a reference to Vulture Peak, where the Buddha gave sermons like the Heart and Lotus Sutras, is located in western Miryang, Gyeongsangnam-do. The temple is located in the southern foothills of Mt. Yeongchwisan (738.8 m). Yeongsanjeongsa Temple was first built in 1997 on the former temple grounds of Samjeoksa Temple. Samjeoksa Temple was used as a training centre for the Righteous Army that fought against the invading Japanese during the Imjin War (1592-98) in 1592. Yeongsanjeongsa Temple was built to pray for peace in Korea. The temple is also home to a massive, golden Reclining Buddha statue that’s 120 metres in length and 21 metres in height. In 2020, all the construction at the temple was completed.
Being a modern temple, Yeongsanjeongsa Temple isn’t home to any Korean Treasures or National Treasures. However, it is home to Gyeongsangnam-do Tangible Cultural Property #387, which is the “Miryang Yeongsanjeongsa Stone Buddha Statue.”
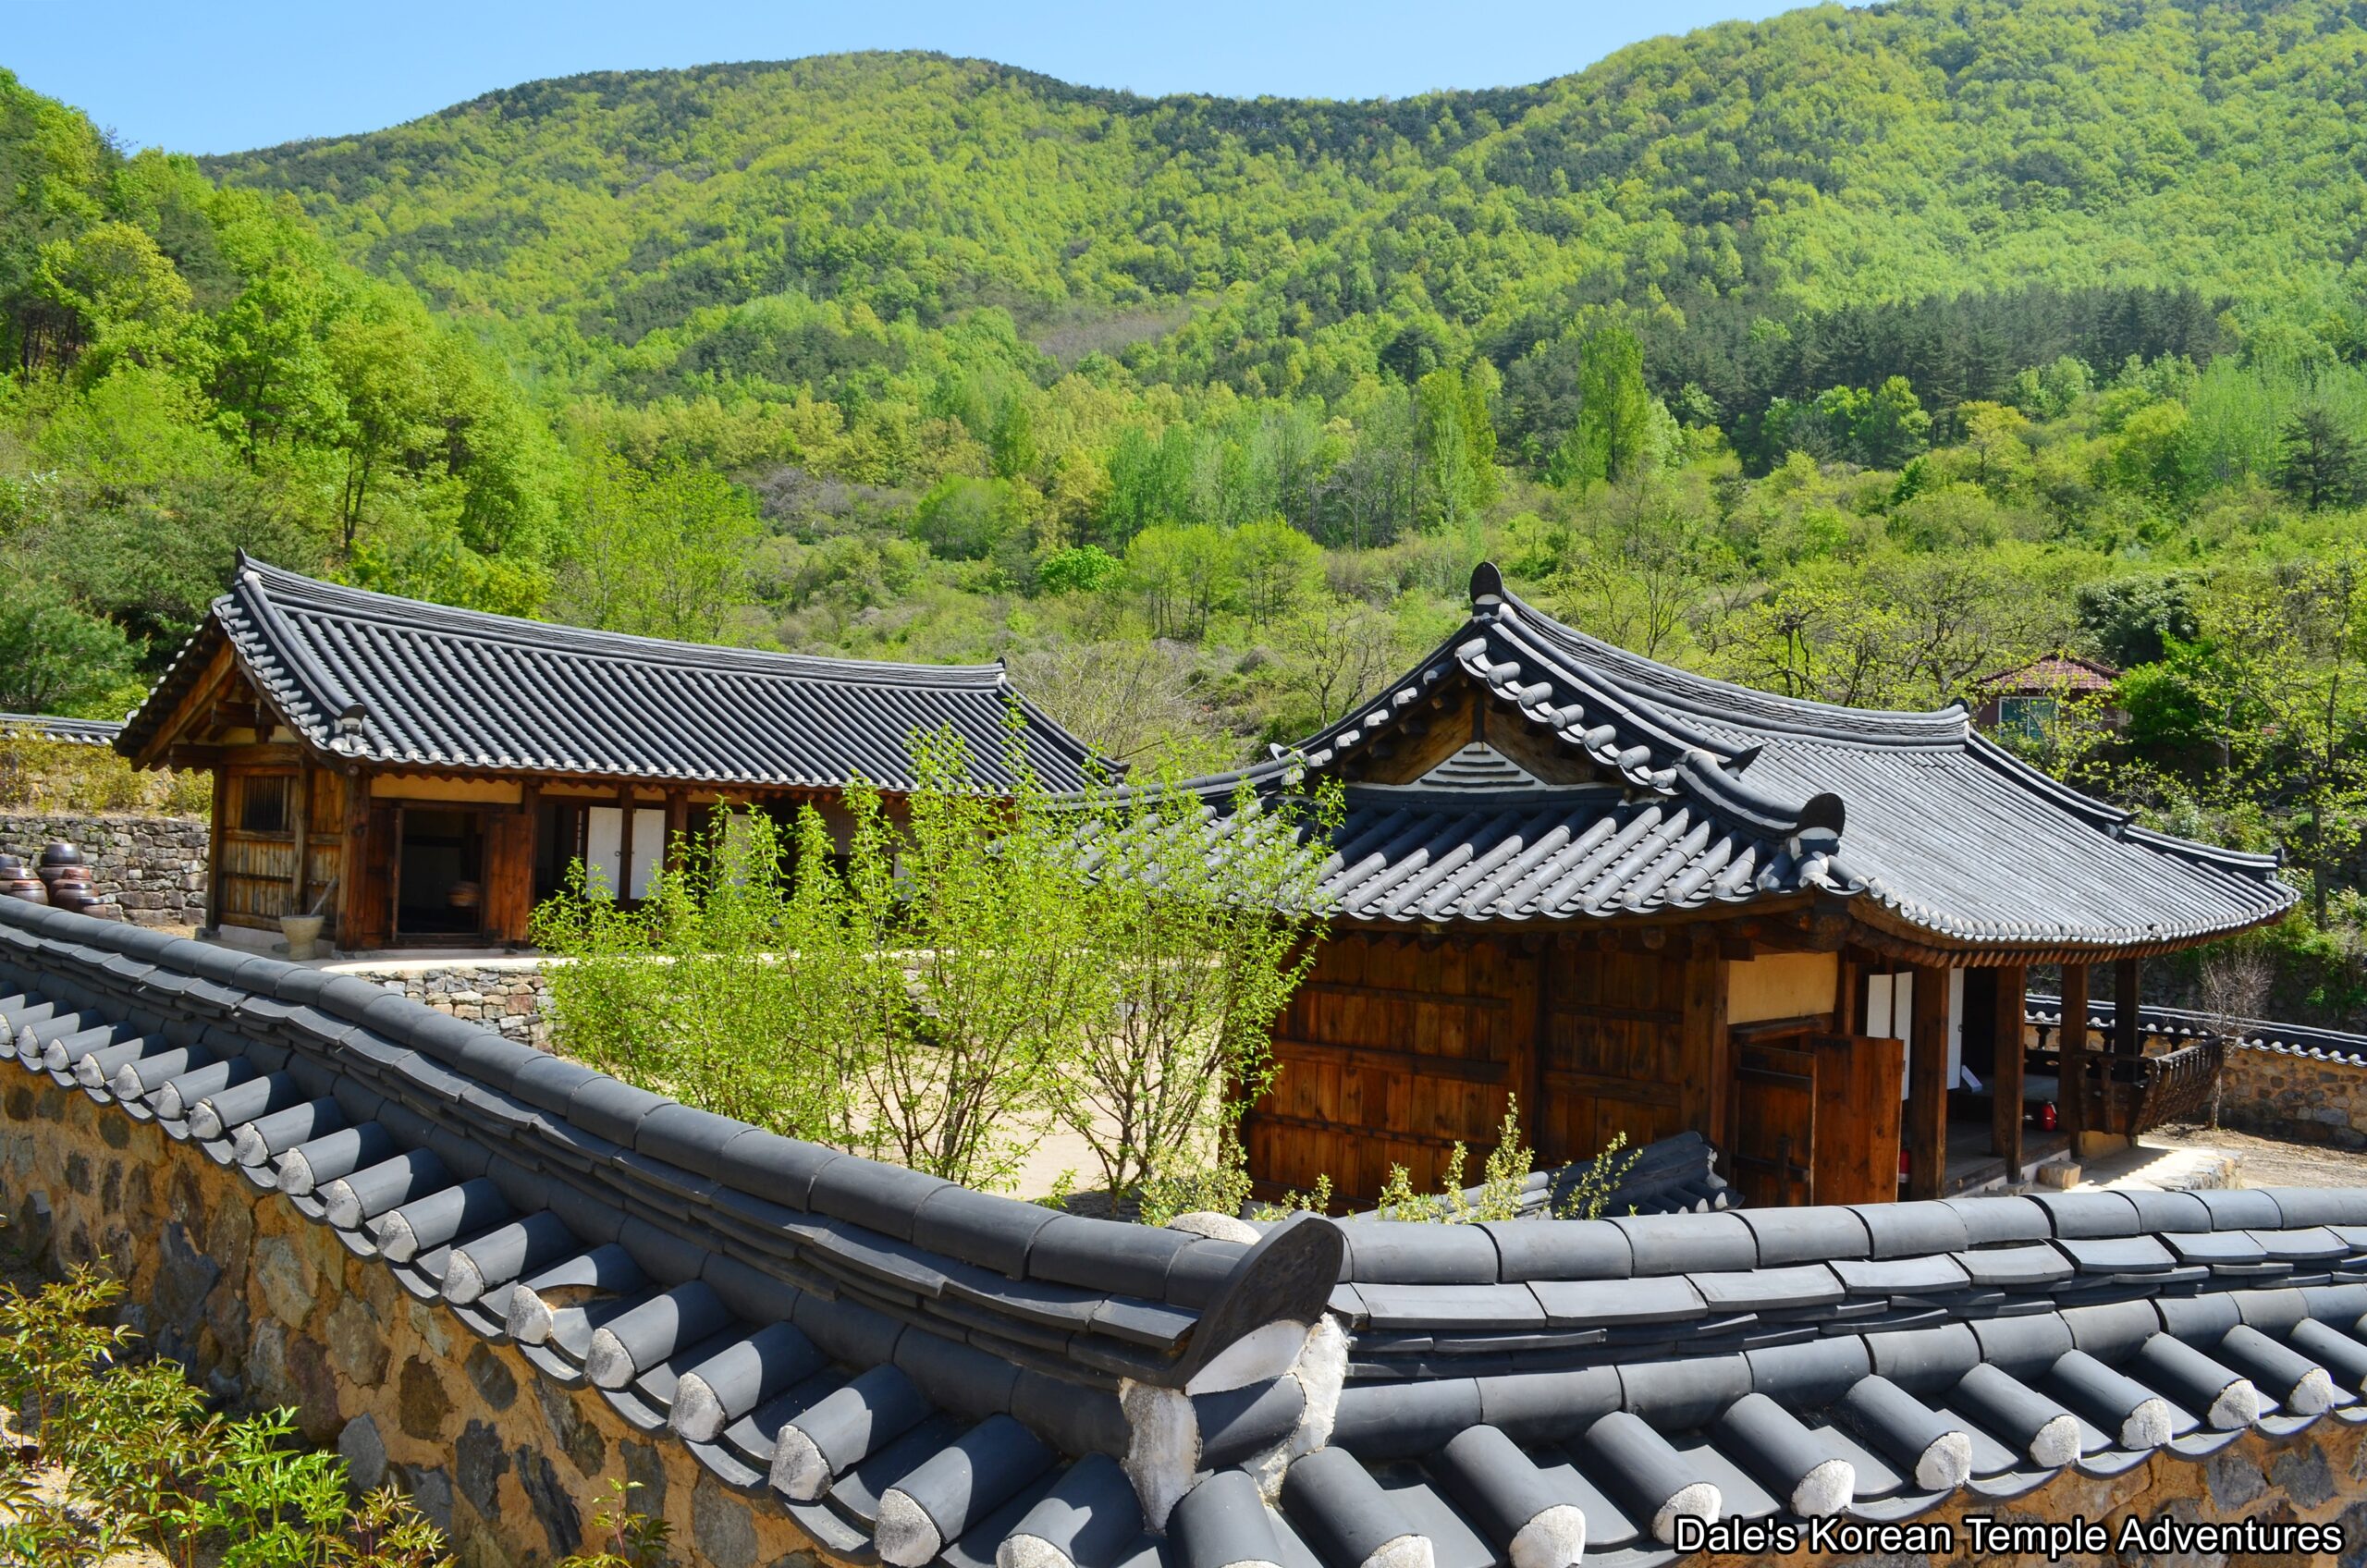
Temple Layout
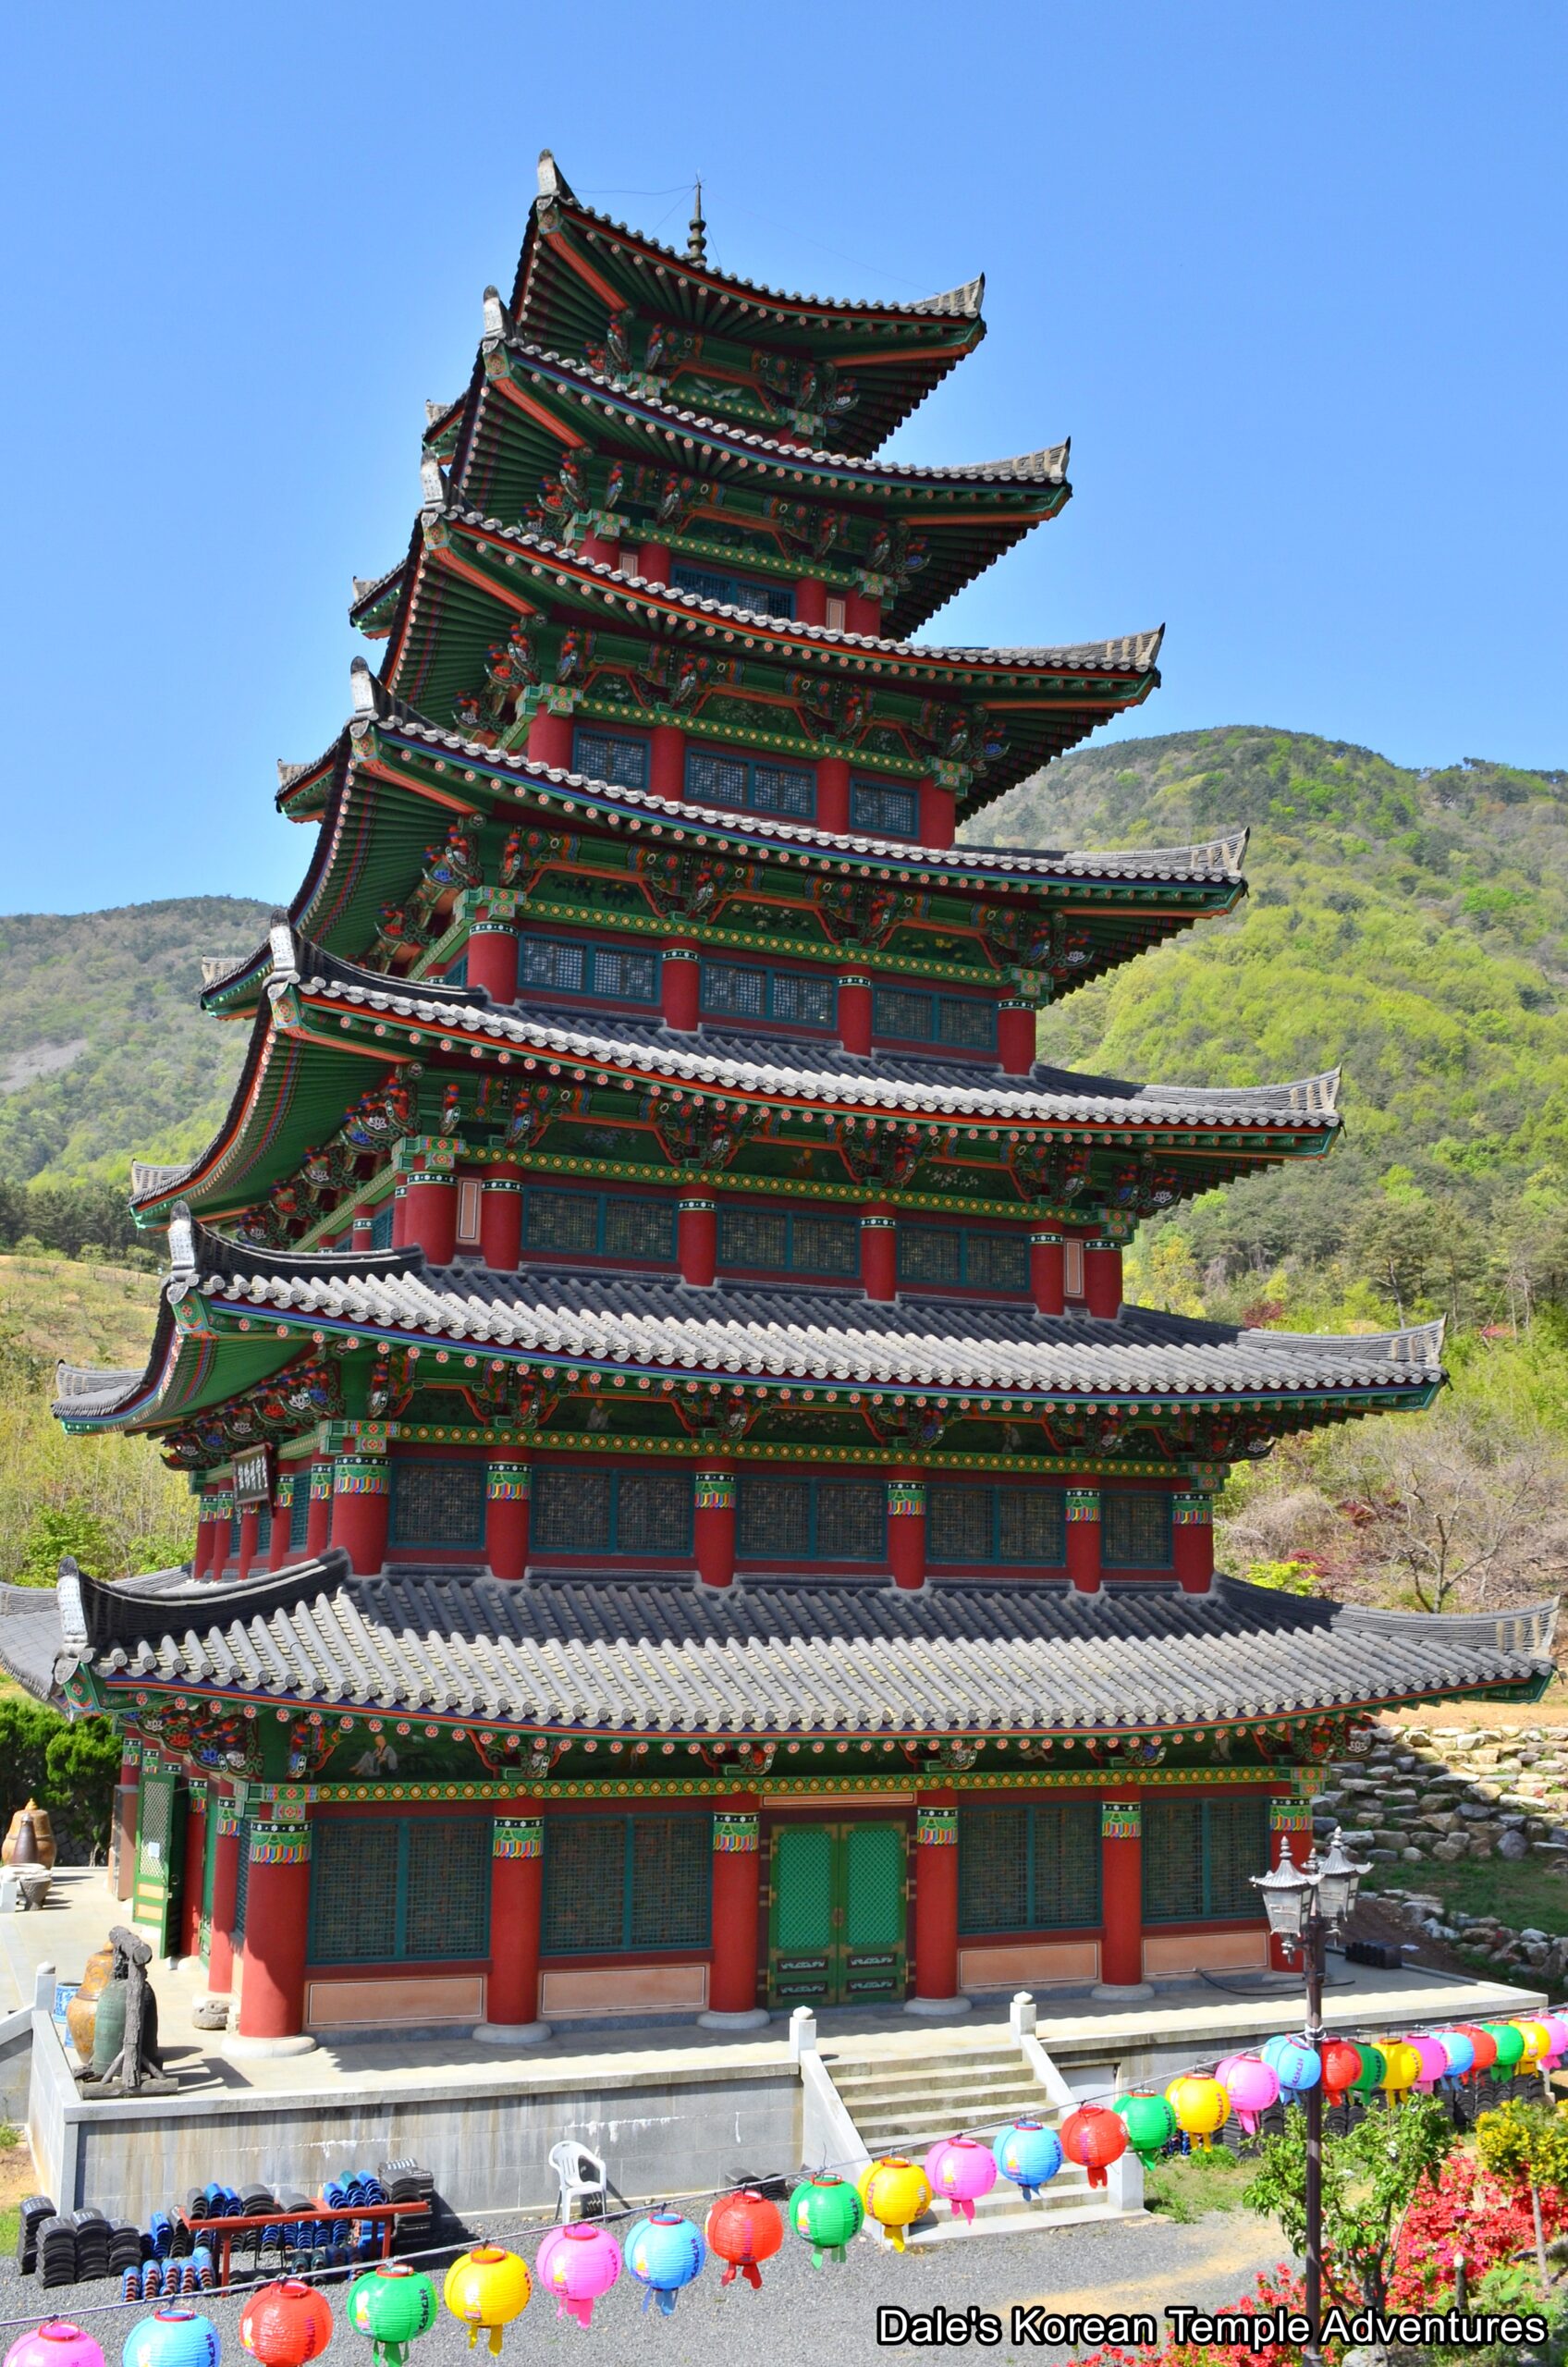
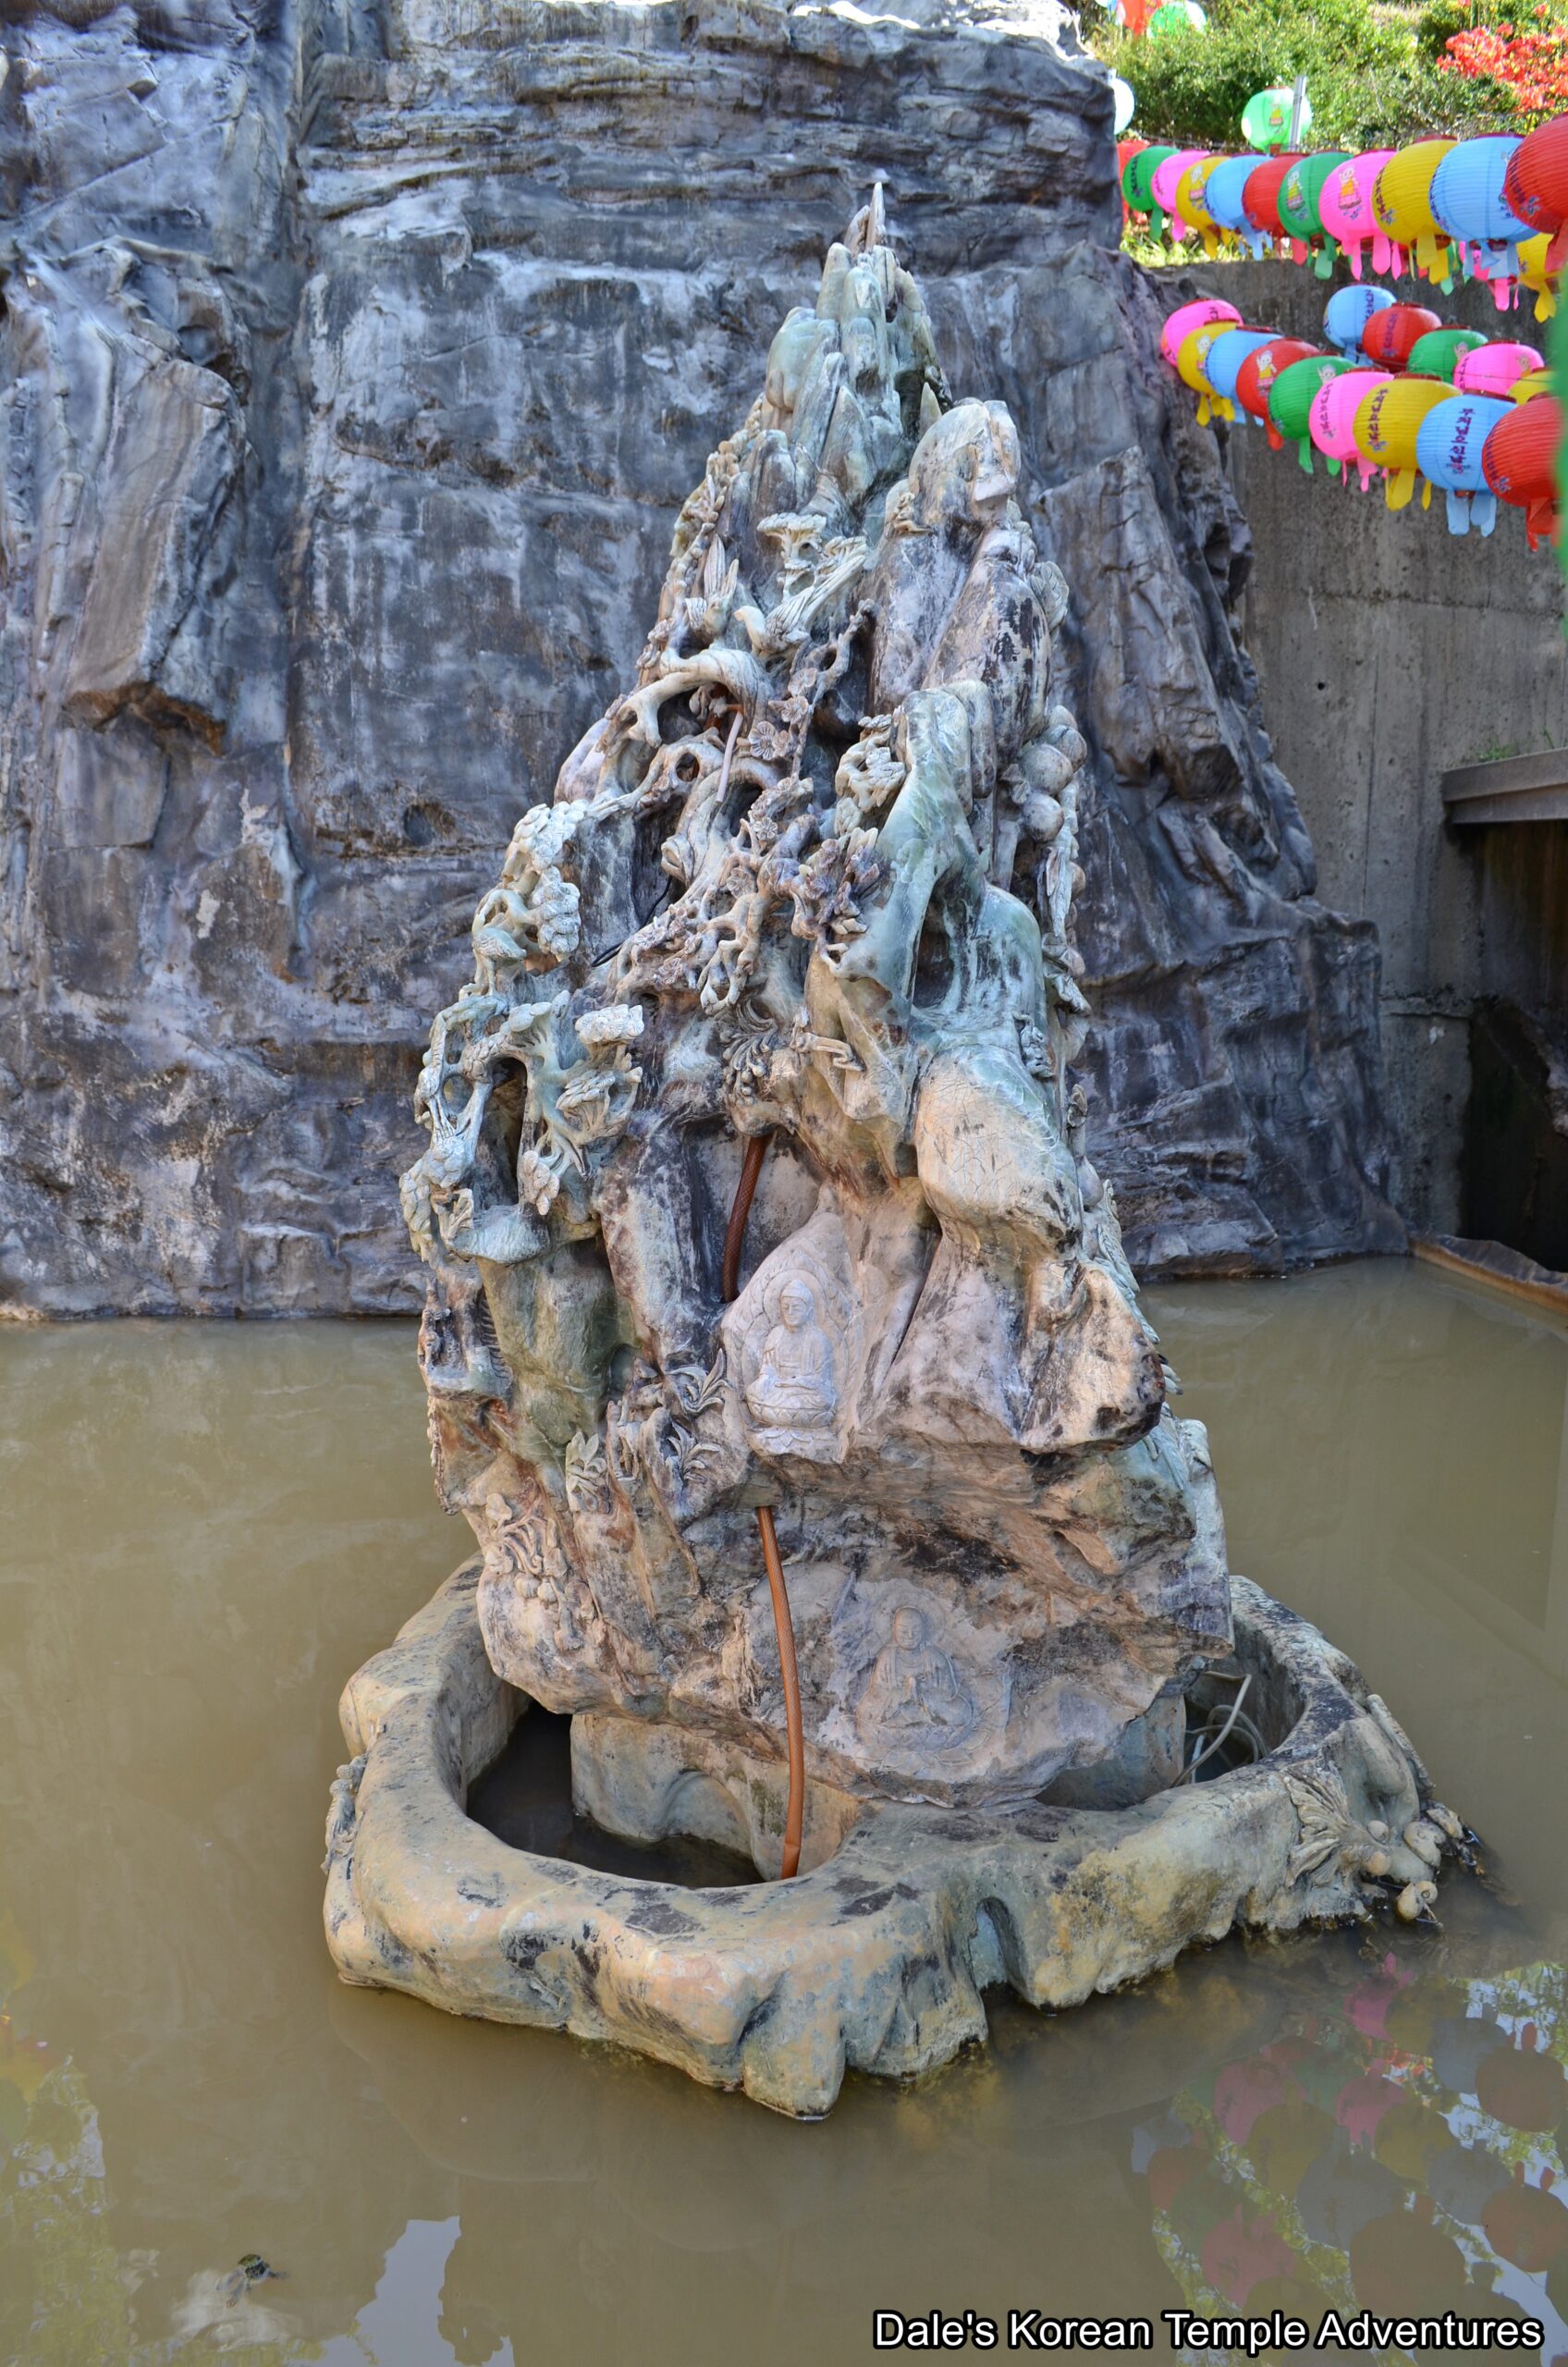
As you first make your way towards Yeongsanjeongsa Temple, you’ll first be greeted by a rather non-descript Iljumun Gate. After passing through this entry gate, you’ll be welcomed by a pair of modern stone guardian posts. Finally, you’ll arrive at the rather spacious temple courtyard. To your immediate left is a large building that acts as the monks’ dorms, the kitchen, and administrative office. And to the right of this modern structure is a beautiful stone statue dedicated to Gwanseeum-bosal (The Bodhisattva of Compassion). This statue is surrounded by a shallow pool of water and two dongja (attendants) in its midst.
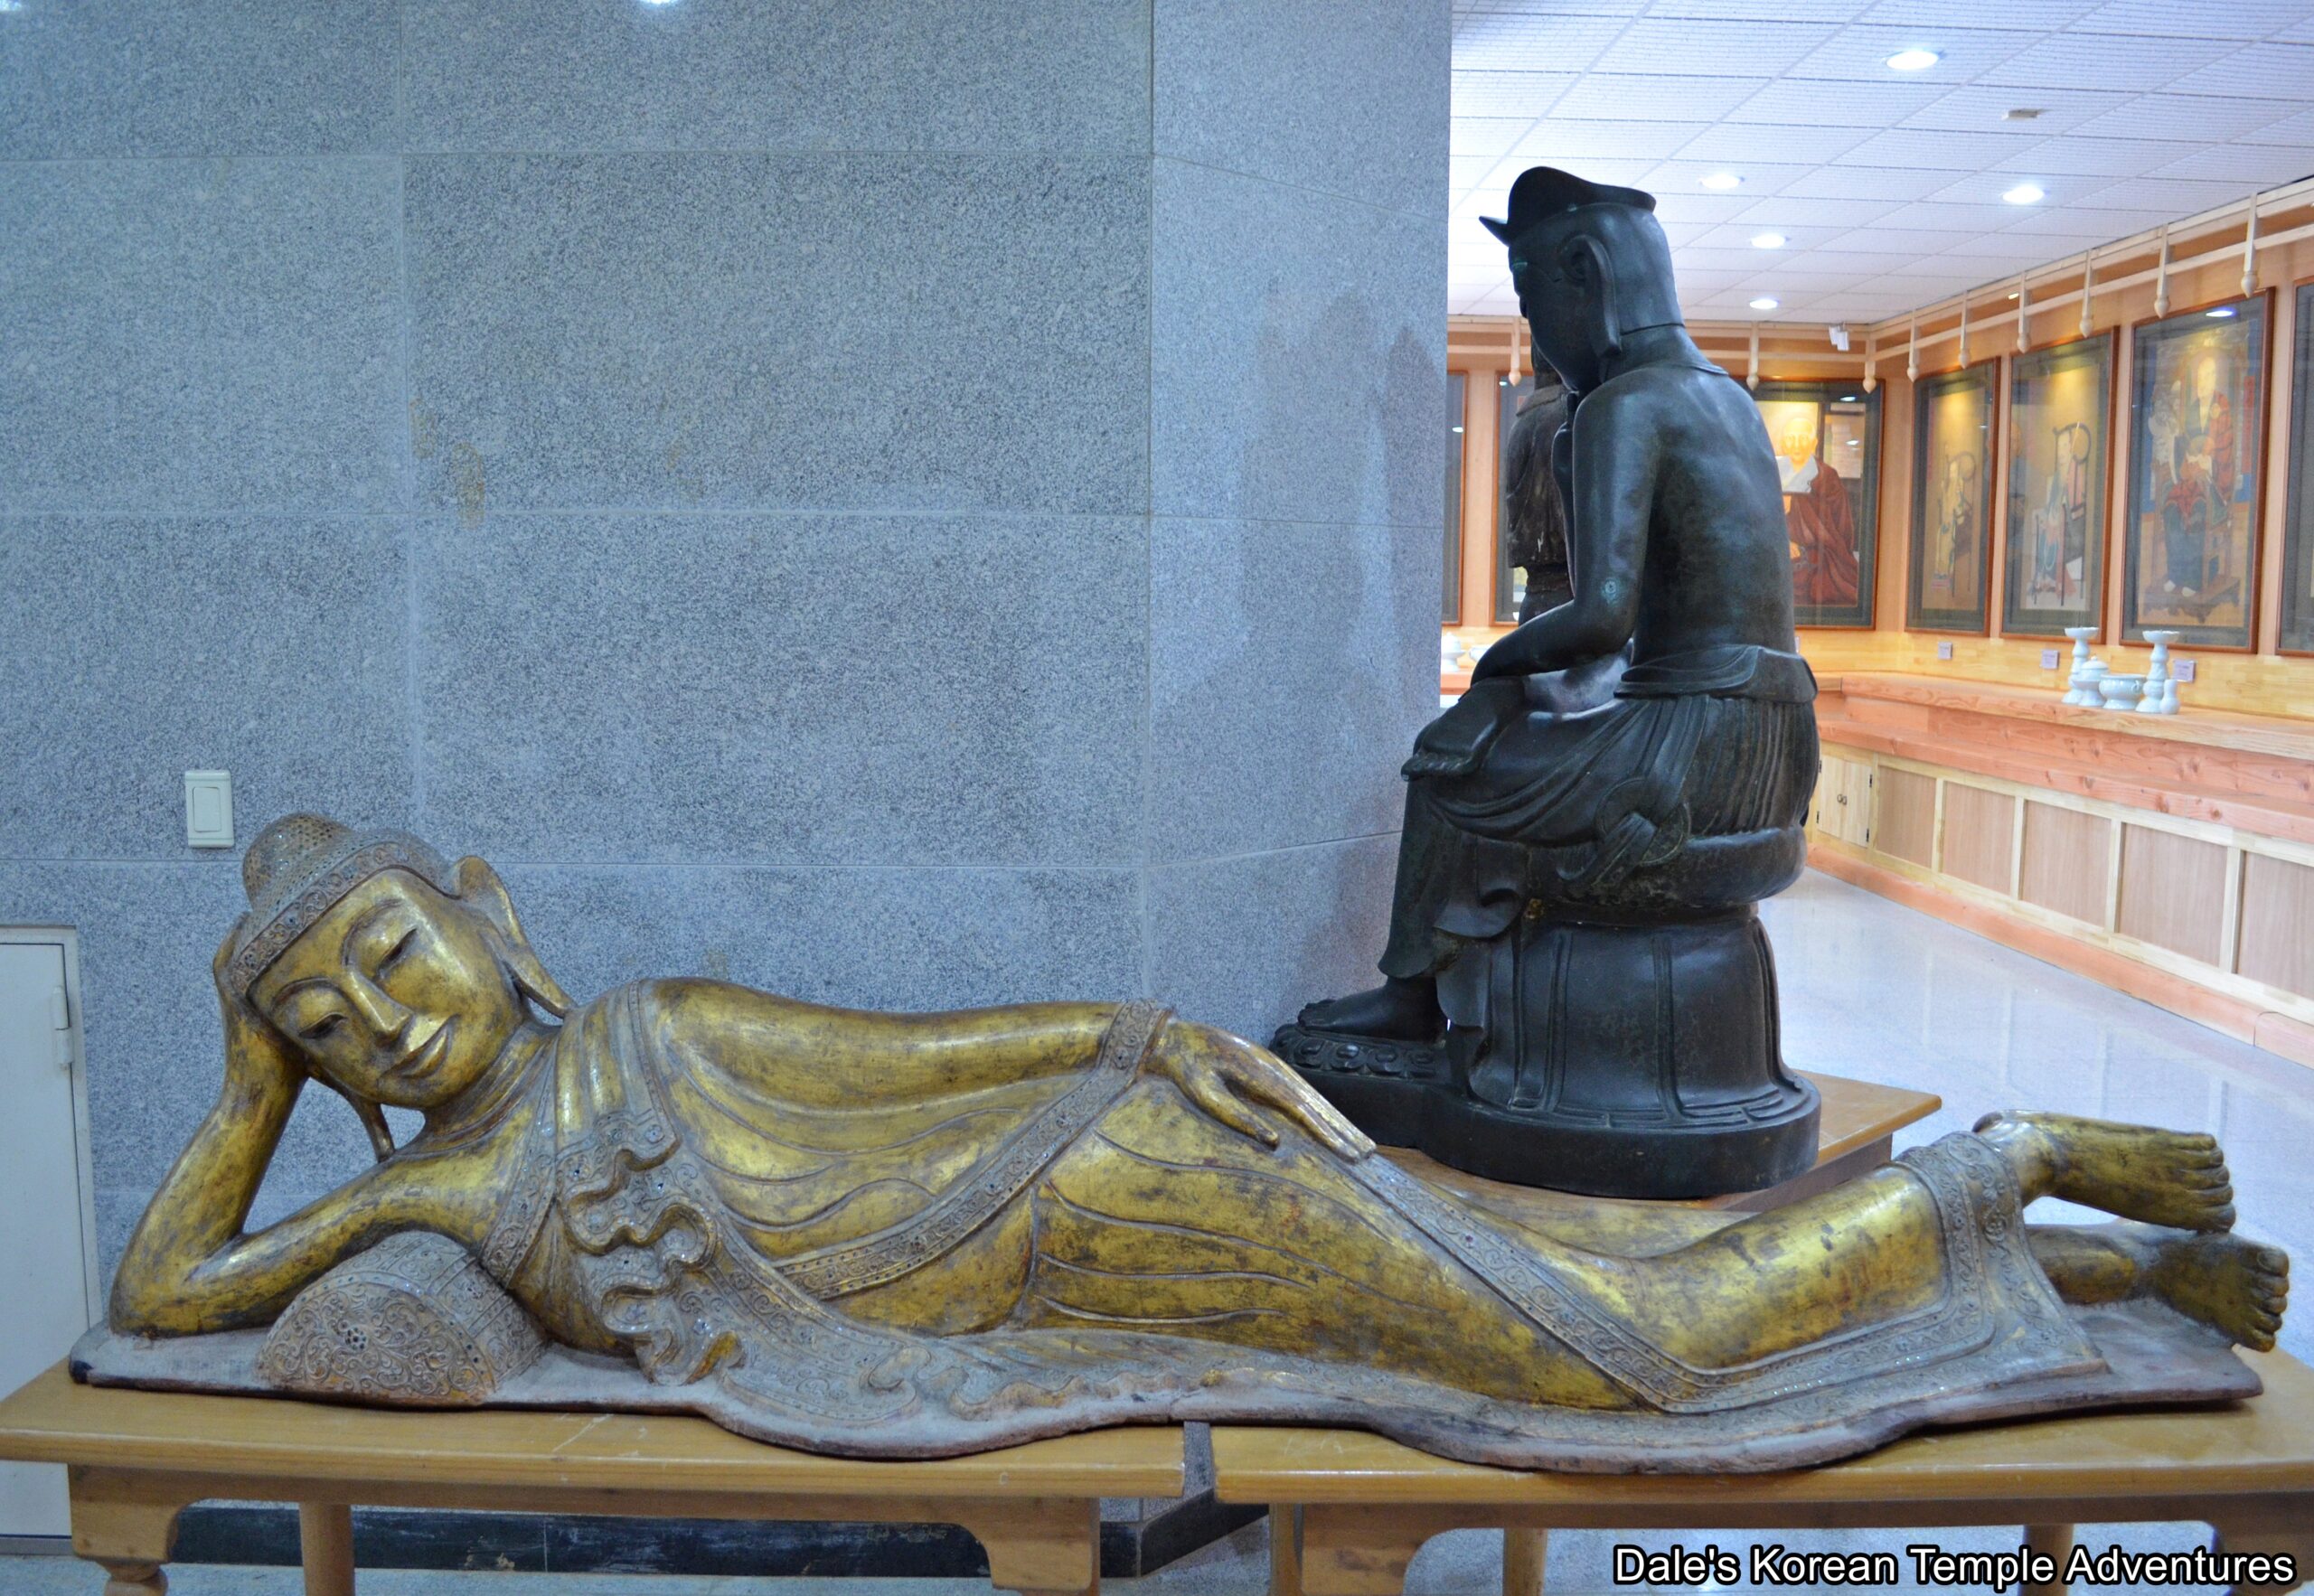
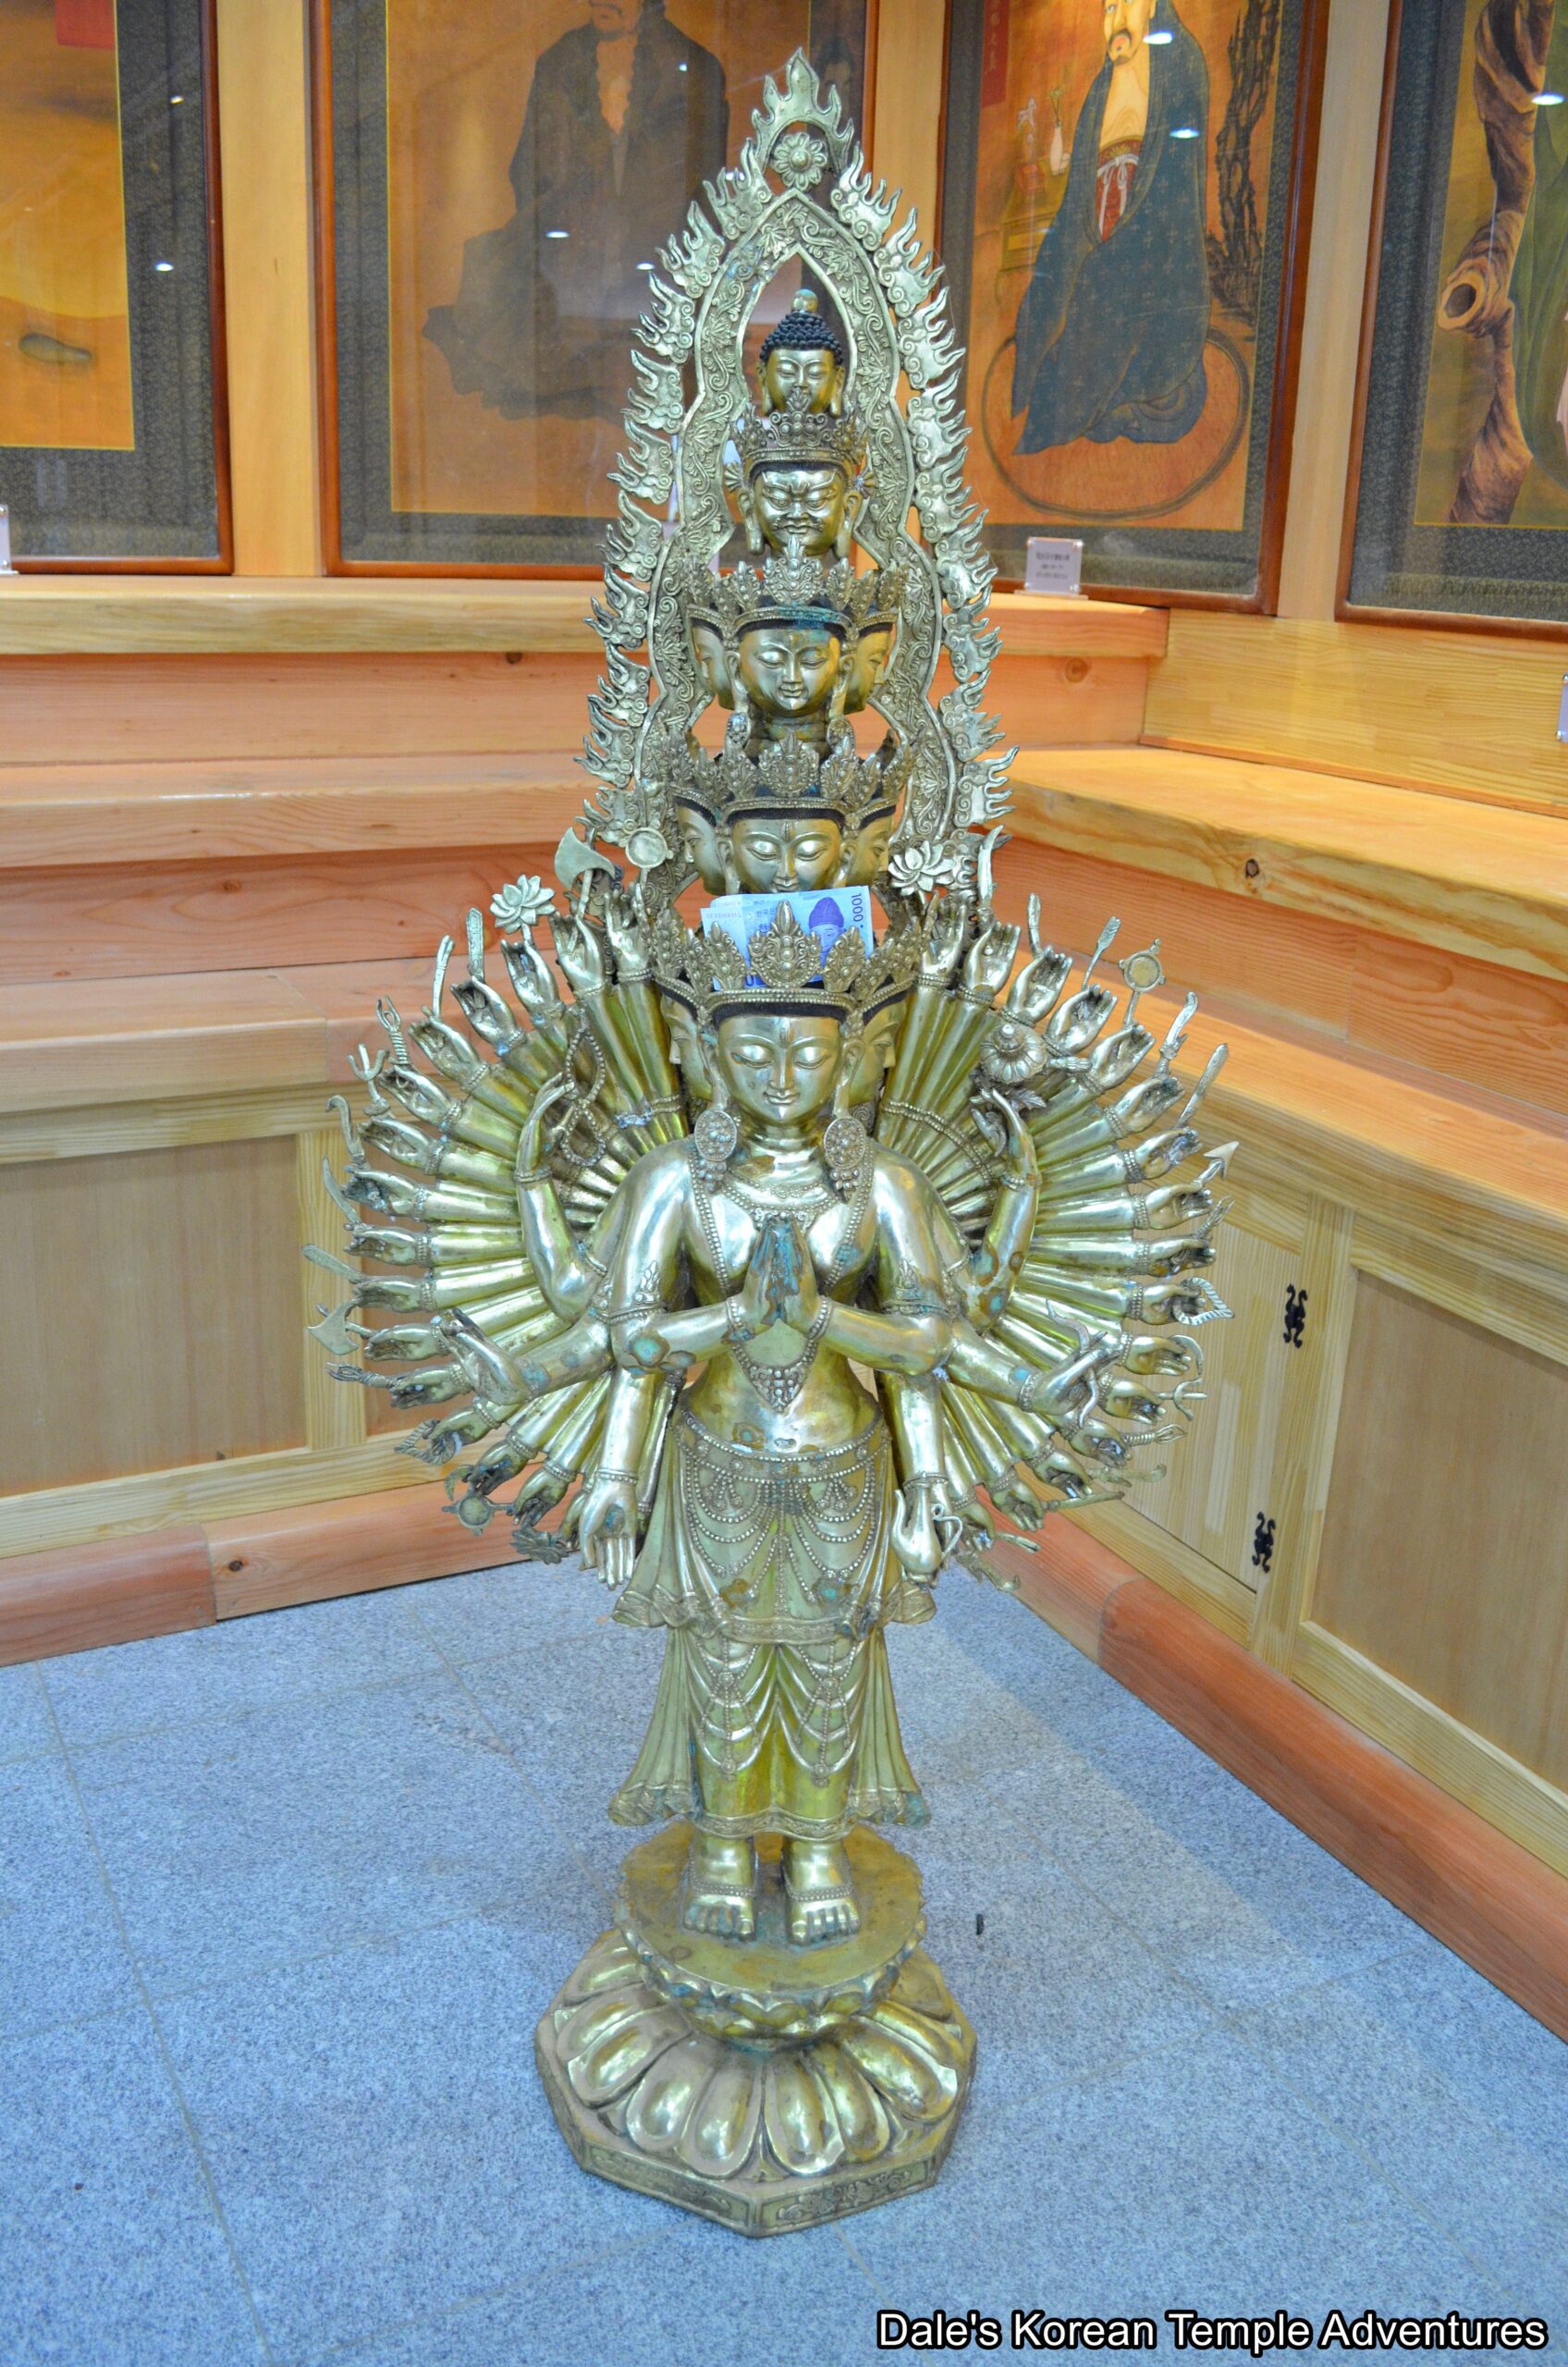
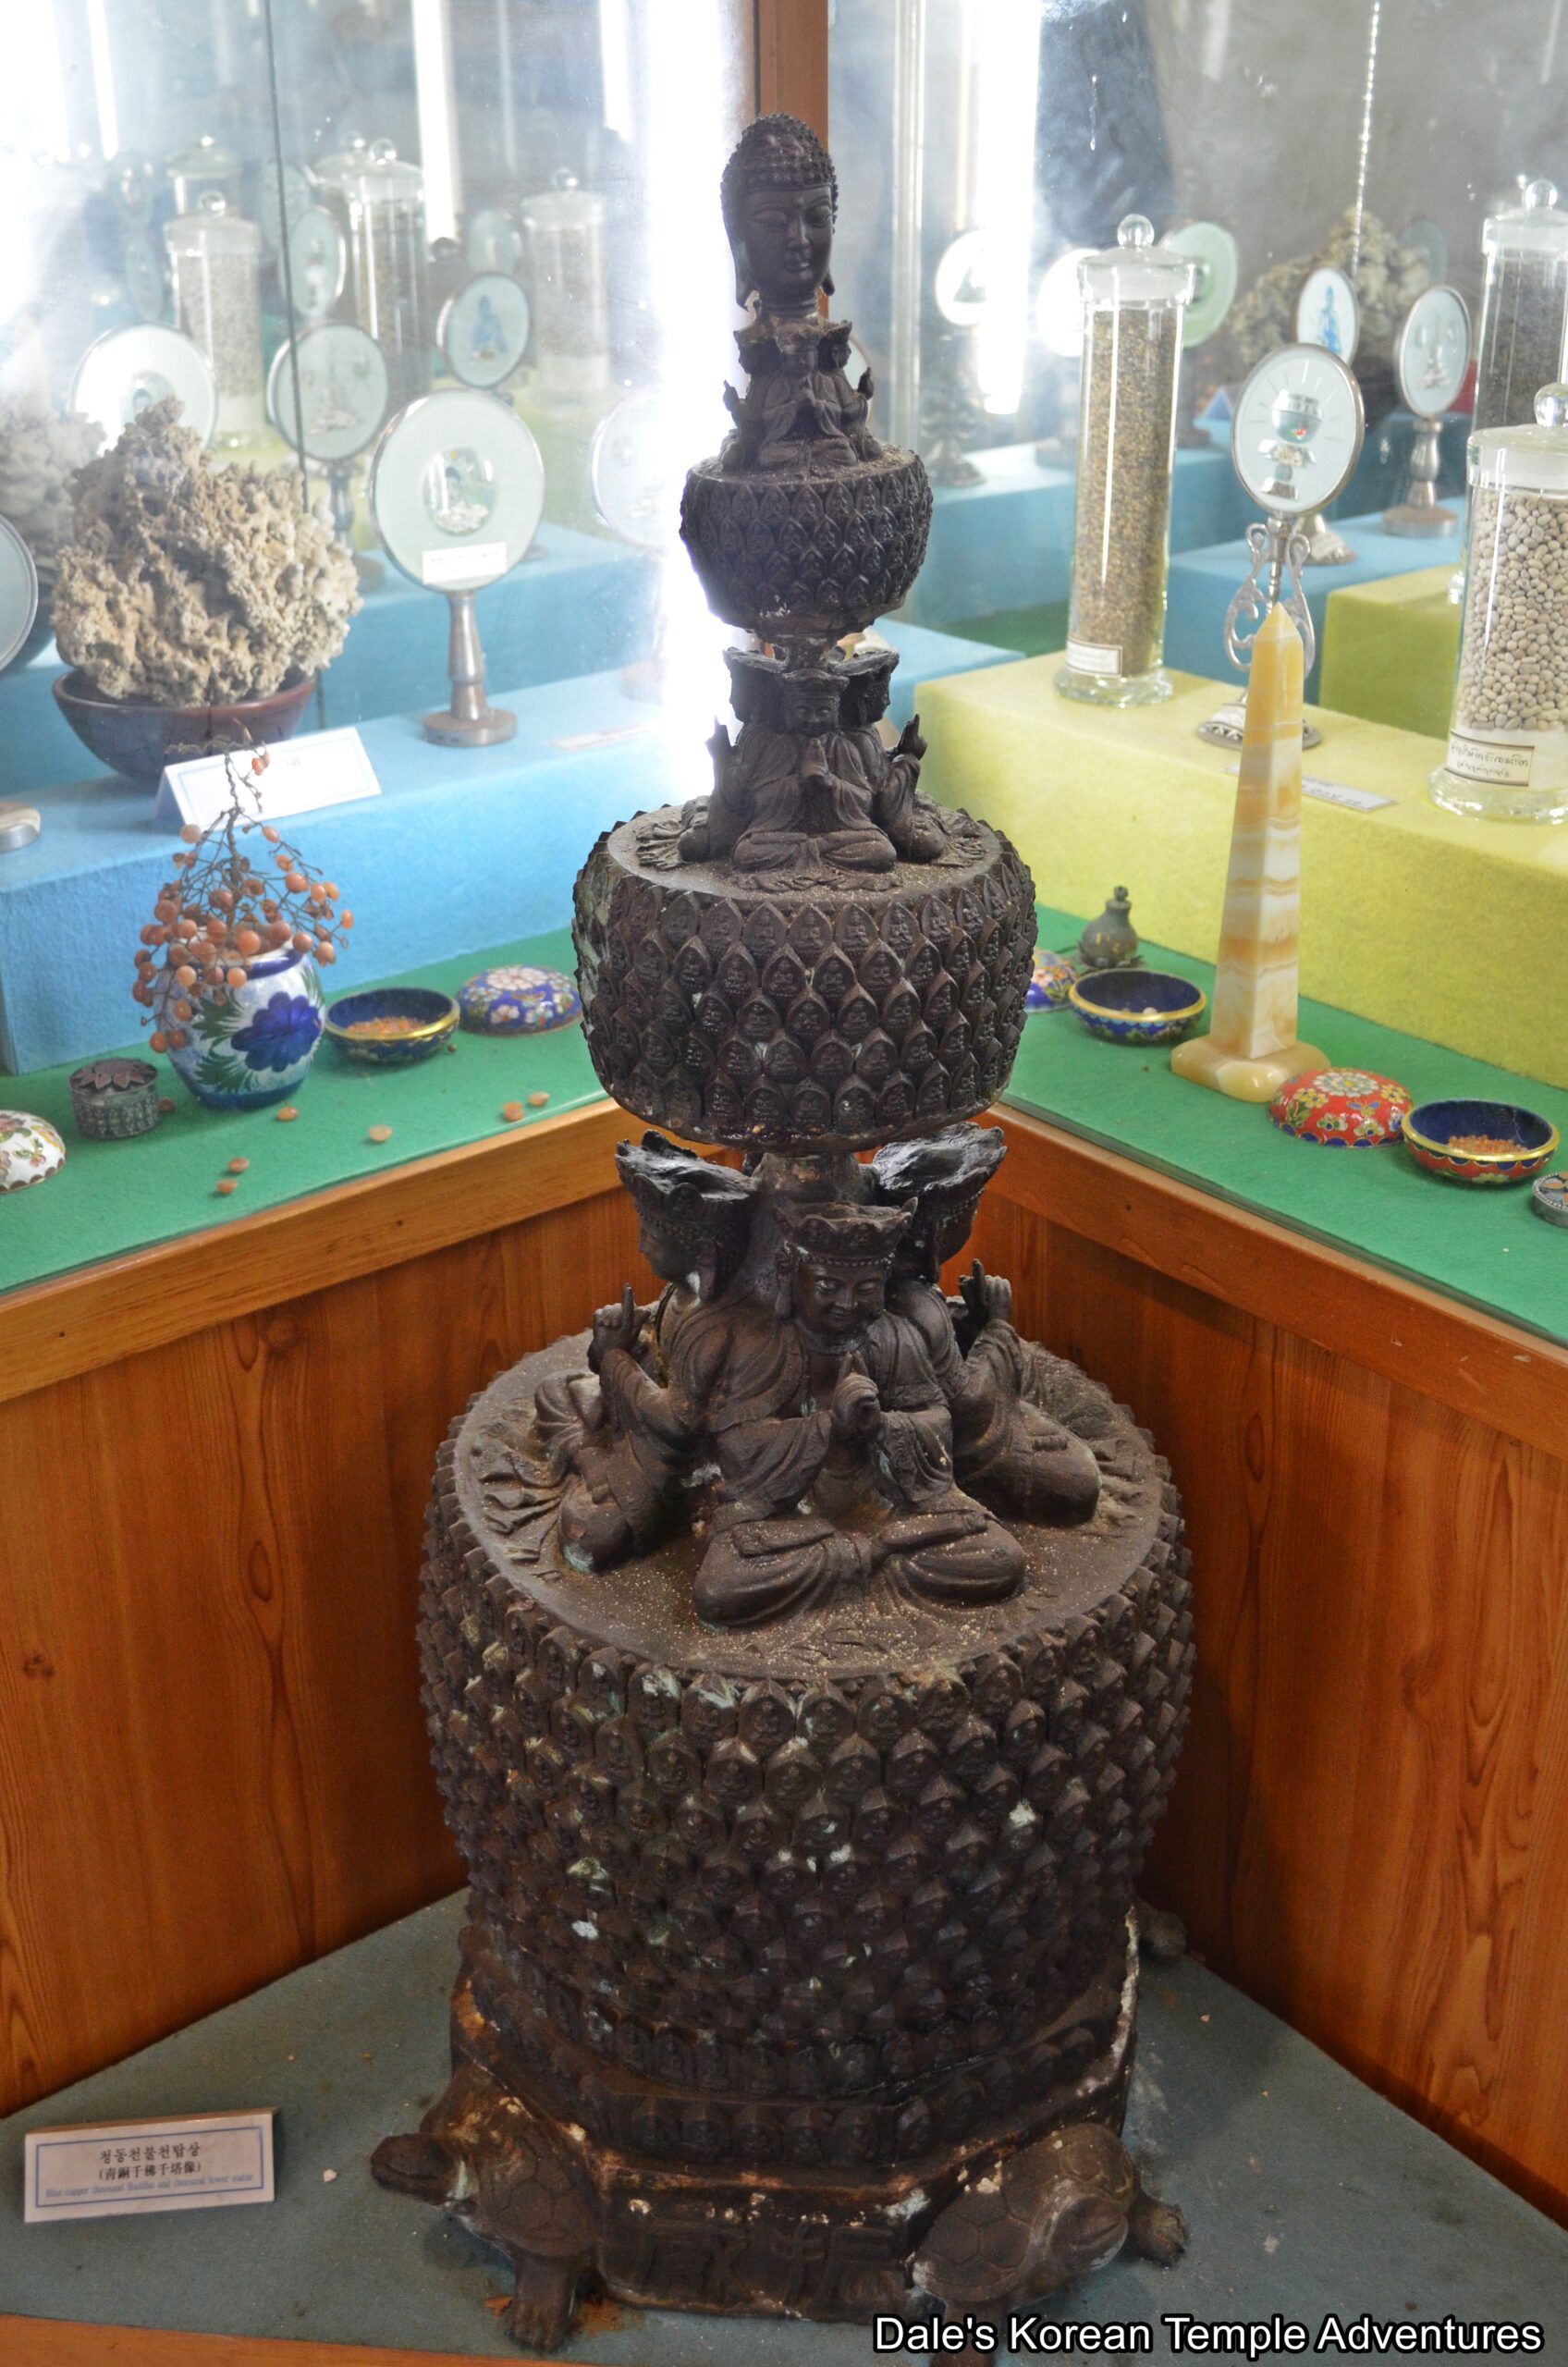
Next to this statue is the amazing seven-story pagoda. This pagoda also acts as the temple museum. In total, some 2,000 Buddhist artifacts such as statues, paintings, and sari (crystallized remains) are all housed inside this museum. The first floor of the structure houses numerous large statues. On the second floor of the pagoda, there are numerous paintings. The third floor houses a world record setting amount of sari (crystallized remains) of monks. The fourth floor has numerous smaller sized Buddhist statues. And finally, on the fifth floor, you can look out towards the enormous, golden Reclining Buddha statue that’s 120 metres in length and 21 metres in height on the neighbouring hillside. Additionally, the “Miryang Yeongsanjeongsa Stone Buddha Statue” is housed inside this seven-story structure. It’s believed that this protected property dates back to the 7th century based on its style. It appears to be an image of Yaksayeorae-bul (The Medicine Buddha) based on the medicinal jar it holds in its left hand. So when you visit the temple pagoda/museum, make sure you keep an eye out for this historic statue.
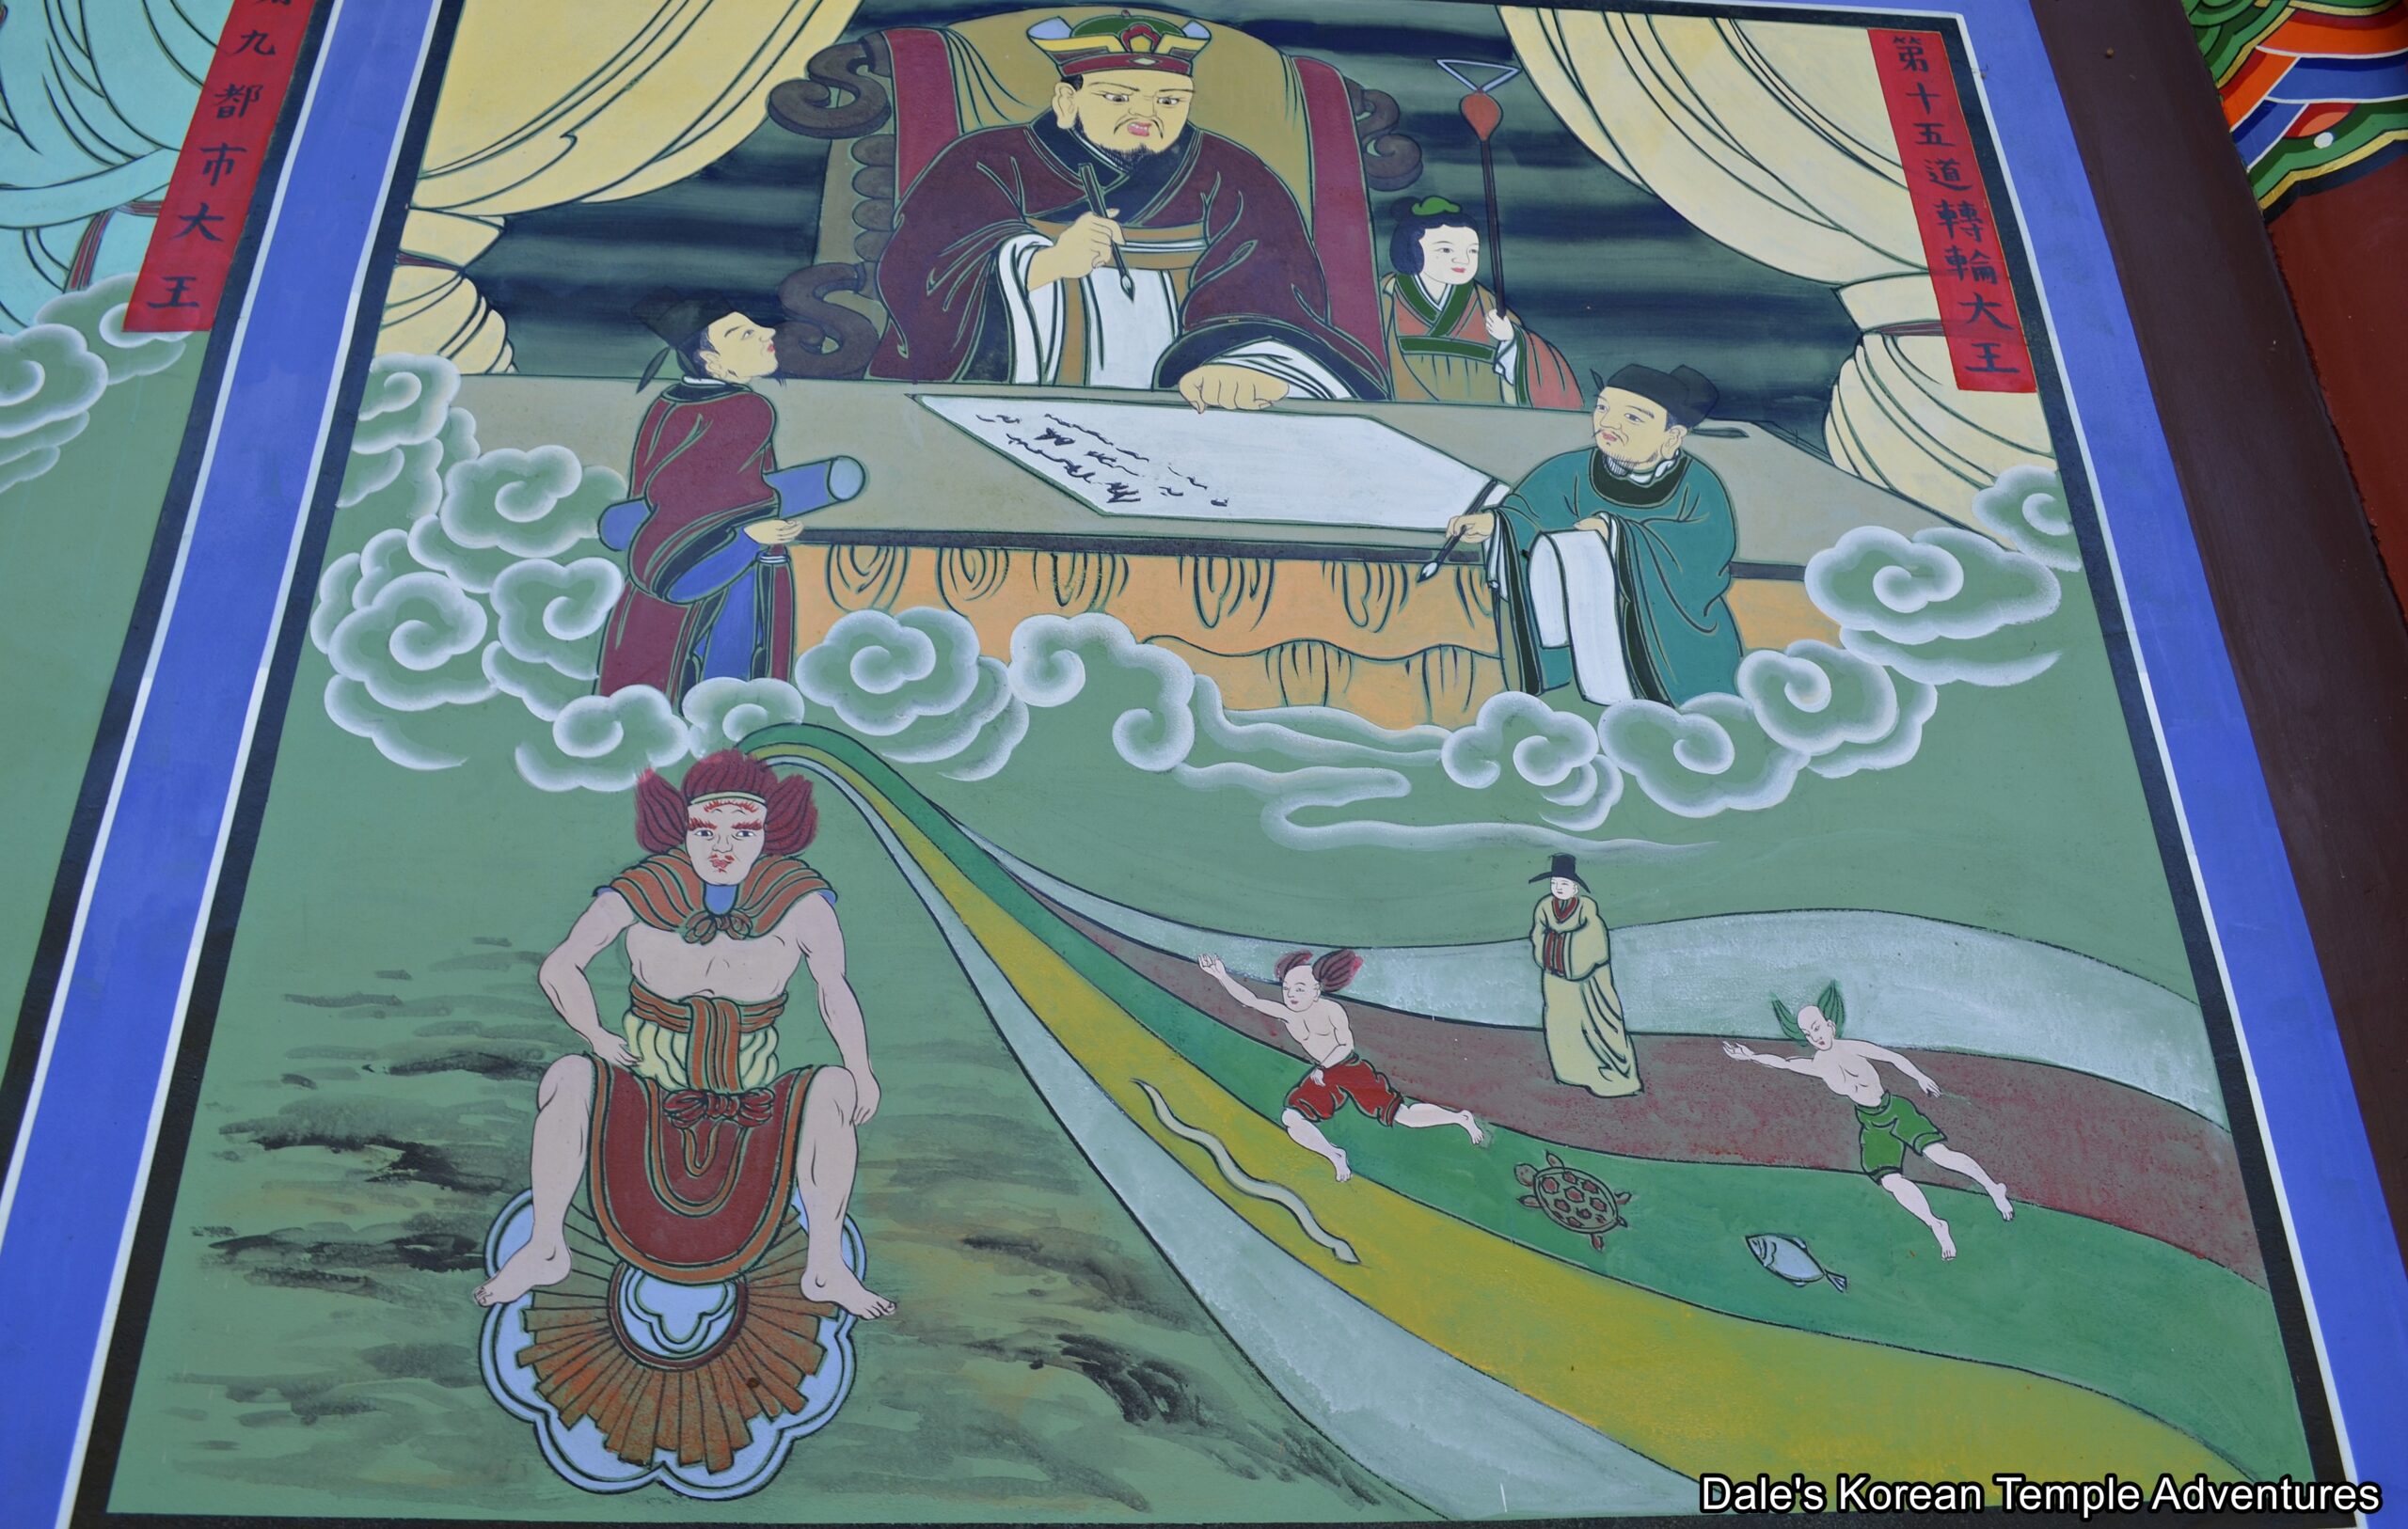
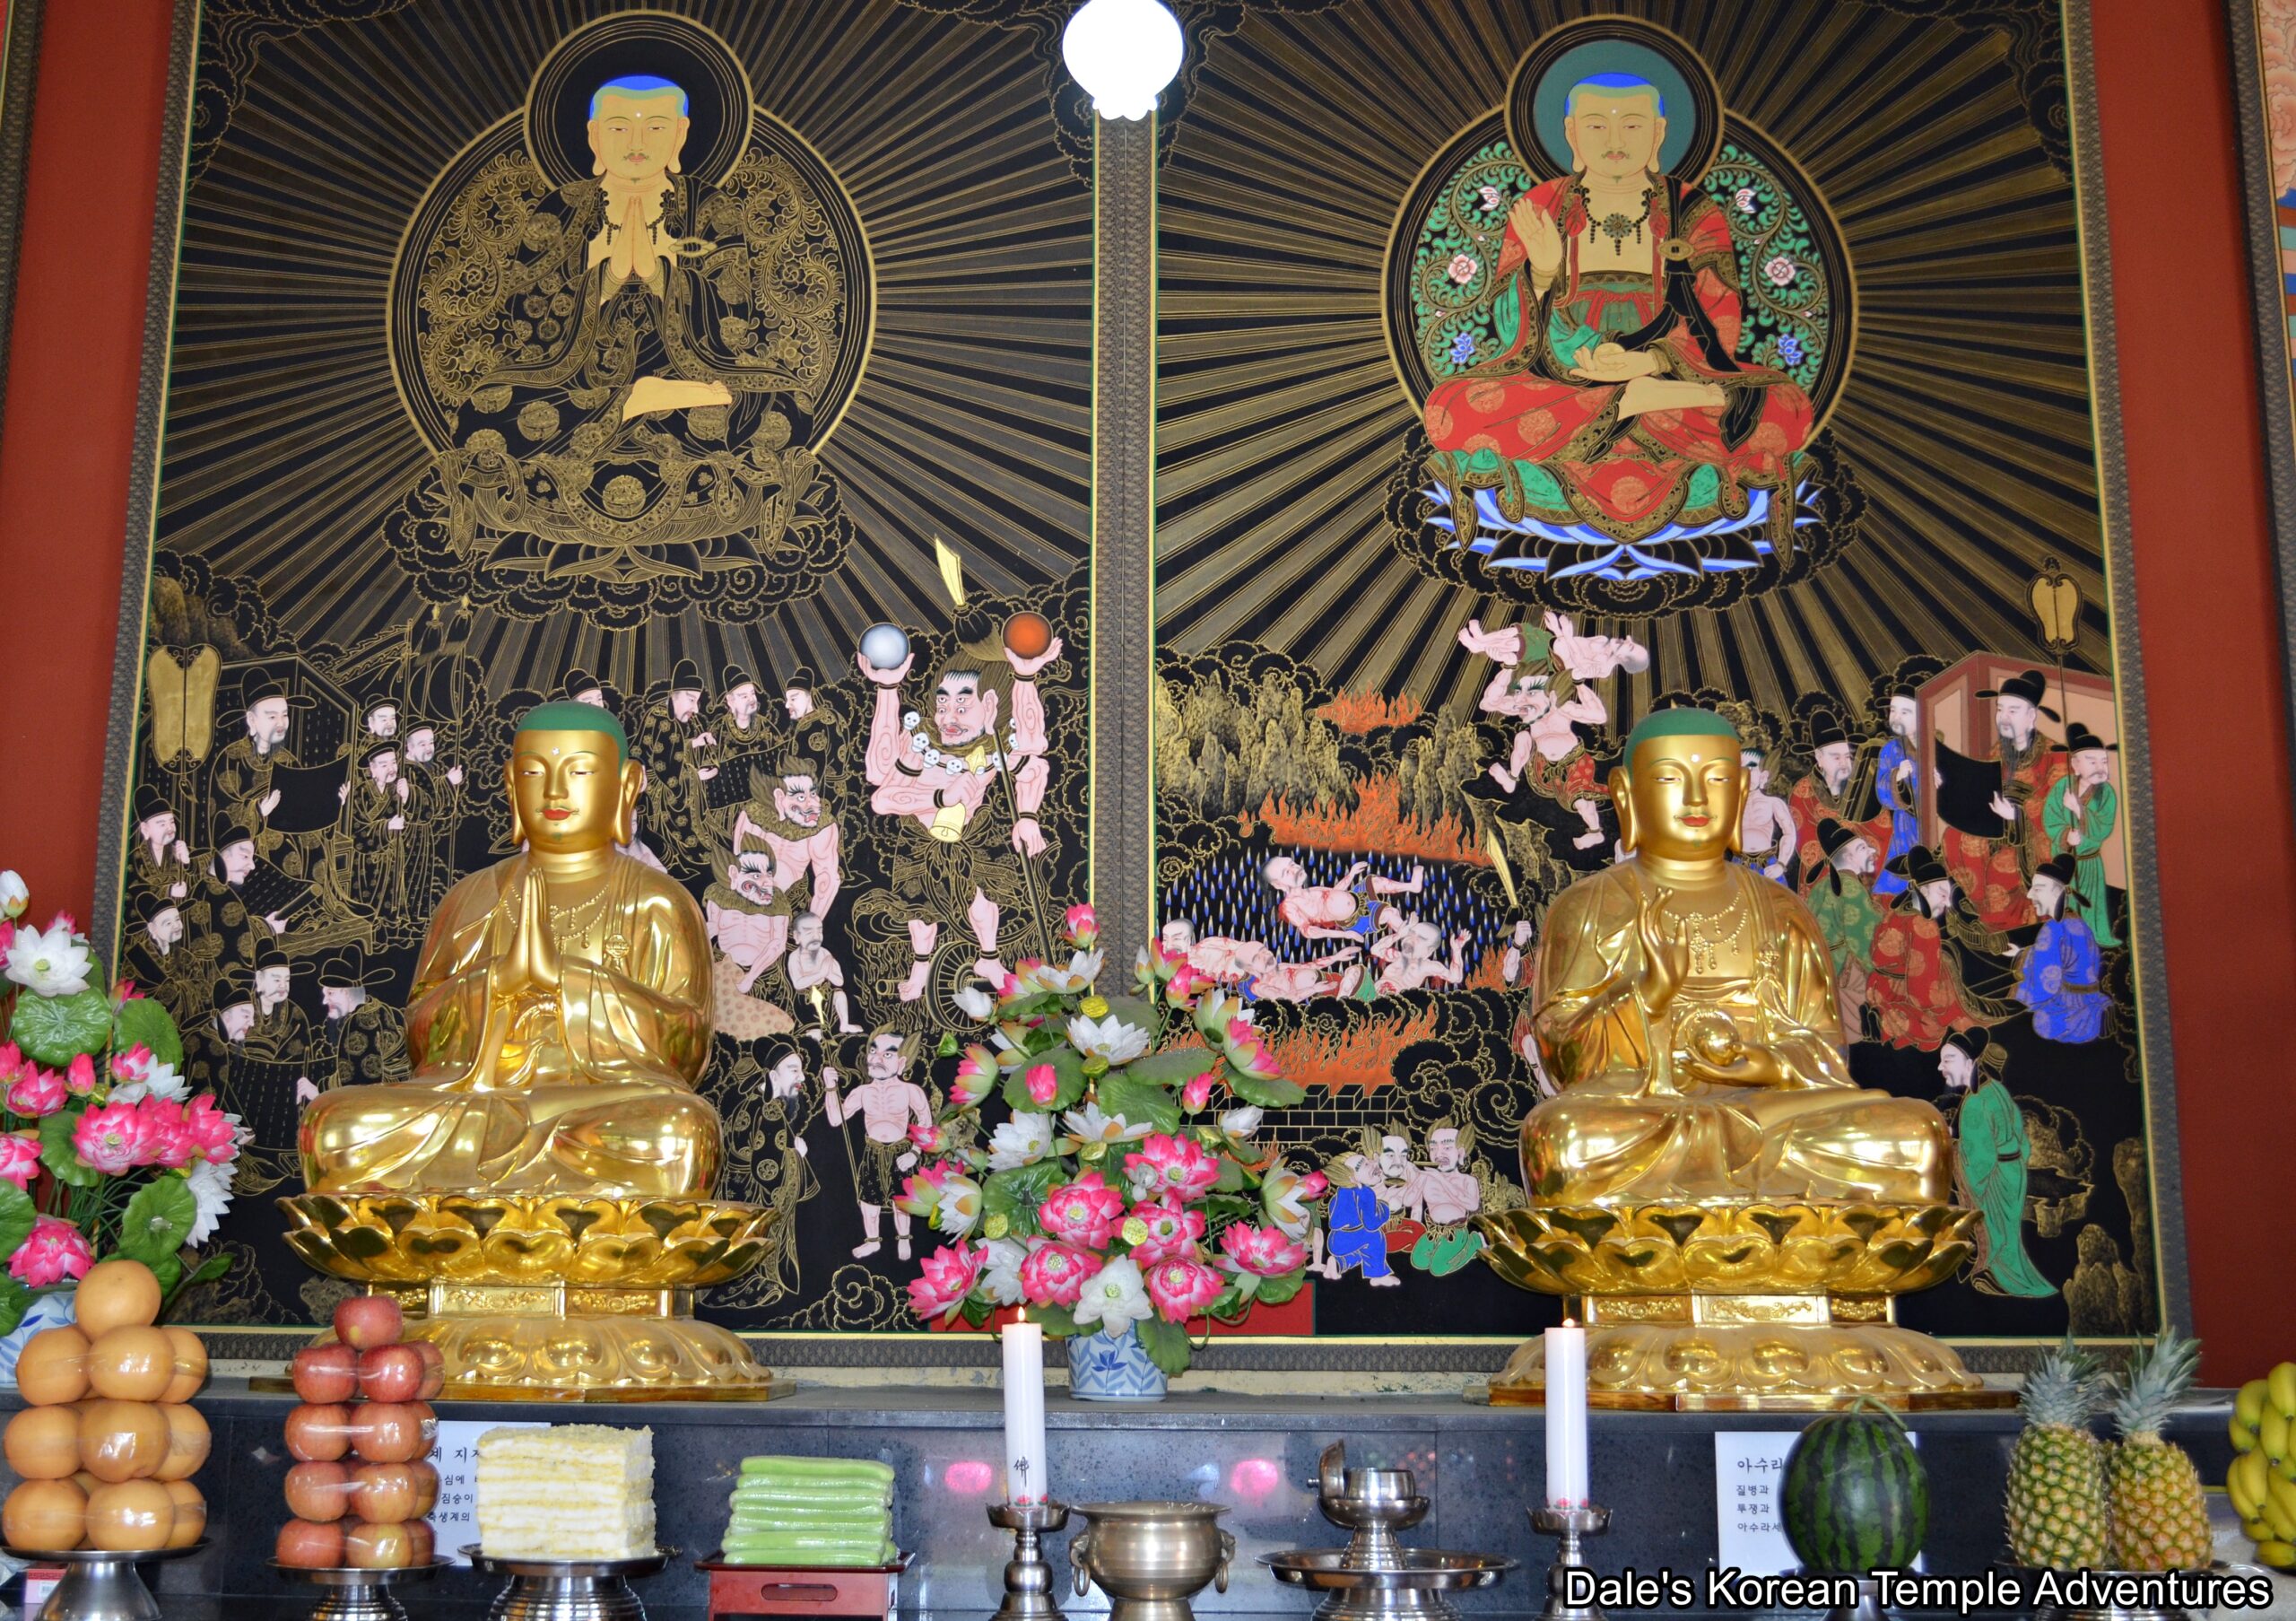
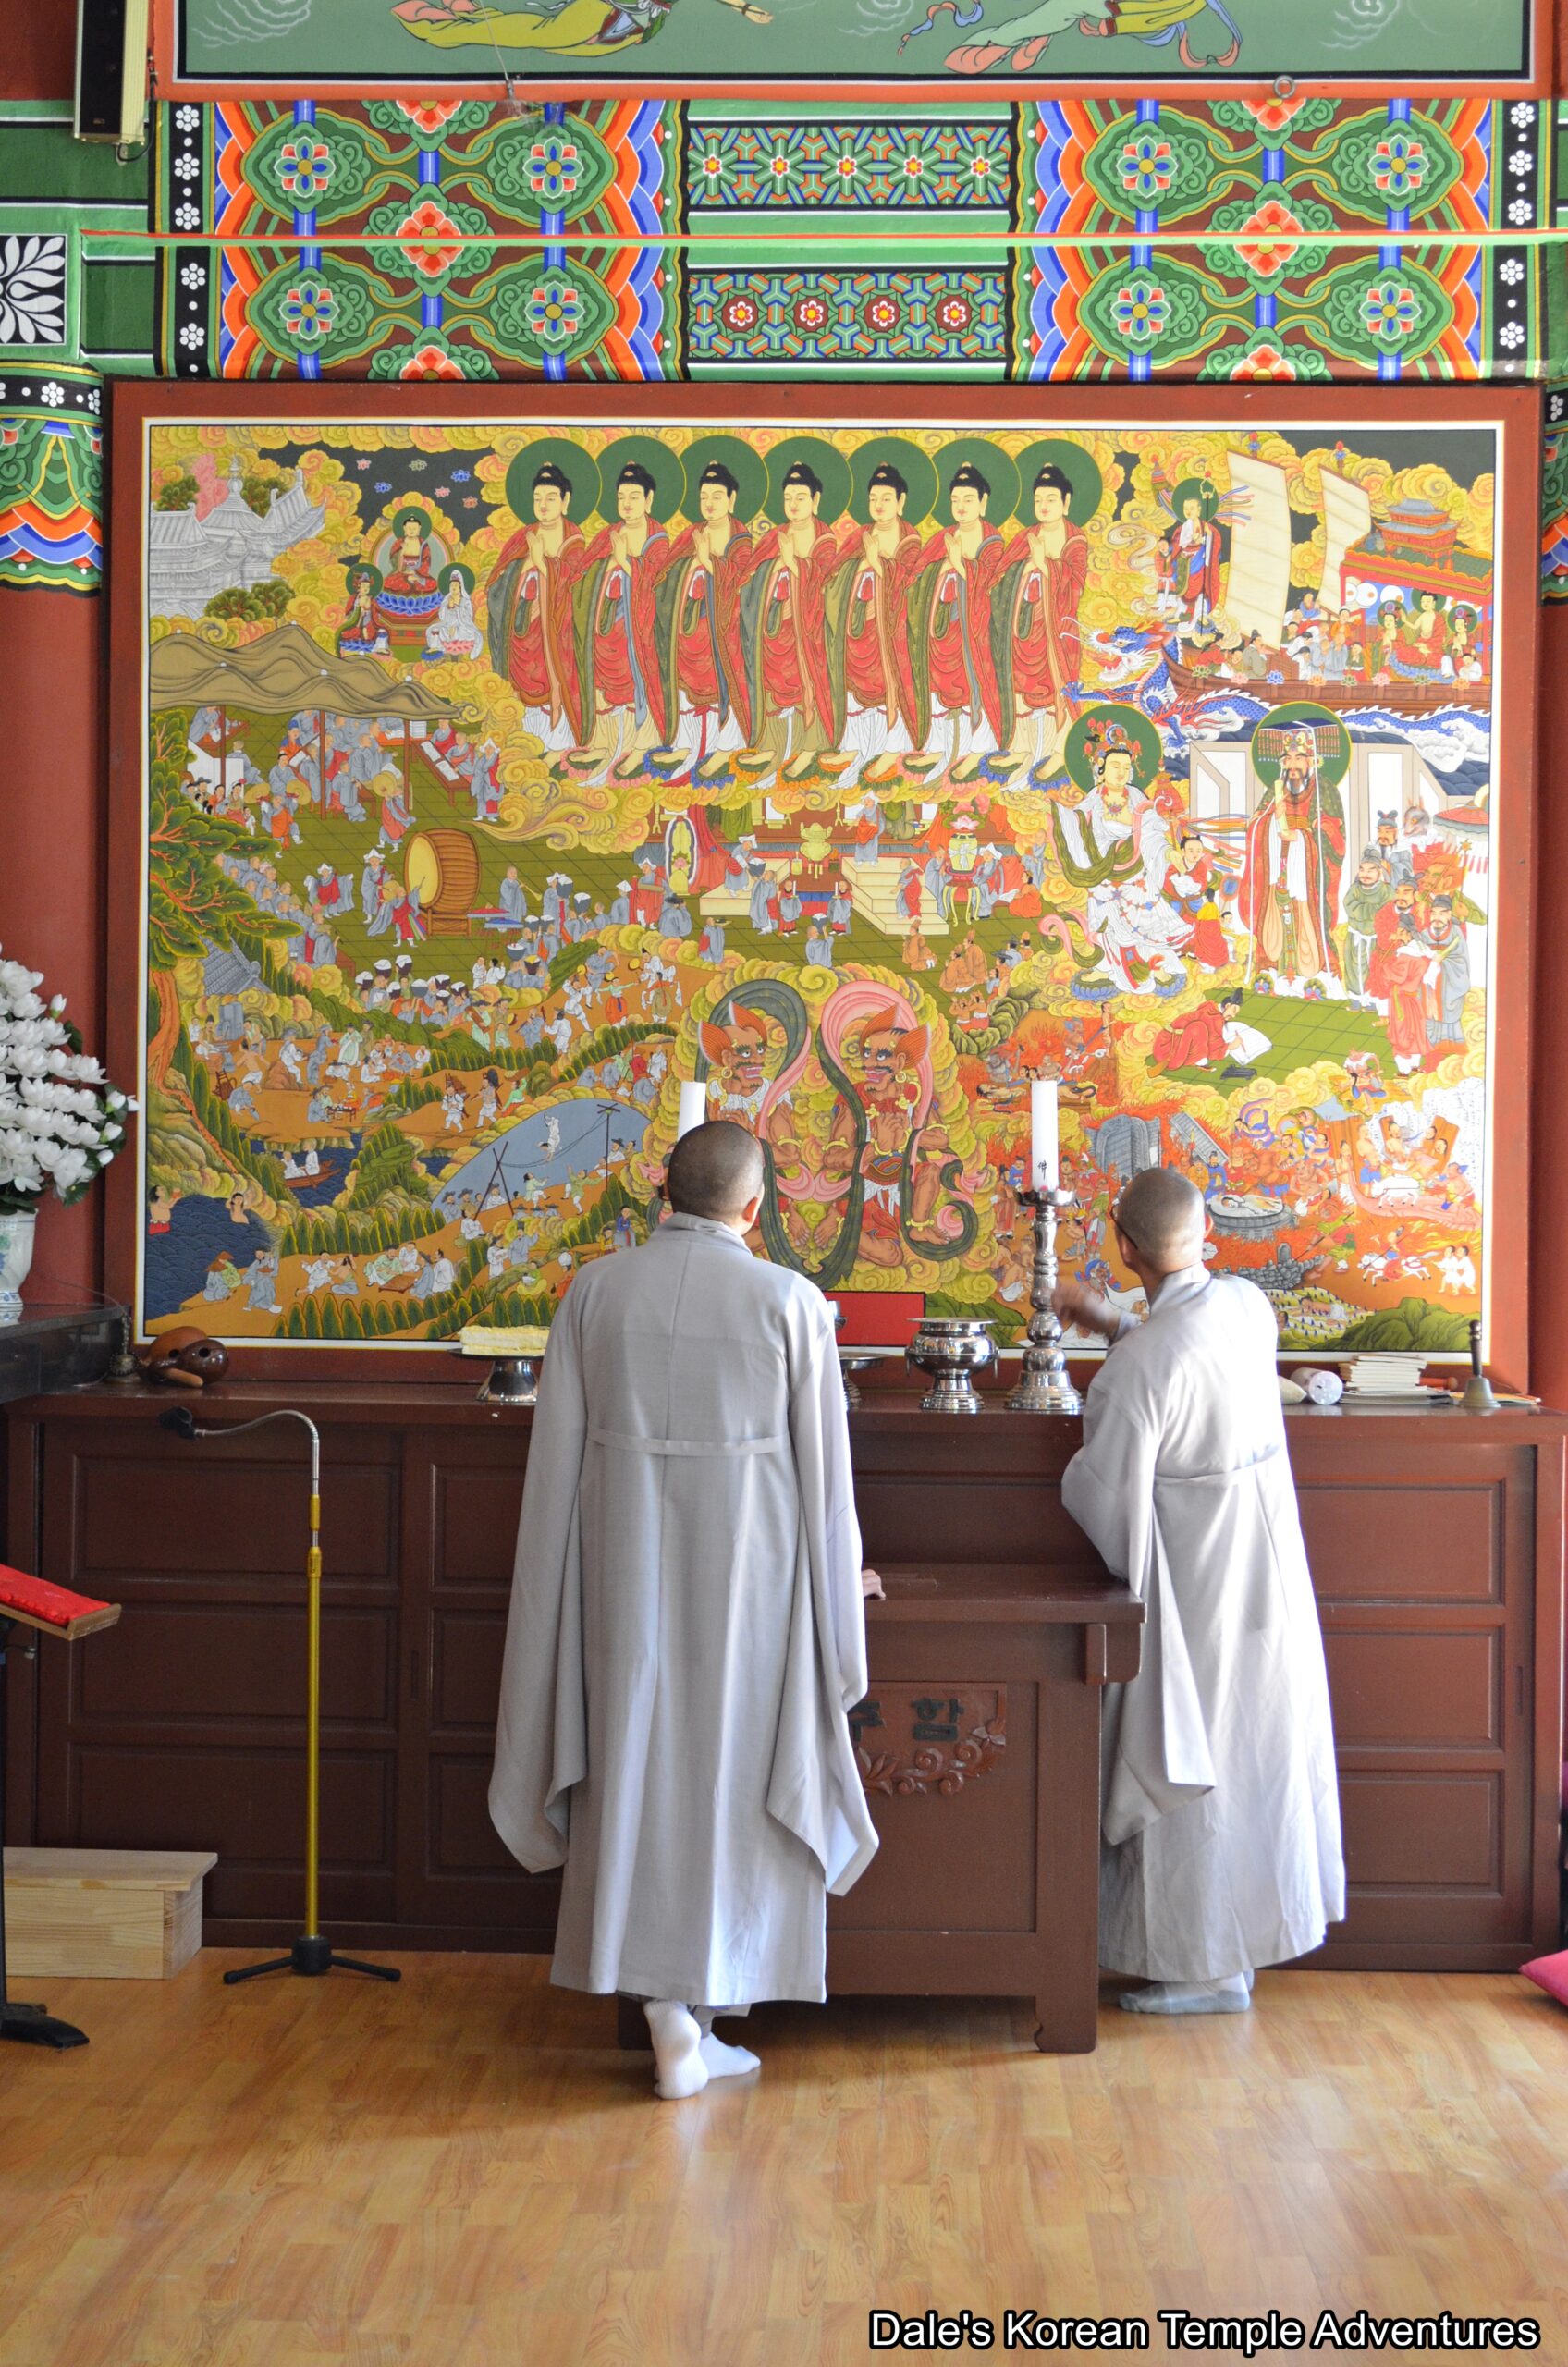
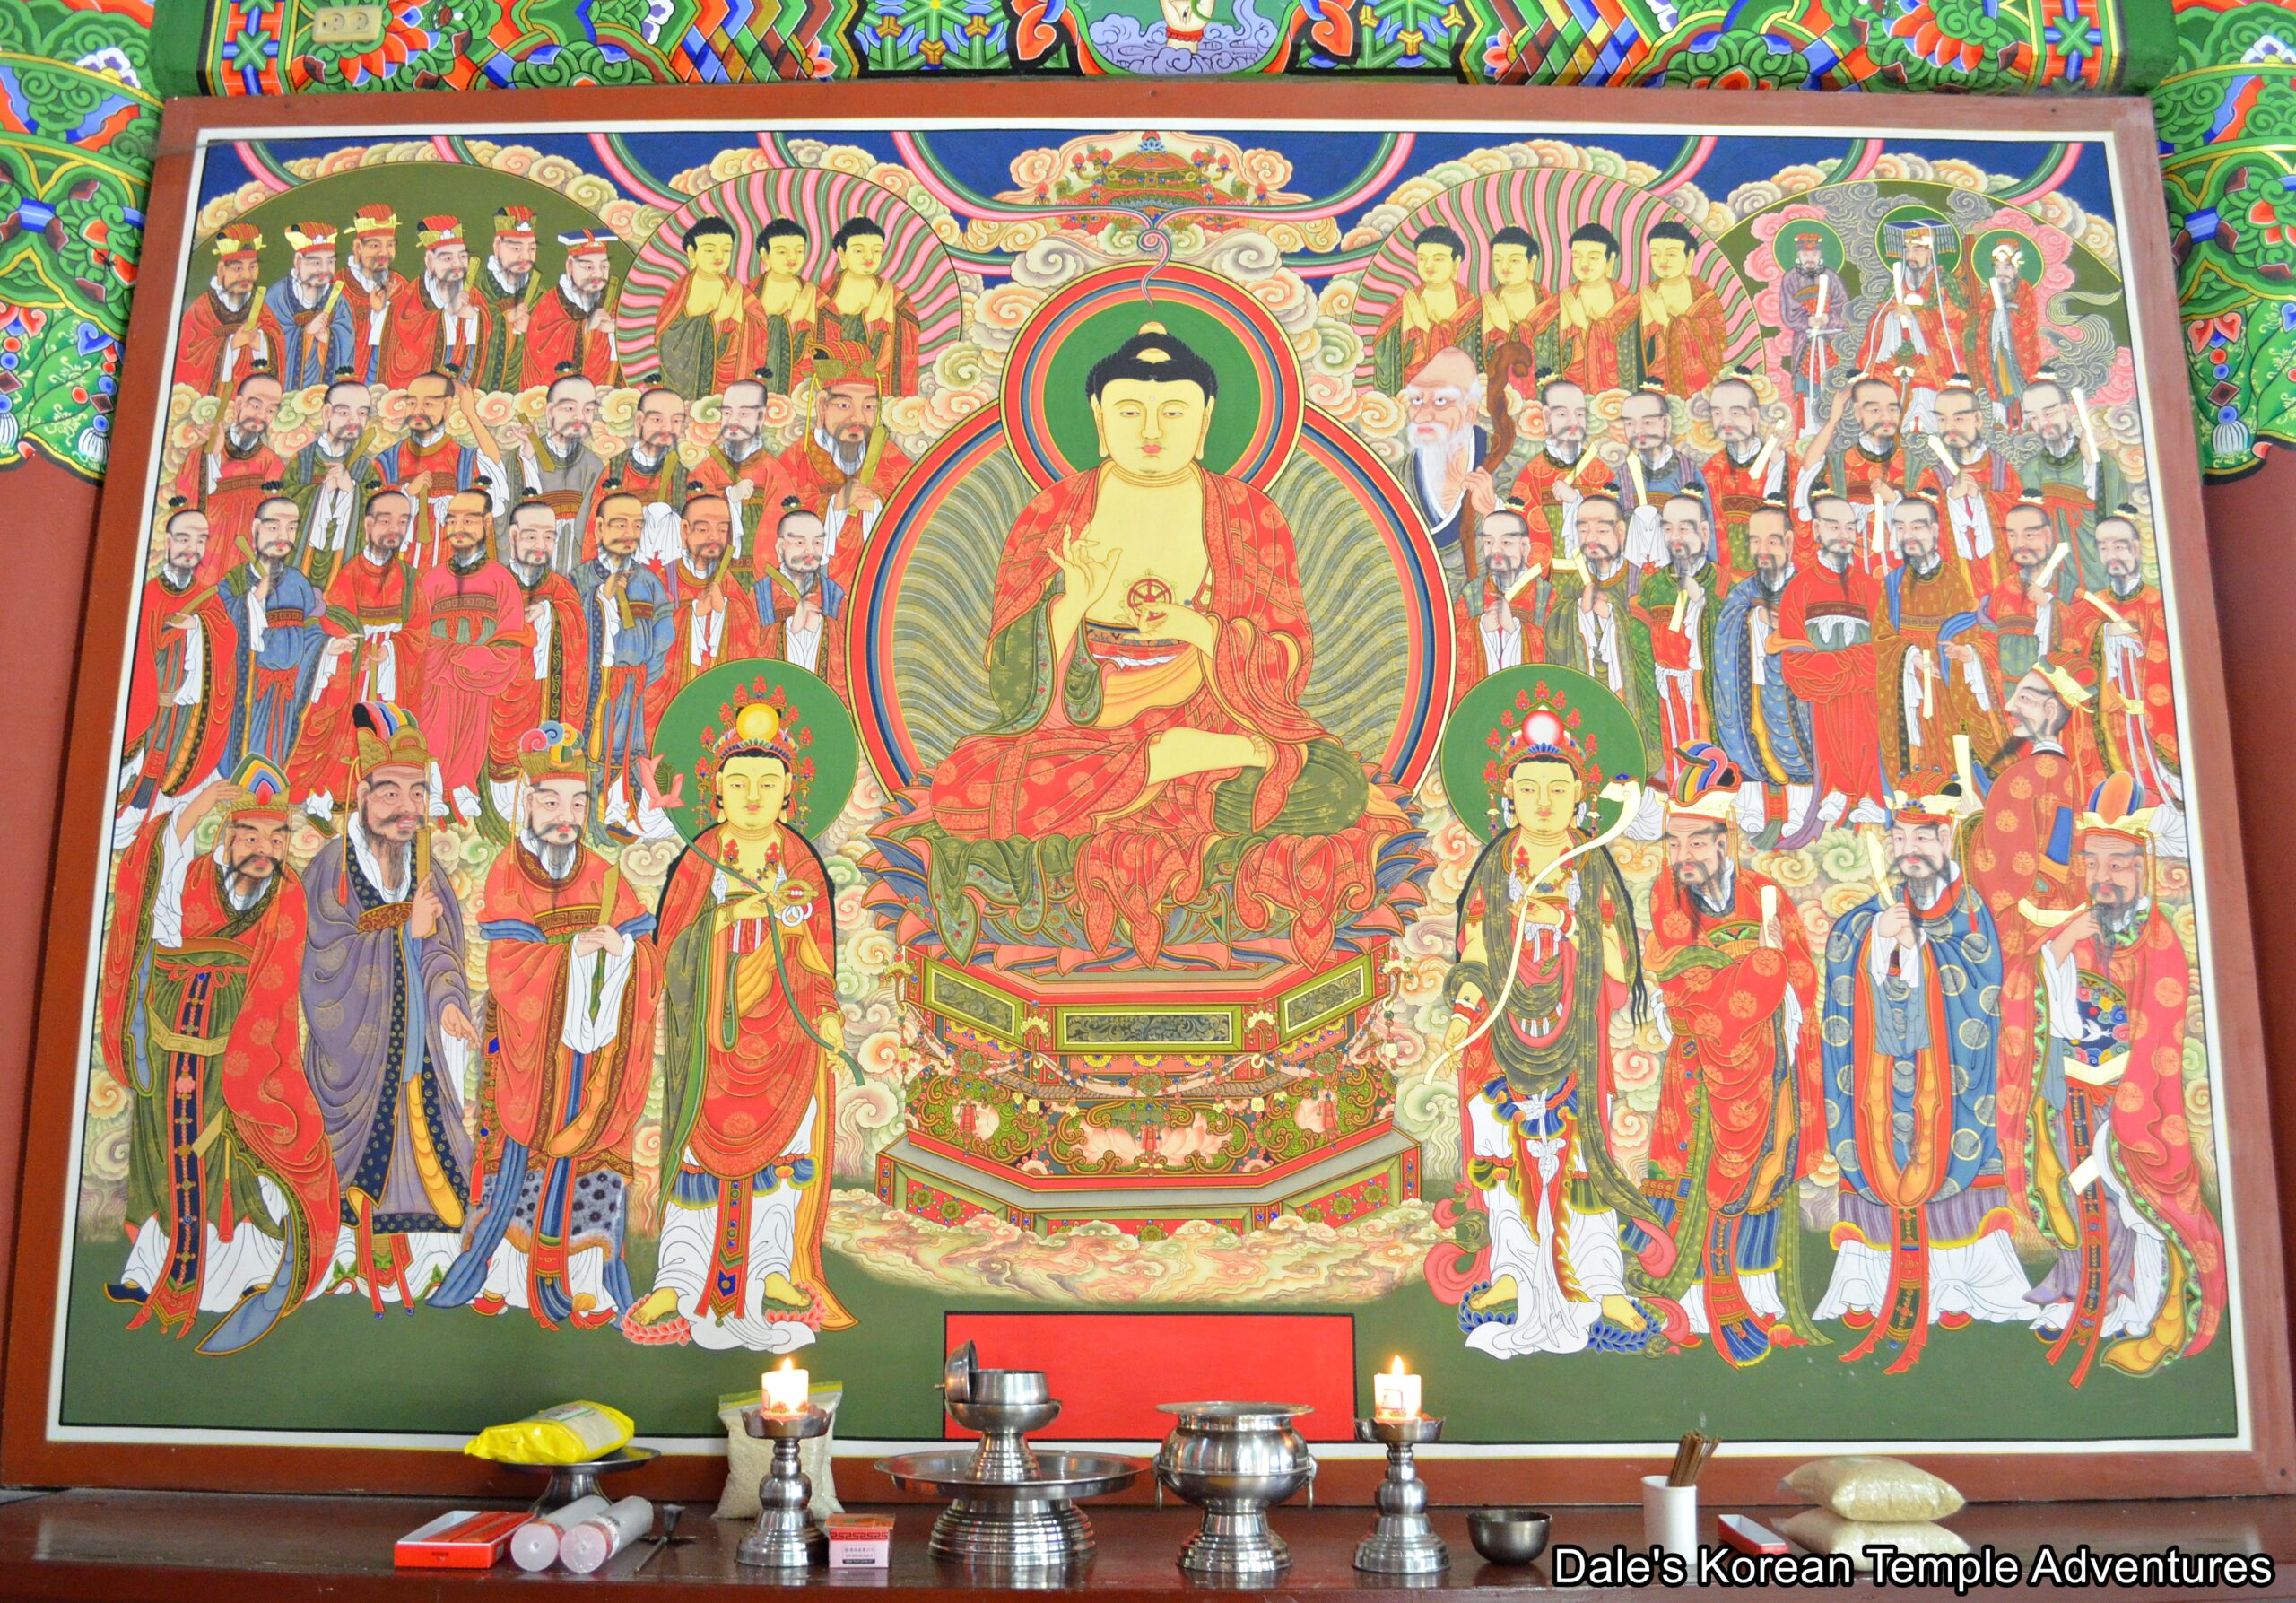
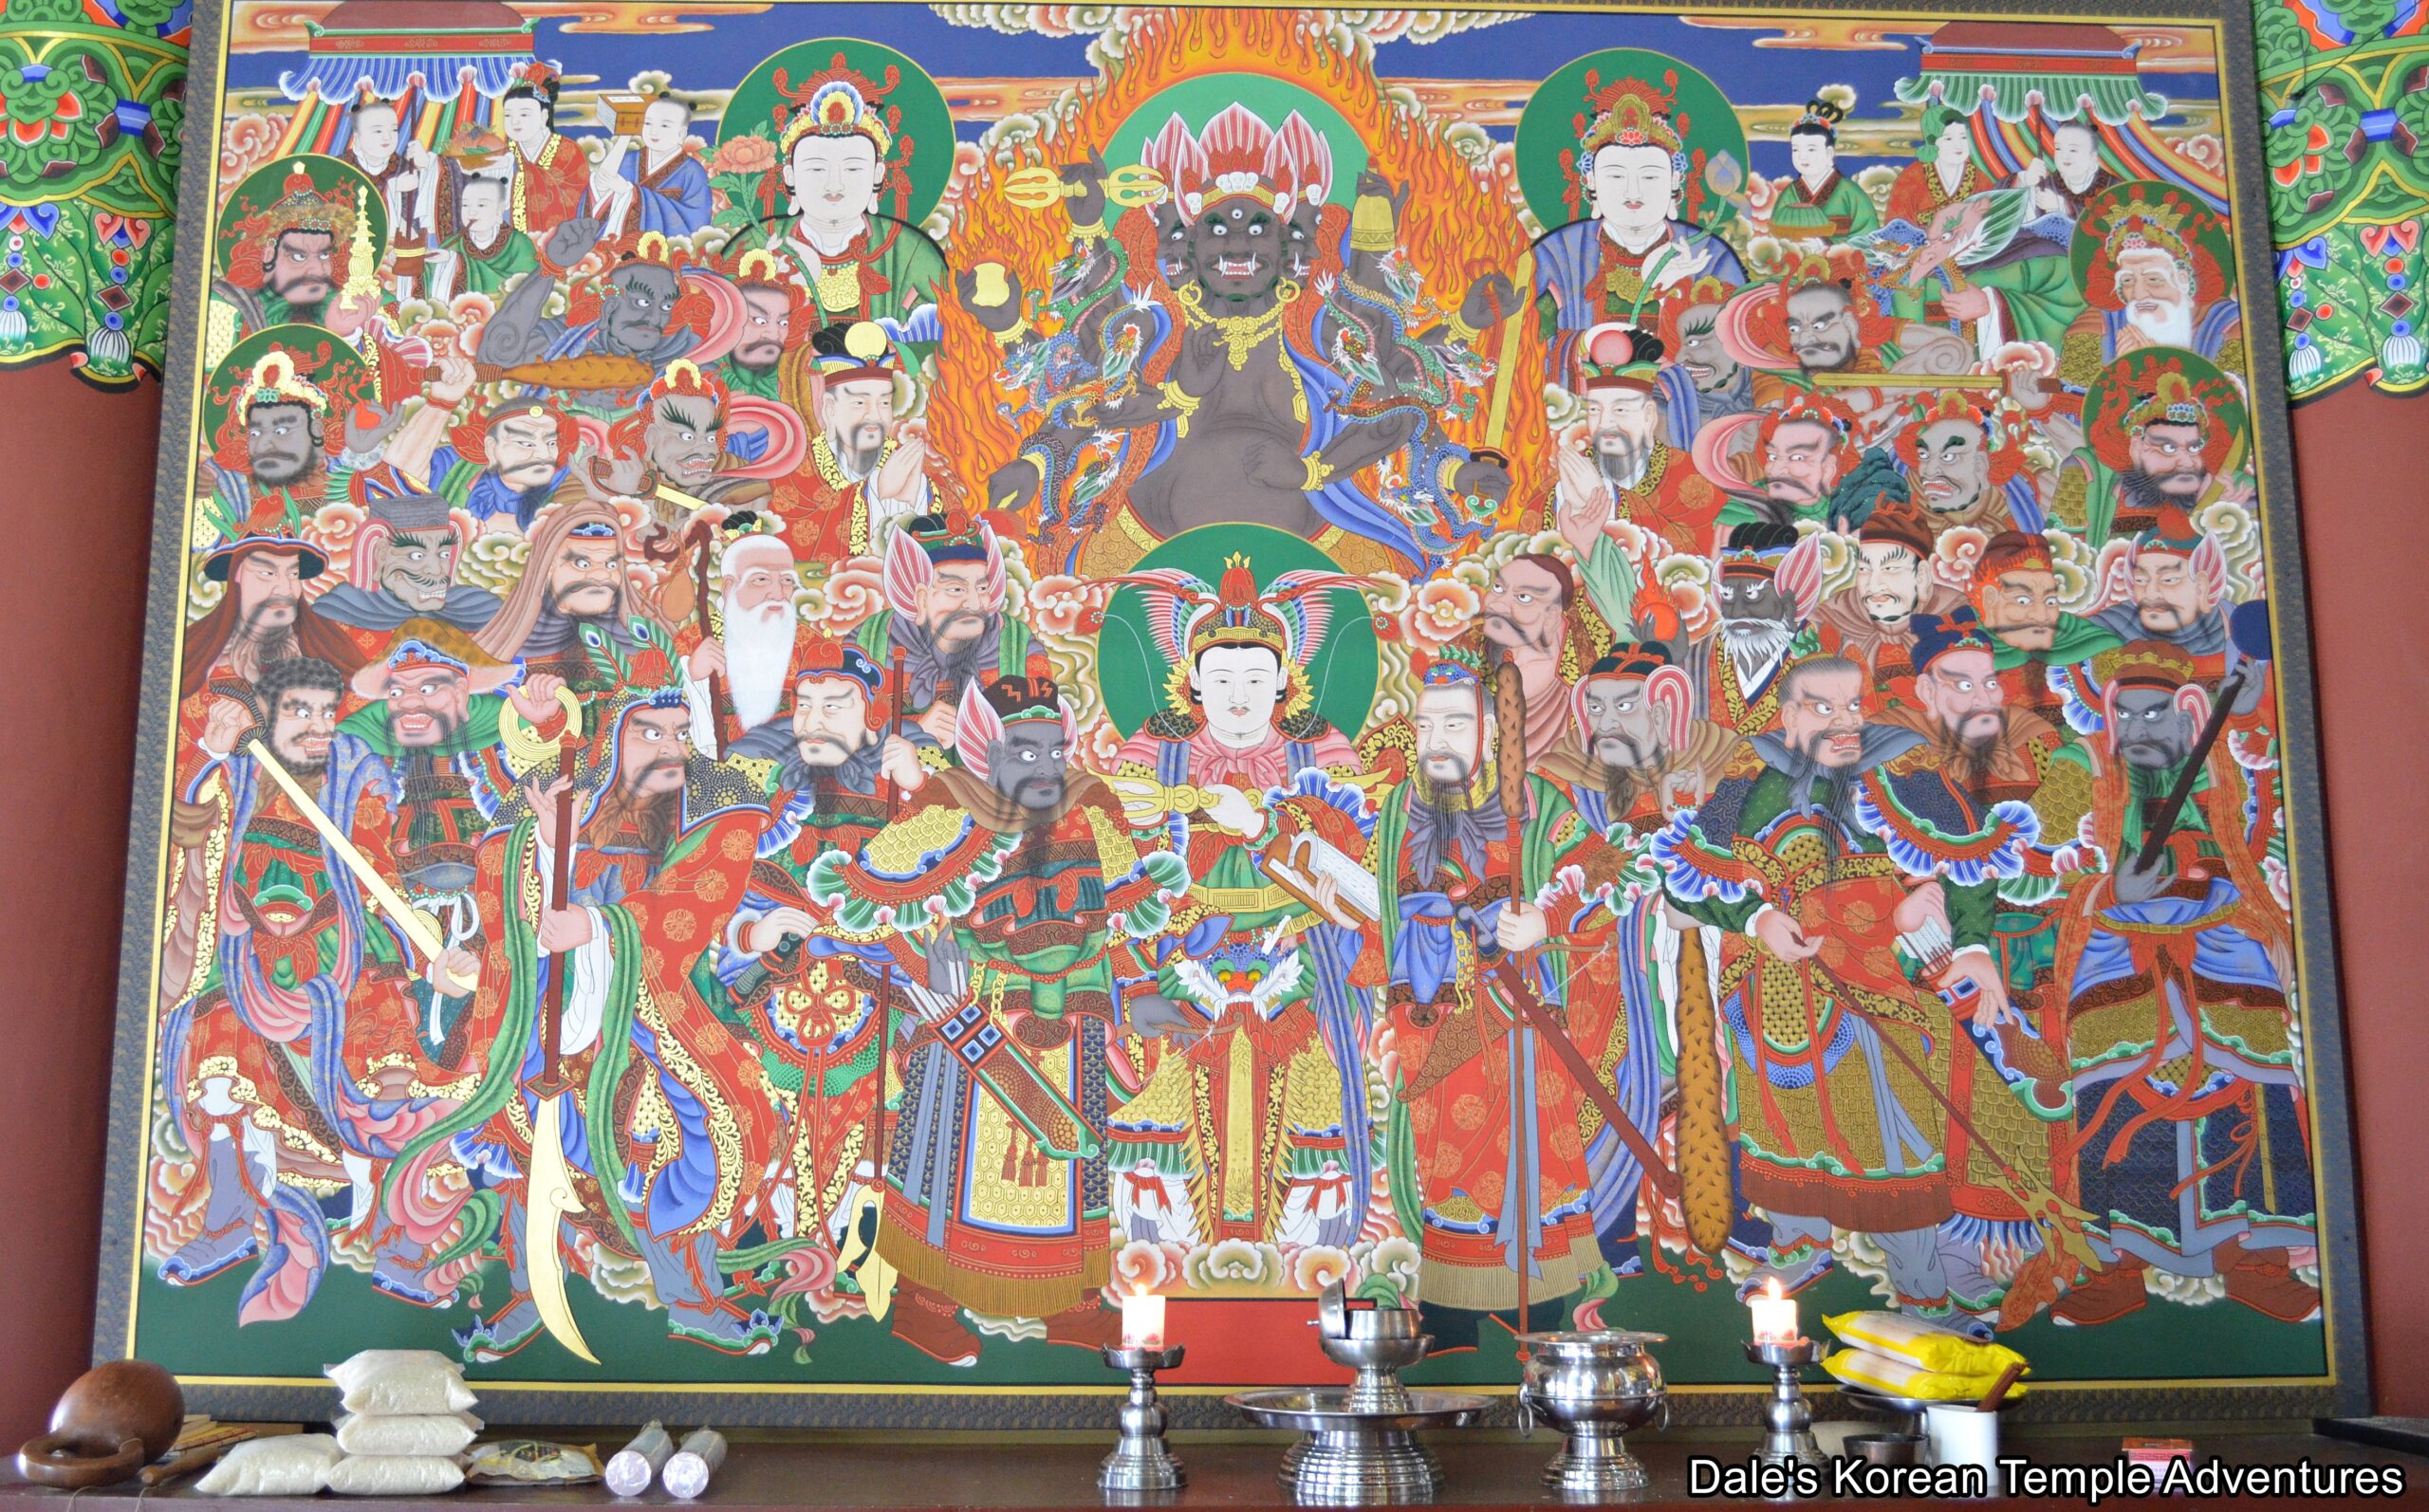
To the right of the seven-story pagoda is the Myeongbu-jeon Hall. The exterior walls to this shrine hall are simplistically painted with murals of the Siwang (The Ten Kings of the Underworld). Stepping inside the Myeongbu-jeon Hall, and seated on a long main altar are seven statues of Jijang-bosal (The Bodhisattva of the Afterlife). All seven statues are backed by seven amazing murals of the Bodhisattva of the Afterlife. These paintings depict various scenes from the afterlife at their bases. On the far left is a wall of gold to commemorate the dead, while to the right is a stunning, modern Gamno-do (Sweet Dew Mural).
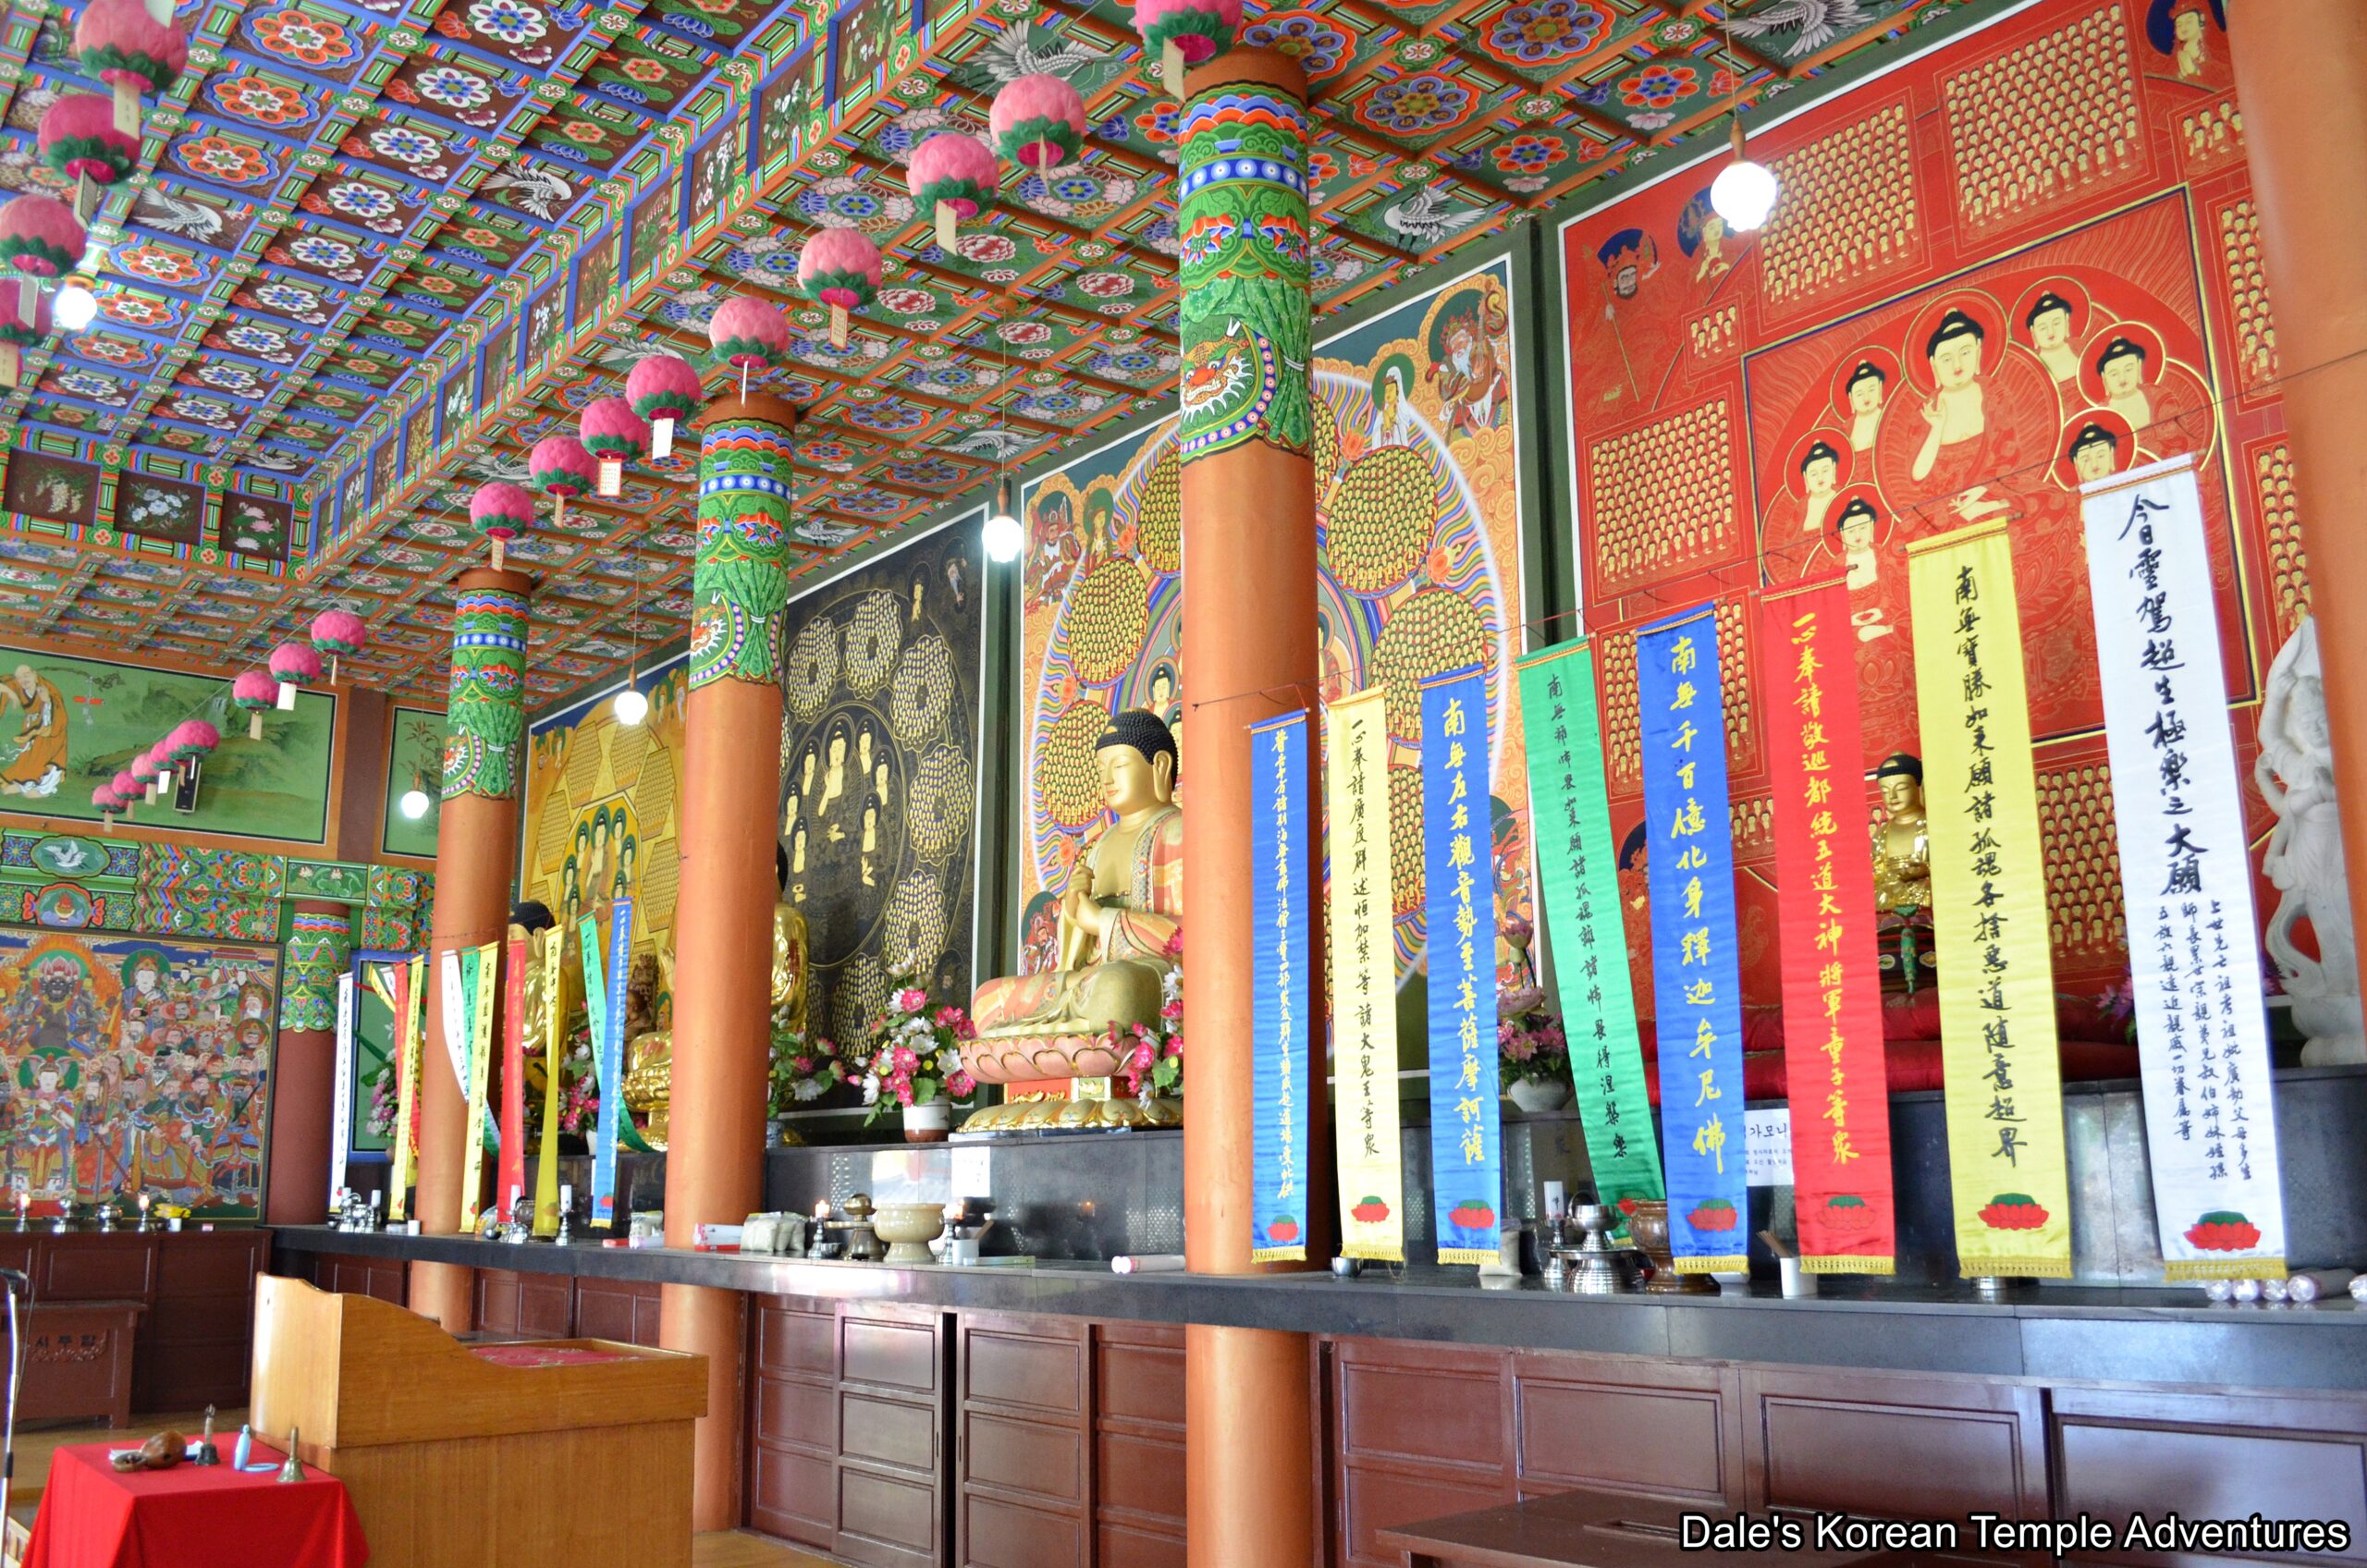
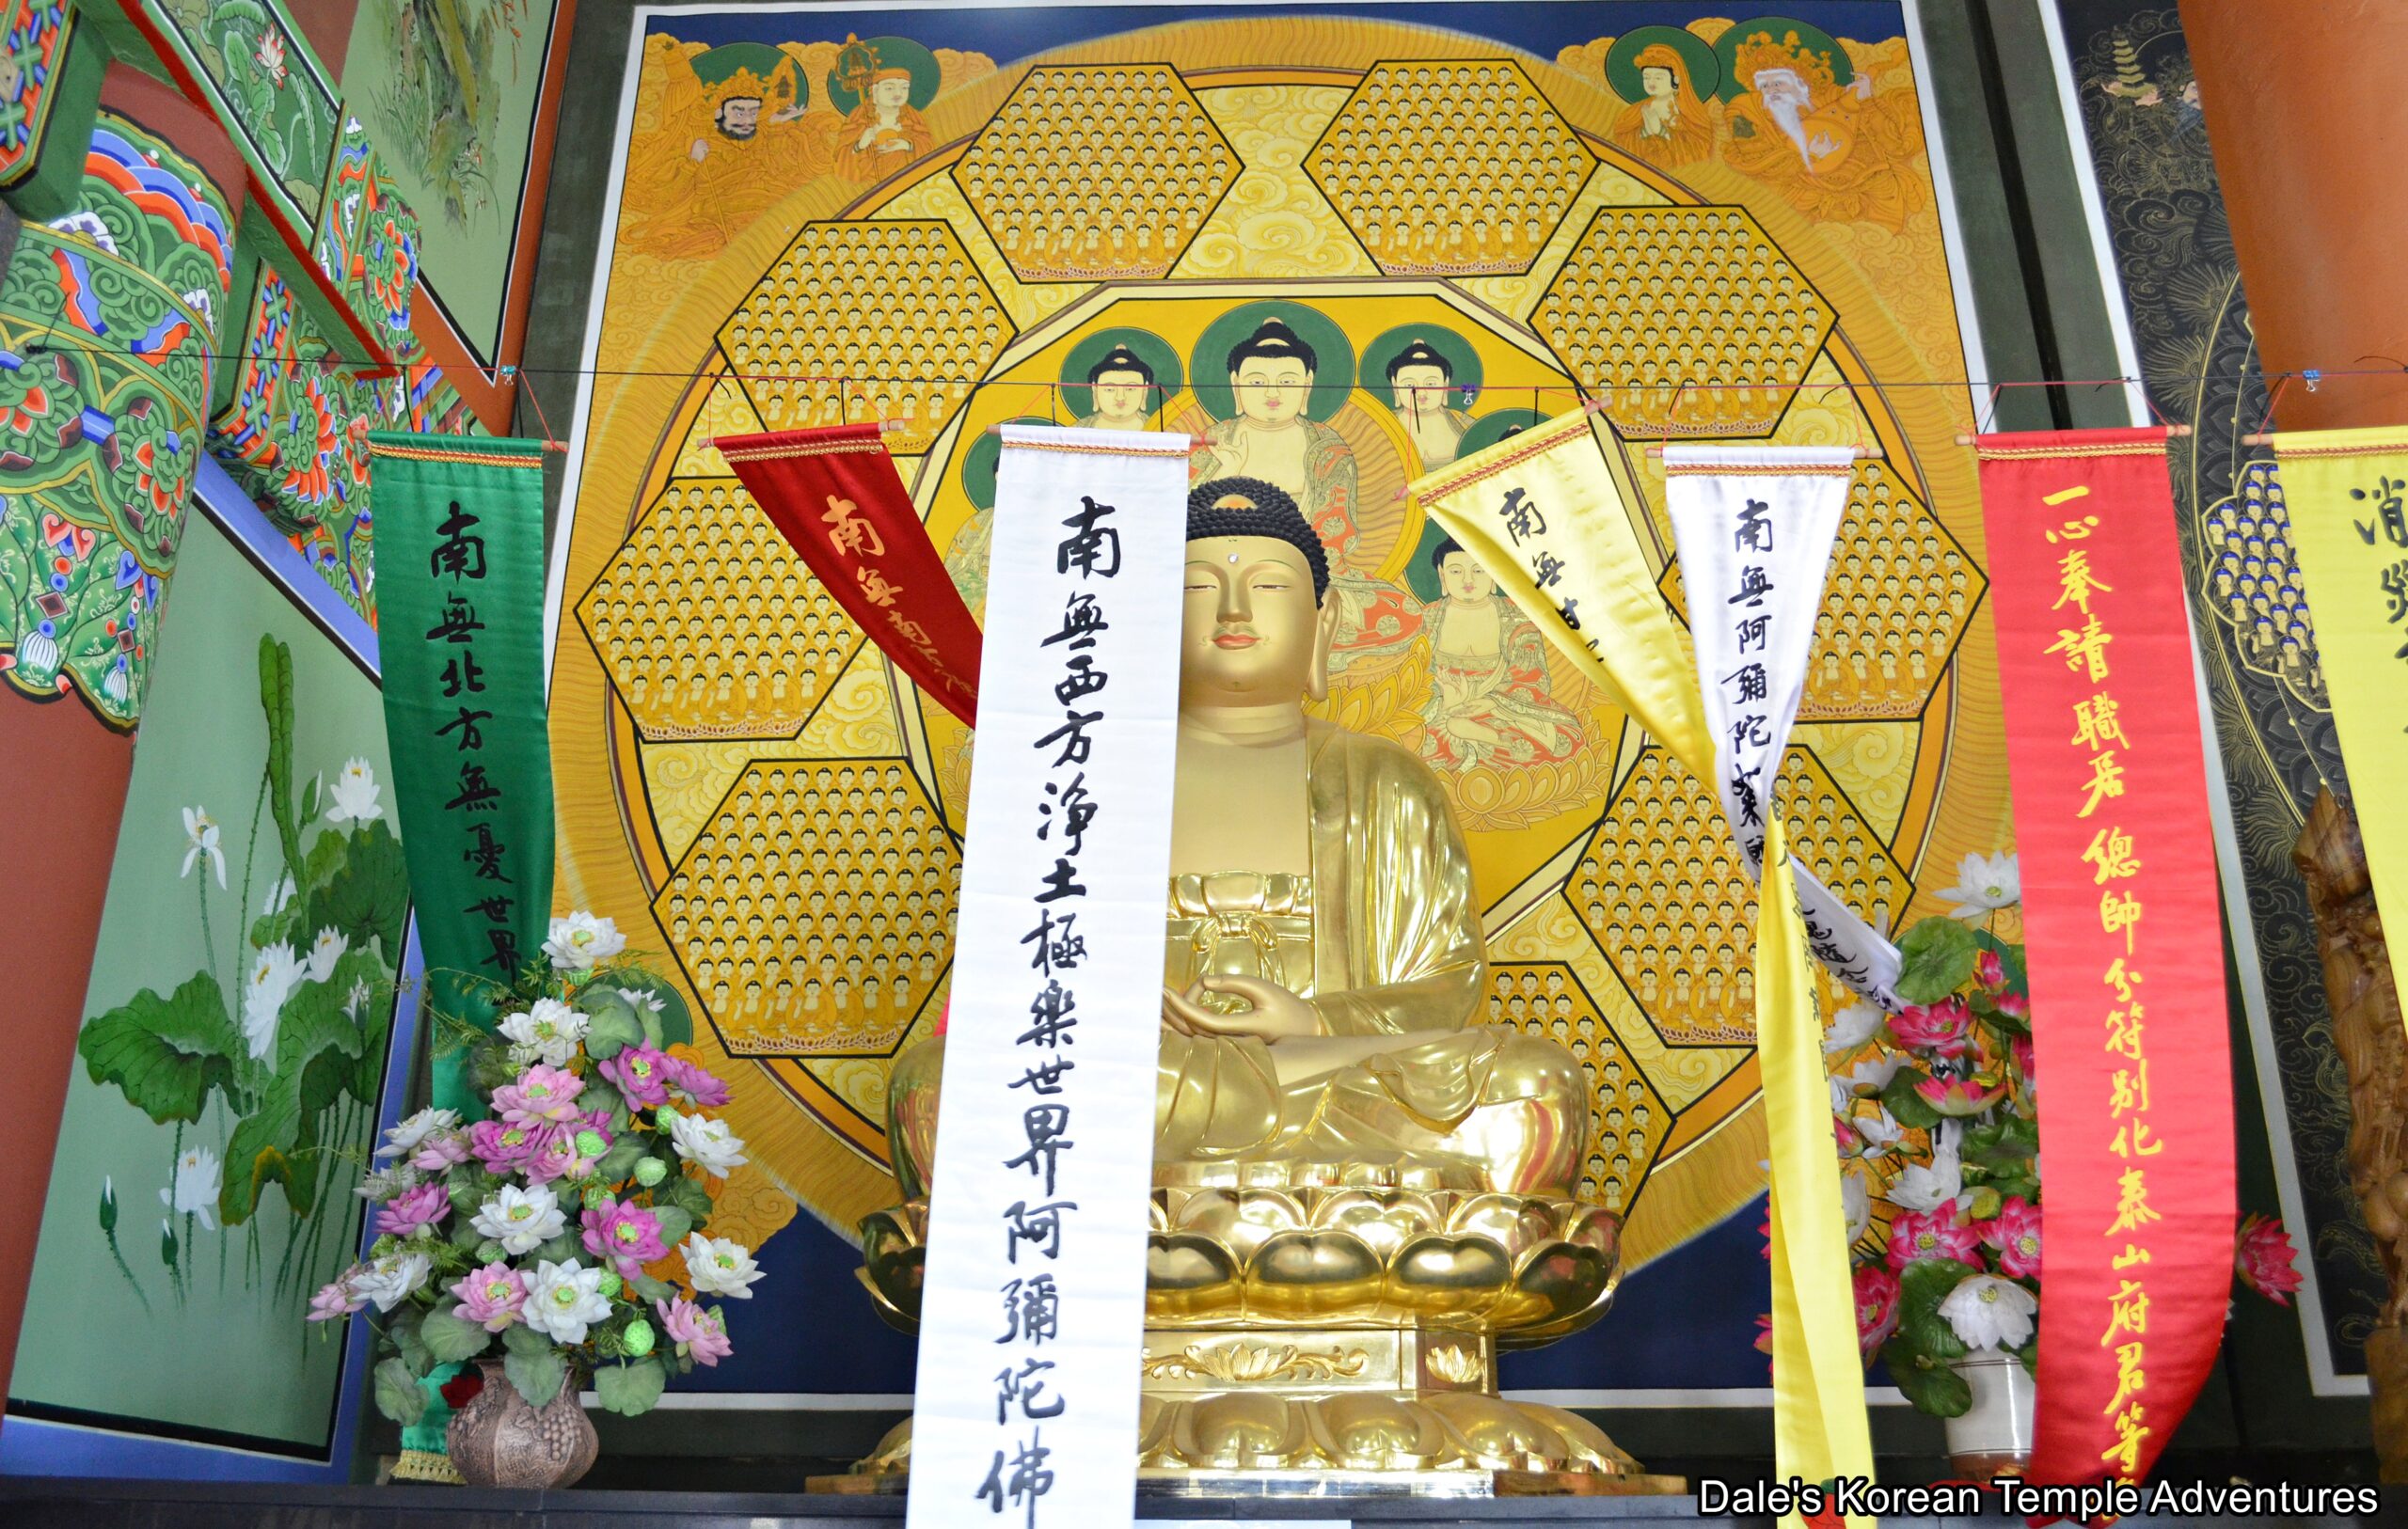
Next to the Myeongbu-jeon Hall is the Daejeokgwang-jeon Hall. But before entering the main hall, you’ll notice an artificial pond that houses what looks to be a moon rock carving of various Buddhas and Bodhisattvas. And out in front of the main hall are a pair of nine-story stone pagodas. As for the Daejeokgwang-jeon Hall, you’ll find murals of the Palsang-do (The Eight Scenes from the Buddha’s Life Murals). Stepping inside the Daejeokgwang-jeon Hall, you’ll find five Buddhas on the main altar, and they are backed by highly original, and absolutely beautiful, murals of various Buddhas. Resting in the centre of the five is an image dedicated to Birojana-bul (The Buddha of Cosmic Energy). This central image is joined on either side by images of Mireuk-bul (The Future Buddha) and Seokgamoni-bul (The Historical Buddha). The far right side, and next to Seokgamoni-bul, is a statue and painting dedicated to Yaksayeorae-bul (The Medicine Buddha, and the Buddha of the Eastern Paradise). And to the far left, and next to Mireuk-bul, you’ll find a statue and painting dedicated to Amita-bul (The Buddha of the Western Paradise). The spacious main hall is new, and it also houses a painting dedicated to Chilseong (The Seven Stars) and a Shinjung Taenghwa (Guardian Mural).
As a bit of a sidenote, the temple is just a couple kilometres away from the birthplace of Samyeong-daesa (1544-1610), the warrior monk. So if you’re out in this area, it’s definitely worth your time to pay your respects and visit the home of one of Korea’s most famous Buddhist monks.
How To Get There
From the Miryang Intercity Bus Terminal, you’ll need to catch the Seogeojyeong Bus. The bus ride will take you about 40 minutes, and you’ll need to get off at the Seogeojyeong stop. From this stop, you’ll need to walk 10 minutes to get to the temple. You can use the seven-story pagoda at Yeongsanjeongsa Temple as your guide.
Overall Rating: 7.5/10
There are quite a few highlights at Yeongsanjeongsa Temple starting with the seven-story pagoda/museum and the massive Reclining Buddha. In addition to these rather obvious highlights, you can also enjoy all the artwork inside the two major shrine halls: the Myeongbu-jeon Hall and the Daejeokgwang-jeon Hall. Both the statues and paintings are stunning. Additionally, the modern Gamno-do (Sweet Dew Mural) and the outdoor statue dedicated to Gwanseeum-bosal (The Bodhisattva of Compassion) are exquisite, as well. While newer in age, Yeongsanjeongsa Temple is a must-see in Miryang.

Korean Weather Words | Live Class Abridged
Sunday during my live classroom we learned about words that are used for talking about the weather. This includes nouns and verbs. The full live stream lasted about two hours, including sentence practice and questions, but you can watch the shortened version here of only the lesson section in just 10 minutes.
The post Korean Weather Words | Live Class Abridged appeared first on Learn Korean with GO! Billy Korean.
“Butterfly” in Korean – Meaning & Cultural Significance
Are you looking to learn how to say “butterfly” in Korean? The general word for “butterfly” in Korean is 나비 (nabi).
In this article, we will guide you not only through the translation and pronunciation of the word 나비 (nabi) but also their cultural significance in Korea. Besides the general term for “butterfly” that you just learned, there are also many different kinds of butterflies, and we’re going to teach you how to say them in Korean.

Quick Summary
Before we deep-dive into this lesson, here’s a summary of what you’ll be learning.
 나비 (nabi) is the word for “butterfly” in Korean. It’s a simple, two-syllable word that is easy for beginners to learn and pronounce.
In Korean culture, butterflies are often associated with happiness and transformation. They appear in various traditional tales and art, symbolizing joy, change, and the beauty of nature.
The pronunciation of 나비 (nabi) focuses on a soft, elongated “na” sound followed by a brief “bi.”‘ It’s commonly used in everyday language, poetry, and songs to evoke the imagery of beauty and nature. You might encounter it in idiomatic expressions or as part of names for places and things intended to convey beauty or elegance.
To effectively remember the word 나비 (nabi), practice with flashcards, include it in simple Korean phrases and sentences, and listen to Korean songs or watch Korean dramas that mention butterflies. This contextual learning can help solidify your understanding and recall of the word and its usage.
Ready? Let’s get to it!
How to say “butterfly” in Korean
The word for butterfly in Korean is 나비 (nabi). You can use this whenever you are generally discussing about butterflies.
If you aren’t familiar with Hangeul yet, it’s best to start with learning the alphabet to better grasp the correct pronunciation of the words we’ll teach you below.
Sentence examples:
세상에서 가장 흔한 나비는 무엇인가요? (sesangeseo gajang heunhan nabineun mueosingayo?)
What is the most common butterfly in the world?
공작나비는 자연에서 보기에 정말 멋져요. (gongjangnabineun jayeoneseo bogie jeongmal meotjyeoyo.)
Peacock butterflies are stunning to see in nature.
나비들은 야생화를 좋아합니다. (nabideureun yasaenghwareul joahamnida.)
고양이가 나비 한 마리를 쫒고 있어요. (goyangiga nabireul jjotgo isseoyo.)
A cat is chasing a butterfly.
Different kinds of butterflies and their Korean names
The word 나비 (nabi) is perfect for describing butterflies in general. However, there are various types of butterflies that vary per location. They differ in appearance, like the details you see in their wings. Perhaps you’d like to know some specific butterfly names in the Korean language, as well?
| English | Korean |
|---|---|
| Black swallowtail | 검은제비꼬리나비 (geomeunjebikkorinabi) |
| Cabbage white butterfly | 배추흰나비 (baechuhuinnabi) |
| Duke of burgundy | 부르고뉴 공작 나비 (bureugonyu gongjak nabi) |
| Hairstreak butterfly | 부전나비 (bujeonnabi) |
| Holly Blue butterfly | 푸른부전나비 (pureunbujeonnabi) |
| Marbled white butterfly | 조흰뱀눈나비 (johuinbaemnunnabi) |
| Monarch butterfly | 제왕나비 (jewangnabi) |
| Mourning cloak butterfly | 신선나비 (sinseonnabi) |
| Orange tip butterfly | 유럽갈고리나비 (yureupgalgorinabi) |
| Painted lady butterfly | 작은멋쟁이나비 (jageunmeotjaenginabi) |
| Peacock butterfly | 공작나비 (gongjangnabi) |
| Red admiral butterfly | 적제독 나비 (jeokjedok nabi) |
| Swallowtail butterfly | 산호랑나비 (sanhorangnabi) |
| Tiger swallowtail butterfly | 호랑나비 (horangnabi) |
| Viceroy butterfly | 바이스로이나비 (baiseuroinabi) |
Other creatures related to butterflies in Korean
Below, you can find a list of insects and other similar animals, which may be interesting vocabulary to learn during this particular topic.
| English | Korean |
|---|---|
| Ant | 개미 (gaemi) |
| Bat | 박쥐 (bakjwi) |
| Bee | 벌 (beol) |
| Beetle | 딱정벌레 (ttakjeongbeolle) |
| Bug | 벌레 (beolle) |
| Caterpillar | 애벌레 (aebeolle) |
| Cockroach | 바퀴벌레 (bakwibeolle) |
| Dragonfly | 잠자리 (jamjari) |
| Firebug | 개똥벌레 (gaettongbeolle) |
| Flea | 벼룩 (byeoruk) |
| Fly | 파리 (pari) |
| Frog | 개구리 (gaeguri) |
| Grasshopper | 메뚜기 (mettugi) |
| Hornet | 말벌 (malbeol) |
| Insect | 곤충 (gonchung) |
| Ladybug | 무당벌레 (mudangbeolle) |
| Mantis | 사마귀 (samagwi) |
| Moth | 나방 (nabang) |
| Mosquito | 모기 (mogi) |
| Snail | 달팽이 (dalpaengi) |
| Spider | 거미 (geomi) |
| Worm | 지렁이 (jireongi) |
Other Korean words related to butterfly
Lastly, here are more Korean words that are related to “butterfly.”
| English | Korean |
|---|---|
| Antenna | 더듬이 (deodeumi) |
| Butterfly stroke (in swimming) | 접영 (jeobyeong) |
| Caterpillar | 애벌레 (aebeolle) |
| Cocoon | 번데기 (beondegi) |
| Larva | 유충 (yuchung) |
| Metamorphosis | 변태 (byeontae) |
| Nectar | 화밀 (hwamil) |
| Pollination | 수분 (subun) |
| Wing pattern | 날개 무늬 (nalge munui) |
| Wings | 날개 (nalge) |
A butterfly’s symbolism in Korea
As a symbol, the butterfly has a long history in Korean culture. It has especially been a popular subject to include in various art forms, such as paintings and porcelain works. It is considered a symbol of prosperity, as well as a symbol of pleasure and joy. It’s been popular to pair together with the flower peony in traditional art, which shares similar symbolism.
When used together, they depict harmony between a man and a woman, expressing a family’s strong and harmonious bond. Together, they also express a state of contentment. Besides art, you can see butterflies and peonies paired together with various other items, such as hair pins and lockets.
Wrap Up
And now you know how to say butterfly in Korean! Not only that but also the names of some specific butterflies in Korean and butterflies’ symbolism in Korean culture. That’s a lot of stuff packed into one little lesson! Next up, if you want to learn more, maybe your next lesson could be the vocabulary for animals in Korean? Or you can search through our blog for more Korean words to learn!
The post “Butterfly” in Korean – Meaning & Cultural Significance appeared first on 90 Day Korean.
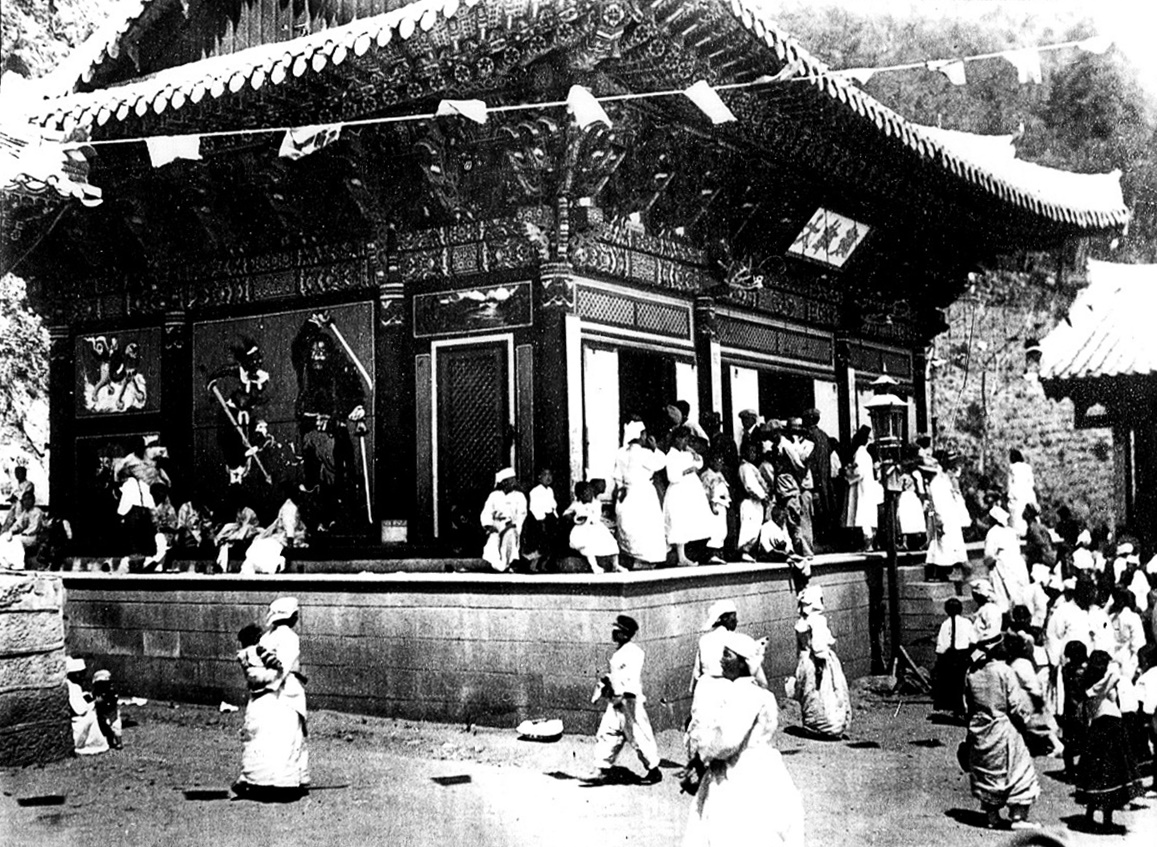
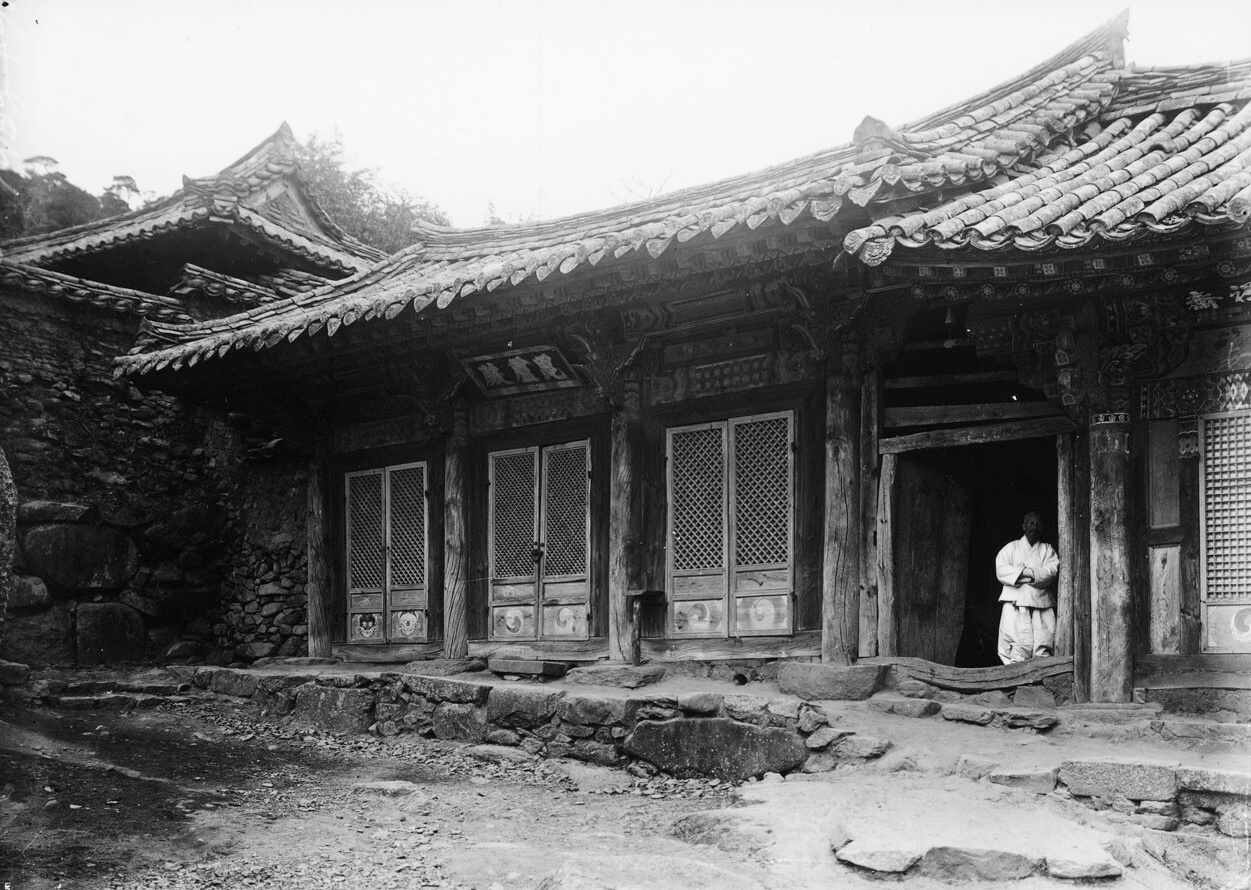
Colonial Korea – Japanese Missionaries in Korea During Japanese Colonial Rule
Introduction
The Japanese Buddhist view of Korean Buddhism from 1877 to 1945 is one filled with colonialist notions of paternalism. This would play out in Korean society during these decades of time with Japanese Buddhist missionaries declaring that Korean Buddhism needed to be reformed so that it could be revitalized. And of course, it would be the Japanese Buddhist missionaries that would take up this mantle as a guide to Korean Buddhists. As a result of this mindset, Japanese Buddhists in colonial Korea, both before and during occupation, didn’t find much use in Korean Buddhism. In fact, they didn’t find it worthy of studying. This paternalistic approach, which should come as no surprise, was extremely off-putting to Korean Buddhists; and thus, it undermined any potential cooperation between the two groups.
Early Japanese Missionaries
For centuries, Japan had been on the receiving end of religious cultural exchanges from both China and Korea. But from 1877 to 1945, the tables had turned. So rather unsurprisingly, whenever Japanese monastics had the opportunity to meet Korean Buddhists, they would try to convert them.
There are numerous early examples of Japanese missionary monks traveling to Korea in an attempt to convert the population. One example can be found in Kato Bunkyo, who was a Japanese missionary from the Nichiren sect, who visited Korean temples in Gyeonggi-do in 1894. Kato would assert that Japanese Buddhism was the “centre of Buddhism of the East.” Furthermore, he would state, “a Buddhist country” should consider as its “most urgent task” saving the Buddhism of neighbouring countries, especially that of Korea.
Then in 1895, another Nichiren monk, Sano Zenrei (1859-1912) proudly posted a sign on the gates of a major Korean Buddhist temple. On this sign, it declared that the temple was now a Nichiren temple. By posting this sign so openly and brazenly, he was announcing that the two hundred resident monks of the Korean temple had been converted to his Japanese sect.
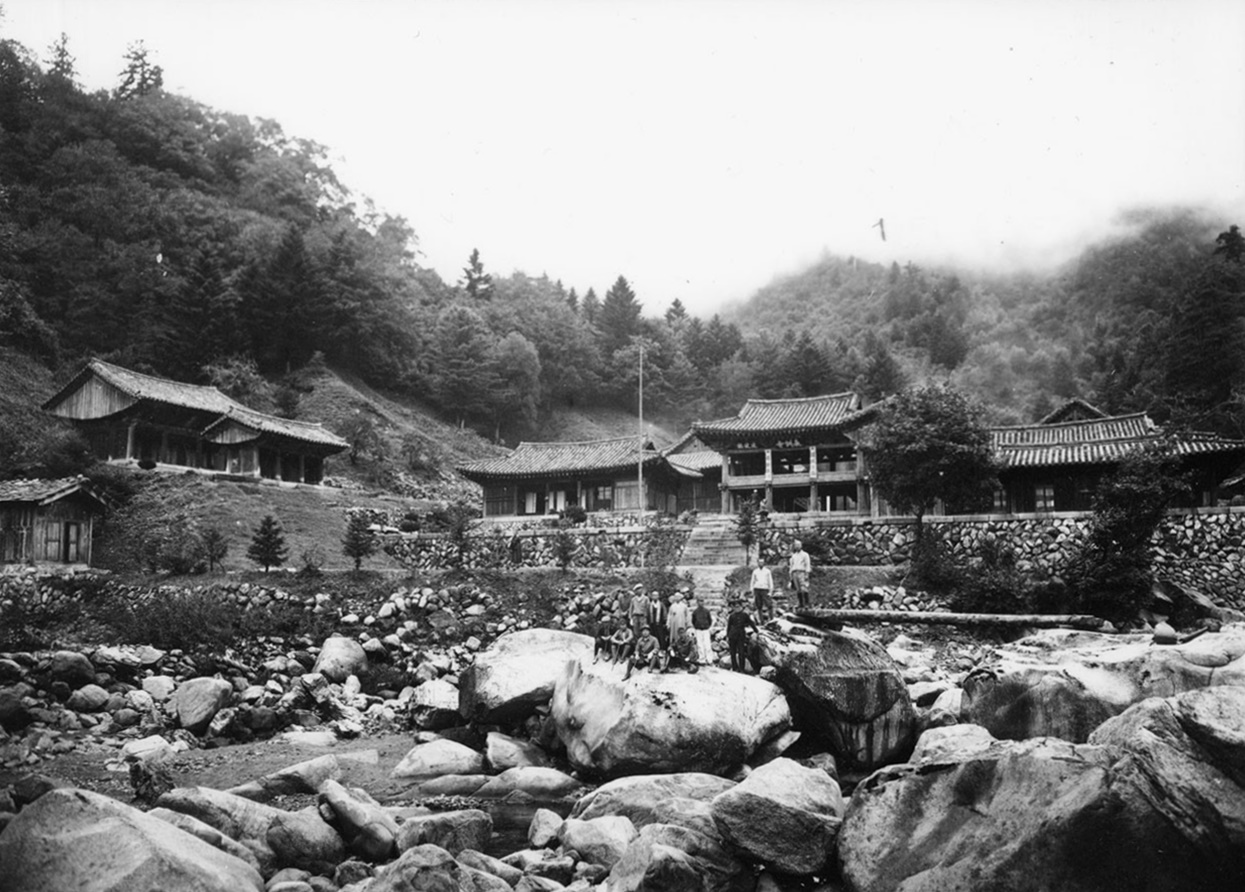
And in 1909, the monk Furukawa Taiko, who was a member of the Japanese Rinzai sect, stayed at Pohyonsa Temple in Hyangsan, Pyonganbuk-to in present day North Korea. Later, he was able to persuade the temple to make itself a branch temple of the Rinzai sect.
But while there were more forceful ways in which the Japanese converted Korean Buddhists, some Japanese monks gave a certain degree of respect to Korean Buddhism at this early stage. An example of this can be found in the monk Shaku Unsho (1827-1909), who visited a number of Korean temples in 1906. Immediately after hearing that Korea had become a protectorate of Japan, he told a Korean master monk that he came to Korea to learn from Korean Buddhism. Unsho also envisioned the establishment of an ideal Buddhism in Korea, which is something he was unable to do in Japan. As a result, he attempted to persuade Resident-General Ito Hirobumi (1841-1909) to grant him authority to control all of Korean Buddhism. Ito would ultimately reject this proposal and chastise Unsho, but it didn’t stop Unsho and others from trying.
In a similar vein to that of Shaku Unsho, the monk Iwa Joen, who was a Hongan-ji Temple missionary of the Jodoshin sect, spent three years at Tongdosa Temple at the turn of the 20th century. While at Tongdosa Temple, he learned the language, customs and teachings of Korean Buddhism. Eventually, he would become a student of the monk Bak Manha, who was a renowned precepts master. However, and over time, Iwa attempted to persuade Bak to convert and become a member of the Hongan-ji Temple teachings.
The example of Iwa Joen would be followed by that of Inoue Genshin (1861-1934), who was a member of the Jodo sect. He worked closely with Korean monks and was integral in establishing a central school and modern institution for Korean Buddhism in Korea. However, he also attempted to take control over these facilities. As a result, he would eventually alienate himself from Korean monastics that thought he was power hungry.
Arguably the most influential Japanese Buddhist missionary in the years preceding 1910 was Takeda Hanshi (1863-1911). Takeda would form strong bonds with leading Korean Buddhist monastics. These would eventually result in working relationships. As a Soto monk, Takeda envisioned a merging of Korean Buddhist administrative institutions to that of the Soto sect. But this, like so many other attempts, would be in vain.
Another interesting figure is Hioki Mokuzen (1847-1920), who was, once more, a Soto monk. After a visit to China to collect the ashes of dead Japanese soldiers that died during the Russo-Japanese War (1904-1905), Hioki made a stop in Korea in 1908. At this time, he visited Tongdosa Temple; and while there, he gave a talk to some three hundred Korean monastics. During this talk, he emphasized the need for reforming Korean Buddhism. And not so surprising, he proposed Japan’s willingness to give guidance and assistance in this endeavor.
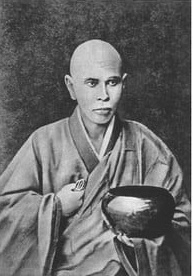
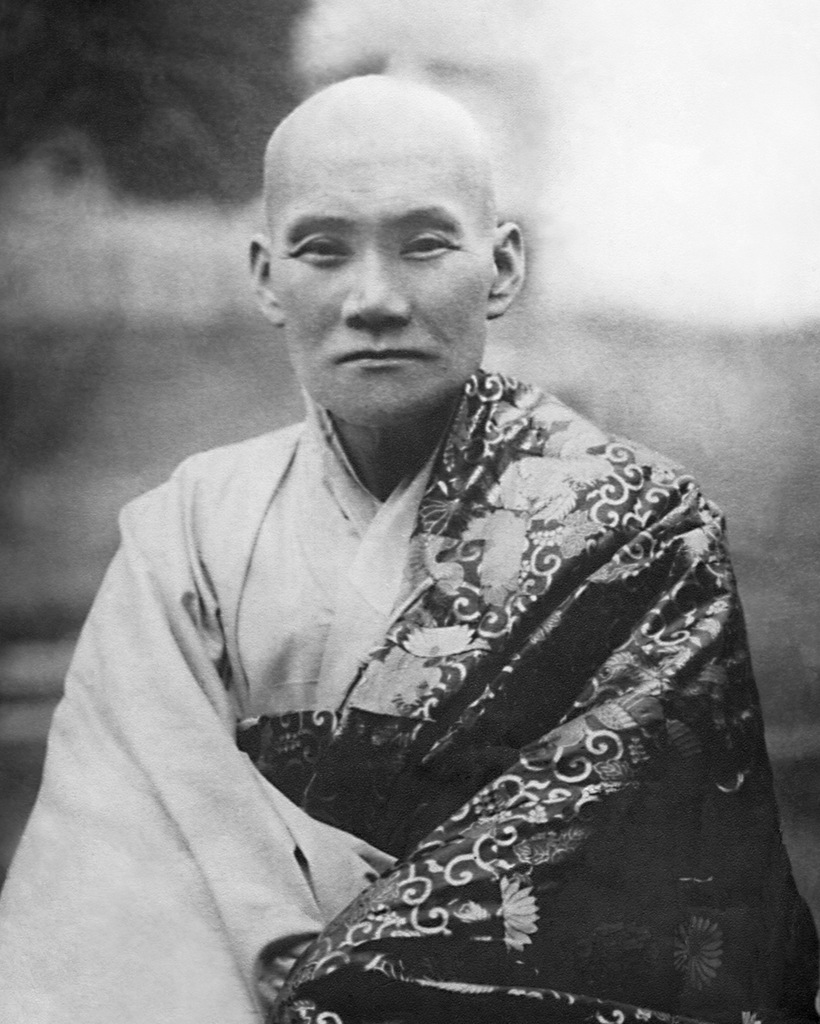
The Japanese Missionary Soma Shoei
There was, however, a Japanese monk that was quite unlike the aforementioned Japanese missionaries. This was Soma Shoei (1904-1971), who lived and practiced Seon Buddhism in Korean temples for six years. As an itinerant monk, he was able to develop friendships with Korean Seon monks with less of a colonial feel and more of one grounded in respect and sincerity. Perhaps what’s most important about Soma identifying as an iterant monk is that he shed his Japanese identity for that of the brotherhood shared by Seon (Zen/Chan) monks in China, Korea, and Japan throughout the centuries. This, in turn, allowed Soma to more easily create a sense of unity within the Korean Seon Buddhist community instead of one of opposition or superiority.
What’s most interesting about Soma is that he doesn’t fit into the conventional perception of what a Japanese missionary monk should be during these tumultuous decades. While Soma understood and appreciated Japan’s colonial control over Korea as reality, this seems to have been superseded by his deep respect for the Korean Buddhist tradition. Additionally, Japanese criticism and discrimination against Koreans and Korean Buddhism are missing. But it’s the exception of Soma that helps us better understand the complexity of this time period in Korean history.
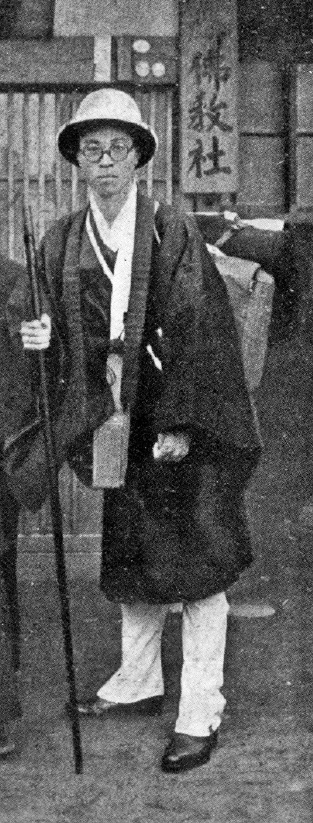
In late April, 1929, Soma Shoei, who was a young Soto monk who had recently graduated from Komazawa University, arrived at Beomeosa Temple in Busan. He wore a traditional Korean long, white robe, and he held letters of recommendation from influential Japanese and Korean lay Buddhists. Through a translator, Soma implored the abbot of Beomeosa Temple to allow him to join the temple for the three-month retreat.
The abbot, Kim Gyeongsan, answered, “Although we have a meditation hall here in this head temple, it is against the rules to accept anybody in the middle of retreat. In addition, the monastic regulations will be too rigid for you to follow. Moreover, it will be quite disruptive to the other monks already in retreat if somebody who is unfamiliar with our language, customs, and culture suddenly joined us. What do you think about practicing meditation at a nearby branch temple, one that also has a meditation hall and which can provide you with special treatment?”
During his six years in Korea, Soma would participate in several retreats at different Korean temples. While at these temples, he studied under various Korean Seon masters. He also visited major temples in Korea. Soma would write extensively about his experiences. This would result in the most comprehensive first-hand account of Korean pre-colonial and colonial Buddhism ever written by a Japanese Buddhist monk. In fact, Soma’s writings on his monastic experiences in Korea at this time lack an air of cultural or nationalistic superiority. Instead, Soma’s writings reveal a deep respect for Korean Seon Buddhism and its masters.
But remember, Soma’s experience is taking place at a time when Japanese Buddhists believed that Korean Buddhism needed guidance from Japanese Buddhism. Additionally, Japanese monks wanted to unify Korean and Japanese Buddhism as a part of a pan-Asian Buddhism. In fact, there were few Japanese Buddhists who viewed Japanese and Korean Buddhism as equals. Instead, there was a hierarchy of Buddhism in the Japanese’s Buddhists eyes. Korean Buddhism was thought of as a pre-modern, backwards, and an anti-social form of Buddhism, while Japanese Buddhism was modern, reformed, and socially engaged. Due to this type of thinking, which is reflected in the Japanese Buddhist monks already mentioned, there was very little respect shown towards Korean Buddhism and its traditions. As a result, it simply wasn’t worth exploring for Japanese monks. Instead, it appeared to be something that needed to be overcome.
Soma and the Association of Korean Buddhism (Chosen Bukkyodan)
With all the being said, even though Soma was eager to learn about Korean Buddhist practices, he was still a person of the times and his writing reflects the colonial discourse of this time found between Japan and Korea. Although he never states it outright, and as a Japanese subject, he believed that Korea would eventually be assimilated into Japan and become Japanese subjects.
It’s also important to keep in mind that Soma’s journey to Korea was made possible by the financial and administrative support of key Japanese Buddhist lay people and the Soto sect. Additionally, Soma’s writings, with the exception of one piece, were all published in “Korean Buddhism,” which was a journal sponsored by his backers. Also, nowhere in his writing does Soma directly challenge Japan’s colonial rule over Korea. However, while he doesn’t directly confront it, Soma is critical of the way in which colonialism was being implemented in Korea.
Soma’s writing was part of a goal to promote the assimilation of Korea with Japan. This helped serve a colonial agenda. And this is supported in the wake of the Second Sino-Japanese War in 1937, when Soma writes in a letter to one of his mentors that he wanted to help Japan in its total mobilization efforts and policies at this time.

So what were Japan’s colonial policies at this time? Well, they advocated for spiritual cultivation and revitalization under one umbrella, which would be led by Japanese Buddhists. And what bolstered and buttressed this concept was the growing popularity of Zen Buddhism in Japan and in the West. As a result, the Japanese also thought that it would appeal to Koreans, as well.
More specifically, the colonial policy of the first decade of Japan’s rule in Korea, which took place from 1910 to 1919, was a military one. However, and as a result of this policy, a massive independence movement arose that saw a sizable number of Korean Buddhist monastics participate in this uprising. This movement was brutally suppressed, while the Japanese colonial government was forced to change its strong tactics for something a bit more conciliatory.
As a result, even though Japanese authorities continued with ideas of assimilation, they came up with a slogan that advocated harmony between Japan and Korea. One such outlet for harmony was the common bond found in Buddhism. Buddhism was seen as a religion that could further the new cultural policies of the Japanese colonial government. It was said about Buddhism that it “could help complete the assimilation policies.”
So it’s rather remarkable with all this in mind, that Soma still had as much respect as he did towards Korean Seon Buddhism when he arrived on the Korean Peninsula.
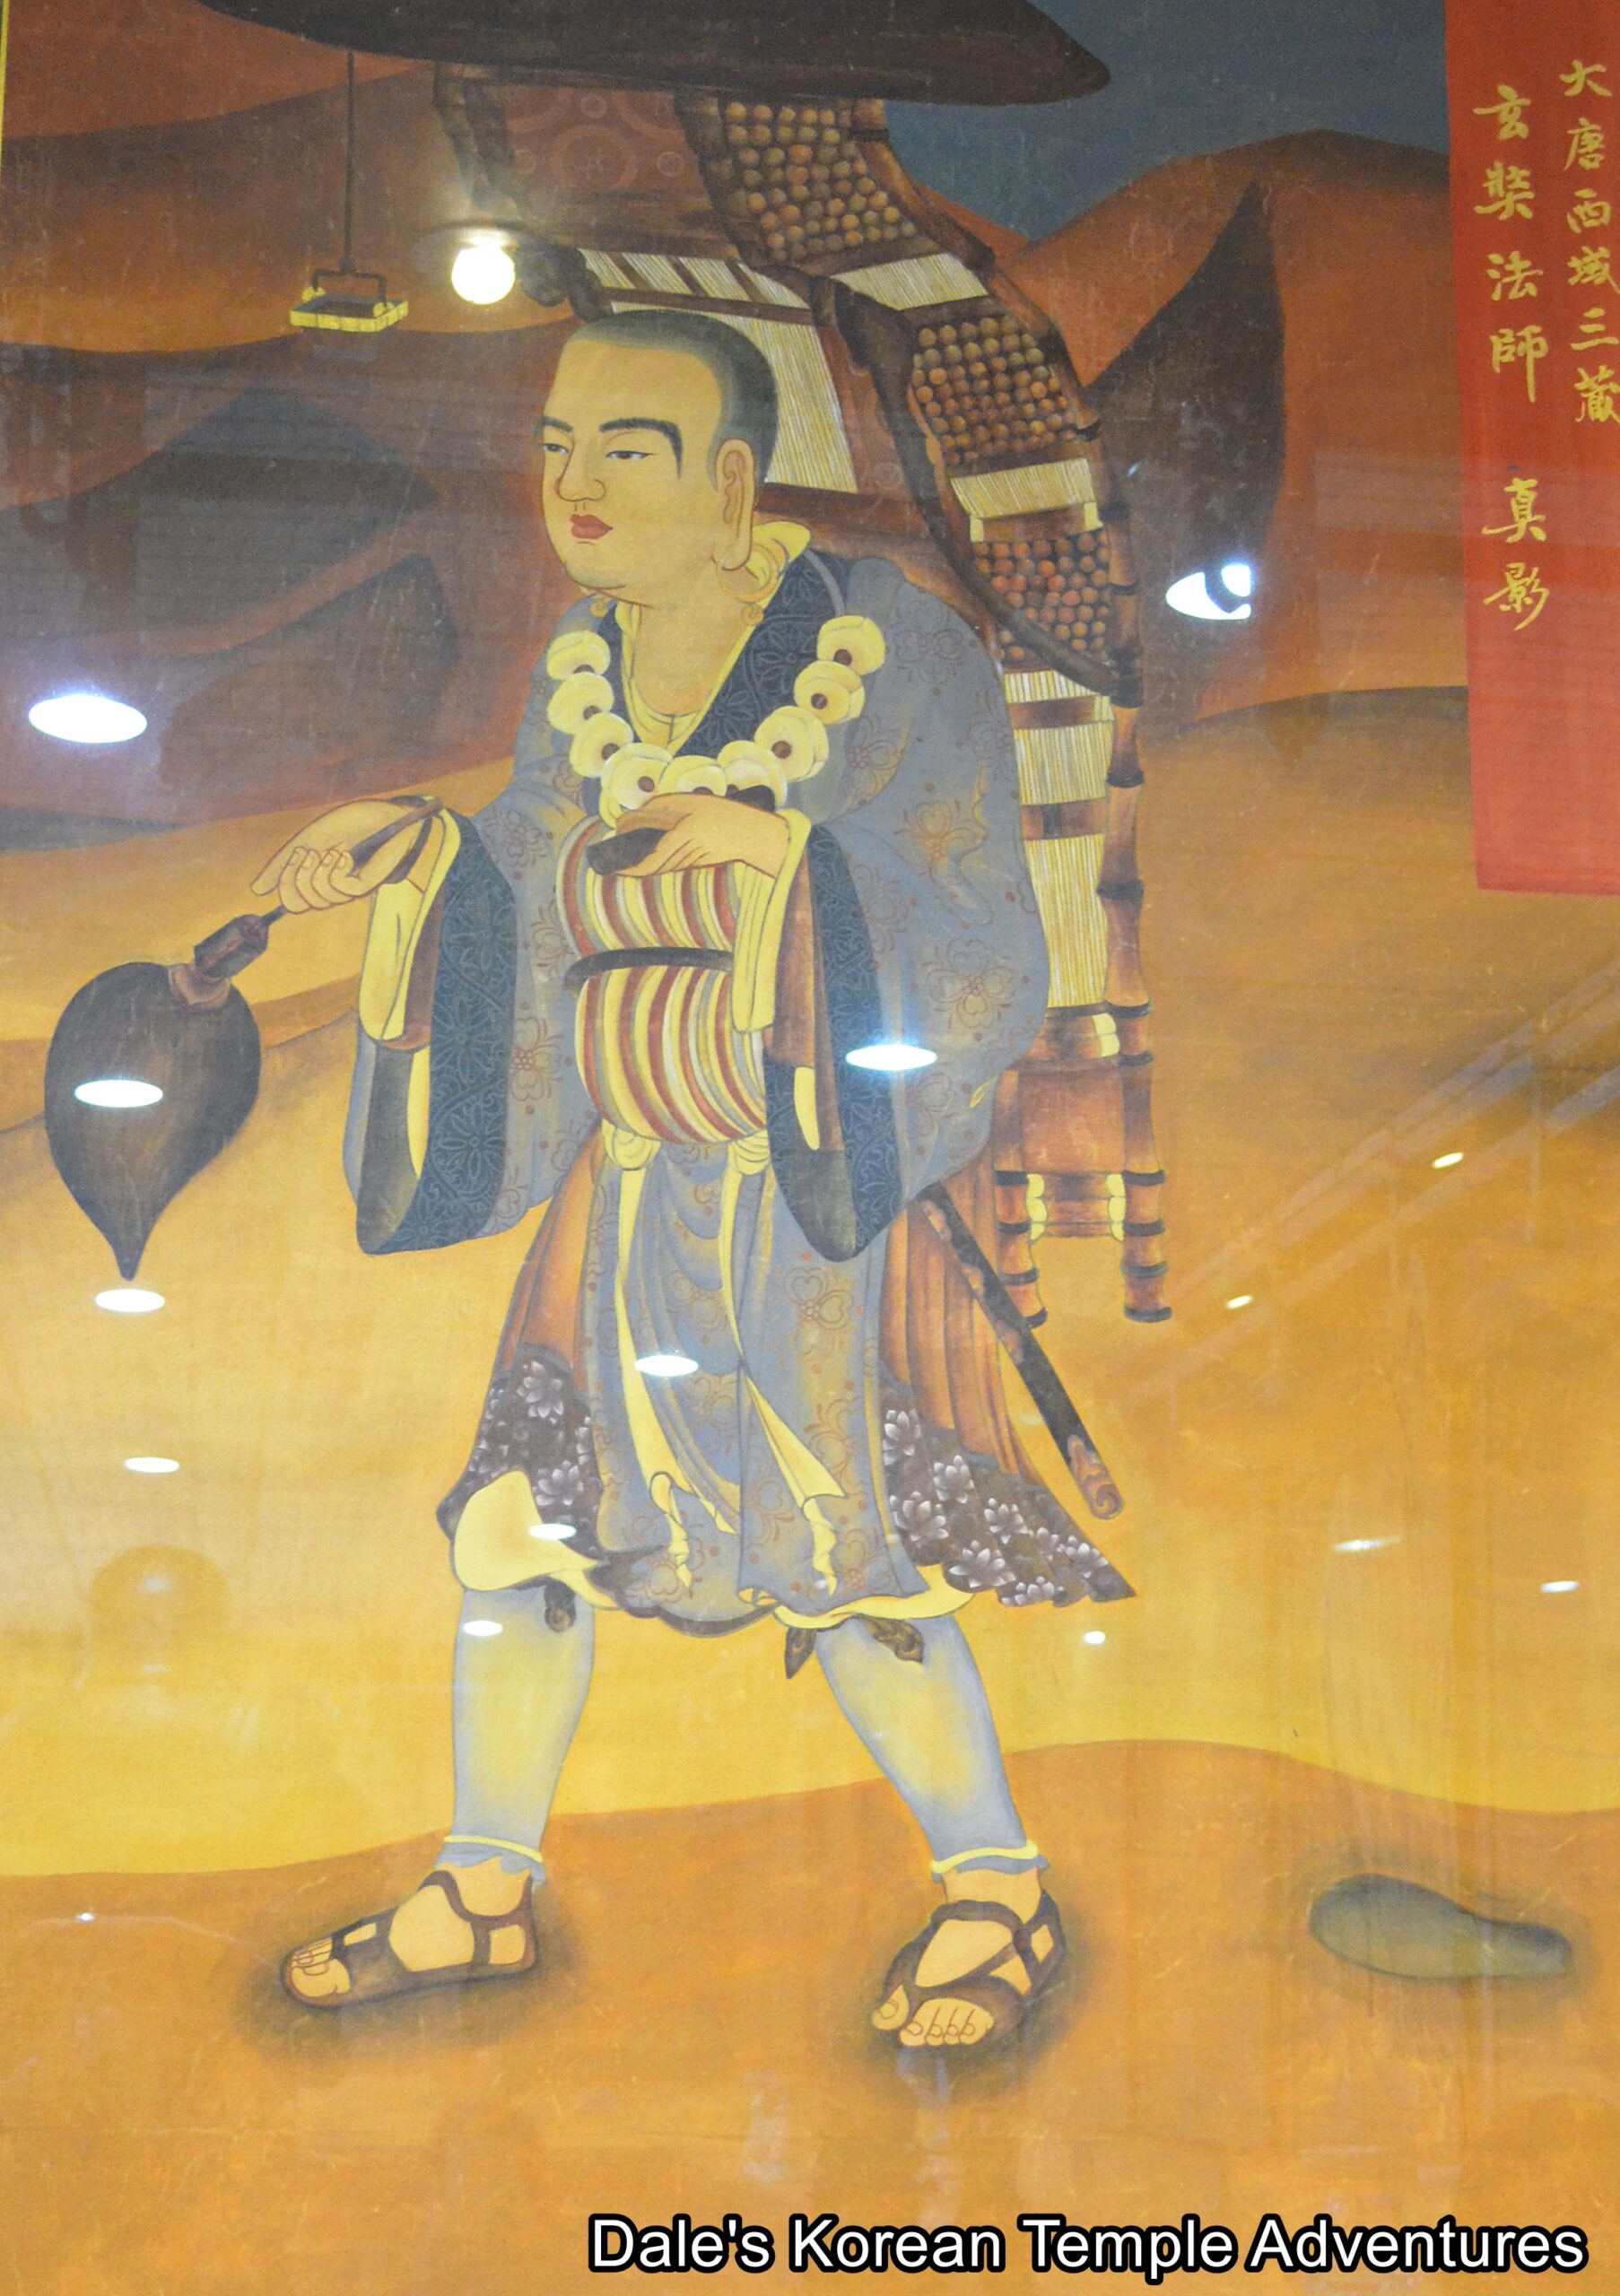
Itinerant Monks – Unsui
Before we talk about Soma’s life in colonial Korea, we must first better understand the idea of an itinerant monk. Soma was grounded in the status of the traditional Zen/Seon/Chan ideology that was shared throughout East Asian countries for centuries. In Japan, an itinerant monk is known as a unsui. However, instead of presenting himself as the pure essence of Japanese civilization like some Japanese Buddhist intellectual did, Soma self-identification as an unsui was something more personal and less political.
The literal meaning of unsui is “cloud” or “water” in English, and it refers to the ideal found within a Zen monastic’s life. And in living like a cloud, which moves freely without a trace, an unsui isn’t confined by time or space in their search for enlightenment. As a result, an unsui monk should travel both near and far and learn from master monks whether they were Japanese or Korean. He was free to wander and learn as an itinerant monk.
Threats to Korean Buddhism During Japanese Colonial Rule
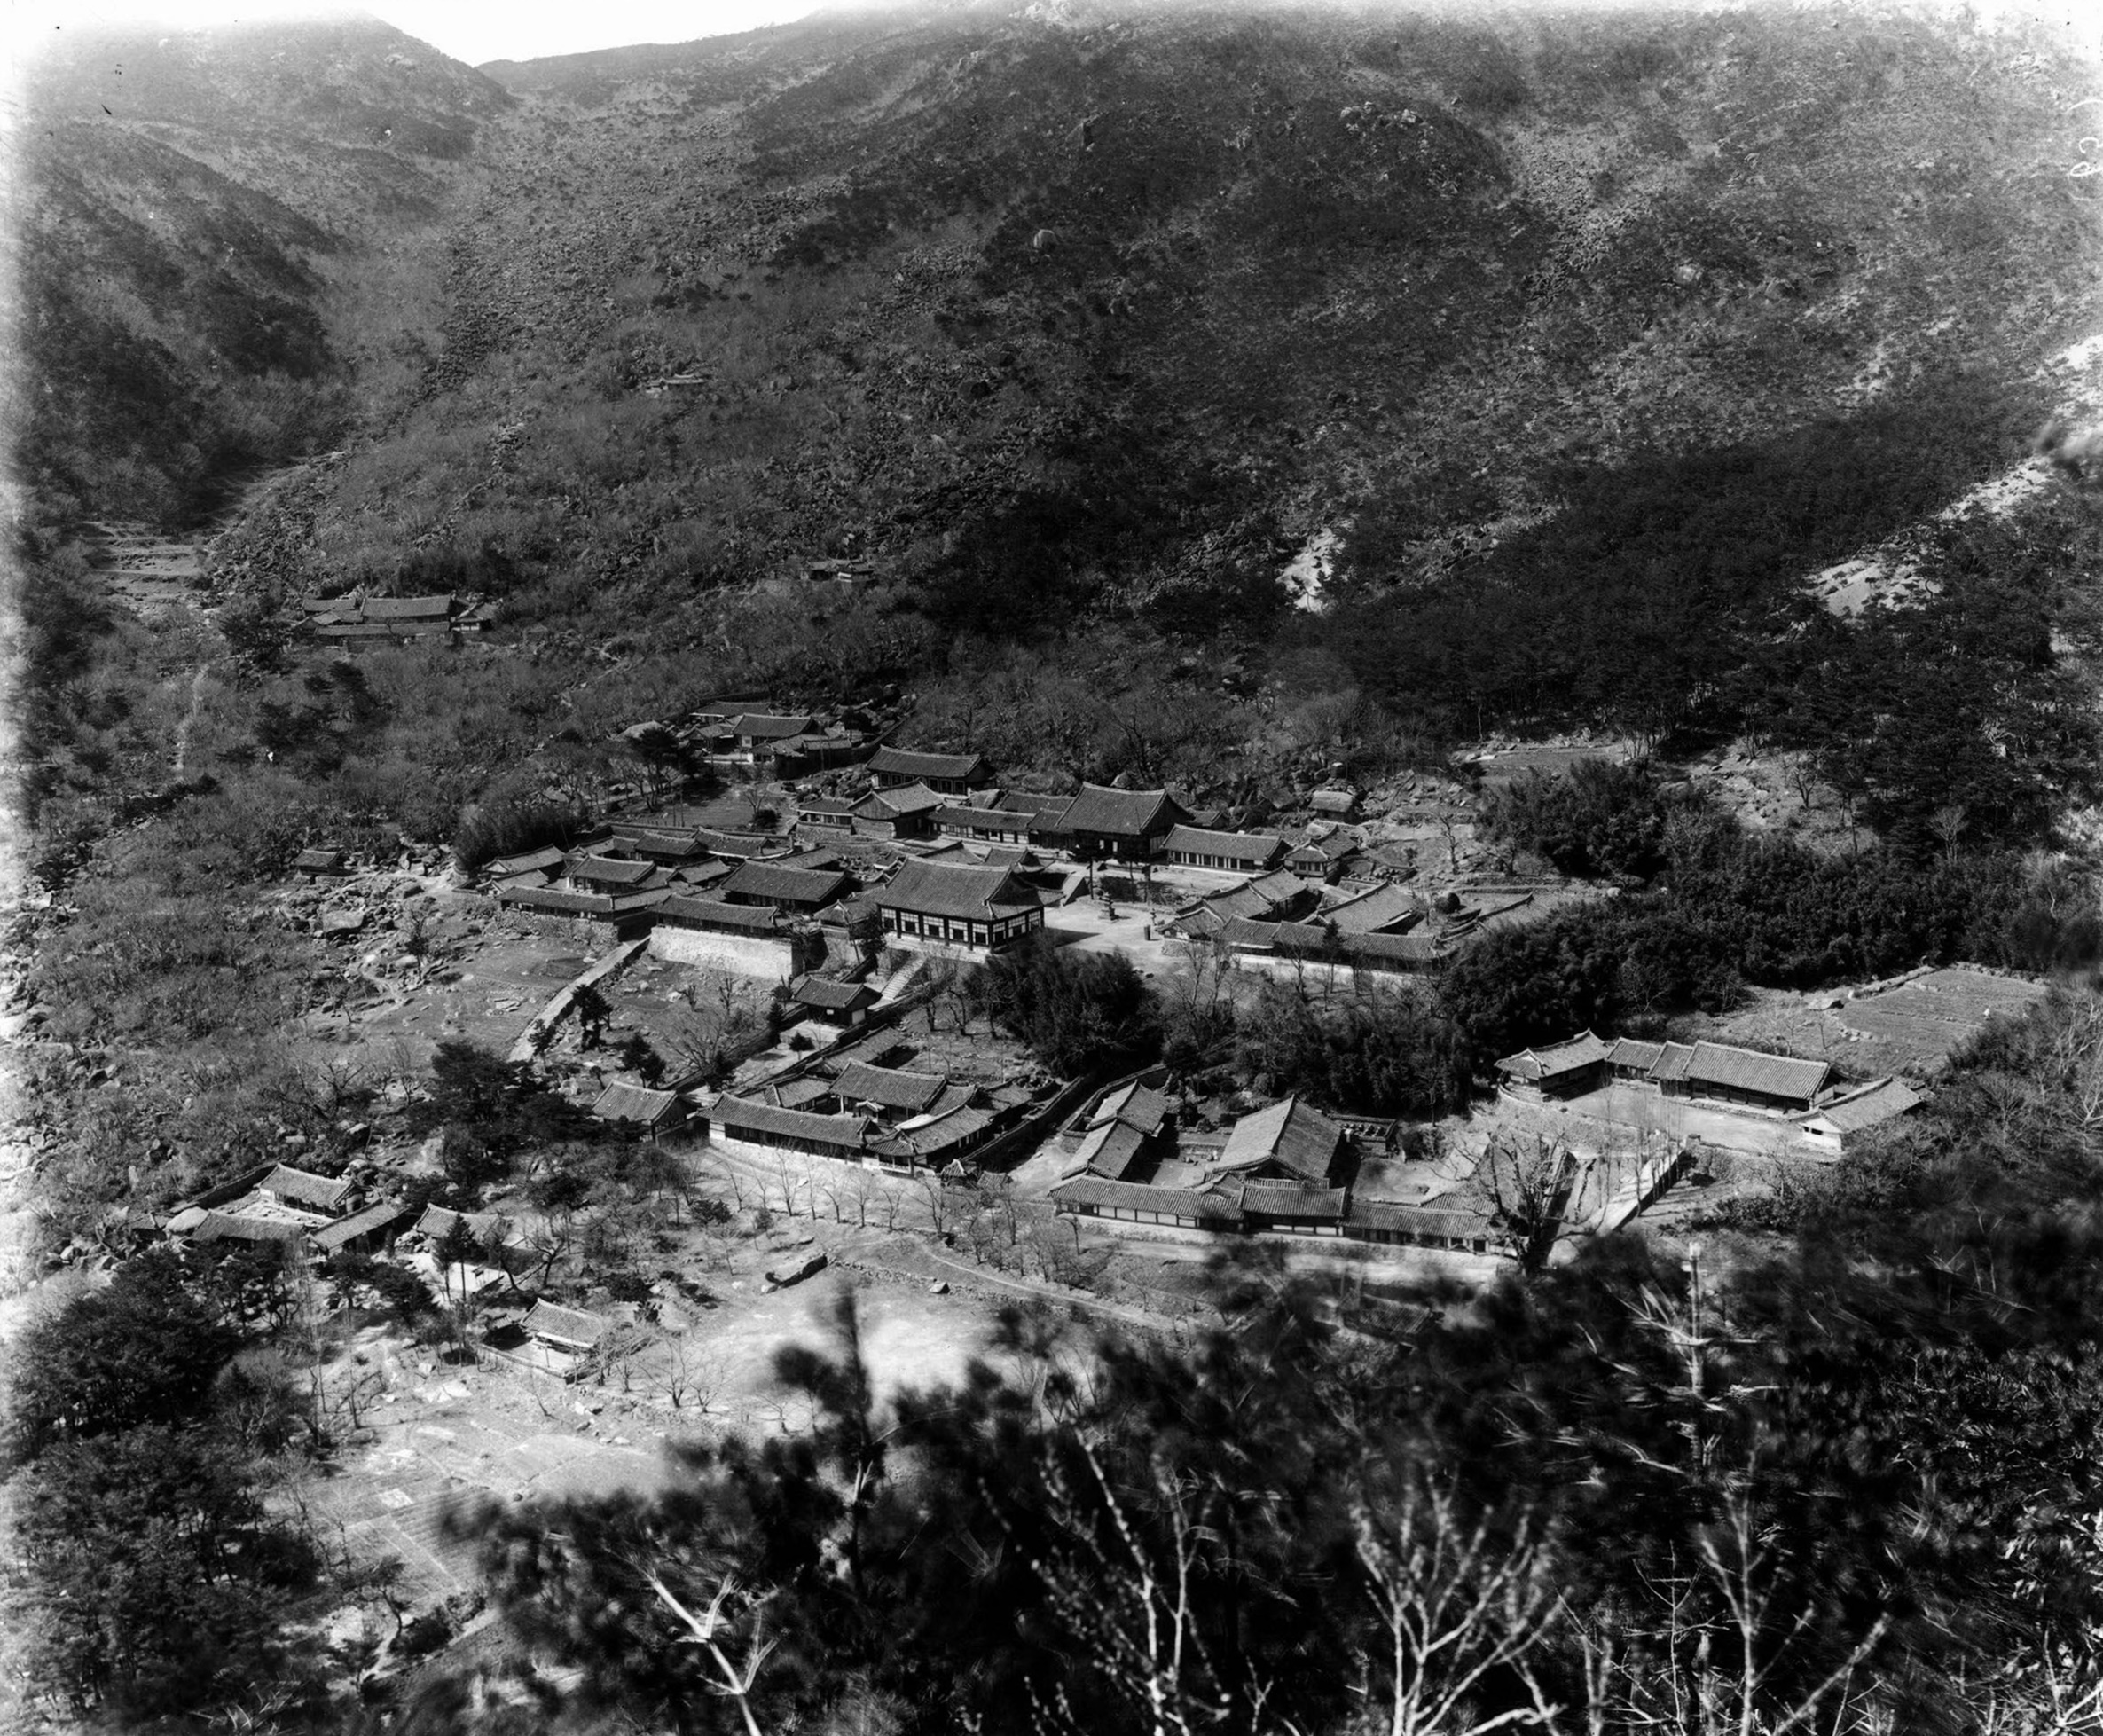
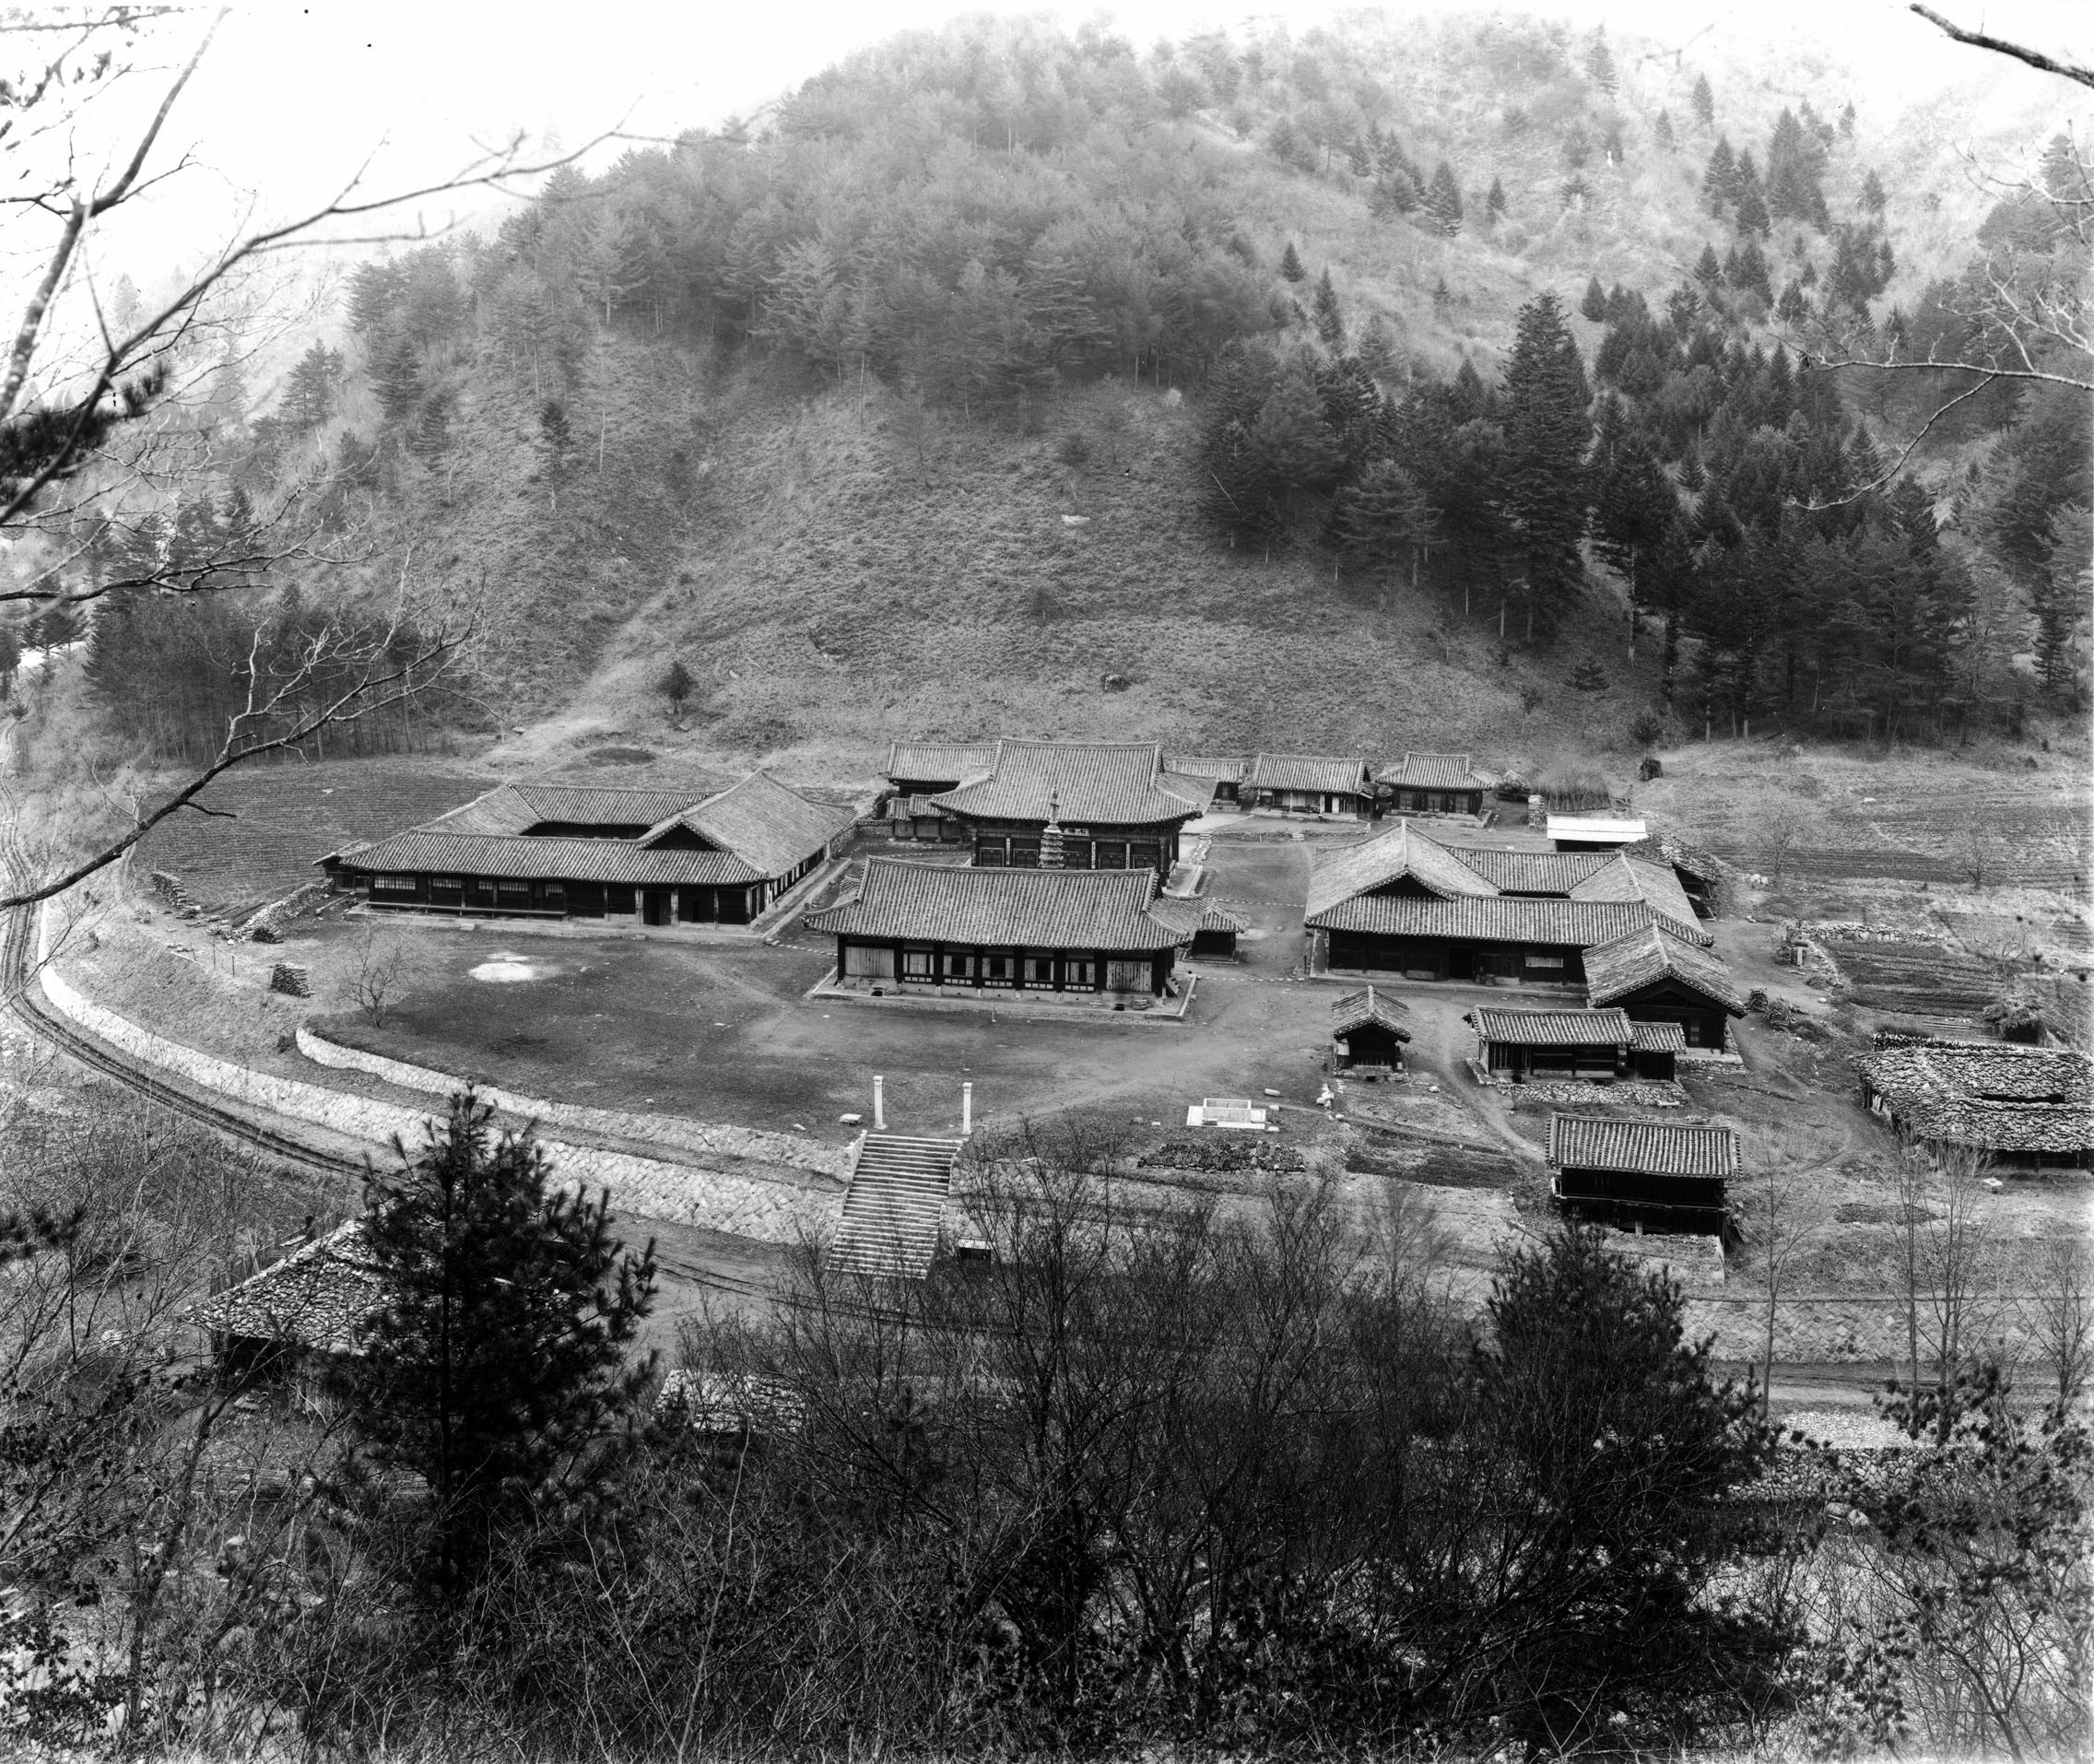
As an itinerant monk in Korea for six years, Soma was nominally assigned by the Soto sect to be a missionary at two Soto branch temples in Seoul. Soma first arrived in Seoul on April 15, 1929. After several weeks of preparation, he headed south towards Beomeosa Temple in Busan with a letter of recommendation from the Head of the Department of Religion from the colonial government. Soma headed to Beomeosa Temple to participate in his first ever retreat in Korea.
According to statistics printed in a Korean Buddhist journal in 1932, Beomeosa Temple and Naewonam Hermitage, which was one of Beomeosa Temple’s hermitages, were two of nineteen Seon temples/hermitages in Korea. This is in stark contrast to the precolonial population of monastics which numbered around 100 temples/hermitages. It’s estimated that about 230 Korean Seon monks were living at either Beomeosa Temple or Naewonam Hermitage as itinerant monks. These monks would practice hwadu meditation. In total, and at this time in 1932, there was a total Seon monastic population of around 7,000 (5,709 monks and 1,185 nuns).
There were several reasons for this decline. Perhaps the greatest reason for the loss of nearly four out of every five Seon temples in the early 20th century is because of Korean Buddhist reformers who were seeking to modernize. They succeeded, in large part, by relocating Buddhist monastics from the mountain temples and hermitages to urban areas, where they attempted to proselytize and minister to larger groups of Koreans.
With this new model, the role of itinerant monks was seen as being useless. Furthermore, the new emphasis in the propagation of Korean Buddhism over that of the personal, secluded practice of Seon Buddhism was seen as being selfish and not affecting the common good in Korean society. As a result, limited temple resources were directed towards the city and the promotion of Korean Buddhism there. Of the 82 city centers in Korea in 1929, they were managed by 63 proselytizing-type Buddhist monks. Seon Buddhism was in full retreat.
Also equally threatening to the well-being of Seon Buddhism in Korea was the increasing trend towards marriage among Korean monastics. A growing number of Korean monks had decided to marry in part because they believed that a married monastic would have more social viability and usefulness in modern society. This belief was in concert with Christian ministers and Japanese monks. As a result, the majority of head monks and administrators at Korean temples were openly married. This would eventually result in major temples petitioning the colonial government in 1926 asking that the provision in the 1911 Temple Ordinance that required Korean monks to remain celibate be lifted.
By 1929, and according to scholar Takahashi Toru (1878–1967), more than 80 percent of Korean temples were following this new style of allowing monks to marry. However, the problem with this is that monks with families quickly drained a temple’s finances. This only further complicated the financial strains that temples were suffering under at this time.
The problem with the straining of finances, and how it specifically pertained to Seon temples, is that Seon monks that remained celibate and single relied on larger temples for financial support. However, with major temples being run by monks with families, it resulted in financial disaster for Seon monks and their temples.
Soma’s Experience at Naewonam Hermitage in Busan
Gradually, other Korean monks came to view celibate monks as unproductive members of the Buddhist community. As a result, they were marginalized. With this marginalization, Seon temples and hermitages decreased in size and number.
In an effort to preserve the Seon tradition and protect the interests of Seon monks, thirty-five monks established the “Society for Supporting Seon Fellows” in 1922. And rather interestingly, Beomeosa Temple was a major force in the establishment of this society. Given that Beomeosa Temple played a leading role in the preservation of the Seon tradition, it’s rather curious as to why Soma was sent to Beomeosa Temple to begin his practice within the Korean Seon tradition. Remember that Soma was given a letter of recommendation from the Head of the Department of Religion from the colonial government as an introduction to Beomeosa Temple.
Soma’s first impression when he arrived at Naewonam Hermitage (located on the Beomeosa Temple grounds) was that “as compared to busy temples in Japan, this temple is truly a blessed place for Zen [Seon] practice.” As for the monks at Naewonam Hermitage, Sumo would say, “I admire those monks who are practicing according to their own ability, as if they had just one day in a hundred years [to practice].”
Soma would go on to describe how he met an old master who decades earlier had been the head monk of Beomeosa Temple. Now this very same old master simply practiced without leaving the temple and its mountain. Intrigued by the Japanese monk wearing a traditional Korean white robe, the master asked Soma a series of questions. This master wanted to know why Soma had come to Korea and why he specifically chose Beomeosa Temple and Naewonam Hermitage.
The Korean master is noted as saying “It’s a strange connection that I will teach Seon [Buddhism] to somebody who came from Japan.” With this comment, the Korean master was acknowledging the social impact that Japan had on Korea at this time.
Evidently, Soma’s answers were satisfactory enough, because he was given permission to join the retreat despite the retreat having already started some two months prior. Typically, this went against the rules of the retreat. But with being given permission, Soma started to meditate alongside thirty other monks for eight hours a day.
Early on, and when submitting articles to the Buddhist journal, Soma would detail the twenty different tasks assigned to each monk during the retreat. Not only would he detail the assigned tasks, but he also observed who was overseeing each of these tasks. This structure of Seon practice was universal among the nineteen Korean Seon temples and hermitages operating at this time.
On the first day, the secretary (seogi) monk assisted Soma in settling into the hermitage. In the meditation hall, and in front of the entire group of monks on the retreat, the secretary monk introduced Soma to those in charge of each task one at a time. Additionally, the secretary monk translated some of the most important regulations and rules that Soma would need to know while at Naewonam Hermitage. Rather interestingly, Soma and the Korean monks communicated by brushing out Chinese characters known as “hanja” in Korean. This was a classical written language that both sides could at least read; and since Soma didn’t know Korean, and the translator had already left, this is how they communicated.
Soma would write about this experience, “For some reason, it came to my mind that when Japanese monks studied in China many years ago, they must have also communicated by way of handwriting. Suddenly, I felt as if I had become one of those monks of old, as if I were not in contemporary Korea.”
At the end of being introduced, Soma made a full prostration to the monks sitting at the front as a sign of respect and a commitment to following the retreats rules. Soma would later say of it, “This one bow had quite a significant meaning.” The bow was an official request that he be received into the retreat, upon which the monks bowed in response as a sign that they accepted him as a full member of the community.
Over time, Soma would adjust to the changes found at a Korean temple. He would wake up at three in the morning, eat spicy food, deal with the humid weather, and more. In addition to coping, Soma was also assigned by the temple to help pick mountain vegetables.
As for the spicier food that the Korean monks ate, Soma would have the most difficulty with this part of living at a Korean temple. One day while eating the communal meal together, Soma got the idea inside his head that he would try the spiciest dish. With eyes closed, his mouth “flamed out like a volcano” and his eyes “brimmed with tears.” Seeing this, a senior Korean monk at the temple recommended that Soma might prefer that the temple provide non-spicy food for him. Soma respectfully declined and continued to attempt the spicy food that the temple provided.
On the second day of Soma’s time at the retreat, a master Korean monk called upon Soma and said, “I would like to teach you everything about Korean monastic life, so it is unfortunate that we both cannot communicate.” To this, Soma replied, “It is unfortunate, indeed, since I also have many questions to ask you. By the way, please treat me as you do other monks.”
Unperturbed, the master monk continued by informing Soma of a number of points: “I assume that due to the differences in culture and customs, especially regarding food, you must undergo some inconveniences. I hope you will be able to get used to these inconveniences, since I hear that it is your purpose of coming here [to practice as the Korean monks do]. If you have any difficulties, though, feel free to ask me. I would like to provide you with as much accommodation as I can.”
To this generosity, Soma would write about the master monk’s words that he felt “like my tears would fall in response to his kindness.”
The master monk would continue by reminding Soma of two very important points regarding the practice of Seon Buddhism: “It is common in Korea for Seon monks to do hwadu practice. If you have adjusted to the daily life here, I would like you to work on a hwadu. Furthermore, needless to say, I would like you to observe precepts well. I assume that you must have heard about the precepts in detail upon ordination. I would like young monks to pay special attention to not smoking, drinking alcohol, and eating meat.”
Rather remarkably, and after only a week at the hermitage, and despite not being able to communicate with Korean monks but through Chinese characters, Soma still felt like he was included at the hermitage. Soma would state: “While in conversation, we became close and could talk about dharma as if we were Zen [Seon] friends from the start. Because they simply spend time meditating and studying sutras, they might not know the world outside well. [Nevertheless], they have something that enables them to live entirely secluded in the deep mountains. Those monks who are into preserving precepts sometimes tested me with honest questions and reflections. Gradually, I felt like I was being led into a world separated from the secular world.”
As to how these Seon temples and hermitages were supported financially, Soma recorded how they specifically did this while at Naewonam Hermitage at Beomeosa Temple. On the third day, there was a big memorial for the donors who had given some land to the temple. In return for this donation, the temple commemorated the donors each year. Soma was surprised by this development that interrupted the retreat because he had just assumed the Seon Buddhism was conventionally anti-ritualistic and anti-social.
Soma would document another large ceremony held on the last day of the three-month retreat. This ceremony would fall on July 15th on the lunar calendar. The day before the fifteenth, there was no meditation; instead, the hermitage and temple were flooded with devout lay Buddhists who came to pray for their deceased ancestors. All the Seon monks participated by chanting sutras, reciting Amita-bul’s name, and praying.
Soma would say of this ceremony: “When syllables of Namu Amita-bul [The Buddha of the Western Paradise] tenderly reverberated throughout the deep mountains, I was enchanted by the solemnity manifesting from the beautiful chorus of chanting and my body swayed from side to side. At this moment, everybody forgot about the sultry weather and suffering and just rejoiced with rapture.”
The next day, and with the ceremony coming to an end, five monks at the temple received acute food poisoning. No one knew what to do. Soma retrieved medicine from his belongings that he had brought with him just in case he himself fell ill; instead, he offered the medicine to the sick monks. Eventually, the monks felt better. The monks were appreciative and Soma was relieved because he wasn’t quite sure what effect the medicine would have on the monks.
In the same way that Soma took care of the Korean monks, they also cared for him. Soma is quoted as stating:
“It is strange that one who does not know the language and customs well can get by each day without many problems. However, behind the scenes of this happiness, I must be aware of how much care the monks of the monastery have provided for me. As if they took care of a baby, they predict and observe my needs from my behavior. By being attentive to my needs, even young monks help me without being asked. However, in fact, this support can be interpreted in another way. Regardless of language barriers, behavior says something beyond what words can. Therefore, friendship can arise not from the unity of words and behavior, but from behavior alone.”
On July 16th, after three months, the retreat came to an end. And with the end of the retreat, the itinerant monks left the hermitage and the temple for destinations unknown. Soma, on the other hand would stay at Naewonam Hermitage, on the Beomeosa Temple grounds, for three more years.
After their departure, Soma would write, “At last, with big backpacks on their backs and holding bamboo hats in their hands, they close the door of the monastery behind them without any attachment. They are finally leaving. I feel alone. They are walking in a line. Walking away. Into the thick forests. They are gone. They have gone to seek the Dharma. They must go somewhere to resolve the great matters of life and death. Will they reach enlightenment there?”
What’s unique about Soma’s experience while at Naewonam Hermitage, and found in his writing, is that they don’t appear to be highlighted by the political necessity to discuss the advantages that the colonizer had over the colonized; namely, Japan’s dominance over Korea. Instead, Soma’s experiences are coloured by the shared identity that the monks had as itinerant monks. This then freed him, at least to a certain degree, of colonial attitudes. And this comes through in Soma’s writing in how he felt included as a member of the Korean Seon monastic community.
Soma’s Experiences in Colonial Korea
A few years later, when Soma was on his way to Gwijusa Temple in Hamgyong Province, and after completing several months of an intensive retreat, he caught the flu and couldn’t resume his travels. Fortunately for him, he ran into two itinerant monks with whom he had practiced before. When they found out that Soma was ill, they took care of him for the next two weeks until he recovered enough and was ready to resume his travels.
Just as Soma was preparing to leave after recovering, it had snowed for three days straight. This, inevitably, would make his journey quite dangerous. As his time to leave neared, Soma said to the two monks, “I’m leaving today.” The two monks responded, “Isn’t it still snowing?” However, knowing that the life of an itinerant monk could be dangerous at times, these monks also knew that an itinerant monk was without bounds. Soma would write, “Being aware of this feeling, the monk does not argue with me further.” Soma knew that he would probably meet these two monks, once more, somewhere else during his travels. And when they met, once more, they would meet with kindness and affection as fellow itinerant monks.
During another exhaustive journey, Soma arrived at a temple on Mt. Chiaksan in Gangwon-do. To his surprise, and upon his arrival at the temple, a monk peeked his head out from a building. The monk said to Soma, “You must be the one from Mt. Geumgangsan.” The monk then took Soma’s bag and brought him inside a building at the temple.
Soma would specifically record this warm welcome in his writing:
“It is such a pleasure to meet an acquaintance in the middle of nowhere. The delight of being an unsui [itinerant monk] erupts from here. The abbot of the temple also appeared and others studying at the temple gathered together. I entrusted myself to them as if leaving my exhausted body to them.”
Like at Naewonam Hermitage, Soma’s identity as an itinerant monk is what connected these monks. It isn’t their Korean and Japanese nationalities. Instead, it’s their Buddhist itinerant identities that connect them.
In January, 1934, and at Tapsa Temple, where Soma sat for yet another retreat, he would reveal a rather comical side to the itinerant monk community in Korea at this time when he states:
“Unsui monks [itinerant monks] usually arrive at Zen [Seon] temples at least a week before a three-month retreat commences. I like this period the most because I can hear all the different impressions, experiences, and stories that the unsui bring from their travels to villages and temples. It is as if I were reading the Unsui shinbun [newspaper] but with a livelier take.”
But before his readers could misunderstand his intent, Soma followed this passage with the following statement:
“If I write this way, Korean unsui monks might be thought of as chatter boxes. There is no one who keeps silence as strictly as the unsui in Korea. They merely express the entirety of a thought with a frank word or phrase. Such is the flavor of Zen [Seon] monks.”
Soma in no way wanted it to be thought that Korean monks were somehow less serious about their practice. Soma’s adventures outside Naewonam Hermitage, but still on the Korean Peninsula, ooze with ideas of respect, appreciation and gratitude towards Korean Buddhism. Instead of using often-used colonial rhetoric grounded in ignorance, Soma provides a different perspective. And for that, Soma’s writing is so important to the colonial-era discord on Korean Buddhism.
The Search for Masters
During his travels throughout the Korean Peninsula, Soma would meet a number of prominent Korean master monks like Bak Hanyeong (1870-1948), Kim Gyeongun (1852-?), and Bang Hanam (1876-1951). All three were well-respected by Korean Buddhists.
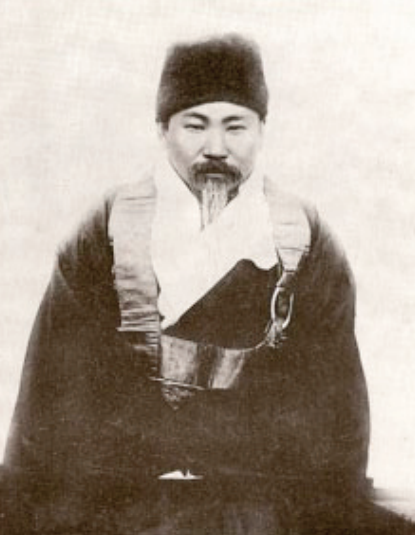
A: Hanam (1876-1951)
Of the three, it’s Soma’s relationship with Hanam that was the most transformative for the Japanese monk. Arguably, Hanam was the most prominent of the Seon master’s during Japanese Colonial Rule (1910-1945). Hanam was a revered reclusive Seon master that never left his temple and was solely dedicated to teaching meditation to students. As a result, he attracted numerous itinerant monks that were serious about the Seon practice. Eventually, Hanam would become the first patriarch of the Jogye-jong Order in 1941, which would become the largest Buddhist sect in Korea. Hanam only agreed to become the first patriarch under the condition that he wouldn’t be required to leave his mountain temple.
In 1933, Hanam resided at Sangwonsa Temple in Pyeongchang, Gangwon-do. Soma would meet Hanam at Sangwonsa Temple, as Soma was leading a three-month retreat at the temple for thirty-five monks. Like at Beomeosa Temple, Soma presented a recommendation letter to Hanam. This letter of recommendation was from the abbot of the neighbouring Woljeongsa Temple. Soma begged Hanam to join the winter retreat.
The following is how Soma would document his initial exchange between himself and Hanam. It was very typical of an encounter found between that of a novice and that of a master in Seon Buddhism. Here is their encounter:
“Hanam: By the way, I hear that Japanese Buddhism is quite popular. Why did you venture into these deep [Korean] mountains?
“Soma: I came to practice Zen [Seon] under your close guidance.
“Hanam: It is quite cold here, it snows a lot, and it’s very windy. In addition, if it snows, it is impossible to get access to the village. What if you get sick?
“Soma: Having given my life for the Dharma, I would rather consider these hardships as a pleasure.
“Hanam: Although I cannot help you if the community denies you admission because your late arrival violates retreat rules [he arrived fifteen days late], I will give you a special permit so that you can practice here.”
Soma would join the remaining winter retreat session. During this retreat, Soma was assigned the duty of cleaning the mediation complex. Additionally, the schedule and rules for the retreat were quite strict. Soma would write about them:
“One is neither allowed to talk until nine o’clock in the evening nor to have personal time. Everybody practices assiduously and seriously. One thing that is different from other meditation centers is that there are just two meals a day—and one of them, breakfast, is [merely] rice soup.”
The reason for just two meals a day was because of the financial situation at the neighbouring Woljeongsa Temple; to which, Sangwonsa Temple fell under administratively. However, Hanam didn’t seem to mind the reduction in food; instead, he would say to Soma, “Seokgamoni-bul [the Historical Buddha] had just one meal a day; therefore, we all should be appreciative of having even breakfast. With that note, I want you to practice diligently.”
Soma would write about how Hanam emphasized the precepts, which were the core of Hanam’s teachings. Hanam would say to Soma, “If one fails to preserve precepts, he cannot be called one who left home to seek the way to enlightenment. A precept breaker is inferior to a lay person.”
Additionally, Soma pointed out how Hanam’s students viewed their master’s teachings as definitive and authoritative. Soma would say on this topic, “Those who are practicing under his guidance, of course, do their best not to break a single word of the master. For his word, no interpretation needs to be attempted.”
In addition to Hanam’s approach to Seon Buddhism, Soma was especially moved by Hanam’s devout practice despite his weakening health at this time:
“Master was suffering from chronic stomachaches, and his energy gradually deteriorated. As a result, it became impossible for him even to sit with us. I was just grateful to him for teaching us despite his illness. In addition, despite his sickness, he never lagged behind us in practice. Except for three or four hours of sleep, he meditates all day.”
When the winter retreat finally came to an end, Soma asked Hanam for some calligraphy from the master. Hanam would write for Soma just four characters: “Do not seek fame.” After this, Soma and his fellow monks joined Hanam for one final meal. During this meal, the monks promised to each other to “practice diligently in the future.”
One year later, Soma would return, once more, to Sangwonsa Temple to see Hanam. This retreat was even more intensive as students didn’t sleep.
It would be Soma, through his writings, that made Hanam well known to the international community. And through his writings, Soma would emphasize Hanam’s understanding of what true Buddhism and monastic life should be like in a modern world.
B: Kim Gyeongun (1852-?)
Another Korean master monk that influenced Soma was Kim Gyeongun. At this time, Gyeongun was 83 years old. Soma would write about Gyeongun, when he first entered the old master’s room, “I could not utter any words. I instinctively prostrated on the floor once. I came to meet this great Zen [Seon] master Kim Gyeongun in person!!” Soma was overwhelmed by emotion.
Soma also delivered a letter to Gyeongun from the scholar monk Bak Hanyeong (1870–1948), which he had brought with him. After reading the letter, Gyeongun said to Soma in a clear voice:
“Buddhism in Japan and Korea is the same. Nevertheless, how good it is for you to come to Korea to study and practice meditation! Who would say the Dharma will perish?! Practice itself is the life of Buddhism.”
During their conversation, Gyeongun repeatedly reminded Soma that he “should not forget to practice diligently.” These words left a lasting impression on Soma. Later, Soma would reflect in his writing, “I believe that if there is no practitioner, Buddhism will be nothing more than a historical relic. The prosperity of Buddhism, as Master says, will depend solely on one thing, practice.”
In comparison, Soma felt embarrassed by his own level of diligence while practicing. He felt extremely self-conscious sitting in front of Gyeongun, who practiced earnestly day and night. Soma would write of his feelings, “I felt as if a tremendous power were pressing in on me—from the old master who has practiced continuously and sincerely.”
Both Hanam and Gyeongun would have a great and lasting influence on how the itinerant monk would practice in the future.
Soma’s Views on Japanese and Korean Buddhism
During his extended travels in Korea, and his extensive experiences, Soma frequently heard what other people thought about Korean and Japanese Buddhism. What’s interesting about Soma’s responses to these comparisons is that he’s generally quite critical and self-reflective when talking about the Japanese people and Buddhism. In comparison, he would be defensive and sympathetic towards Korean people and Korean Buddhism.
Soma was very aware of how the Japanese treated Koreans in colonial Korea. His first experience with this Japanese arrogance happened when he was first staying at Beomeosa Temple. Japanese tourists that were on a sightseeing trip visited Beomeosa Temple to see the fall leaves. While there, these tourists approached Soma and asked him about something. Initially, the tourists didn’t realize that Soma was a Japanese monk because he was wearing the traditional white robe of a native Korean monk. When Soma answered in fluent Japanese, the tourists were surprised. During their visit, Soma could sense the tourists arrogant gaze as they looked down on the Koreans at the temple and the monks.
Soma would write in a letter:
“It is shameful to see Japanese people living in Korea. Their understanding of Korea is entirely wrong. And those lacking a correct understanding of it display the attitude of conquerors. Korean people have to put up with it. Not everybody, I believe, will tolerate it.”
This initial experience was reinforced when Soma was out traveling on a cold winter day. He sought shelter at a local police station and started up a conversation with a Japanese police officer. When the Japanese police officer discovered that Soma was in fact a Japanese Buddhist monk, the police officer complained that there needed to be more Japanese monks in the village. That way, they could administer funeral ceremonies for the Japanese residents. Soma would later lament: “Japanese Buddhism is needed only for funerals!”
Even better, the same Japanese police officer told Soma that when a local troublemaker sought advice, he sent him to a Christian church since there was no Buddhist monk or temple nearby. This further saddened Soma, when he found out that the local troublemaker had converted and become a devout Christian. The officer would later admit that he himself was ignorant about Buddhism, but that he remembered that his mom would make him put his palms together to pray to the Buddha when he was small.
In contrast to these encounters with Japanese people, Soma often defended Korean Buddhism. One time, when a Korean female innkeeper asked him, “Japanese monks, I hear, are esteemed, aren’t they? There was a time when Korean monks’ social status was low beyond comparison.”
Soma would go on to question what it meant to be a Japanese Buddhist monk: “Is it true, as she said, that Japanese priests are socially higher than Korean monks? Is social status necessary for those who have renounced the world?”
Perhaps Soma’s response is a reflection of Hanam’s instruction “Do not seek fame.” Soma would continue, “Is it desirable for one who has renounced the world to have a social status? I myself am nothing more than an alms beggar.”
Soma’s encounters with both Japanese and Koreans allowed him to better understand and appreciate the broad misconceptions that Japanese people had towards Korean Buddhism and their monastics. However, through his writing, Soma was able to influence a number of Japanese Buddhist monks and intellectuals to modify their perceptions of Korean Buddhism.
Conclusion
In 1936, and after six years of traveling throughout the Korean Peninsula, Soma would return to Japan to live there as an unsui (itinerant monk). After practicing for a year at Eihei-ji Temple, and in 1938, Soma would continue his meditation retreat at the small Soto temple Daijo-ji Temple in Kanazawa.
Having lived and practiced in Korean temples for such a long period of time, Soma would use these practices even in the Japanese style. In a letter written in March, 1938, Soma would write about the meditation practices and retreat management at Daijo-ji Temple that they were “quite similar to those of the Korean [temples].”
Soma would follow this letter with another written in December, 1938 about the volatile global situation and how it related to imperial Japan and the rest of the global community. With the Second Sino-Japanese War starting in 1937, Soma had friends that had been drafted and killed in this war. As a result, Soma would become quite defensive of his itinerant lifestyle, when he wrote:
“Just because it is the time of total mobilization for all people in Japan does not mean that one cannot do any service for the nation unless one puts on a military uniform. It is also important to protect the home front without guns, and it will be honorable for an unsui [itinerant monk] like me to exert oneself through practice in a monastery.
“With that in mind, I have practiced so far in good health. However, at the time of state emergency, it is wasteful to only practice meditation. Furthermore, I have been able to practice for a long time; this is not the first time that I started practice. I would like to return to Korea as soon as possible and do my best at a given place. I think that returning would be the best thing to do, and it would not run counter to the unsui practice. Thus, I feel like finishing practice in Japan and traveling to the temples that I had wanted to visit. Now, I have finally arrived in Tokyo. My return to Korea this time will be a real one. For so many years in the past, I have been given so much support in my studies. This time, I will devote my entire energy for the benefit of Korea.”
These comments make it clear that Soma understood and appreciated what the Japanese were doing to Koreans during Japanese Colonial Rule (1910-1945). He also understood what would happen as a result of Japan’s efforts during the war against China and the West. And yet, Soma’s descriptions of the monastic experience, which dominates his writing, aren’t occupied with a sense of the colonizer and the colonized. Instead, the journal for which Soma wrote was probably more interested in the moving representation of Korean Buddhism. As a result, readers could enjoy these stories without requiring any of the ideological rhetoric found in Japanese colonialism.
Thus, it goes without saying that Soma’s experience in Korea provided a unique perspective on Korean Buddhism through the lens of a Japanese monk. And the relationship that Soma formed with temples and their monastics were free of any political connections to Japanese colonialism. Instead, they were replaced by Soma’s identity as an itinerant monk. This identity freed Soma of the trappings found within Japanese colonialism and Japanese Buddhism. They were replaced by a clear view and representation of what Korean Buddhism was at this time from the perspective of an outsider looking in. This is highly important for a time when both Koreans and Korean Buddhism were suffering.
Recent comments