

Temple History
Buseoksa Temple, which means “Floating Rock Temple” in English, is located in Yeongju, Gyeongsangbuk-do. It’s also one of Korea’s most famous temples. Buseoksa Temple is home to five National Treasures and five additional Korean Treasures. As for the temple itself, Buseoksa Temple was first established by the famed monk, Uisang-daesa (625-702 A.D.), under the royal decree of King Munmu of Silla (r. 661-681 A.D.), in 676 A.D. There were a few reasons for the Silla Kingdom’s royal support in establishing Buseoksa Temple. The first is that it would help promote the ideas behind Hwaeom (Huayan) Buddhism throughout the Korean Peninsula, and Buseoksa Temple would also act as the base to help spread the message of Hwaeom Buddhism.
Interestingly, after Uisang-daesa found the site to build Buseoksa Temple, about five hundred non-believers attempted to prevent the famed monk from building the new temple. During the establishment of Buseoksa Temple, the political climate was extremely unstable and tenuous after the unification of the Korean Peninsula by the Silla Kingdom (57 B.C. – 935 A.D.) after defeating the Baekje (18 B.C. – 660 A.D.) and Goguryeo (37 B.C. – 668 A.D.) Kingdoms. In fact, Buseoksa Temple was built near a strategic pass, which was the boundary between the Goguryeo and Silla Kingdoms. So with the building of Buseoksa Temple, The Silla Kingdom (57 B.C. – 935 A.D.) possessed a significant position on the peninsula that would allow for greater administration and management. And with Hwaeom Buddhism’s focus on the principles of unity and harmony, it was hoped that Buseoksa Temple, in part, would help quell some of the social unrest at this time in Korean history.
When Buseoksa Temple was first built, Uisang-daesa held assemblies at the temple for forty days and gave talks on the Flower Garland Sutra, or the “Hwaeom-gyeong – 화엄경” in Korean. Uisang-daesa preached and taught Hwaeom Buddhism from thatched houses and grottoes around the Taebaek and Sobaek mountain ranges. This allowed him to spread Hwaeom Buddhism throughout the region. In total, Uisang-daesa would have three thousand disciples who were taught directly from Buseoksa Temple.
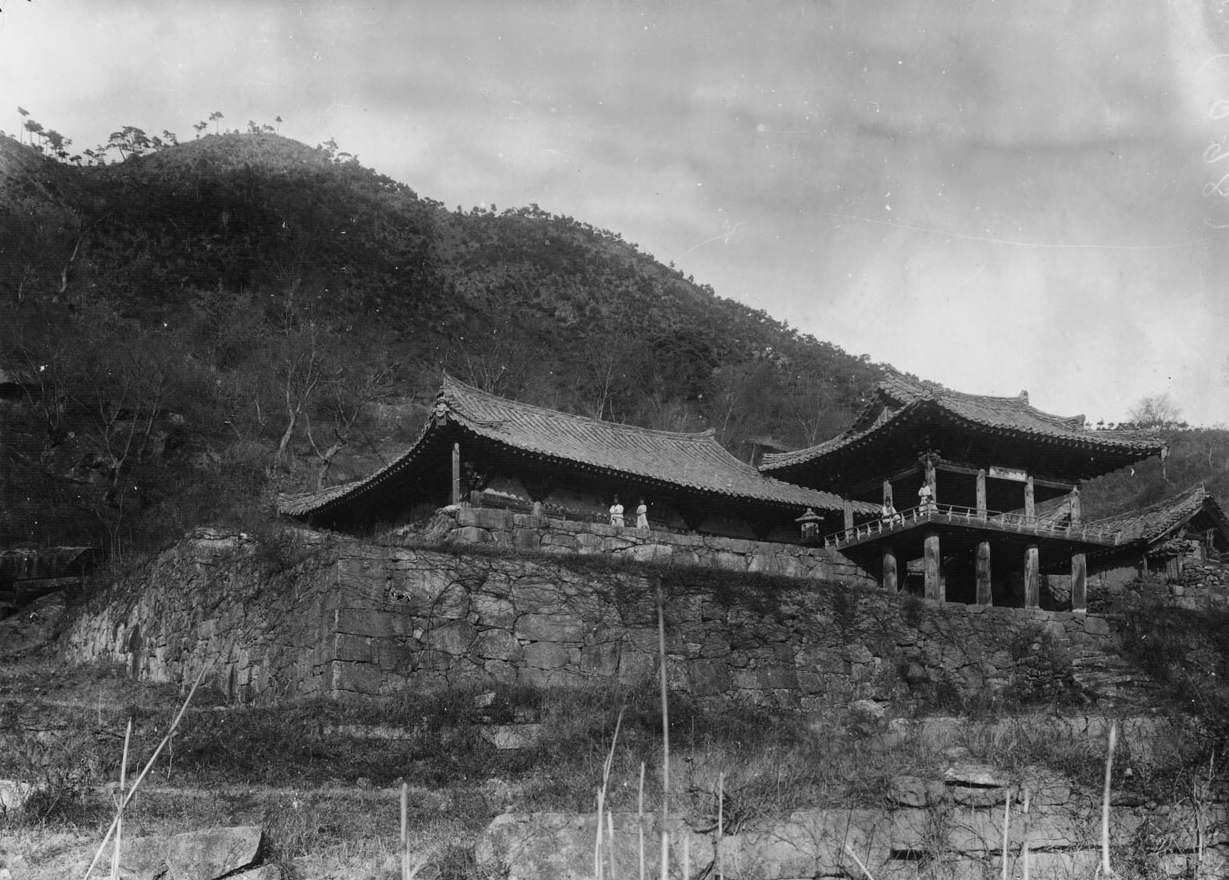
The current configuration of the temple, which includes the huge stone stairs, was most likely completed after Uisang-daesa’s lifetime. The most reliable evidence points to the time of King Gyeongmun of Silla’s reign from 861 – 875 A.D. And once again, it was completed with significant Silla state support.
During the Goryeo Dynasty (918-1392), Buseoksa Temple was known as either Seondalsa Temple (a variation of Buseoksa) or Heunggyosa Temple (a reference to the revival of the Hwaeom Sect). Then, under the supervision of the monk Wonyung-guksa (964-1053), Buseoksa Temple reached it artistic and architectural zenith. An imprinting of the Tripitaka Korean blocks took place at this time. And the partial remains of these imprinting blocks remain to this day. Also, Buseoksa Temple at this time underwent significant expansion.
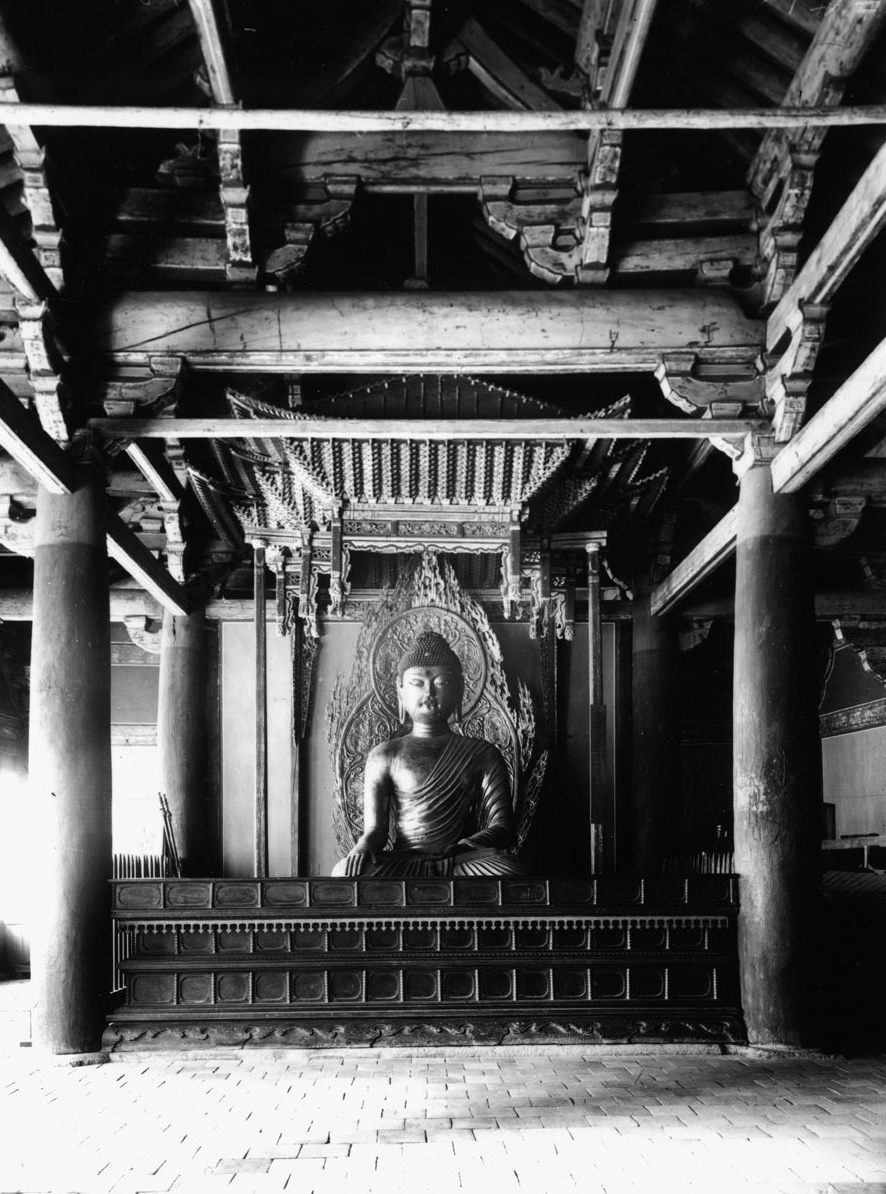
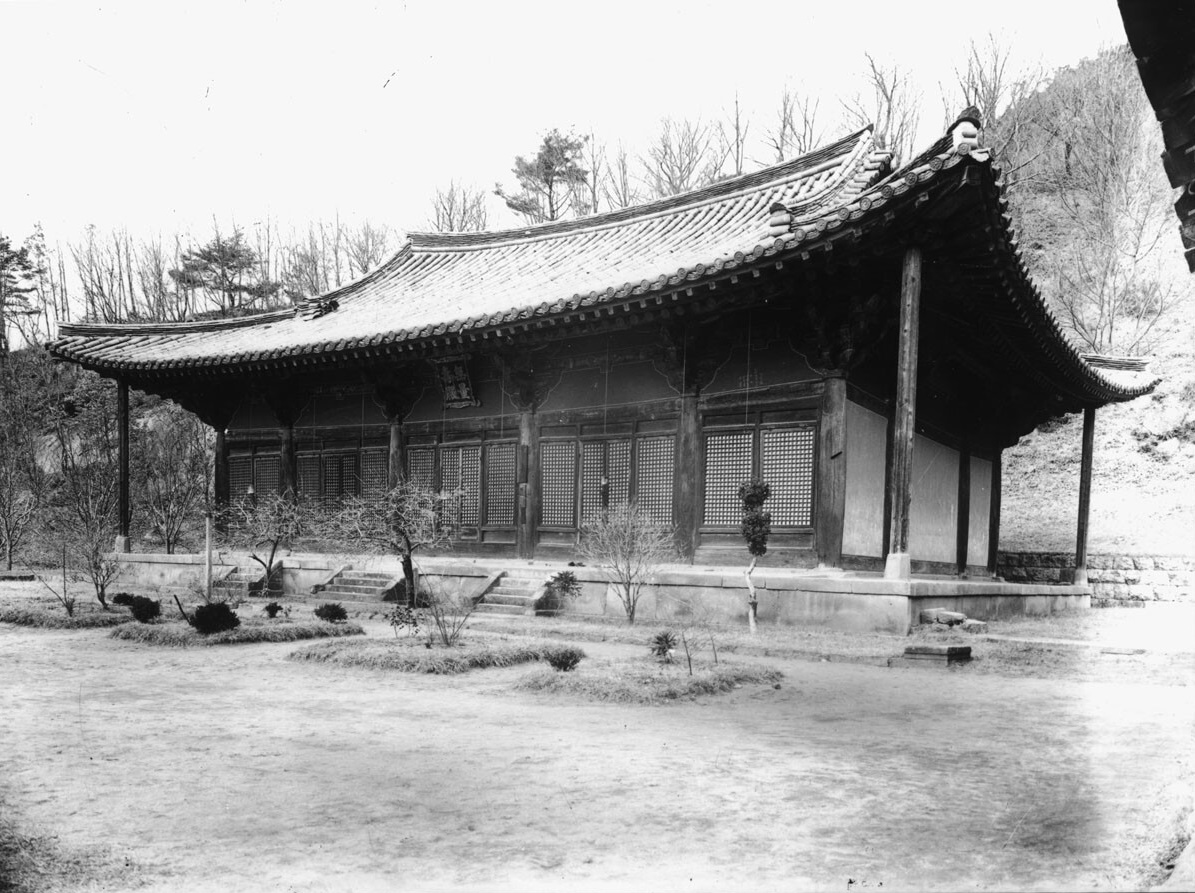
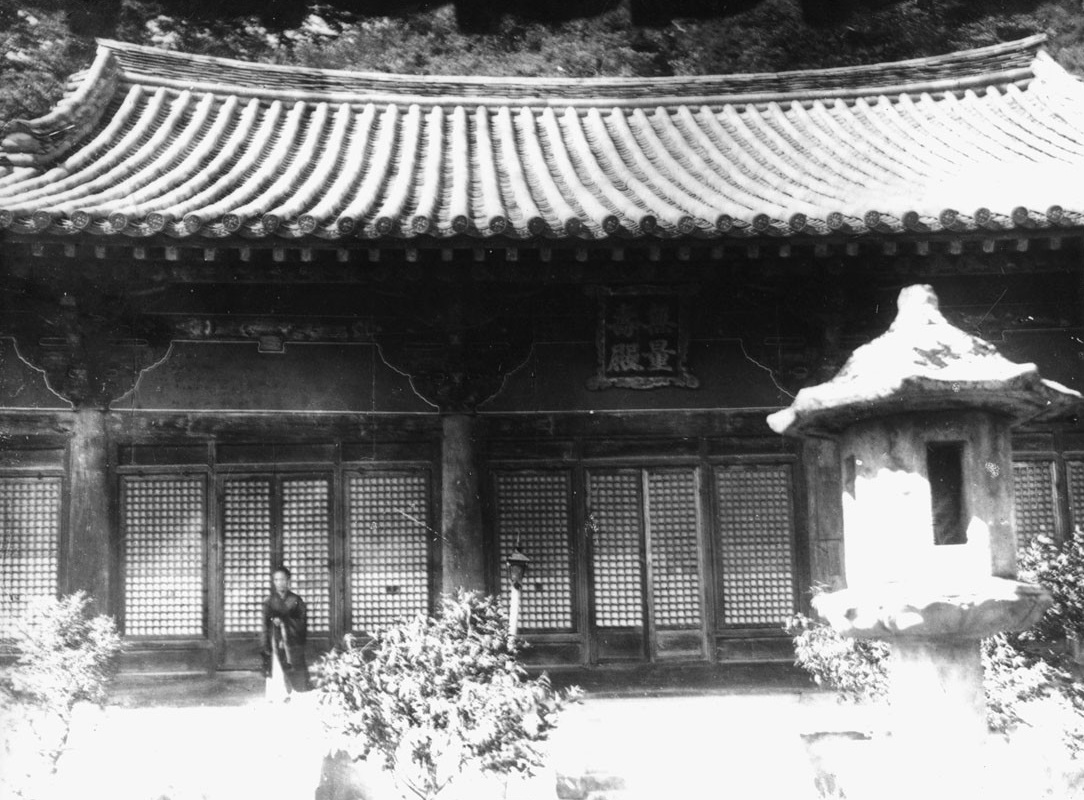
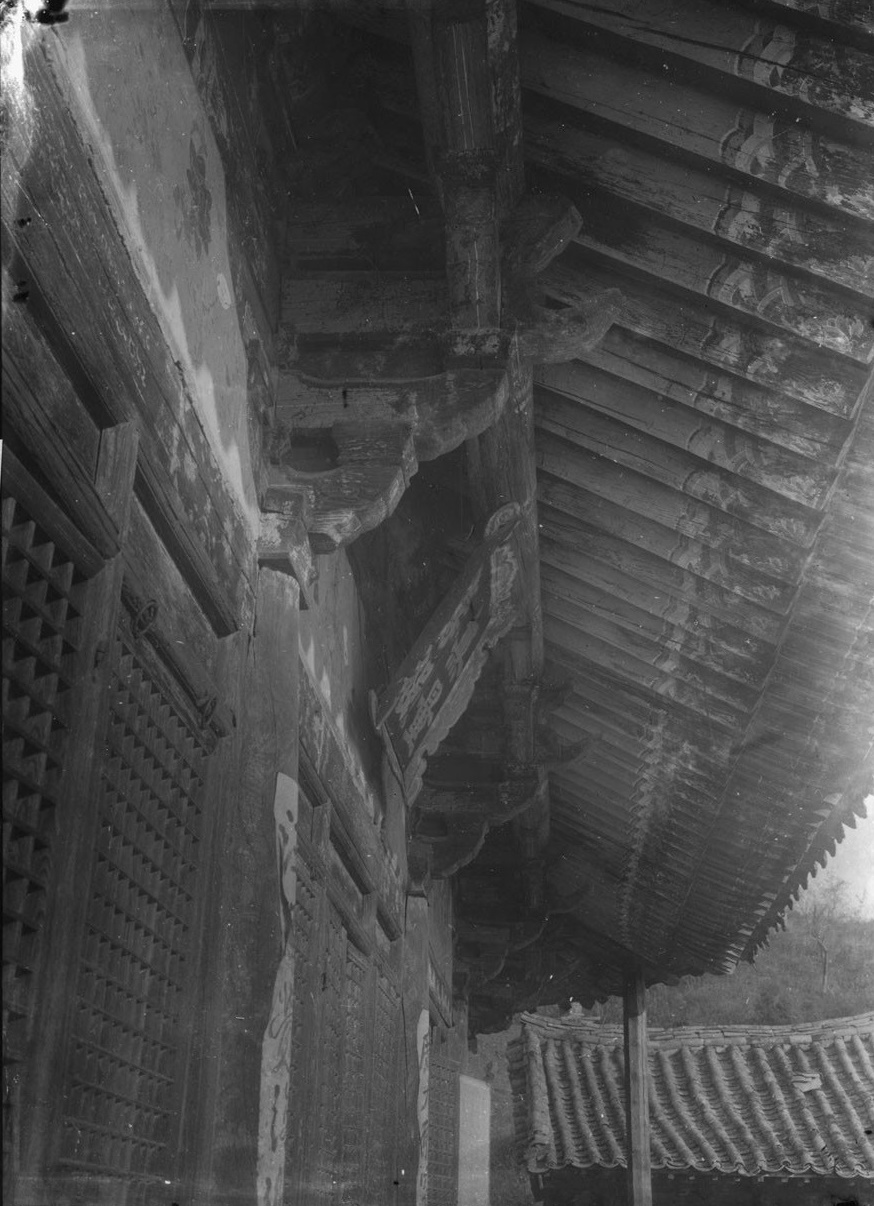
In fact, records state that the Muryangsu-jeon Hall and the Josa-dang Hall were reconstructed around 1377. Furthermore, while it’s probable that the Josa-dang Hall was repaired in 1377, it’s unlikely that the Muryangsu-jeon Hall was based on its architectural style. Instead, it’s more likely that the Muryangsu-jeon Hall was rebuilt about one hundred and fifty years earlier, which makes it an early 13th century building rather than a late 14th century structure. It would seem that the records confused reconstruction with repair.
The repair and reconstruction of Buseoksa Temple continued during the Joseon Dynasty (1392-1910). This included the large rebuilding and reconstruction conducted by Samyeong-daesa (1544-1610) in 1580. As well as the restoration of several shrine halls in 1748 after a destructive fire in 1746.
During the Japanese Colonization of Korea from 1910-1945, both the Muryangsu-jeon Hall and the Josa-dang Hall were disassembled and reassembled in 1916. And after Korean independence, these two structures underwent further repair in 1967. Remnants of twin pagodas at the old temple site were used to build a pair of pagodas to the left and right of the Beomjong-gak Pavilion. Also, the Jain-dang Hall was built at this time up near the Josa-dang Hall; and both the Iljumun Gate and the Cheonwangmun Gate started to be built in 1977 and completed in 1980.
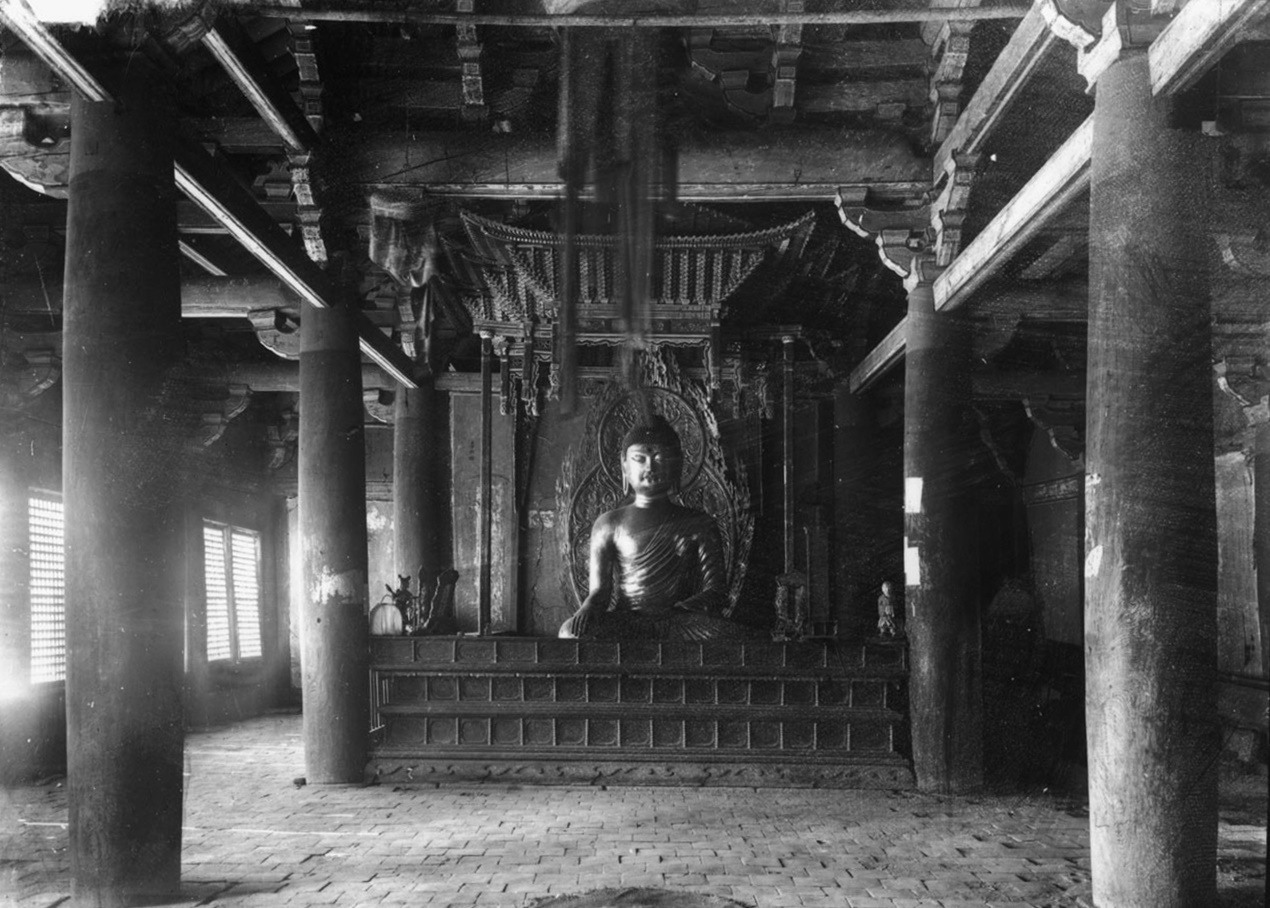
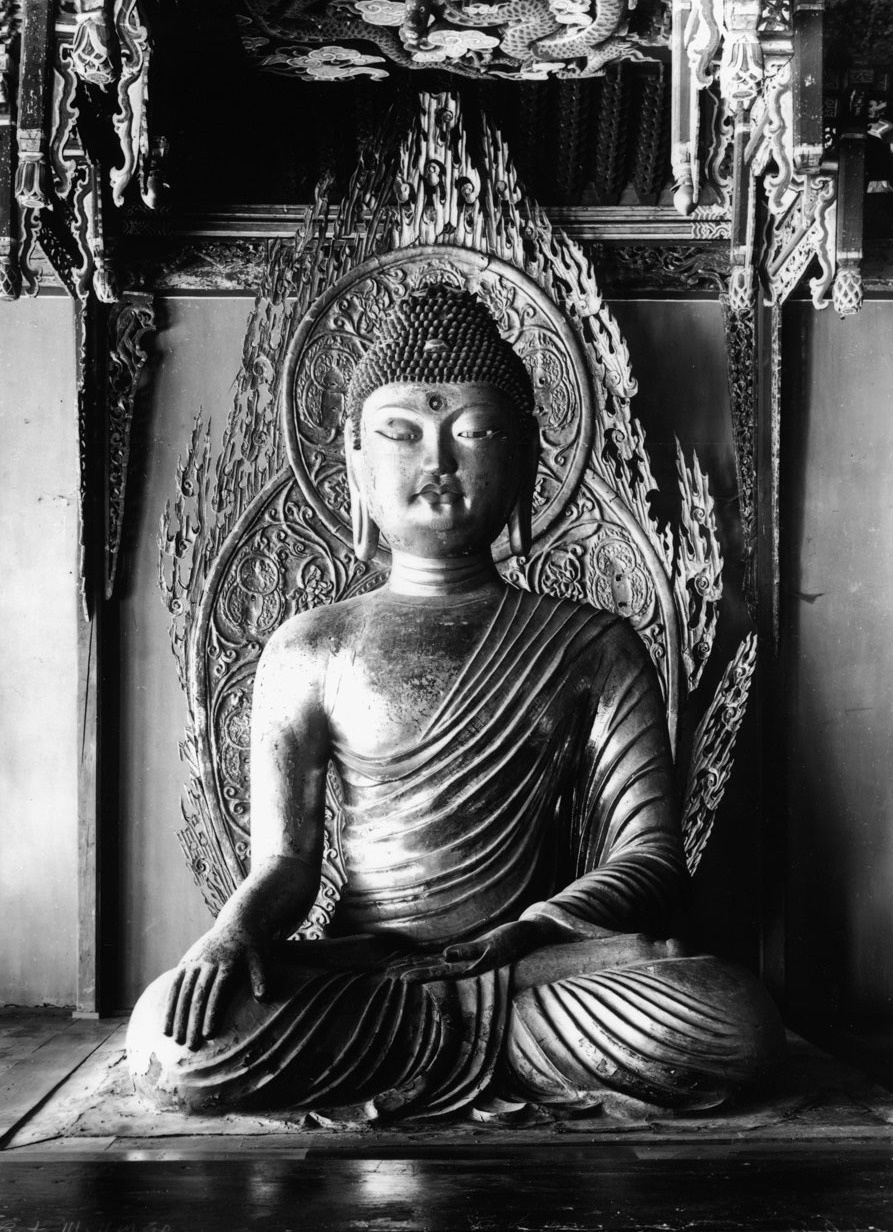
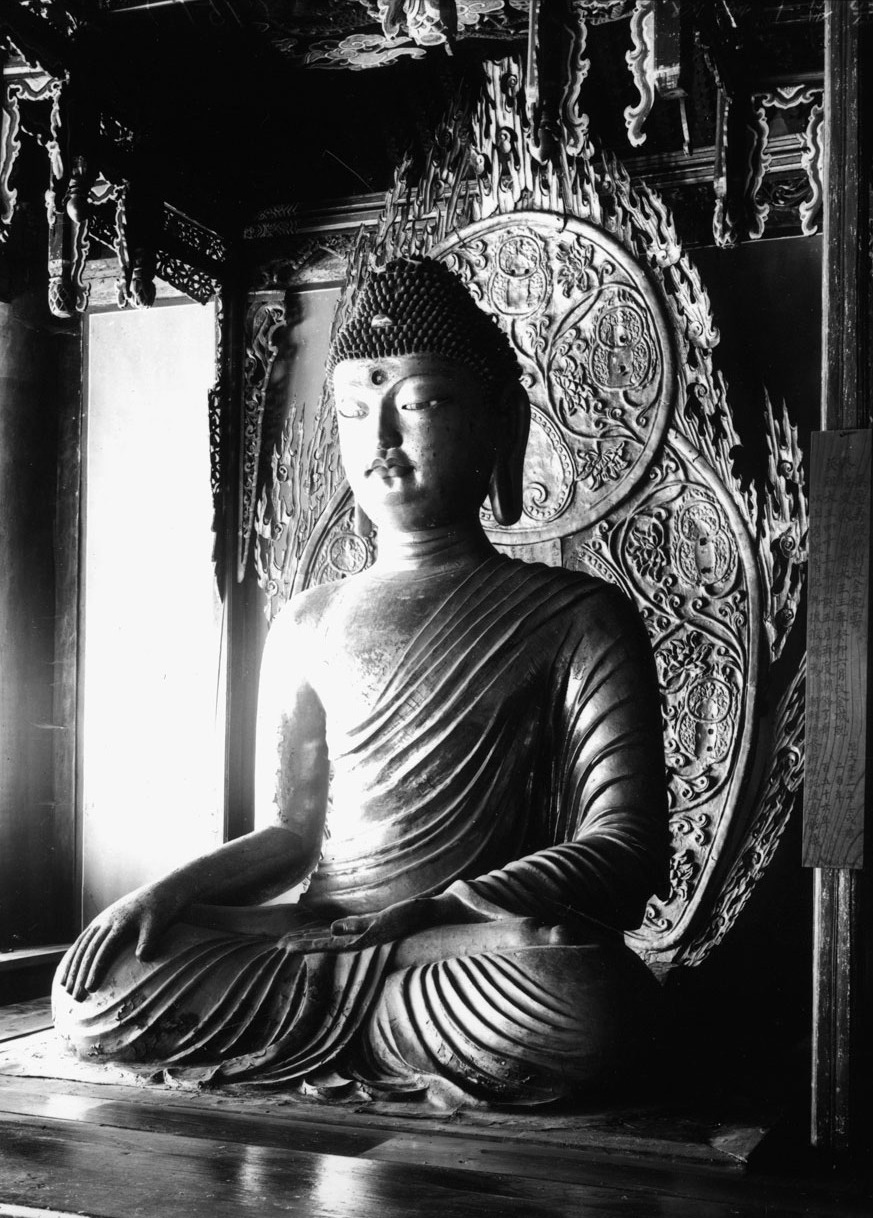
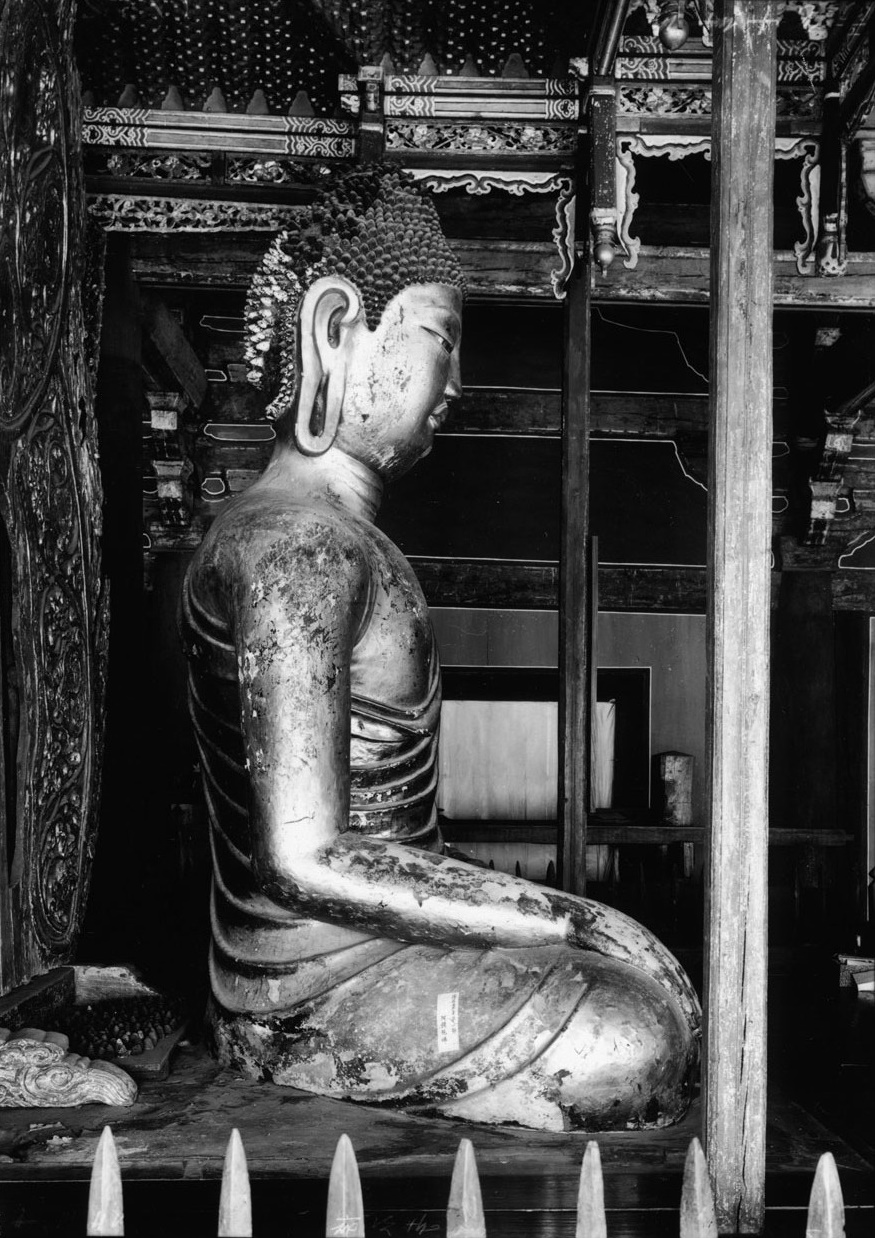
Colonial Era Photography
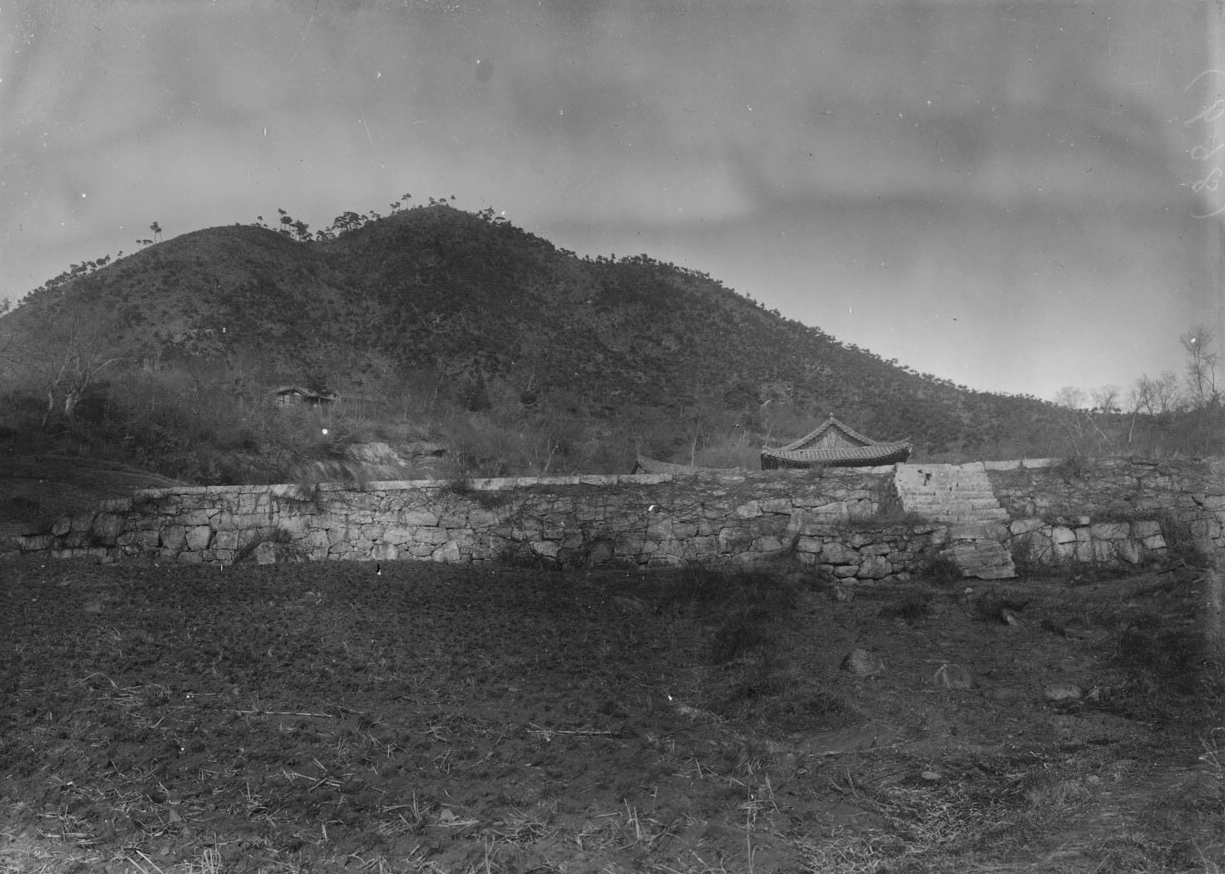
It should be noted that one of the reasons that the Japanese took so many pictures of Korean Buddhist temples during Japanese Colonial Rule (1910-1945) was to provide images for tourism and illustrations in guidebooks, postcards, and photo albums for Japanese consumption. They would then juxtapose these images of “old Korea” with “now” images of Korea. The former category identified the old Korea with old customs and traditions through grainy black-and-white photos.
These “old Korea” images were then contrasted with “new” Korea images featuring recently constructed modern colonial structures built by the Japanese. This was especially true for archaeological or temple work that contrasted the dilapidated former structures with the recently renovated or rebuilt Japanese efforts on the old Korean structures contrasting Japan’s efforts with the way that Korea had long neglected their most treasured of structures and/or sites.
This visual methodology was a tried and true method of contrasting the old (bad) with the new (good). All of this was done to show the success of Japan’s “civilizing mission” on the rest of the world and especially on the Korean Peninsula. Furthering this visual propaganda was supplemental material that explained the inseparable nature found between Koreans and the Japanese from the beginning of time.
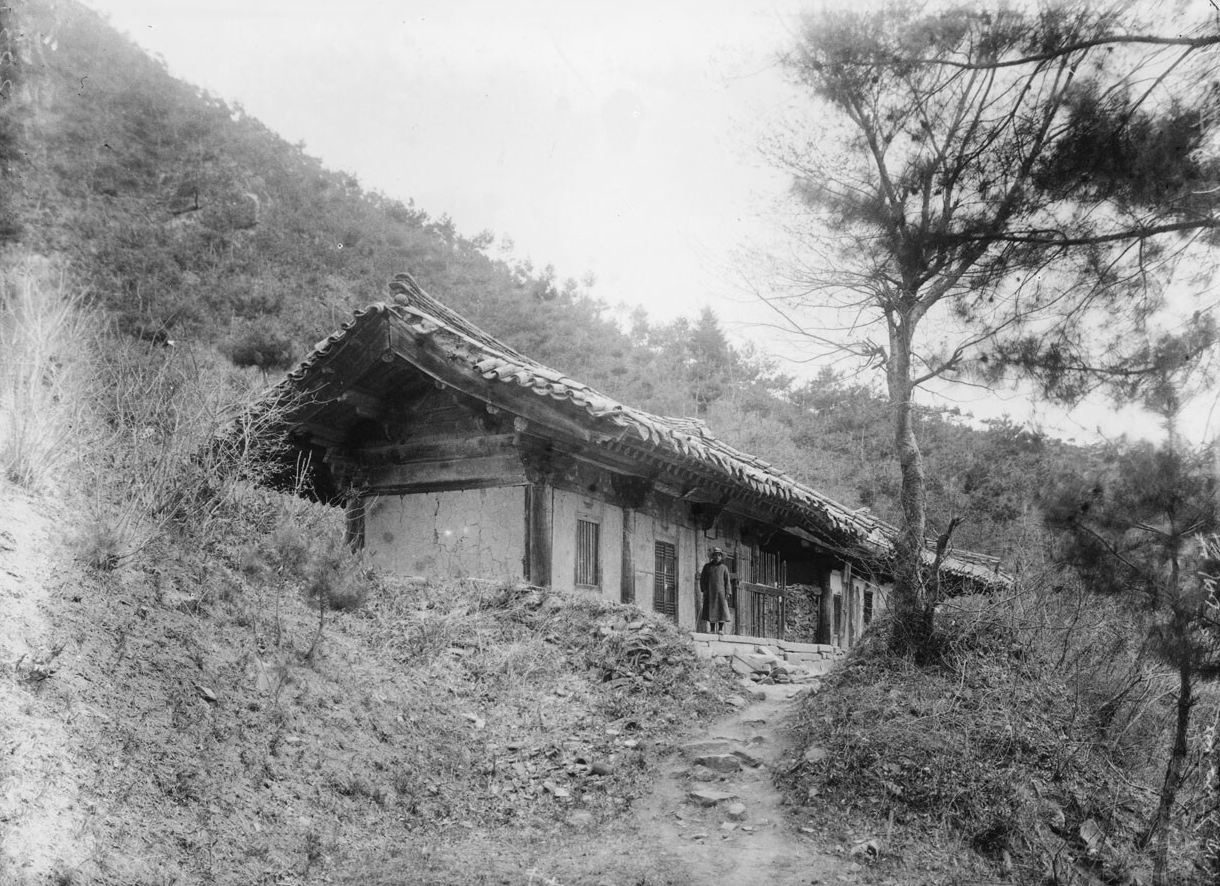
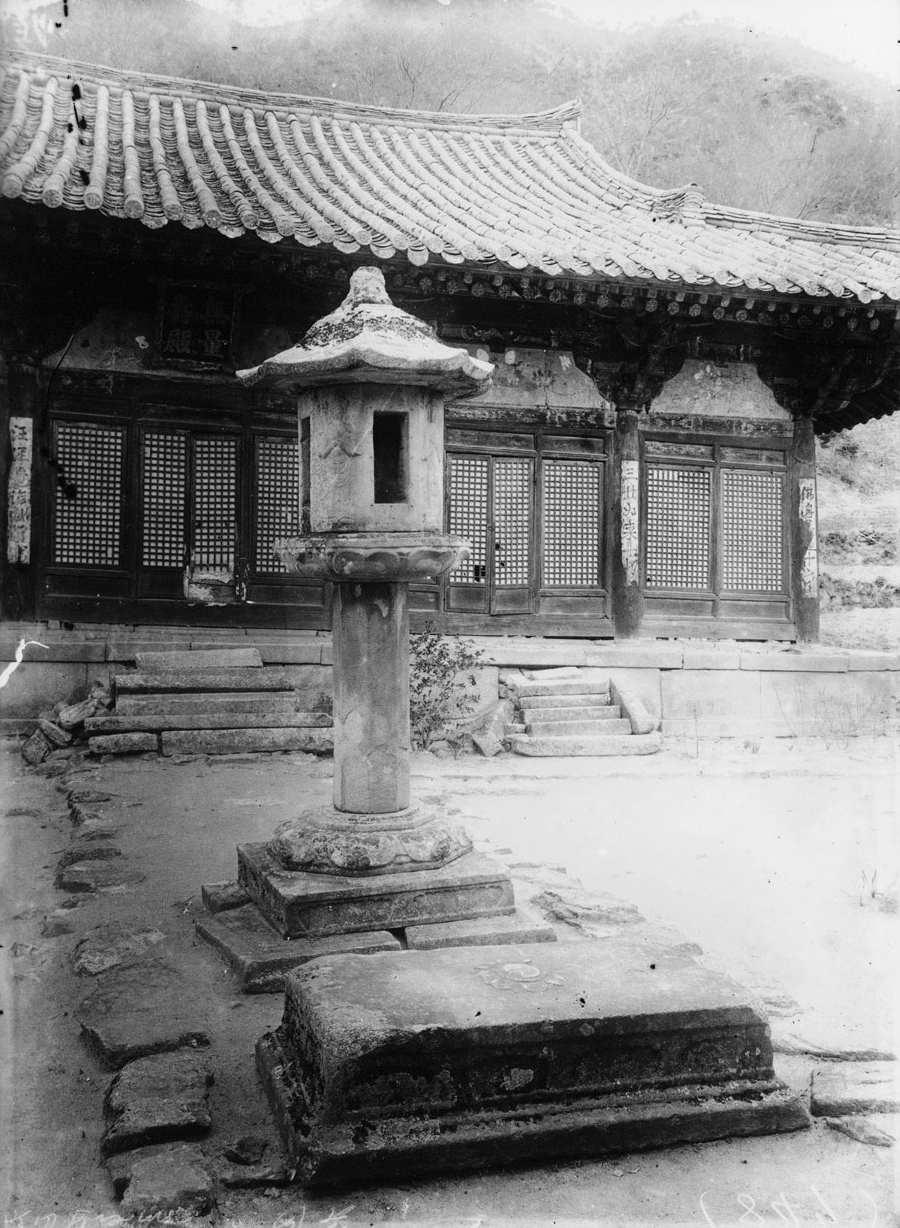
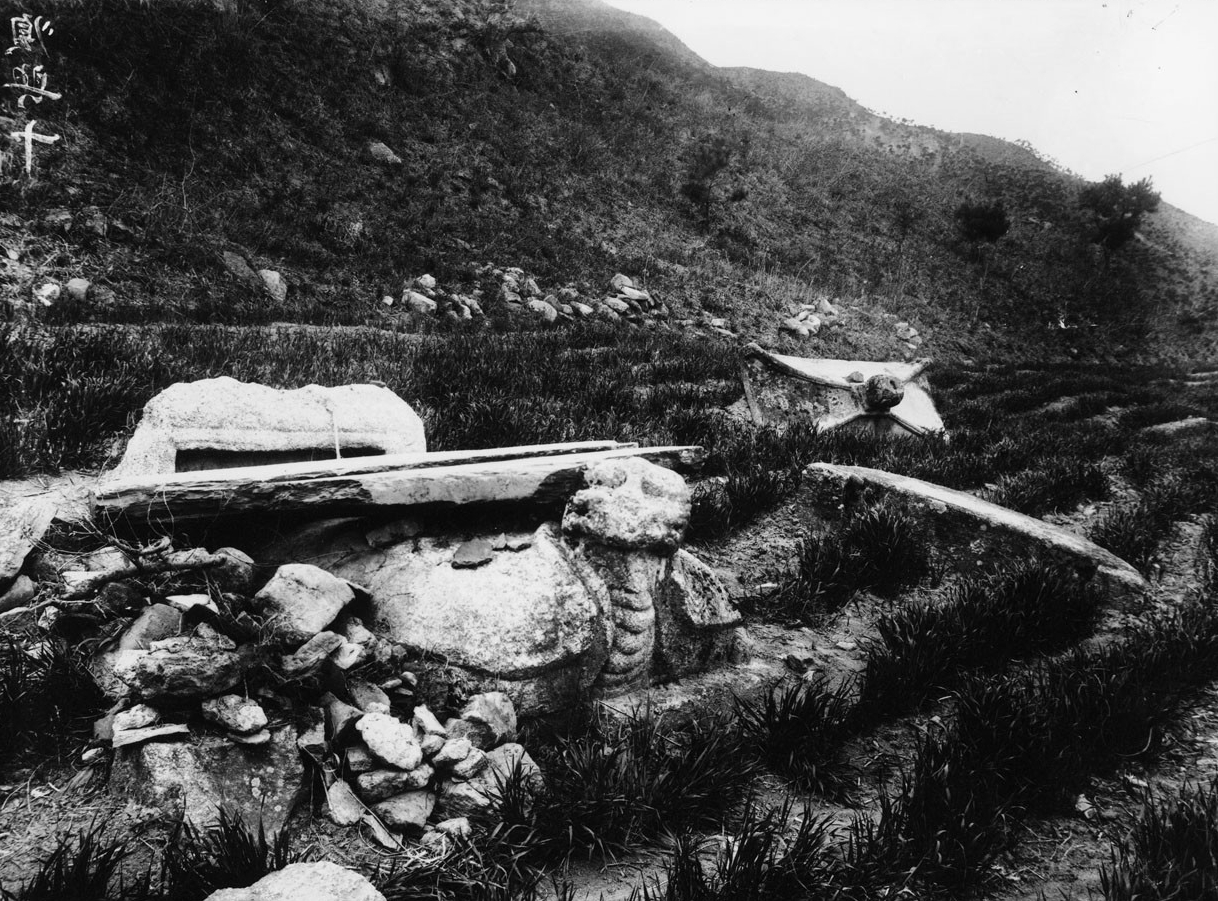
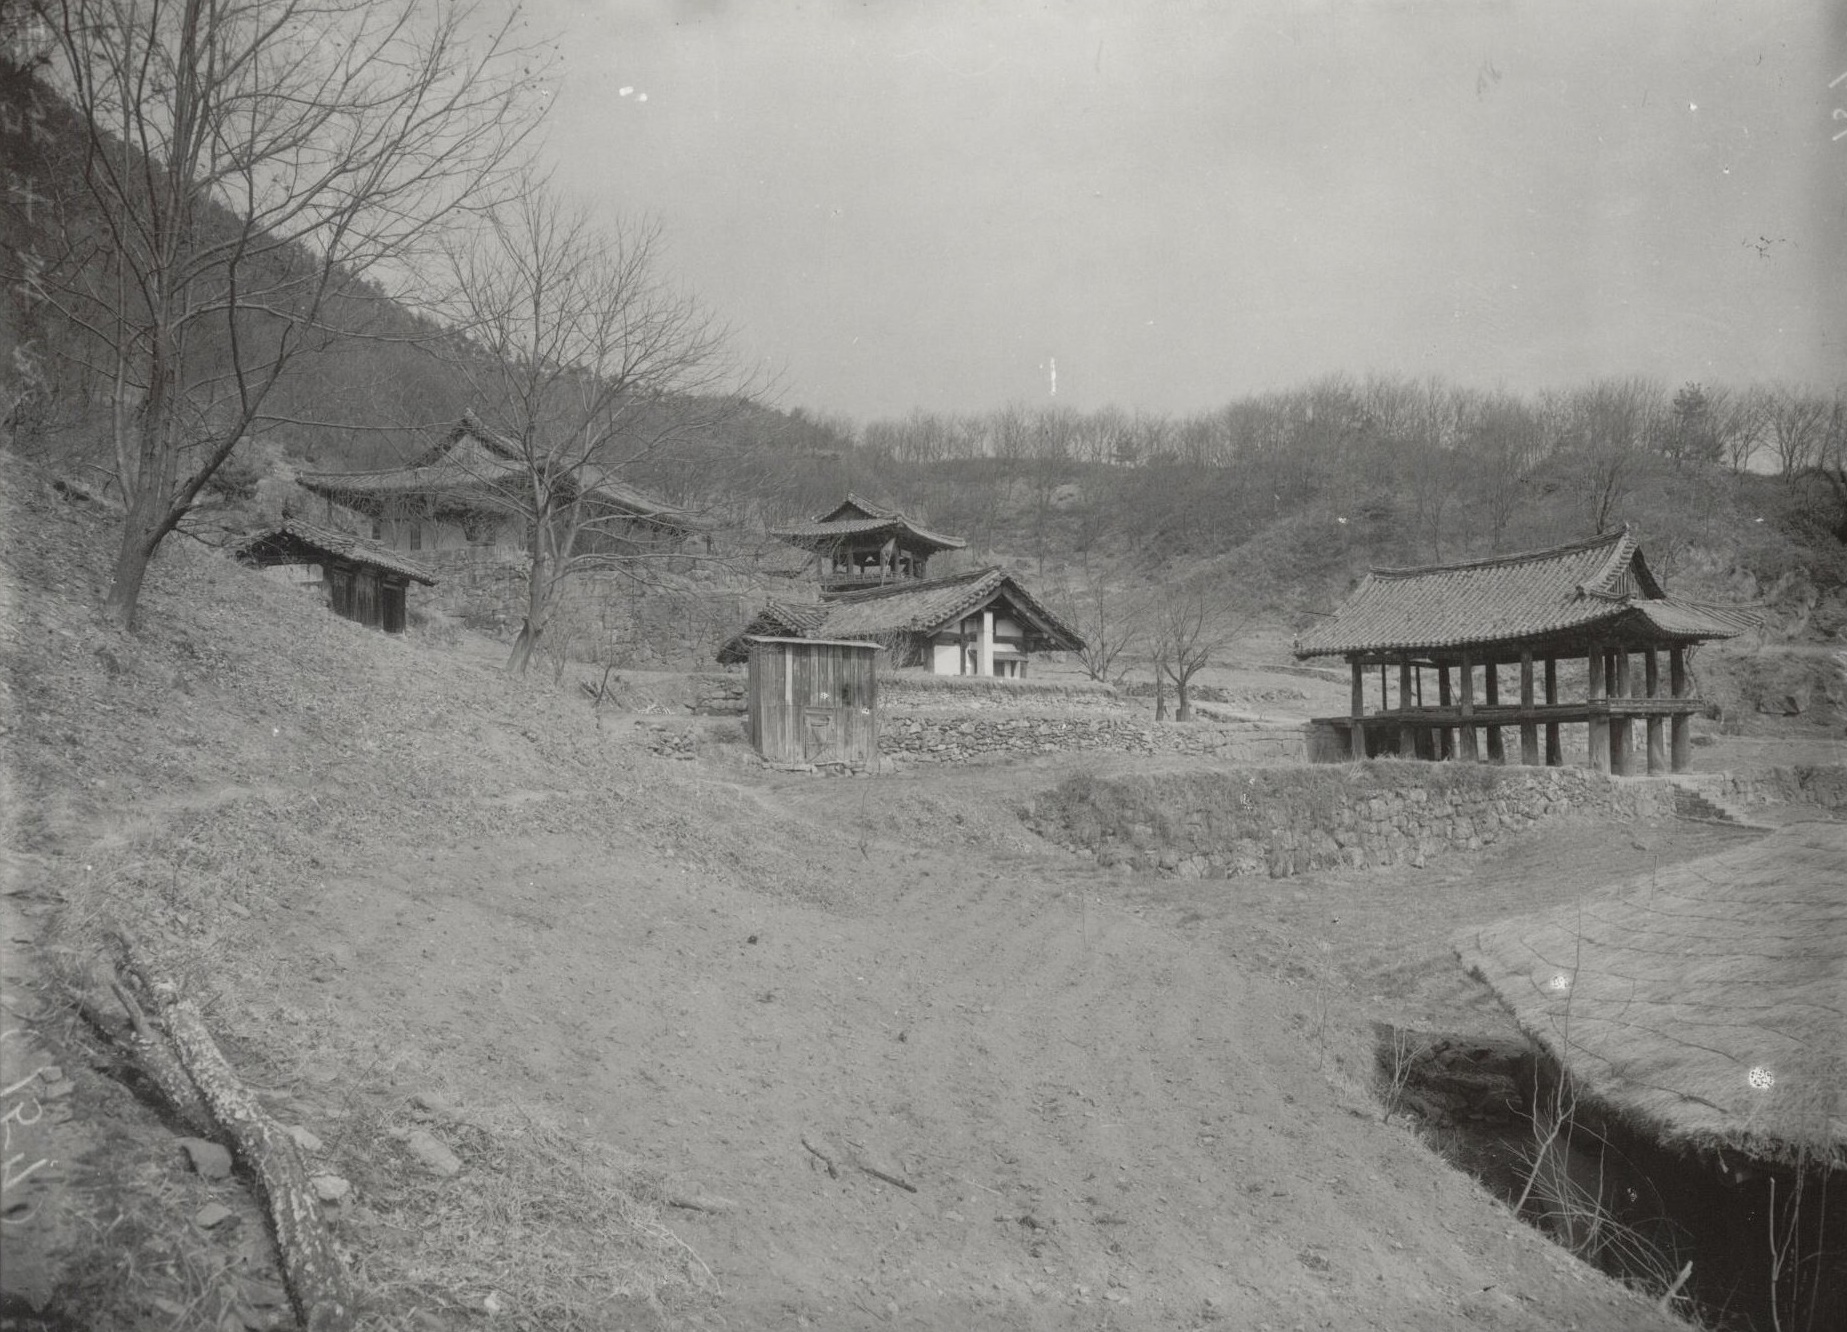
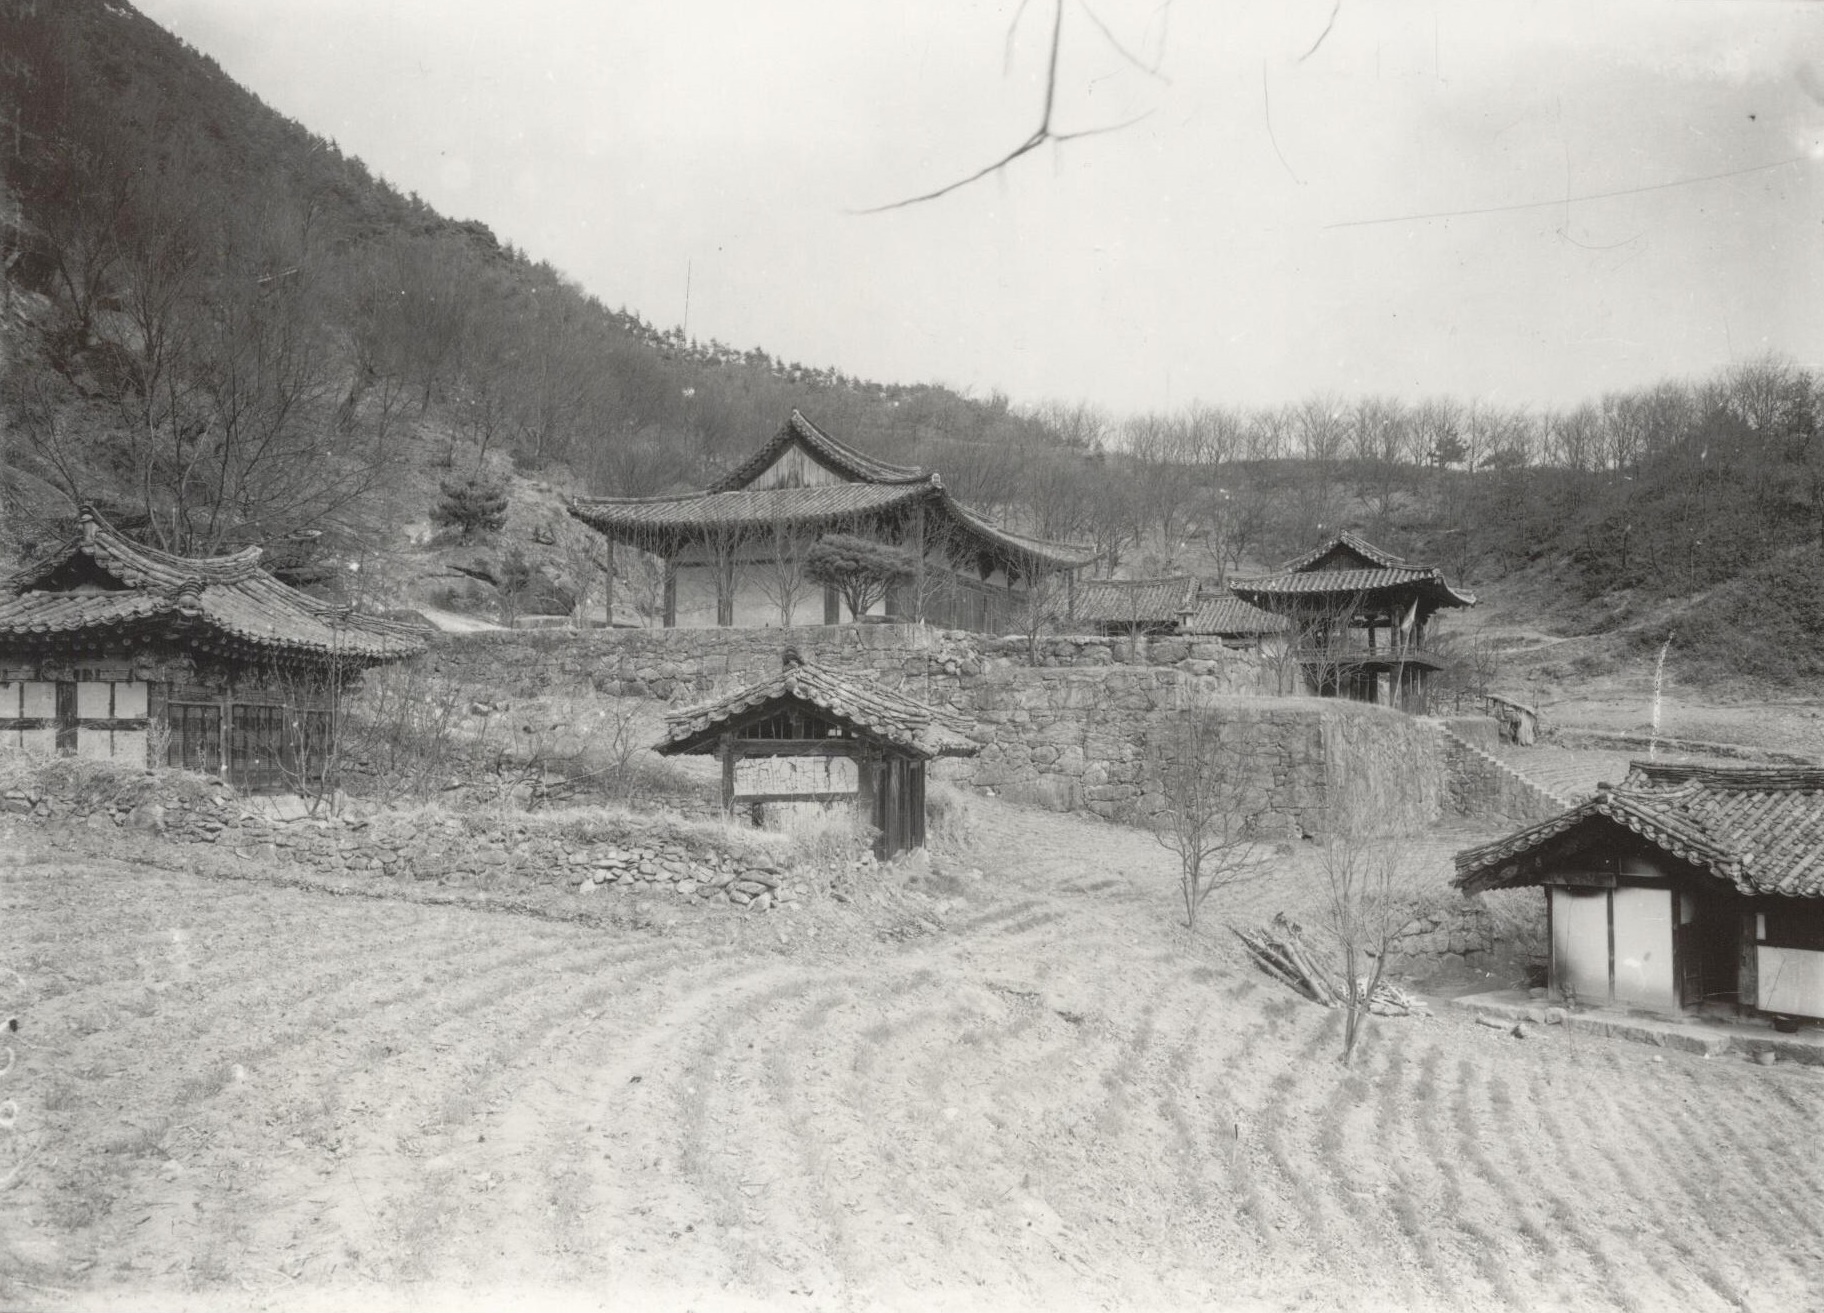
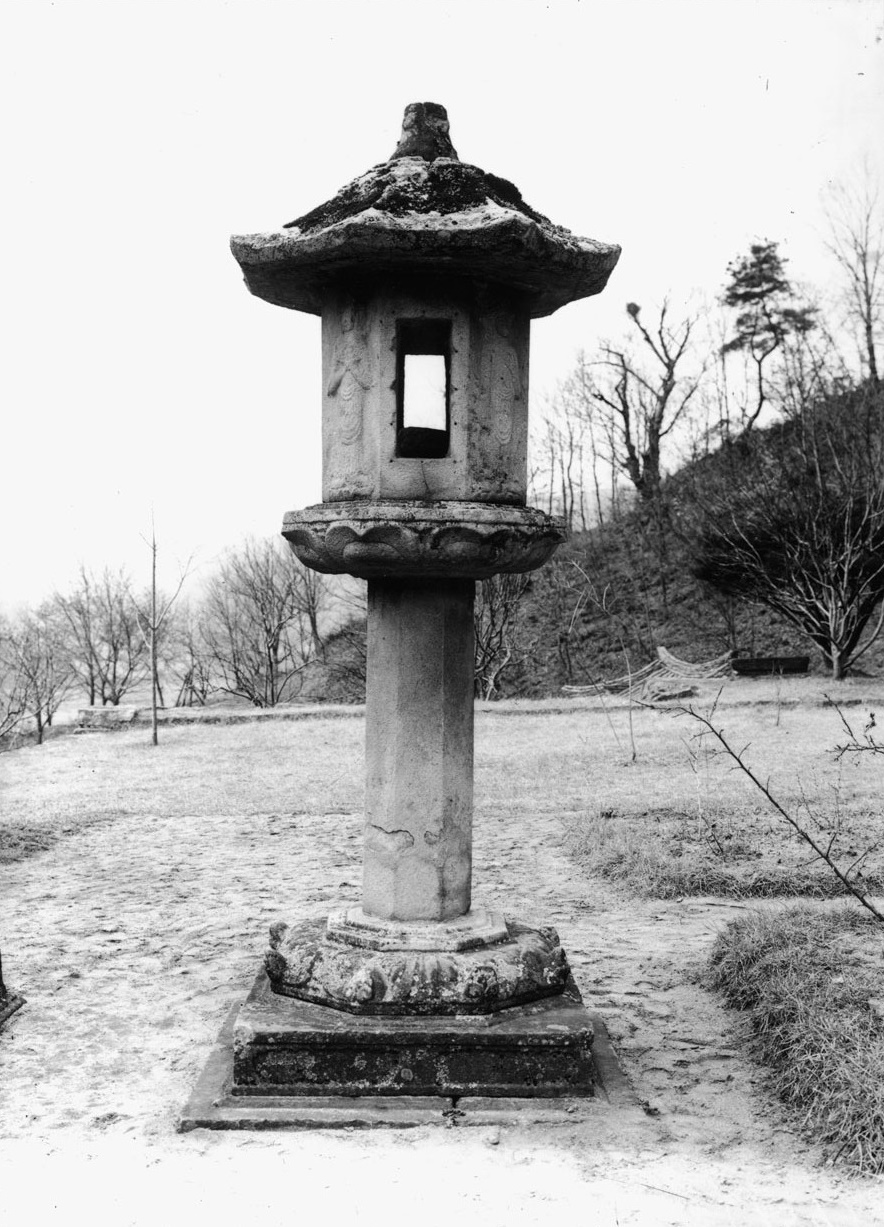
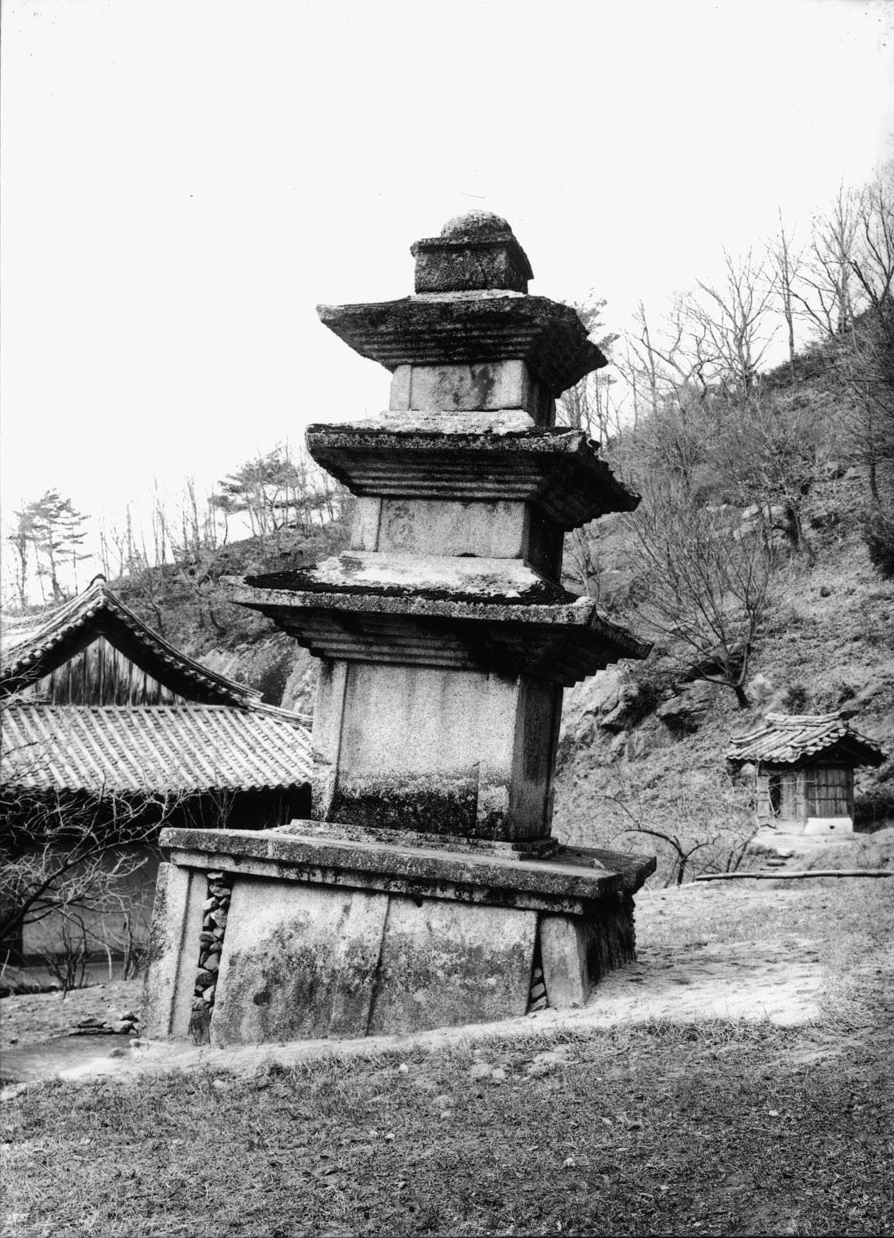
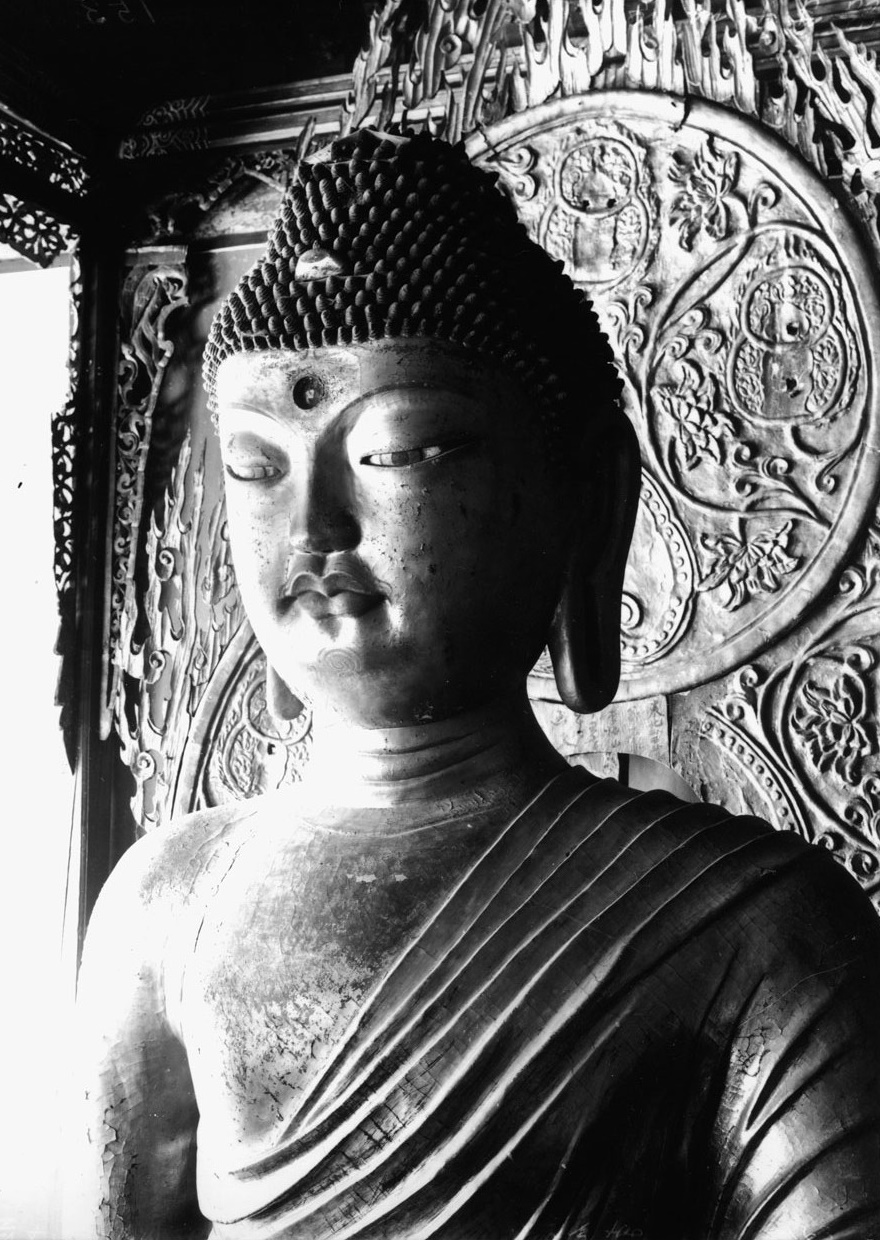
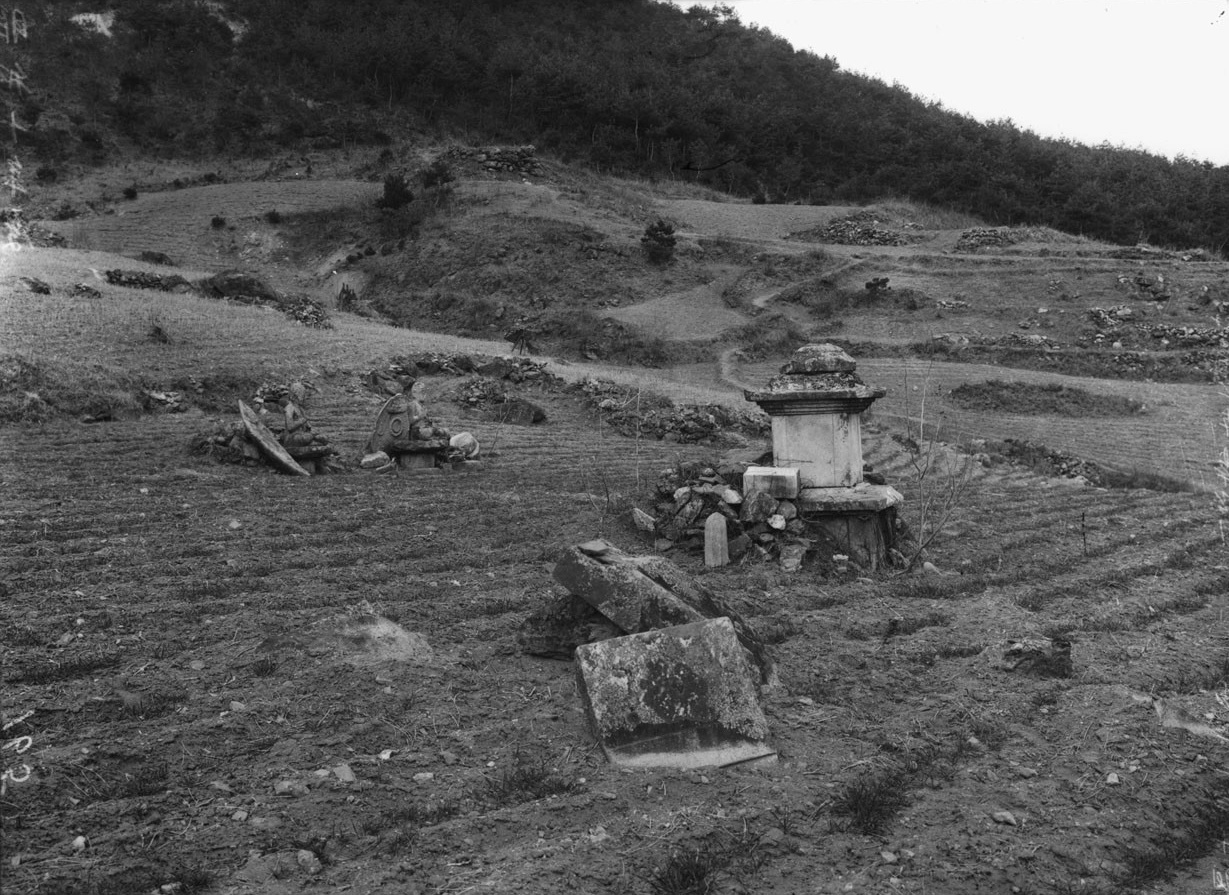
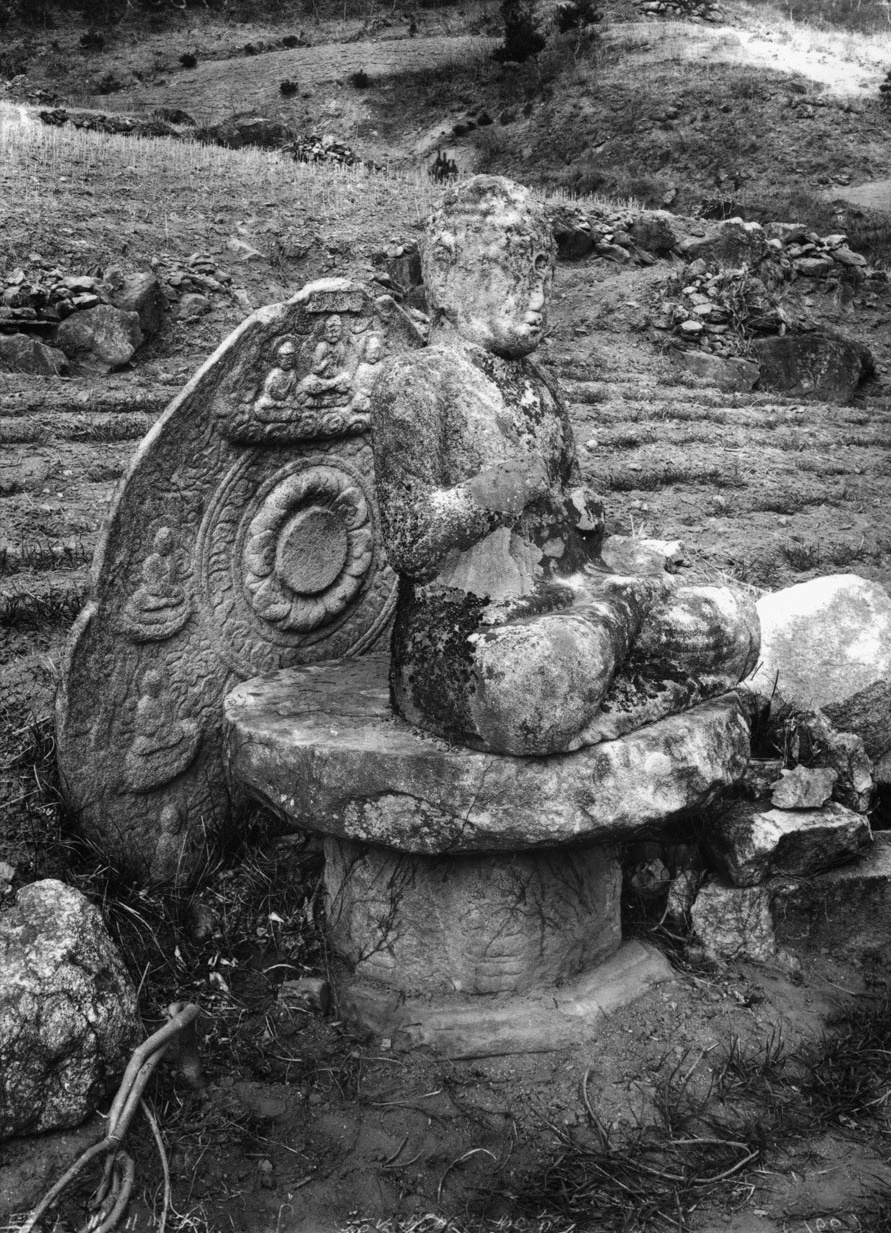
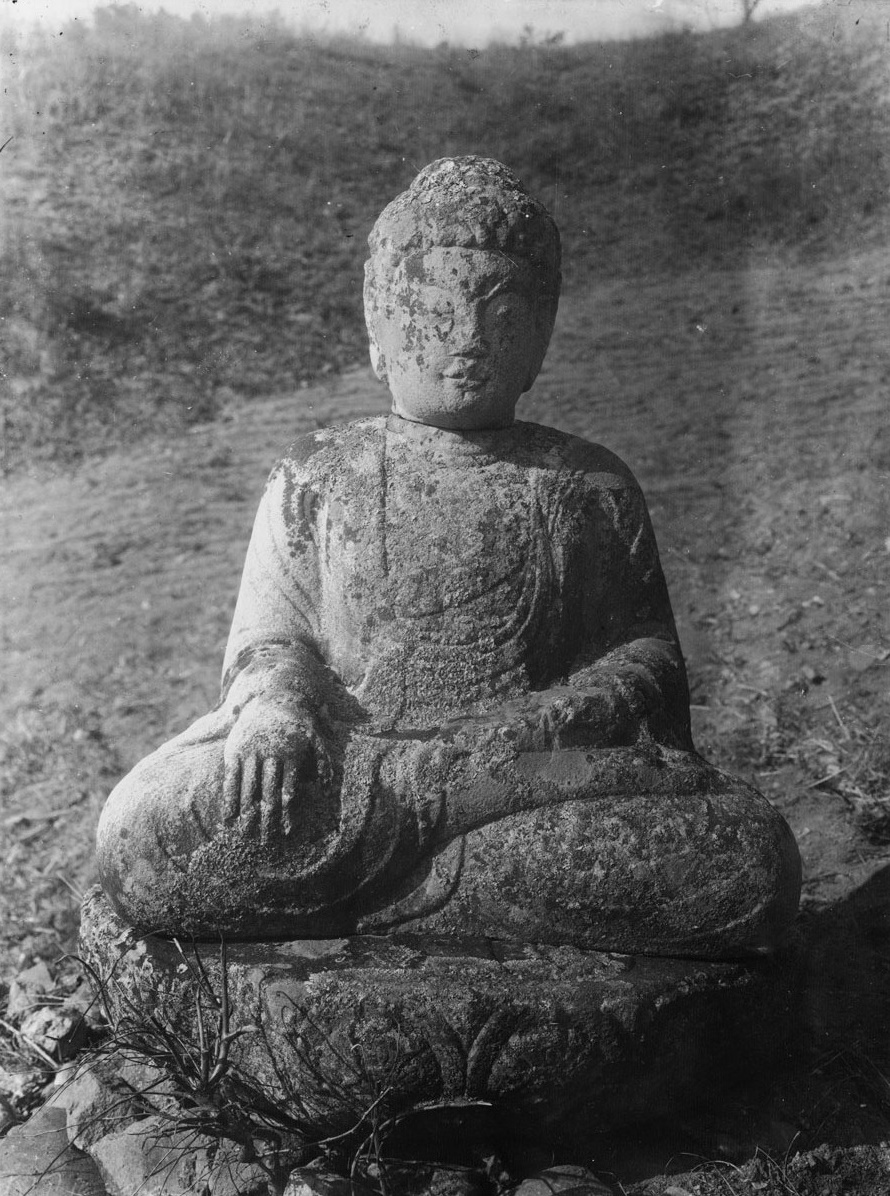
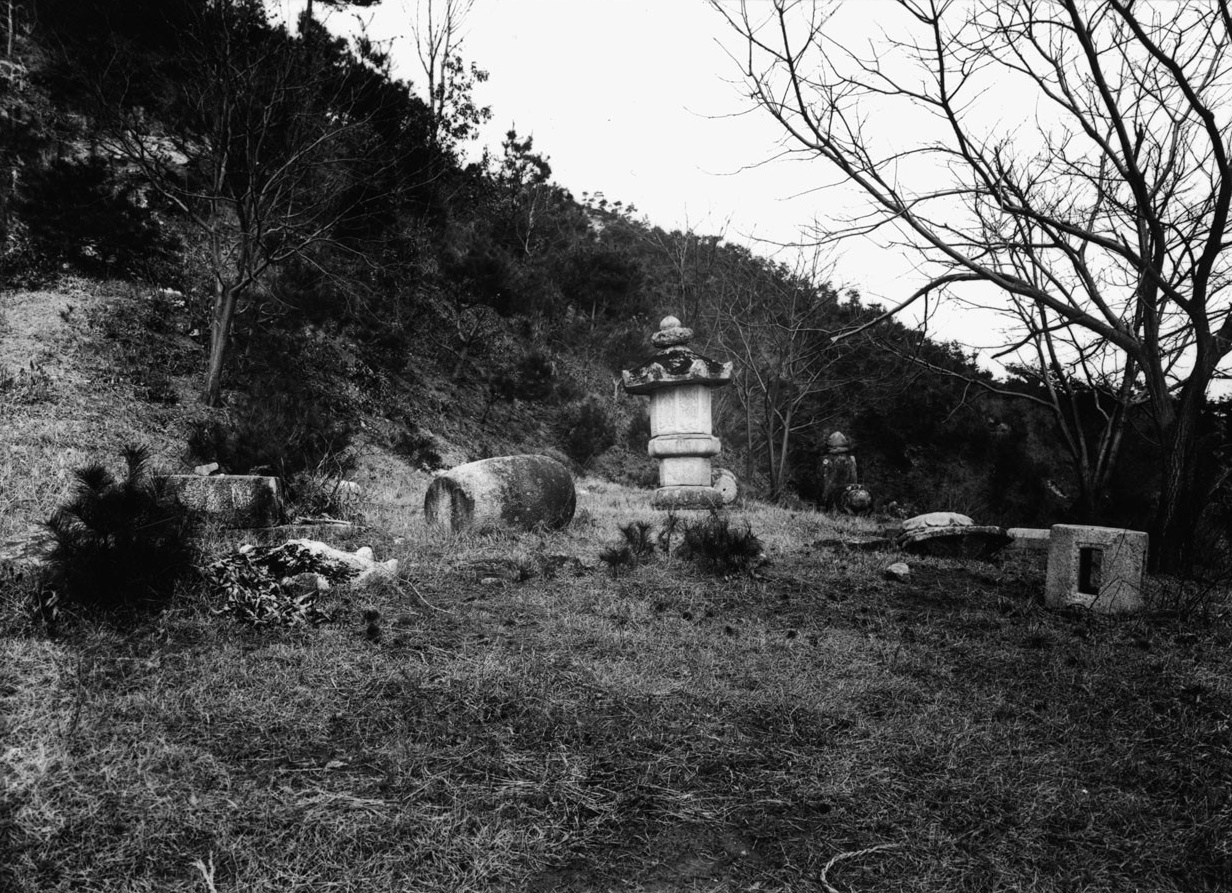
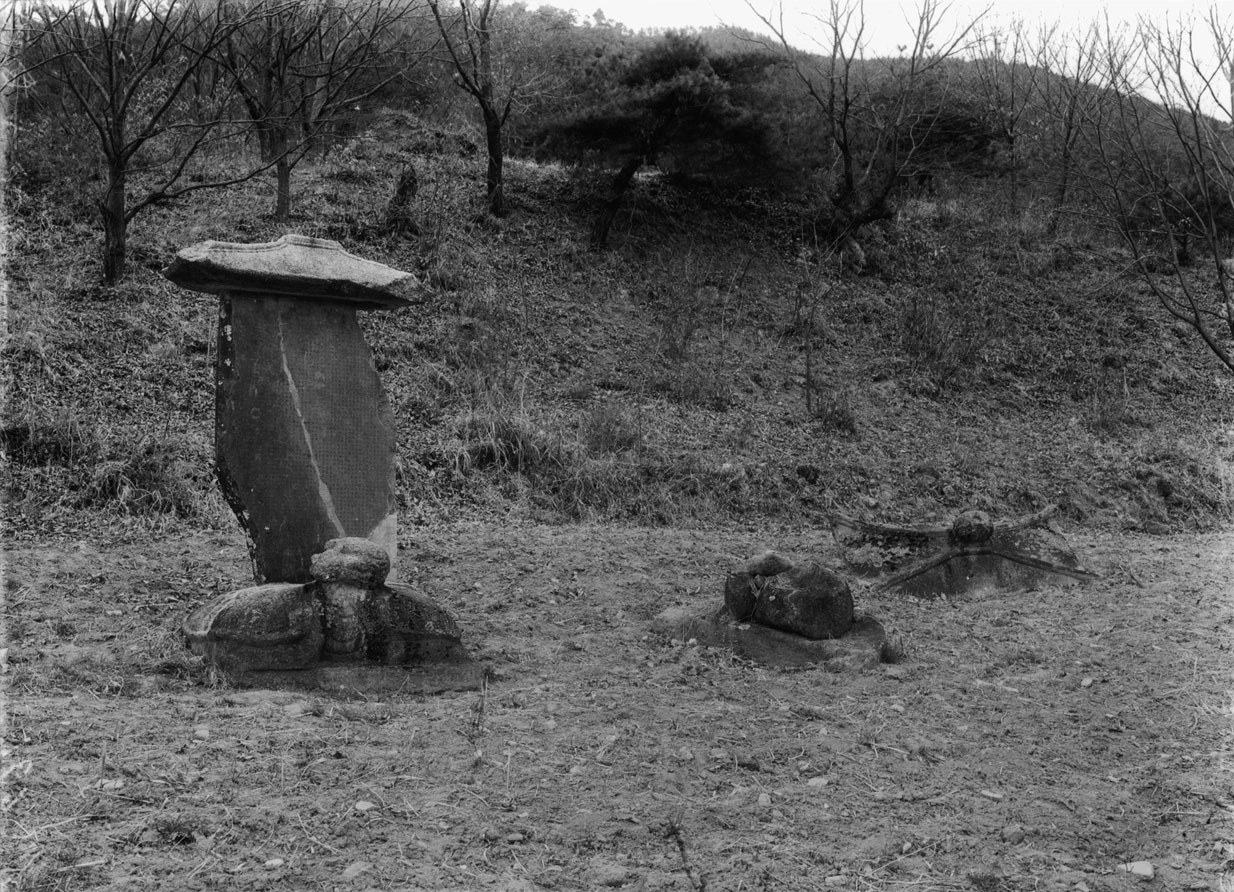
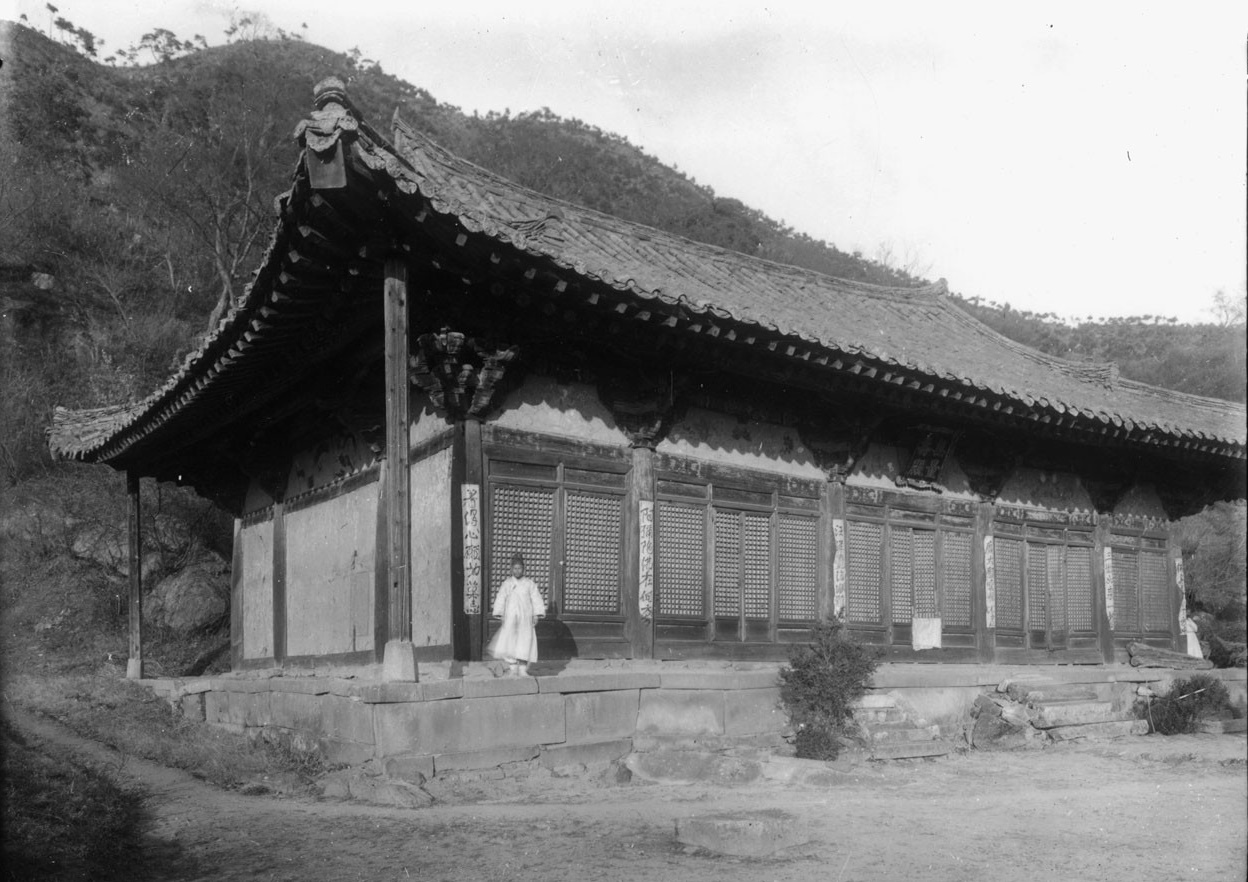
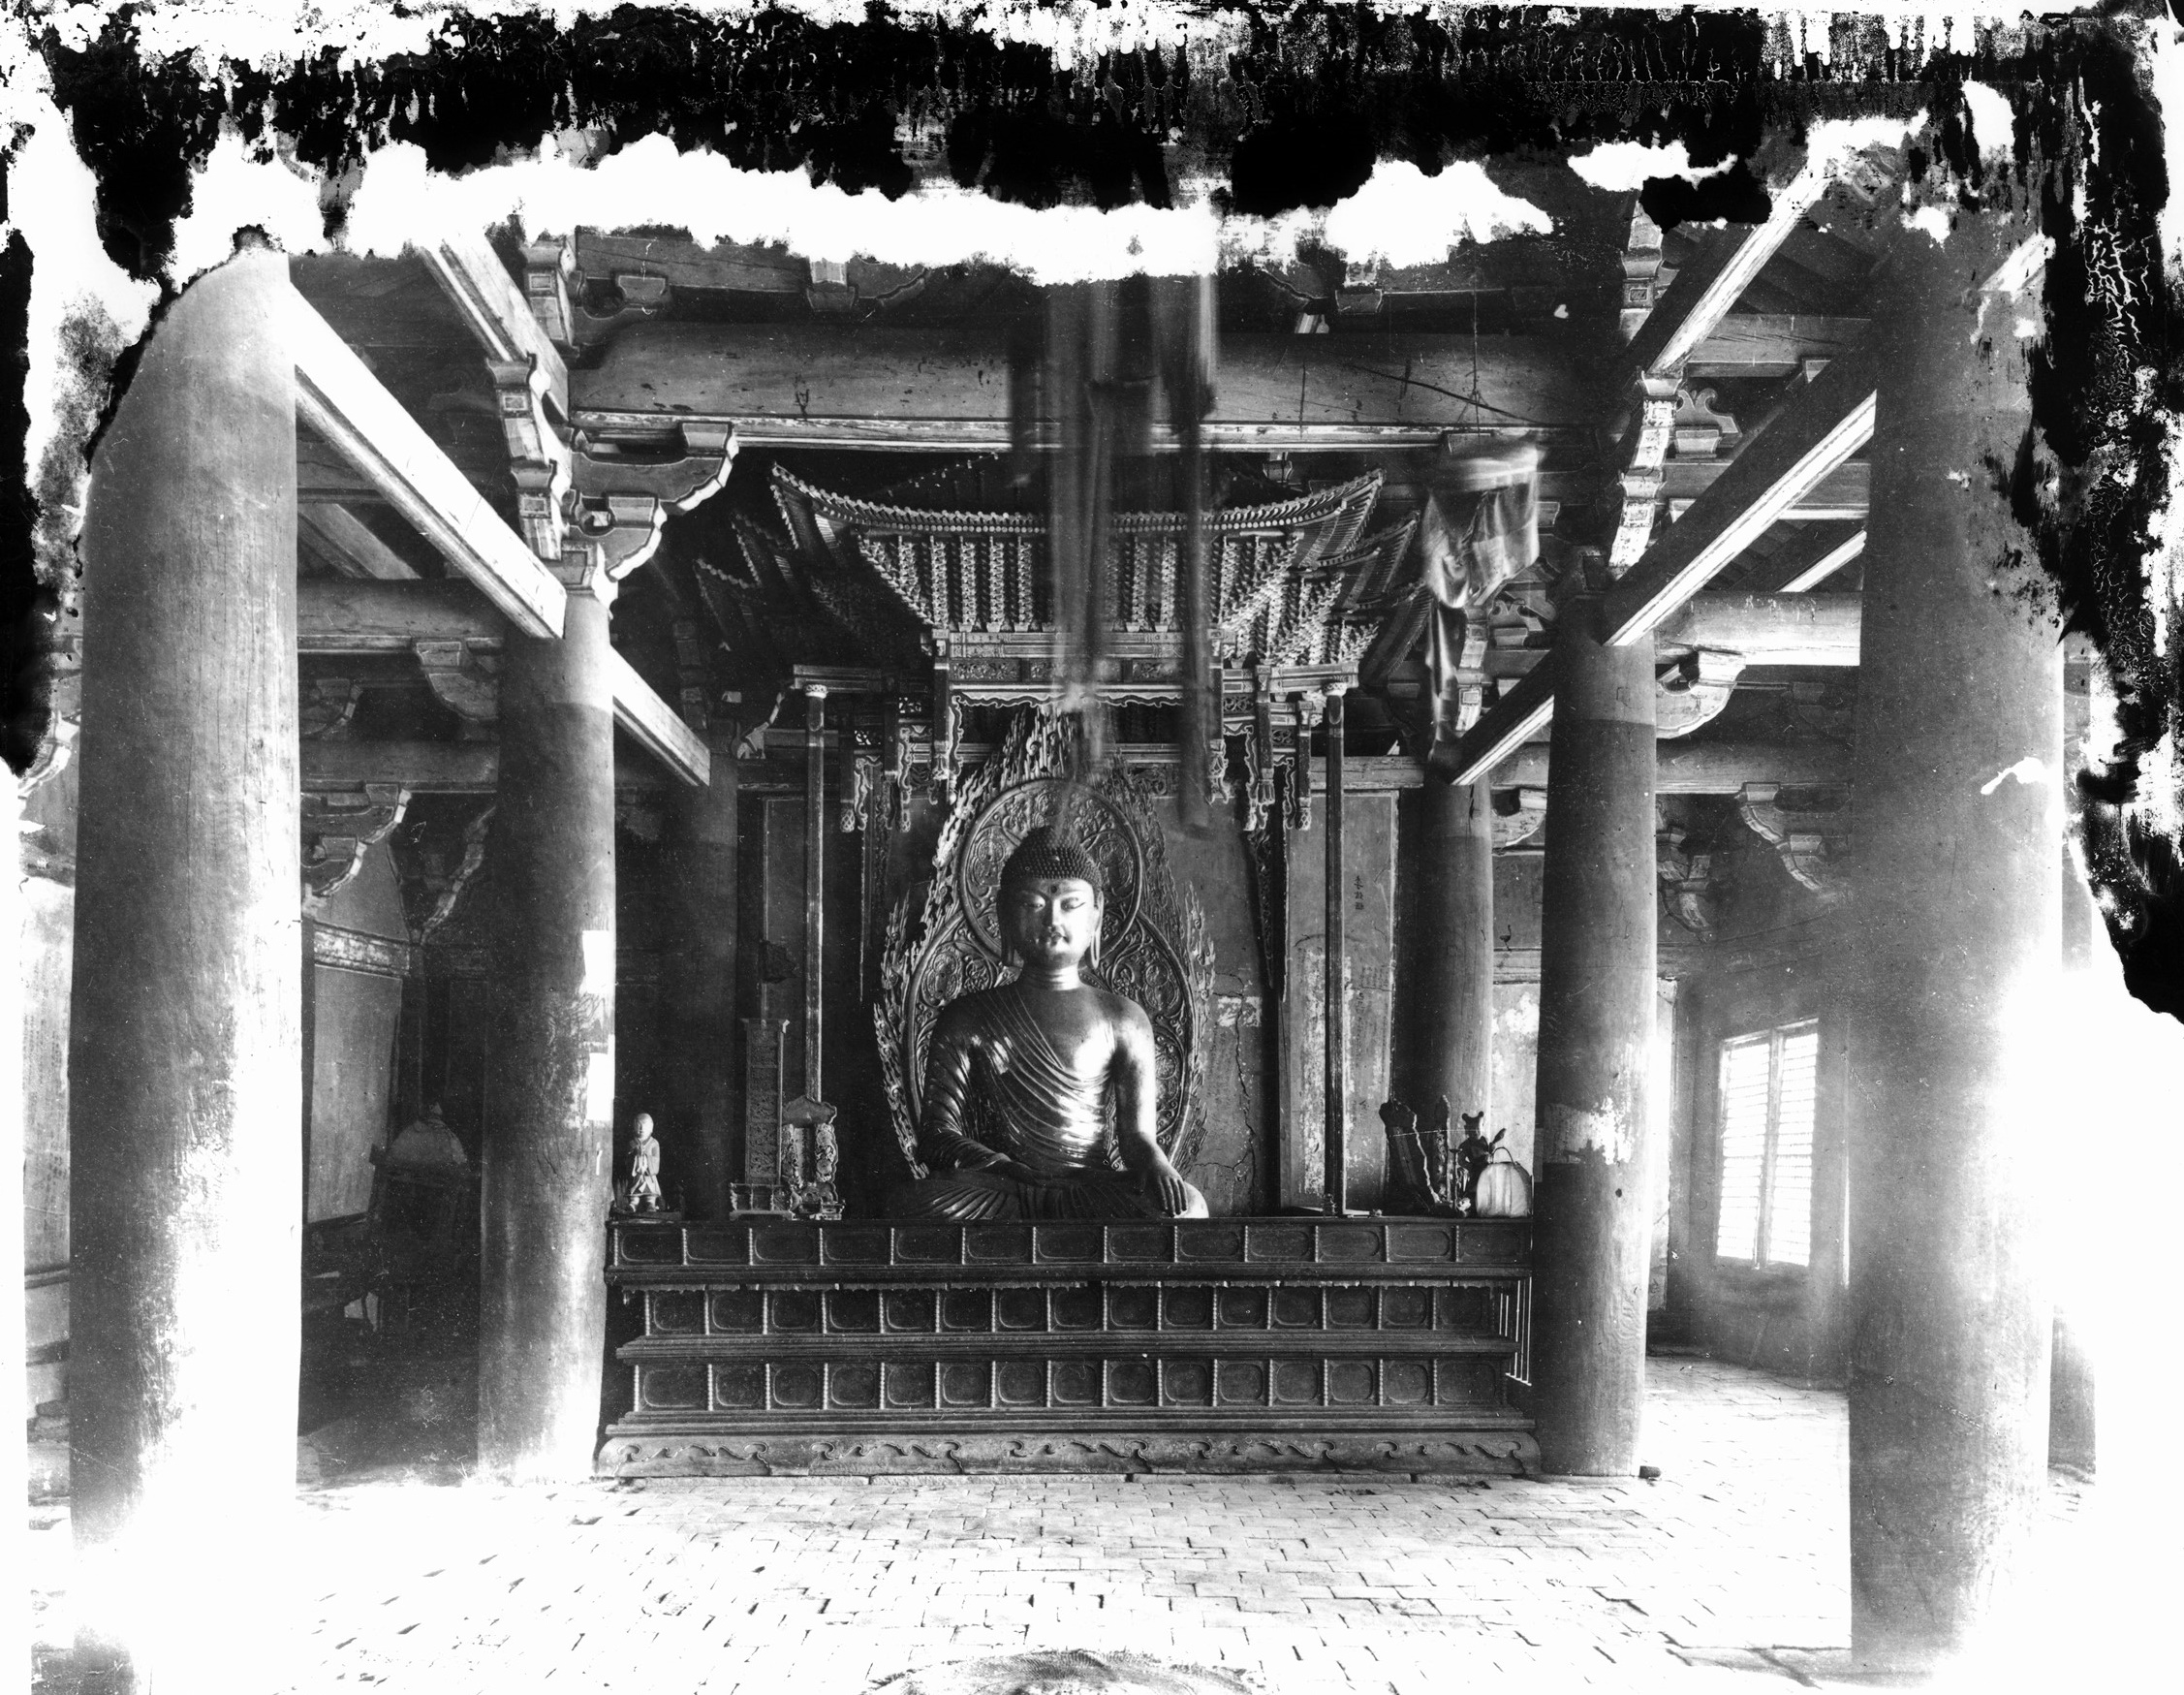
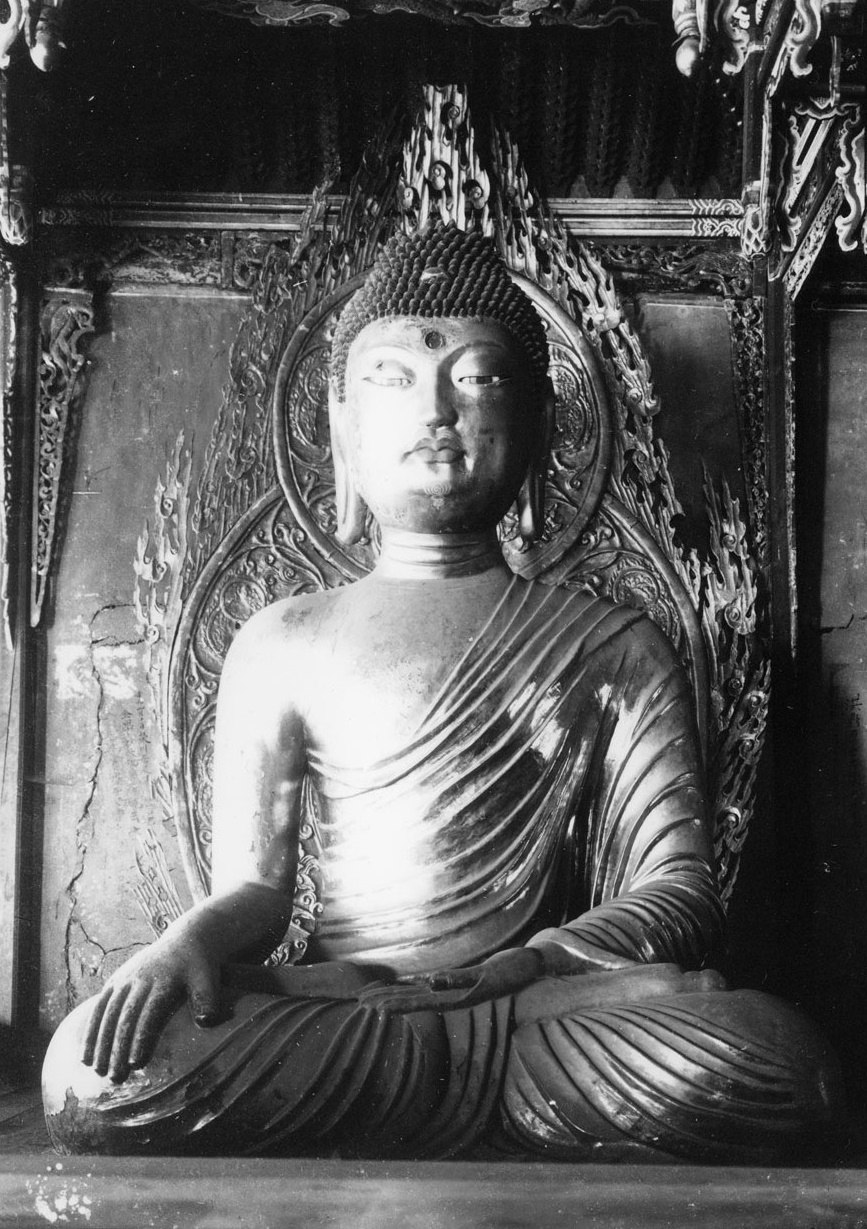
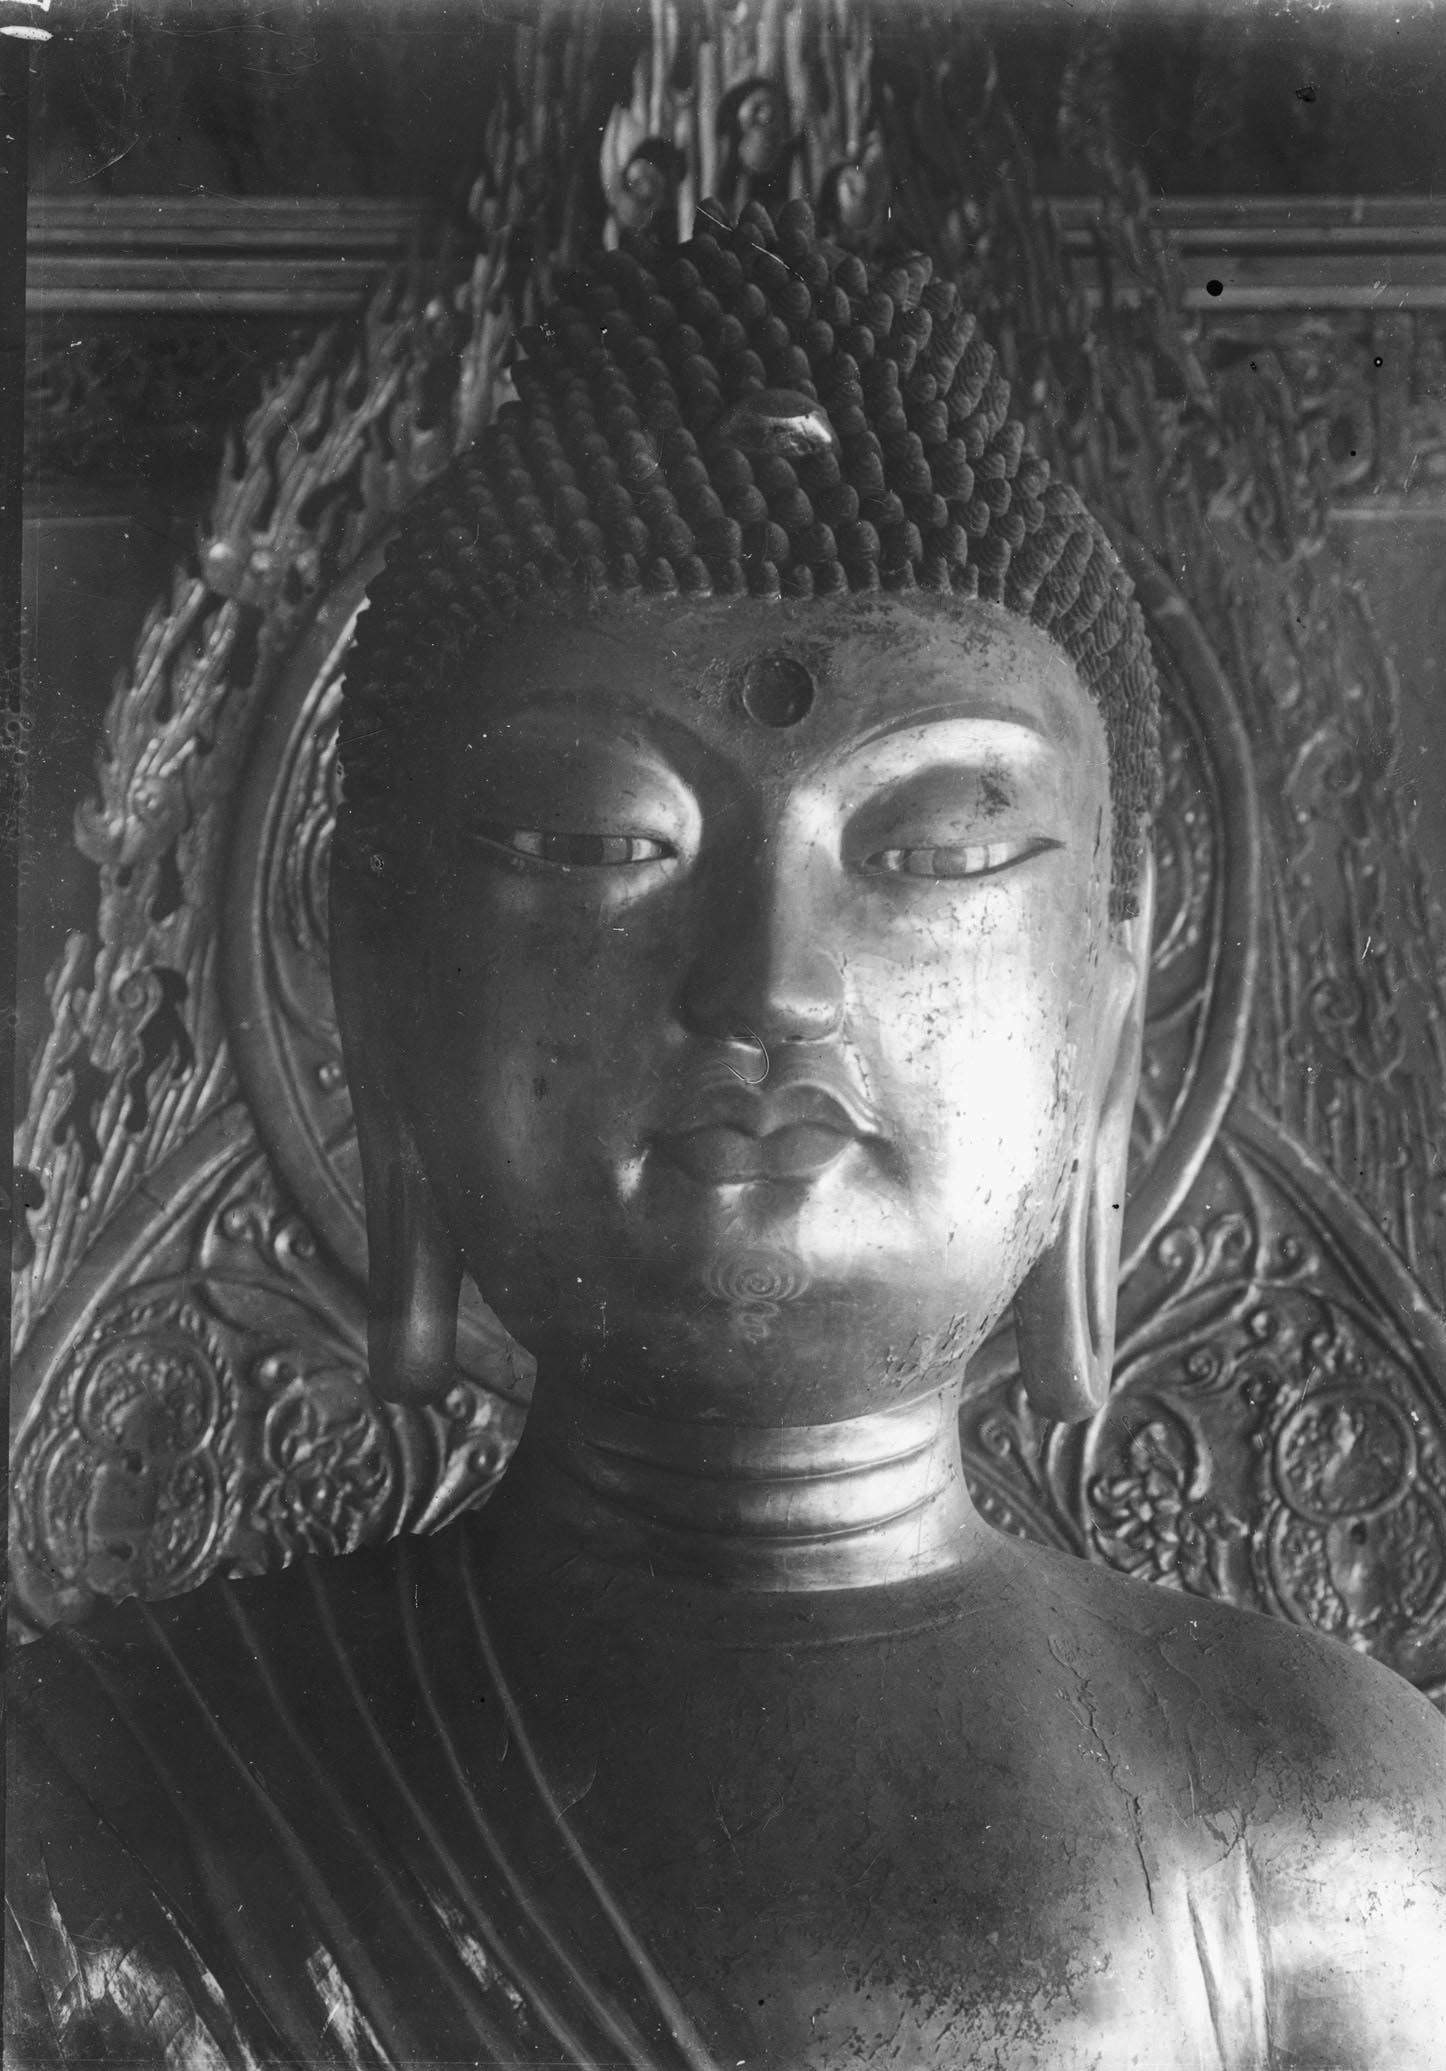
To further reinforce this point, the archaeological “rediscovery” of Japan’s antiquity in the form of excavated sites of beautifully restored Silla temples and tombs found in Japanese photography was the most tangible evidence for the supposed common ancestry both racially and culturally. As such, the colonial travel industry played a large part in promoting this “nostalgic” image of Korea as a lost and poor country, whose shared cultural and ethnic past was being restored to prominence once more through the superior Japanese and their “enlightened” government. And Buseoksa Temple played a part in the propagation of this propaganda, especially since it played such a prominent role in Korean Buddhist history and culture. Here are a collection of Colonial era pictures and drawings of Buseoksa Temple through the years.
Pictures of Colonial Era Buseoksa Temple
1912
Pictures of Colonial Era Buseoksa Temple
1915
Pictures of Colonial Era Buseoksa Temple
1918
Pictures of Colonial Era Buseoksa Temple
1935


Pictures of Colonial Era Buseoksa Temple
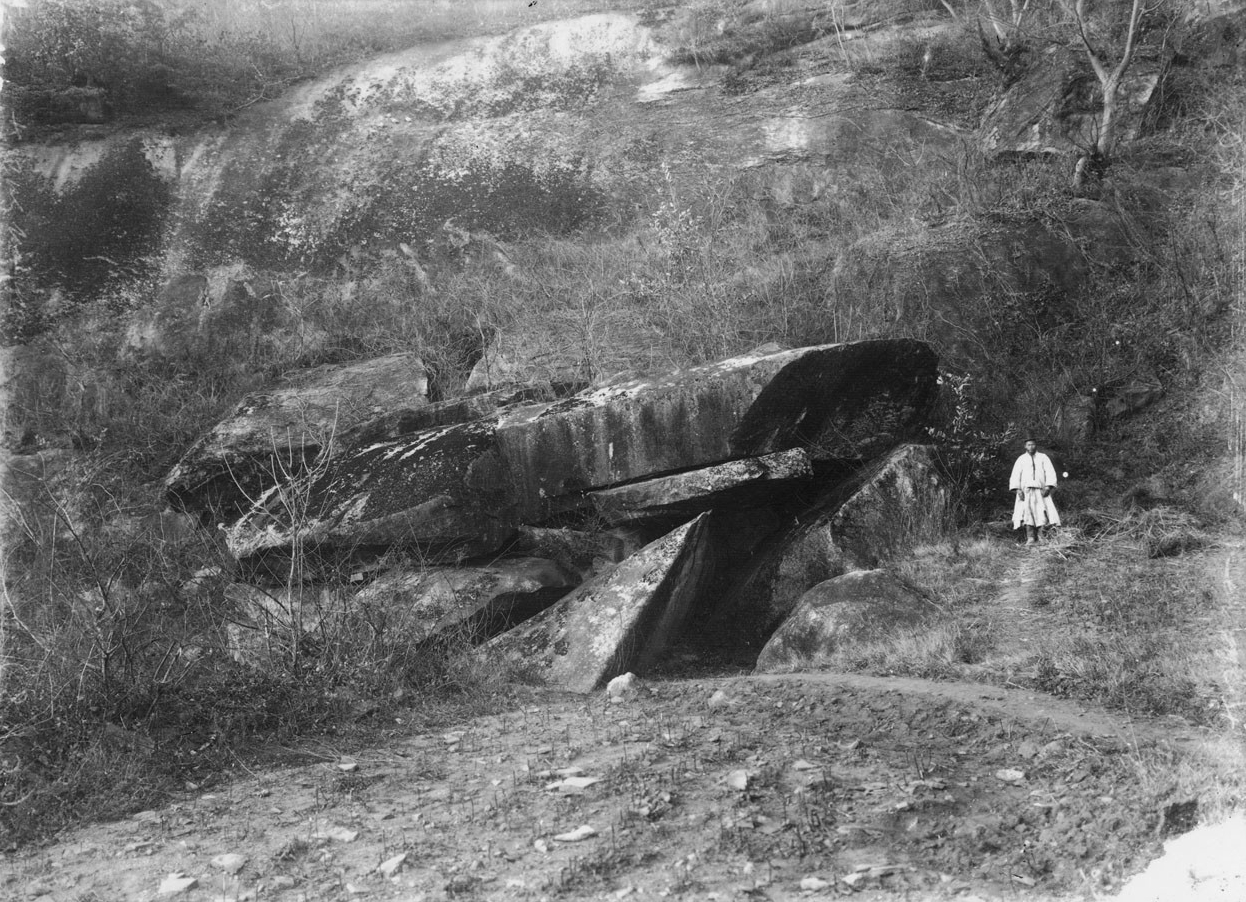
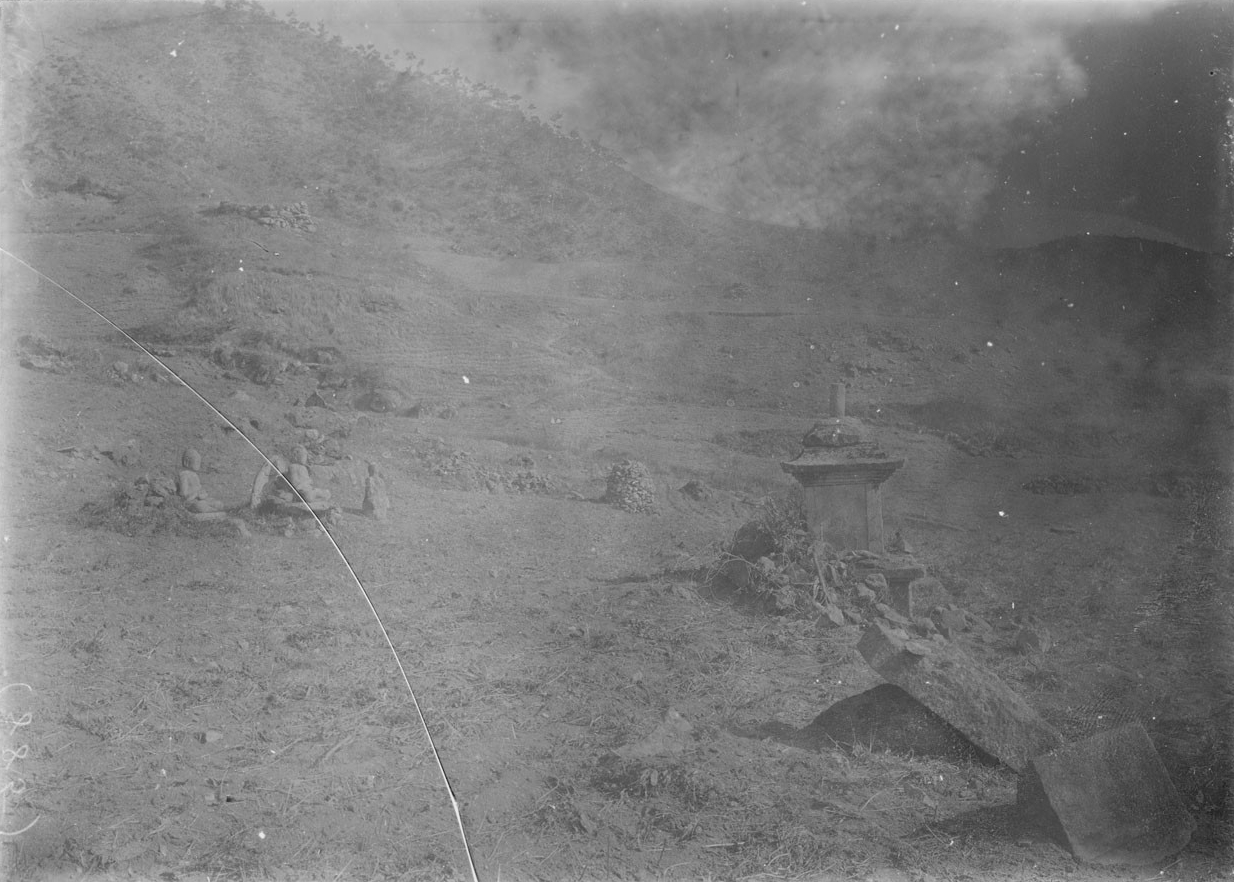
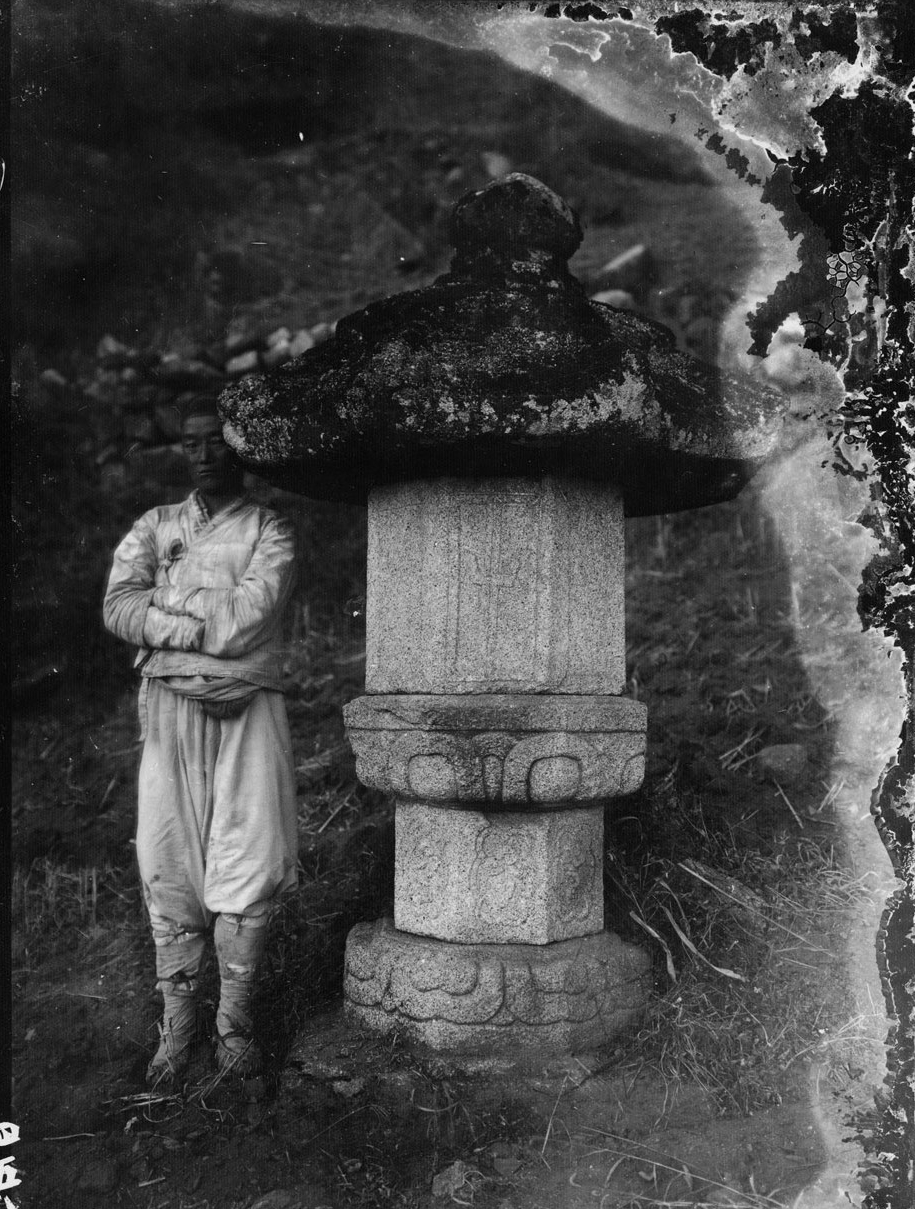
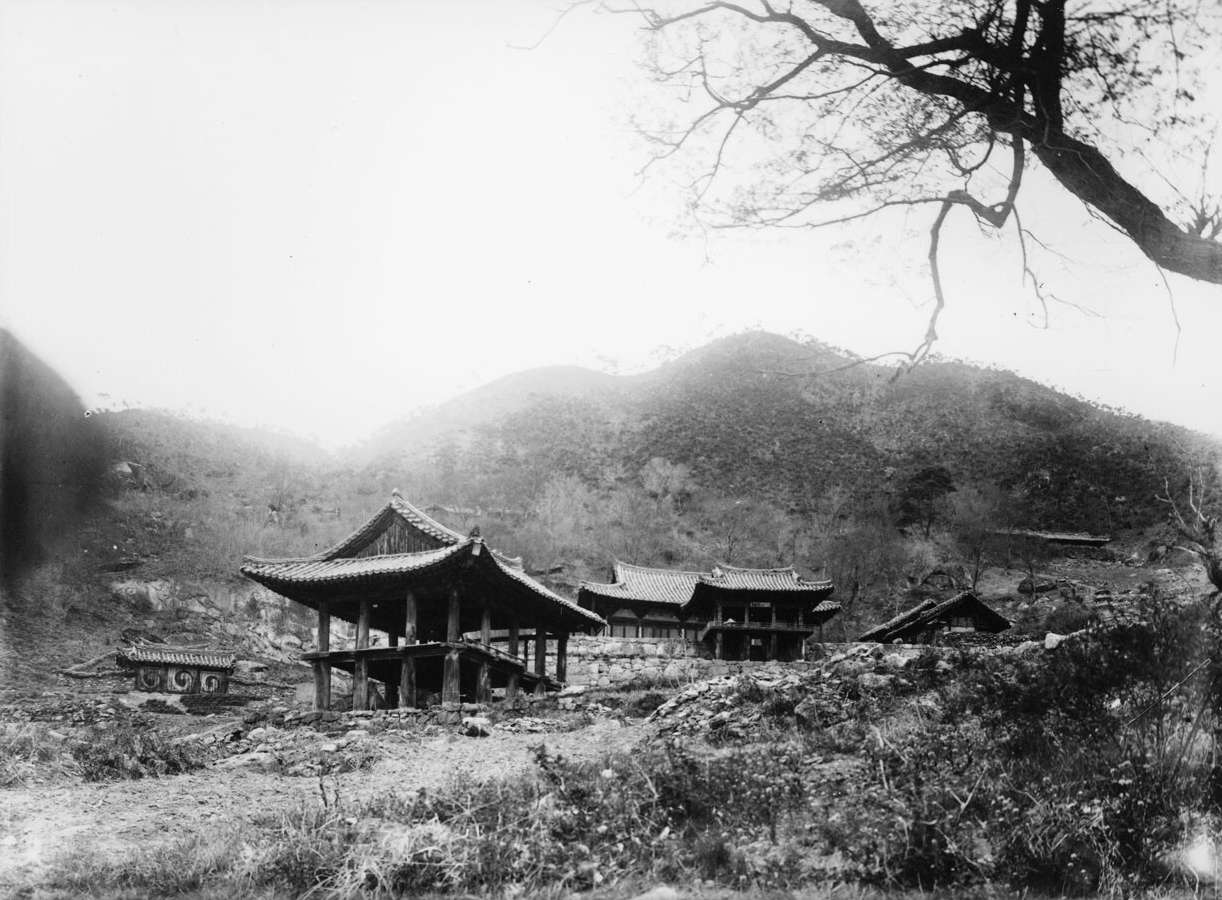
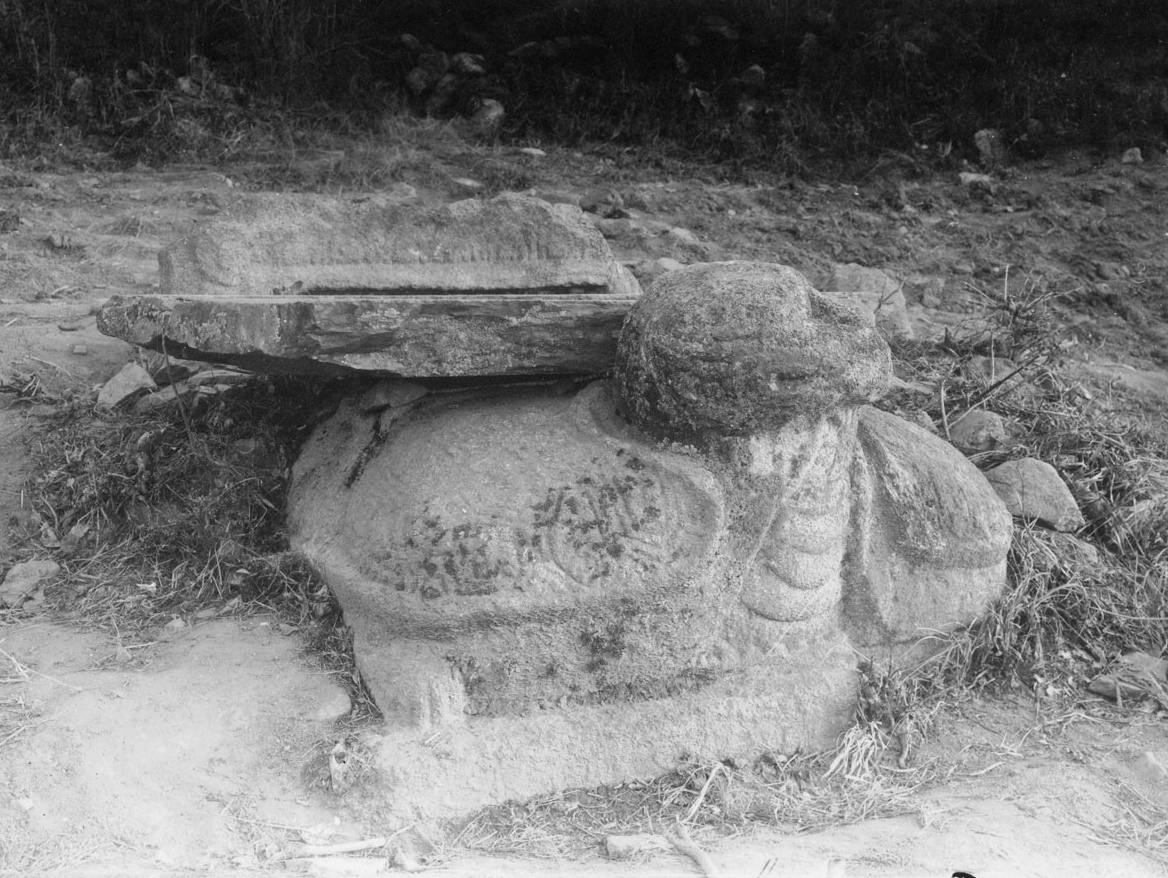
Specific Dates Unknown (1909-1945)

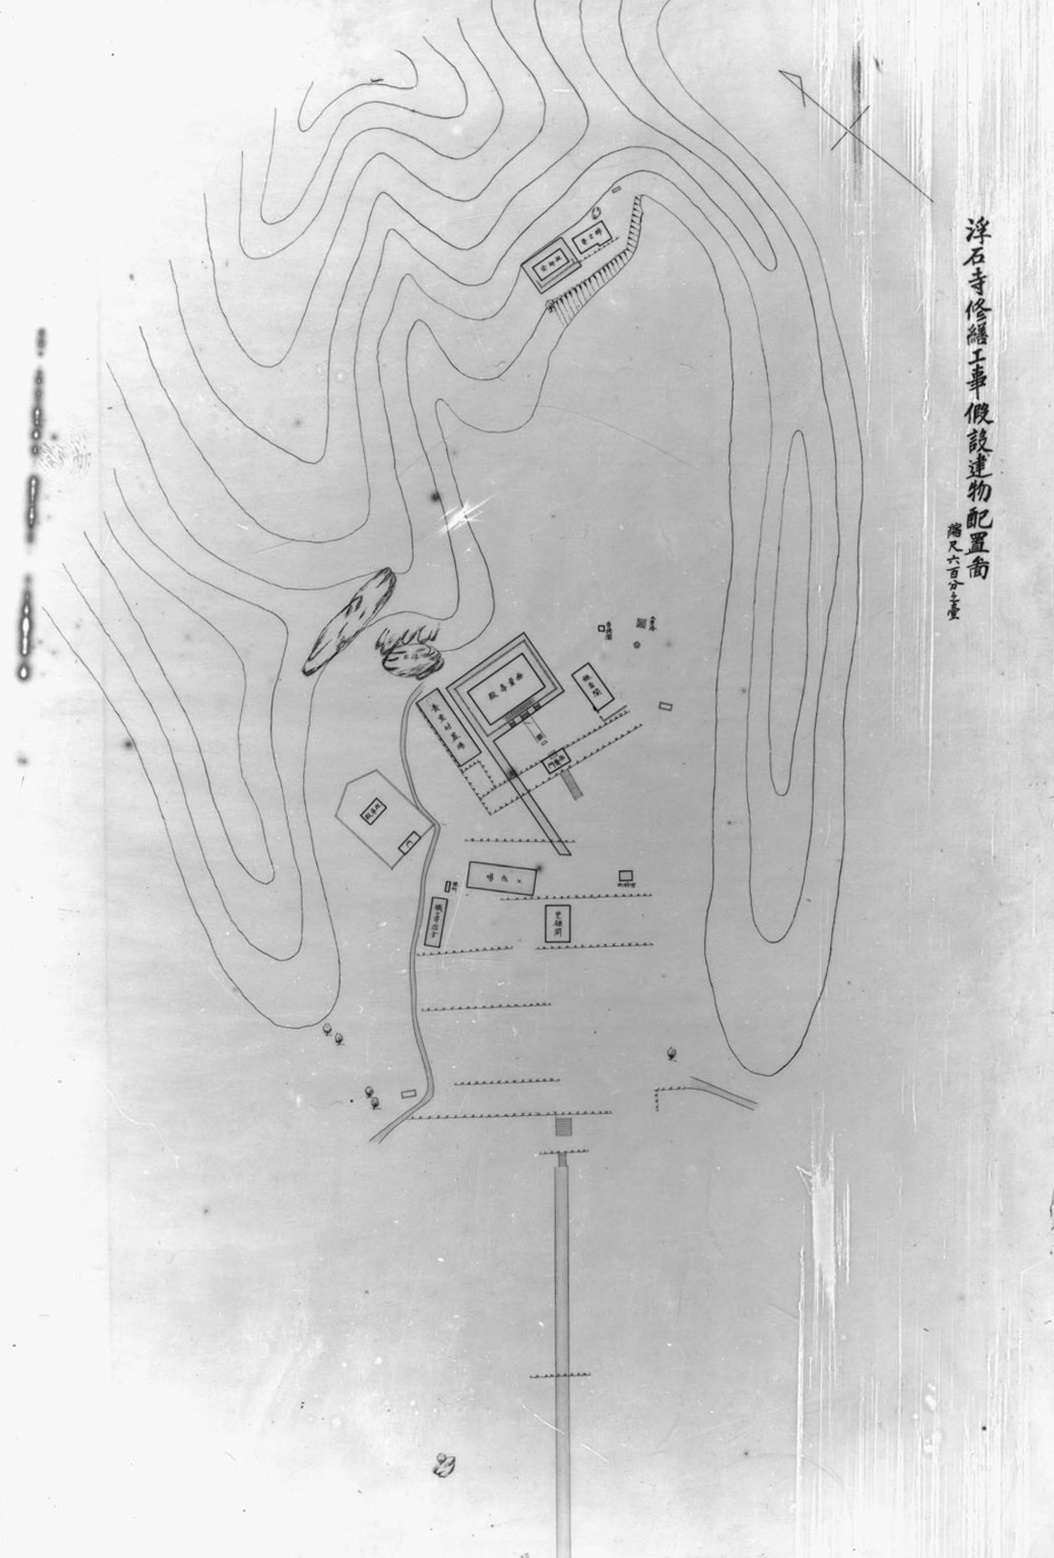
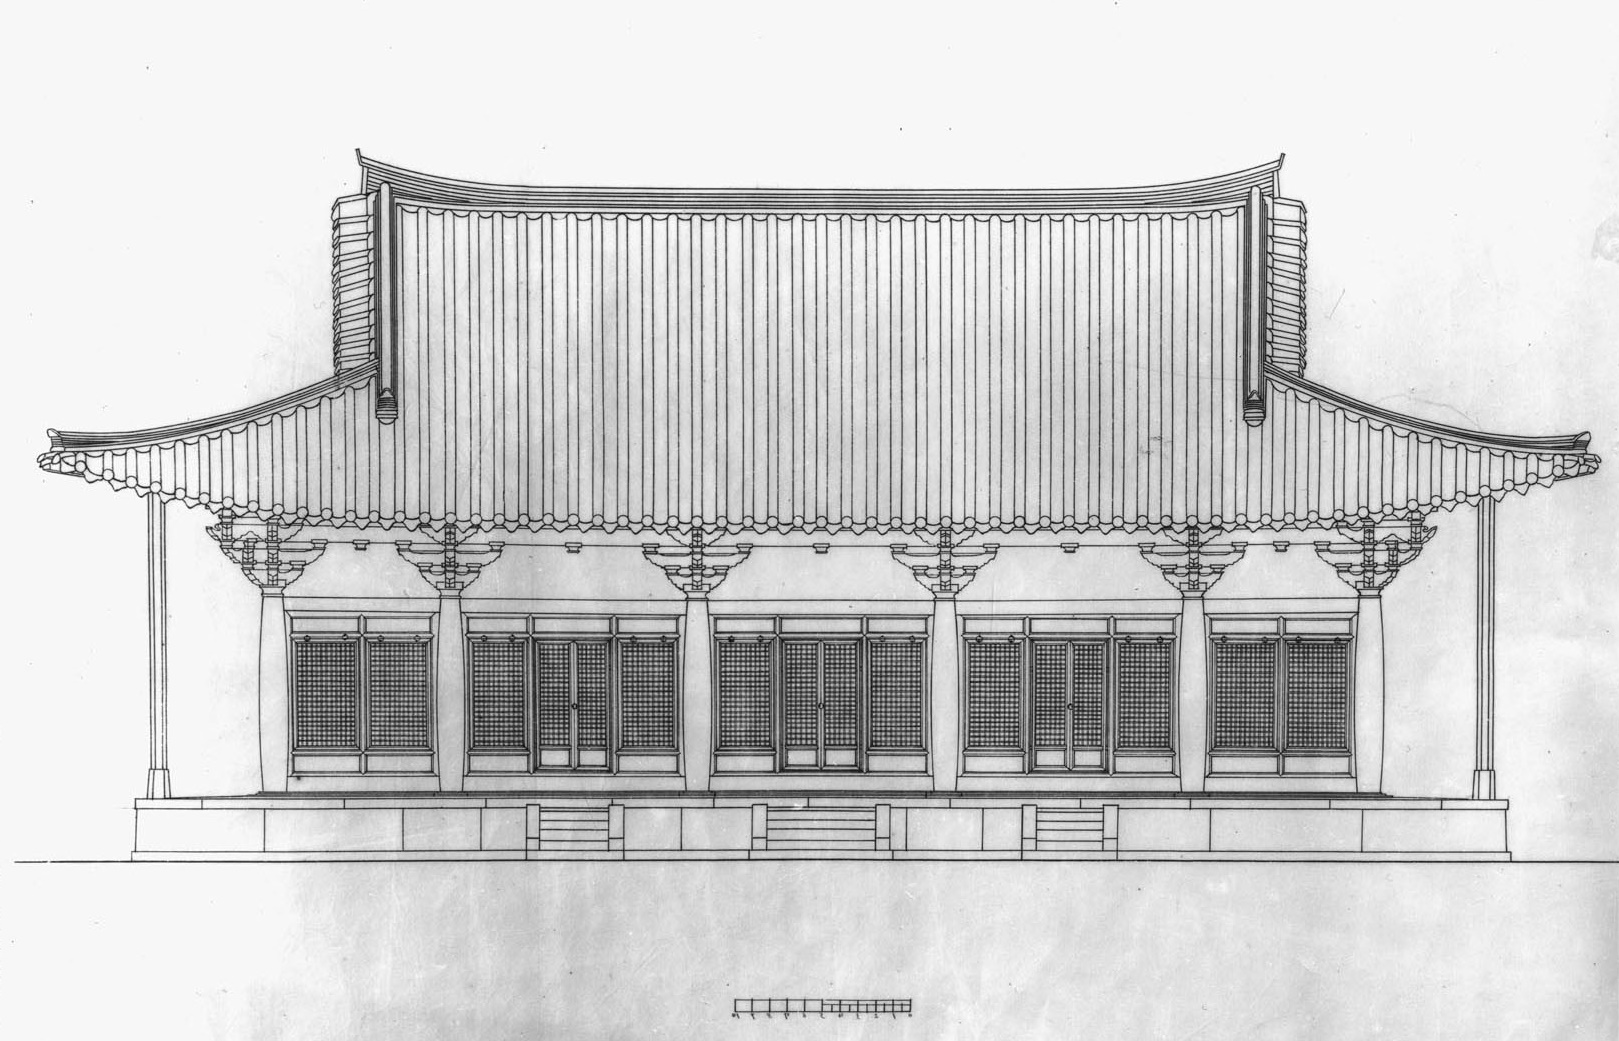
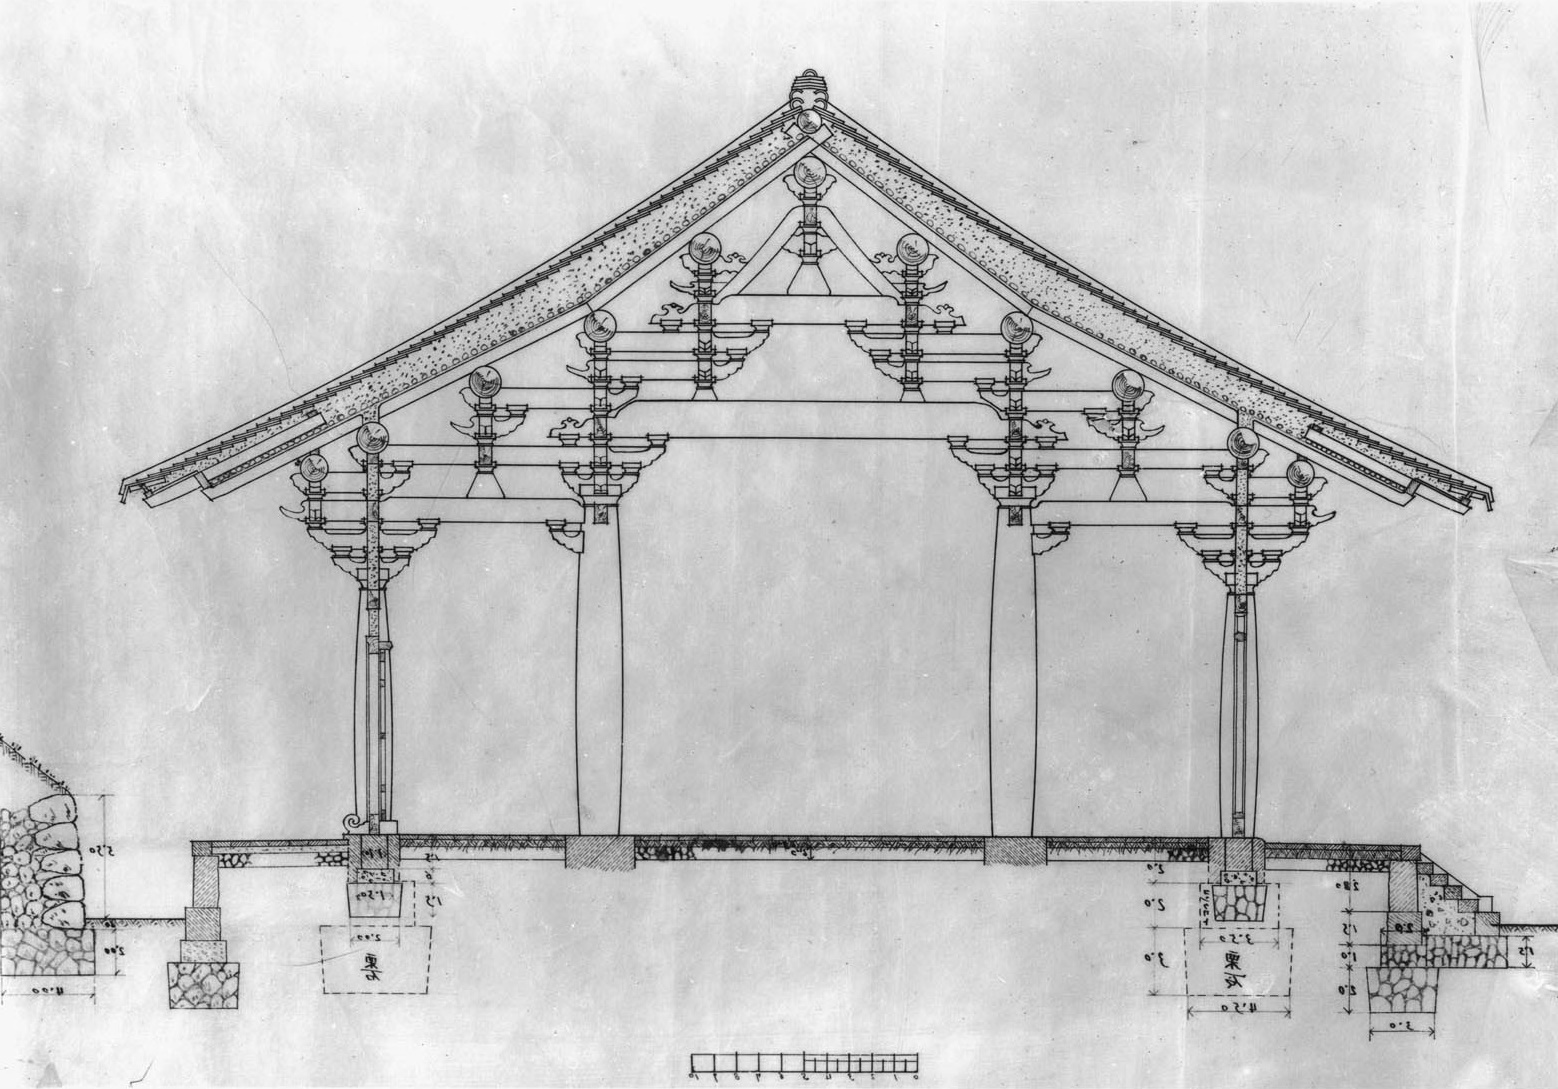
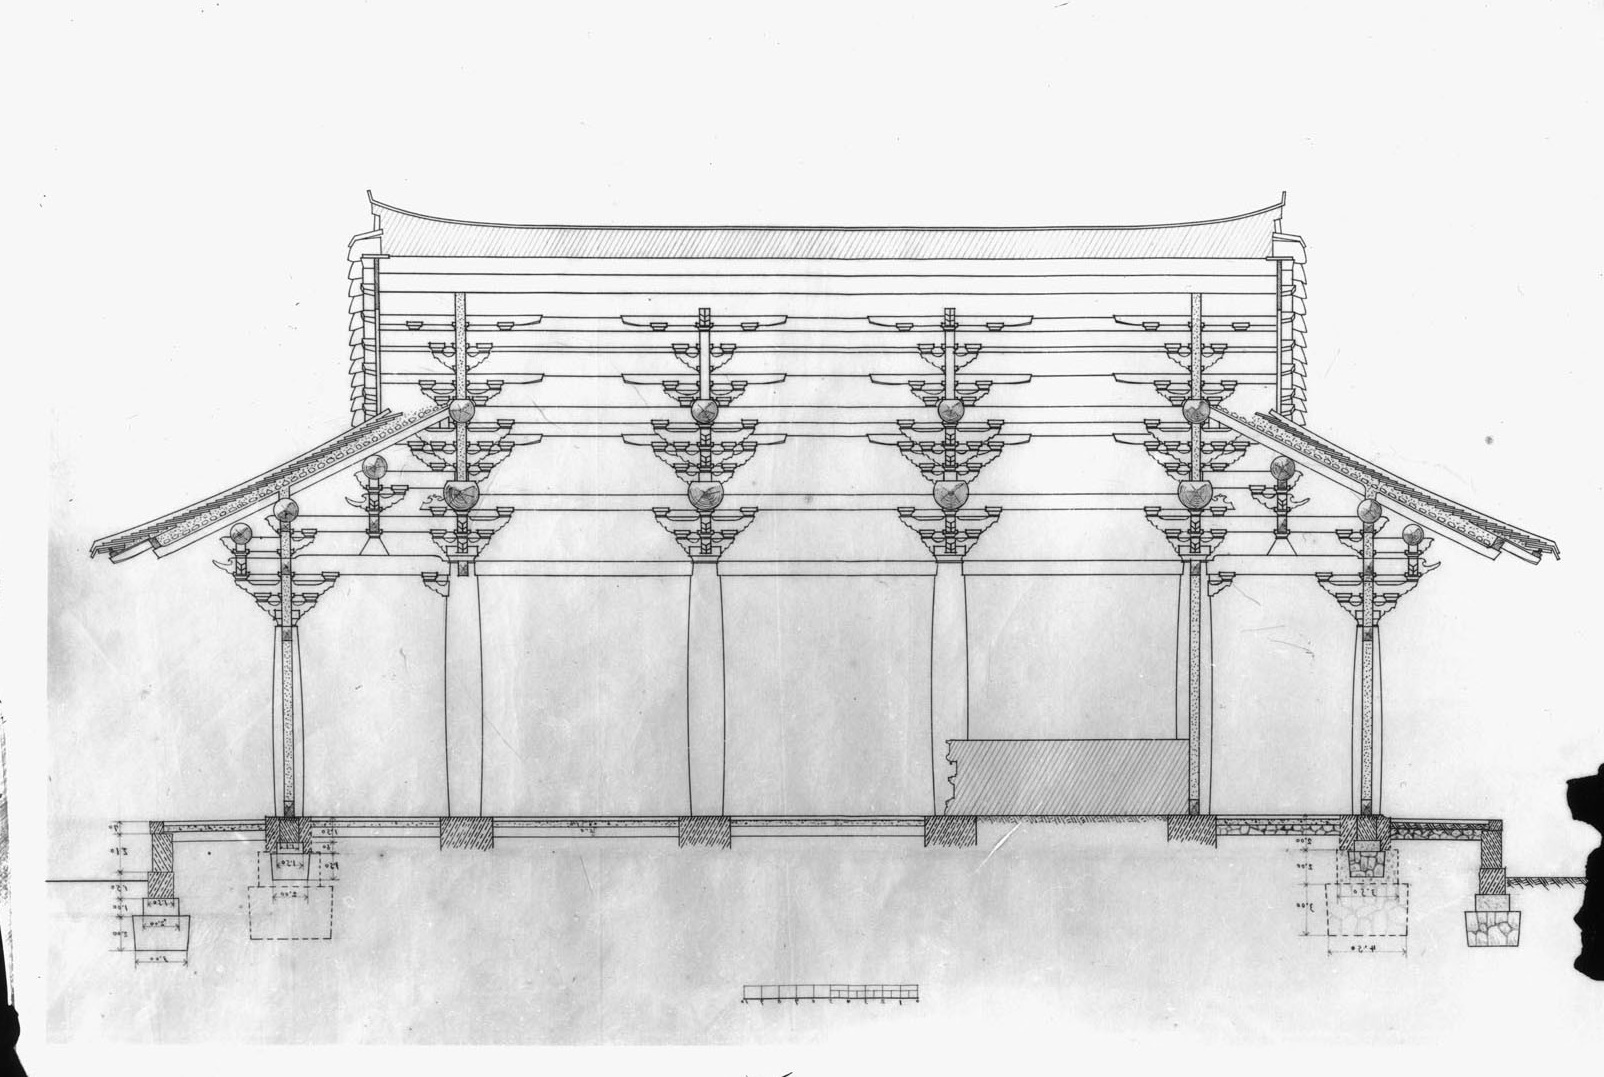
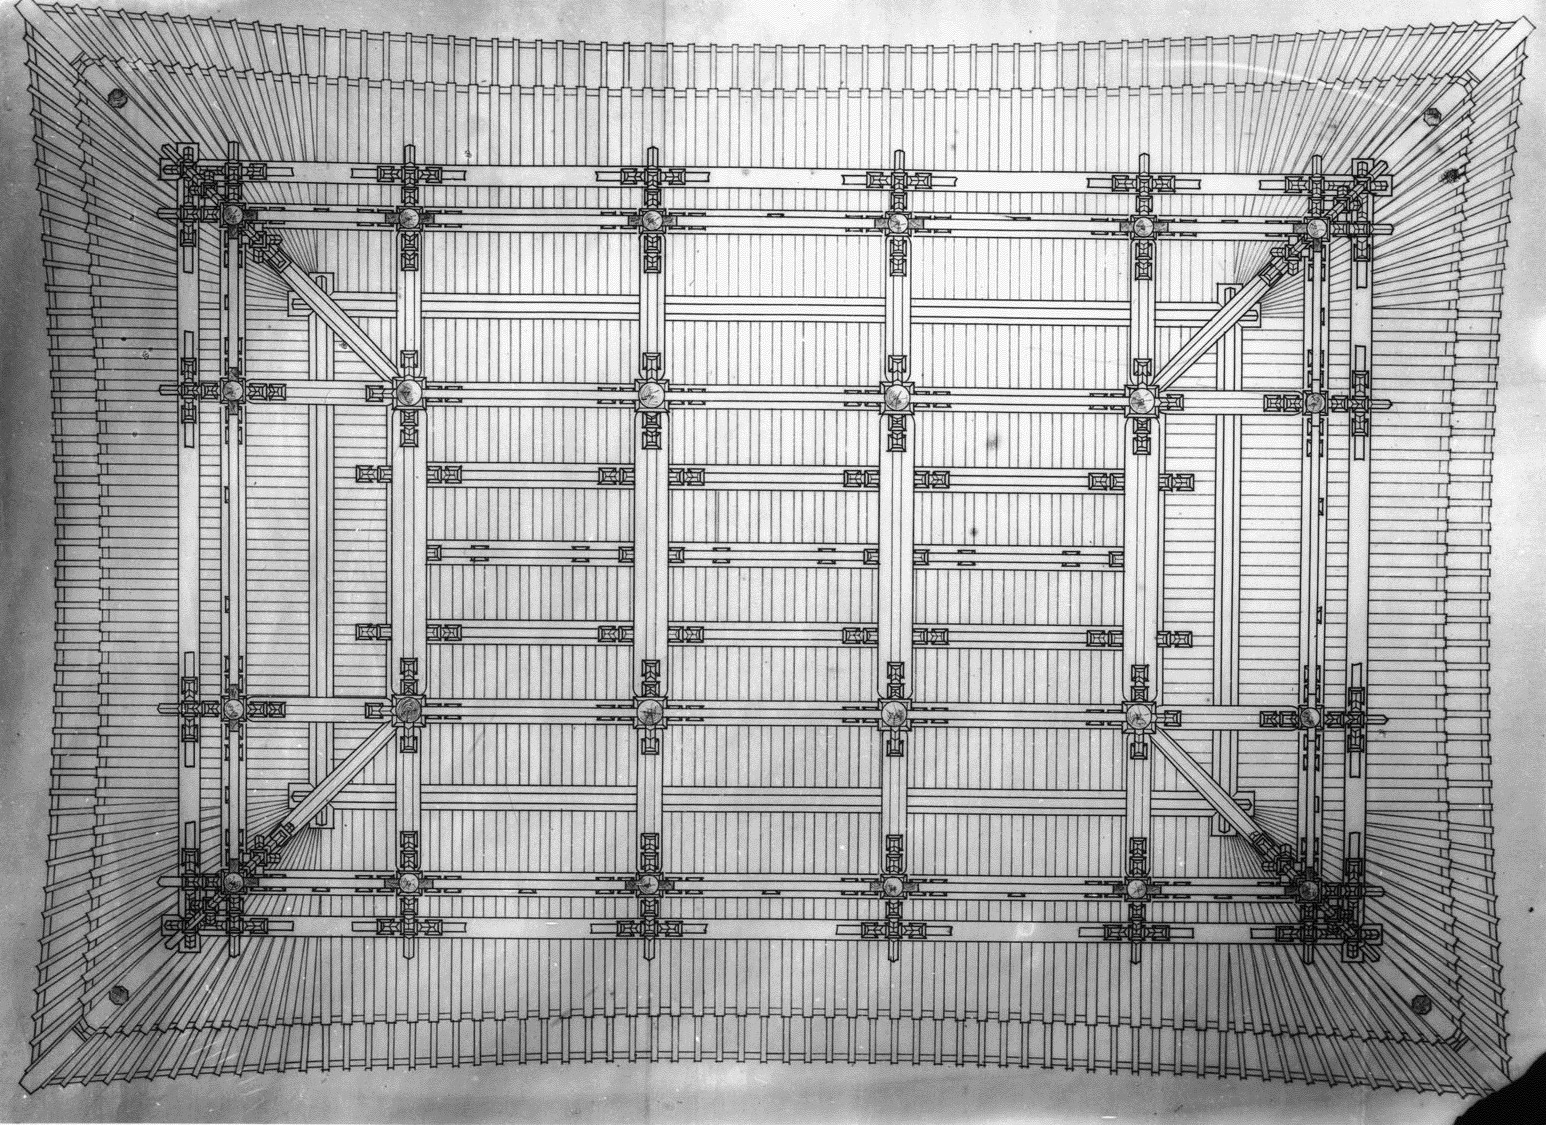
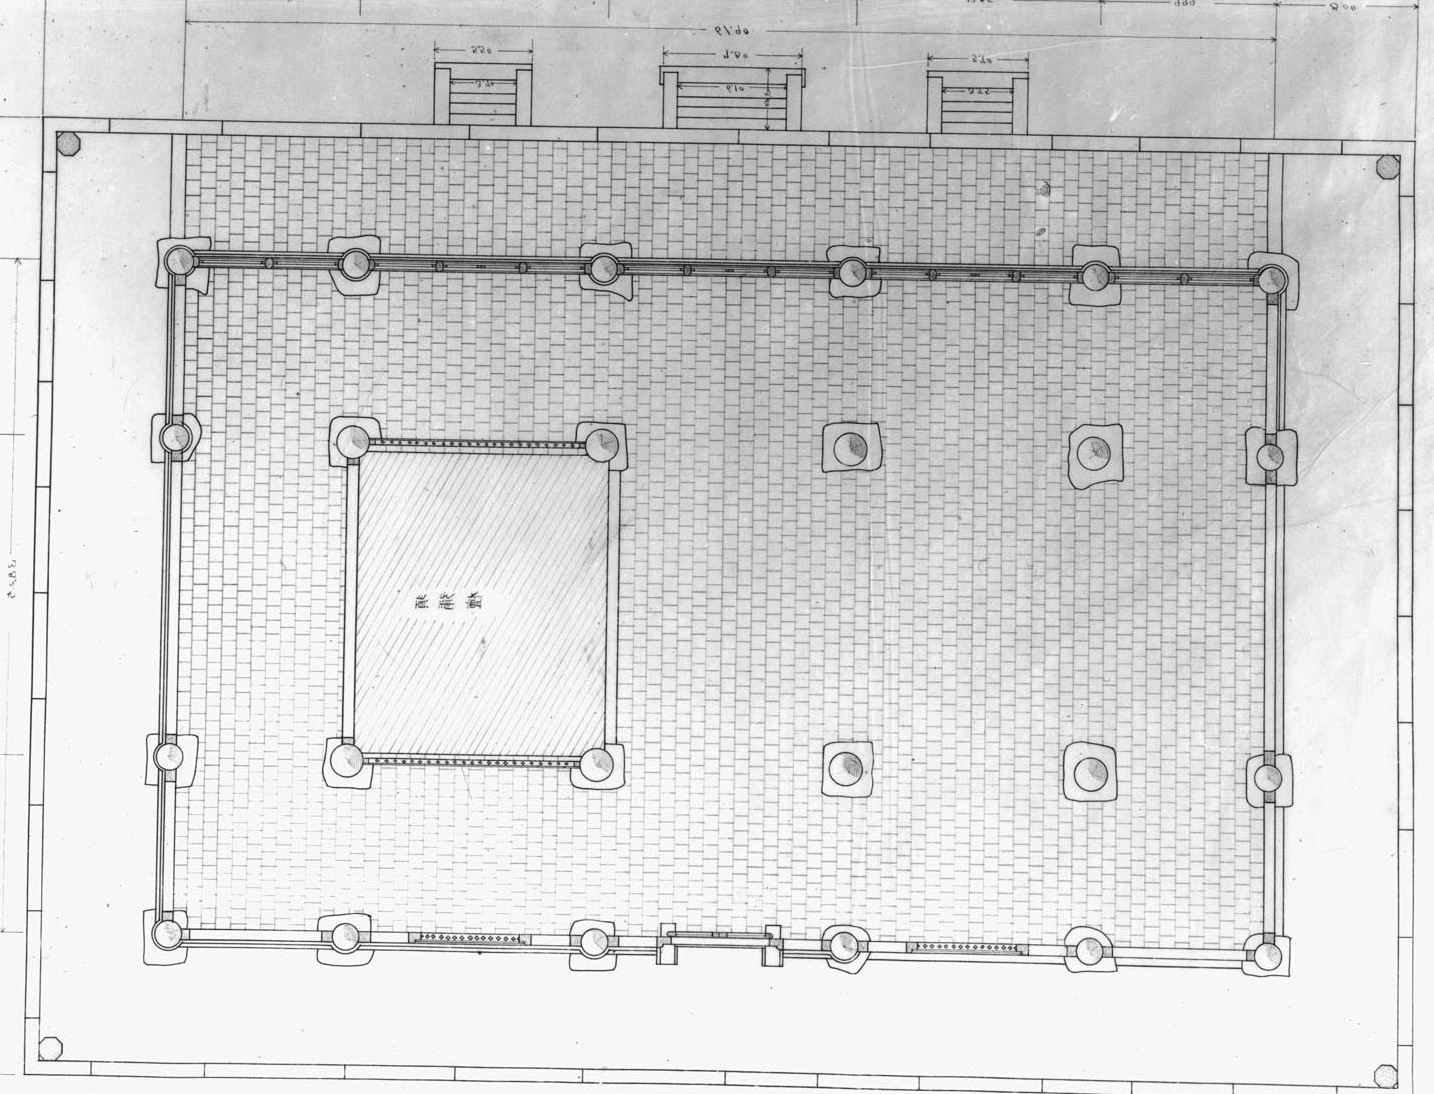
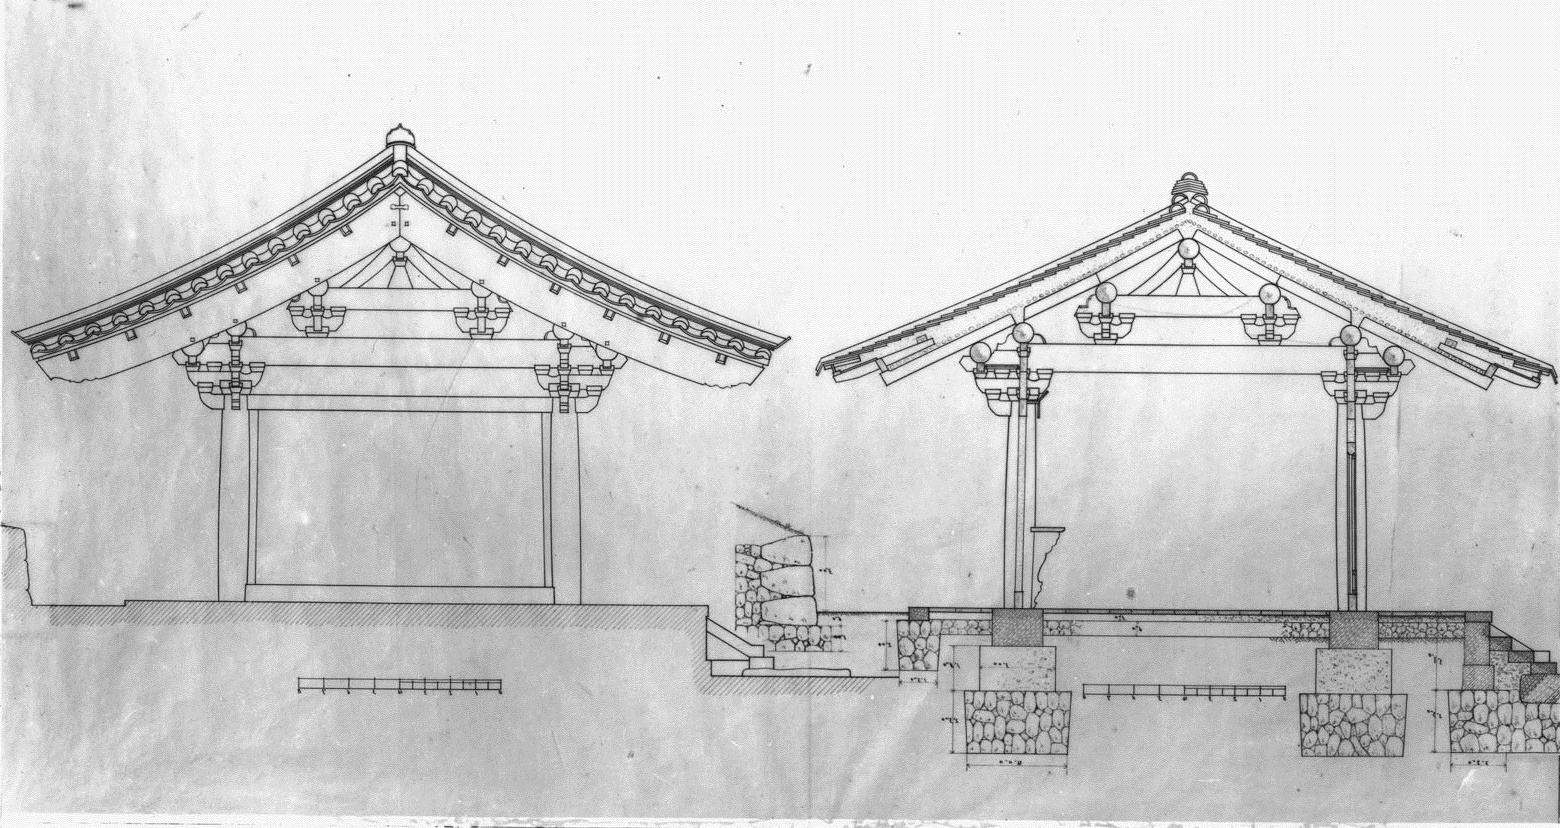
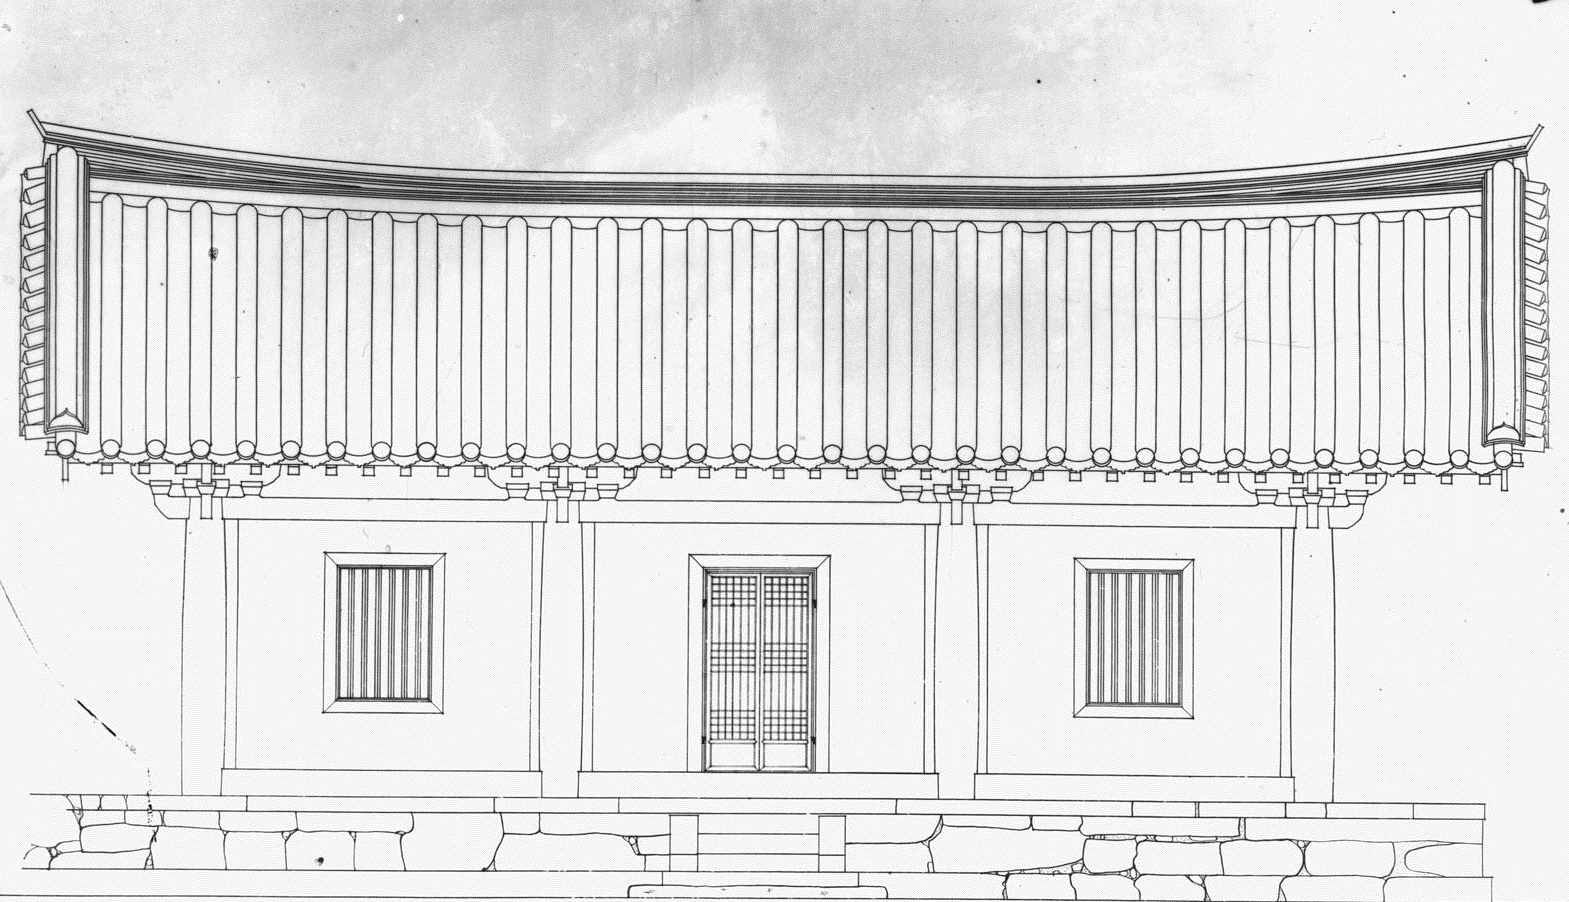
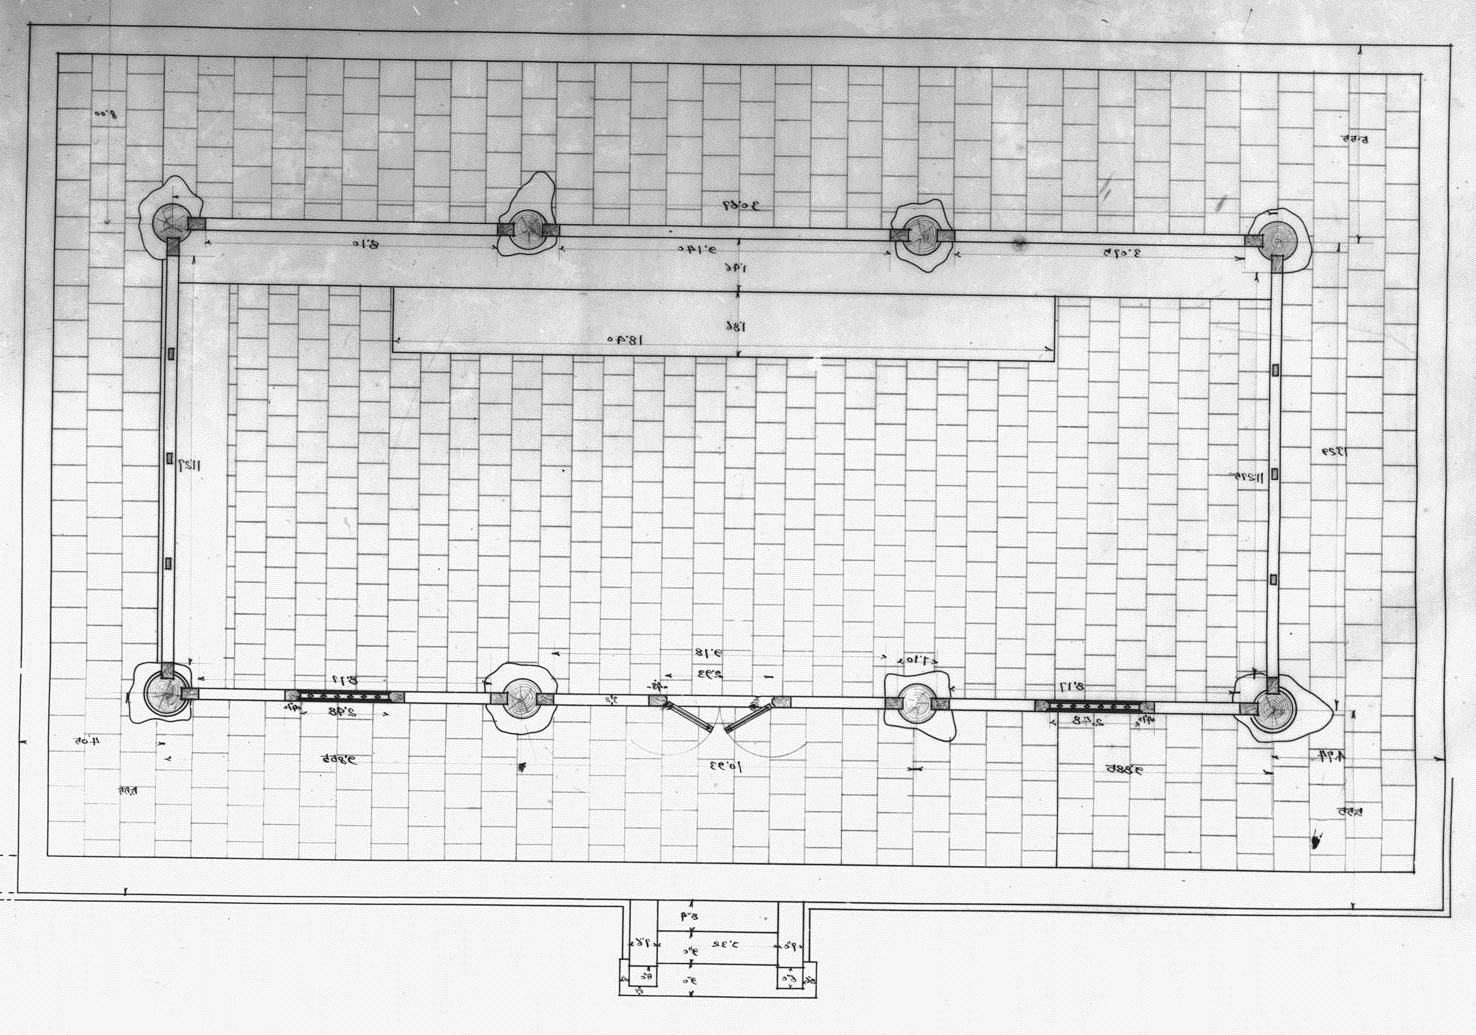
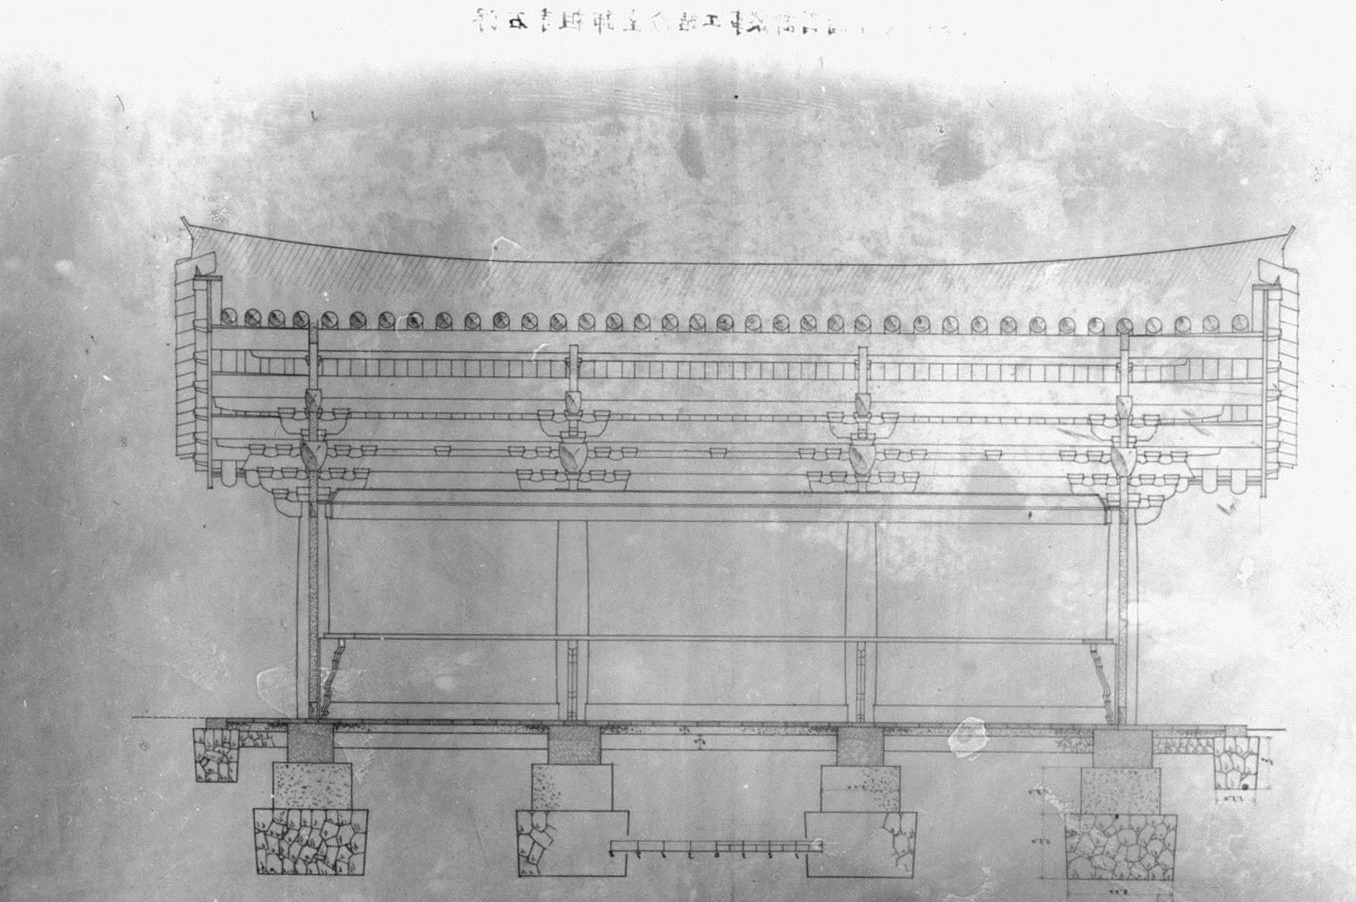
Pictures of the Architectural Plans of Buseoksa Temple from the Colonial Era
Specific Dates Unknown (1909-1945)
Recent comments