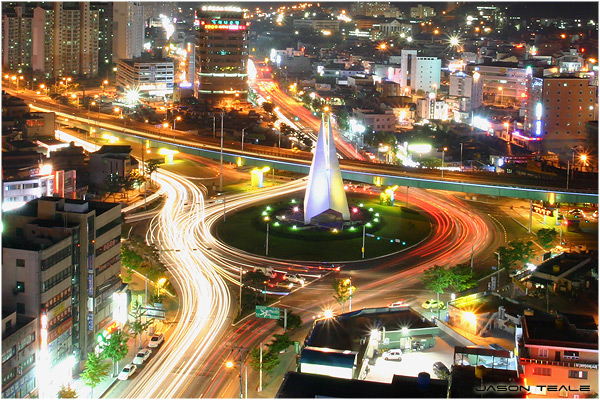
The Shot: This is an iconic shot for me. Not only was this one of the first places that the photography bug really bit me this is one of the first areas that I lived in during my early years in Korea. I am standing on top of the Namun Plaza building in Ulsan. I am over looking the Sinbok Rotary that basically signals the entrance to the University district of Ulsan. Dave Harvey took me up here early on in my photography career and showed me the ropes. The image that I took back then won me a trip to Fukuoka courtesy of Korea Bridge back in the winter of 2004. This same building will also be where I will get married in only a few short weeks.
The Location: The Namun Plaza is one of the taller buildings in the area. This multi-purpose building is filled with everything from a wedding hall to a newspaper office. This means that there are always people coming in and out and it may be a bit tough to get up to the roof. Your best bet is to get off the elevator just before the 18th floor as the buffet restaurant covers the entire floor. I got off on the 16th and hit the stairs. When I got to the top floor I walked outside and turned left.
There is quite a high ledge so if you plan ahead, a stool or a step ladder would be a good thing to have. If not, you can stand on your tip-toes and shoot. This shot is from the left corner when you are facing the rotary.
The Shot: There are many ways to shoot this site but you want to get a bit of the mountains in the background along with the colour of the sky. All of which make for a more pleasing frame. You may want to focus more on the Rotary if you’d like but in my mind it is just not that busy to draw any more space in the frame that it already holds.
The Set-up: As I said earlier the ledge here is really high and you need to be a bit careful when trying to get the shot. If you are taller than I am you will have a better time composing the shot. I would recommend using a smaller tripod like a gorillapod or a table tripod like the one that I have from Manfrotto.
The Post Processing: After doing the usual HDR adjustments in Photomatix 4, I did something a little different this time around and opened this up using camera raw. I did all of the colour and contrast adjustments there, but I did one more thing that really added to this shot. I used the graduated filter feature in camera raw. This can be found in the tool bar above the photo and it the little rectangle with one side darker than the other.
Once that field opens up you can click and drag the filter across any part of your photo. The cool thing is that you can then tweak your settings to improve your over all effect.
The thing with any traffic shot in HDR is that you have to watch the lights from the cars. If there are some problems you will have to mask in the light trails with one of the bracketed images. So take a look for the weird blank spots in the light trails and paint them in again with a layer mask.


Recent comments